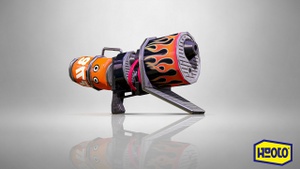
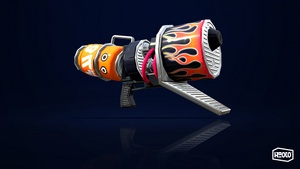
Competitive:Blaster
- For information about the Blaster, see Blaster.
Splatoon
| Abbreviations | Blaster |
| Sub | |
| Special | |
| Base damage | 50–80 (Splash) 125 (Direct hit) |
| Ink consumption | 8% |
| Special depletion |
Countermeasures
Use a charger to splat a Blaster from a long range.
Gear abilities
Gear abilities provide different effects in battle that benefit the player with their equipped weapon. This is a guide to gear abilities in relation to the weapon. Strategy, synergy, viability, and purpose may be written here.
Splatoon 2
| Abbreviations | Blaster |
| Sub | |
| Special | |
| Base damage | 50–70 (Splash) 125 (Direct hit) |
| Ink consumption | 10% |
| Special points | 190p |
| Role | Slayer |
| Strengths | Splatting, high damage, splash damage, flexible with abilities |
| Weaknesses | Requires good accuracy and the ability to lead shots, low ink efficiency, slow firing rate, poor turfing, lack of mobility after shots |
Use
- The Blaster is a slayer's weapon, just like the Tentatek Splattershot and the Enperry Splat Dualies. However, its slow firing rate and poor turfing means it needs to be treated differently from rapid-firing weapons:
- Its shots travel slower than those of rapid-firing weapons — 9.45 units per frame versus 22 units per frame for the Tentatek Splattershot, for example. This means that a Blaster user has to lead their shots in order to be accurate.
- The Blaster becomes less accurate (by 10 degrees) immediately after becoming airborne, whether from a jump or a drop.
- Waiting 25 frames – during the descent of a jump – will allow the outer reticle to shrink back and the accuracy to improve for up to 70 more frames.
- Main Power Up reduces the shot deviation during a jump by up to 40%.
- The Blaster's damage – arguably its greatest asset – widely varies depending on whether a target is hit directly, and if not, how close to the shot's explosion the target is and whether the shot exploded on a solid surface:
- 125 health points (HP) of damage per direct hit — enough to splat most opponents in one hit
- 50-70 HP per hit of splash damage if the shot's explosion does not hit a solid surface
- 25-35 HP per hit of splash damage if the shot's explosion hits a solid surface
- Thus, when firing up a ledge or around either an obstacle or an opponent's brella shield for splash damage, avoid hitting solid surfaces to maximize damage.
- The Blaster suffers a longer lag time after each shot compared to rapid-firing weapons, making it easily punishable after a miss:
- The interval between firing and either morphing or using a sub weapon is 23 frames — far longer than the 4 frames of Tentatek Splattershot.
- Its firing rate is 50 frames between shots (1.2 shots per second) – far slower than the Tentatek Splattershot's 6 frames between shots (10 shots per second)
- Therefore, unless attacking an opponent up a ledge or around either an obstacle or their brella shield, always go for direct hits.
- While not as mobile as other slayer's weapons, the Blaster can still be effective at flanking, and its high damage makes it devastating at sharking.
- The Blaster operates best in areas and stages that are less open, such as in an alley or beneath a short ledge, where an opponent has less room to avoid shots and outmaneuver the Blaster user. Walleye Warehouse and Camp Triggerfish are just a couple stages well suited for a Blaster.
- Besides its long lag after each shot, the Blaster suffers from other drawbacks:
- Its movement speed while firing (0.45 units per frame) is very slow compared to weapons of comparable range. Combined with the long lag after shots, the Blaster is rather immobile and vulnerable to attack after each shot, so shots must be fired judiciously.
- Its poor ink efficiency and turfing make it prone to getting surrounded by opposing ink if fired recklessly. Avoid overextending into the opponents' territory.
- Swim Speed Up can help relieve some of the mobility issues, while Ink Resistance Up reduces the loss of running speed in opposing ink.
- A Blaster is best accompanied with a teammate whose weapon is efficient at turfing, such as the Splattershot Jr. or the N-ZAP '85.
- Toxic Mist can be used to slow enemies down, allowing for an easier splat. It also depletes their ink tank, making it harder for enemies to attack consistently.
Countermeasures
- Any weapon that has a combination of longer range, better mobility, or higher rate of fire without sacrificing too much damage can counter a Blaster. For example, both the Splattershot Pro and Dualie Squelchers and their respective variants meet all of these requirements.
- The Splat Brella and Undercover Brella and their variants cannot sufficiently protect their users from the splash damage of the Blaster.
- Whenever possible, exploit the Blaster's poor ink efficiency and turfing by surrounding it with ink. Sub weapons and teammates can help accomplish this.
- It is preferable to engage an opposing Blaster in a more open area – where there is more room to avoid its shots, outmaneuver it, and surround it with ink – than in a closed area. If this is not possible, remain farther back on a ledge or further around a corner to avoid splash damage.
- A long-ranged weapon, such as a charger or most splatlings, can attack a Blaster from long distance with impunity. But if the Blaster user gets close, it can easily splat its slower firing opponents.
- A competent Blaster user is likely capable at both flanking and sharking:
- Keep track of all four members of the opposing team – which ones are present, which ones are splatted, and which ones are back at their spawn point.
- Check the map periodically for opposing ink forming around flanks to anticipate a flanking attack.
- To prevent sharking, check suspicious puddles of the opponents' ink, preferably with a thrown sub weapon.
- Weapons that track opponents, such as Point Sensors, temporarily prevent an opponent from sharking and makes them an easier target for long-ranged teammates to pick off.
- When pursued by a Blaster, using almost any sub weapon (except for Squid Beakons) can either delay their pursuit or deter them from chasing.
Gear abilities
Gear abilities provide different effects in battle that benefit the player with their equipped weapon. This is a guide to gear abilities in relation to the weapon. Strategy, synergy, viability, and purpose may be written here.
Quick Respawn shortens respawn time after getting splatted (under specific conditions). Like other slayer's weapons, the Blaster benefits from abilities that promote aggressive play, such as Quick Respawn and Stealth Jump.
- One main, or 10 ability points, reduces the respawn time by 1.21 seconds.
- Two mains, or 20 ability points, saves 2.21 seconds for respawning.[1]
Swim Speed Up can help close the distance towards an opponent, more quickly respond to an opponents' push, or escape unfavorable situations.
Stealth Jump hides its user's Super Jump landing marker from opponents (and allies) who are not too close to it — about three tile lengths in the middle of Inkblot Art Academy.[2] This encourages its user to Super Jump back to the frontlines more often.
References
|


