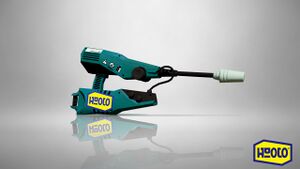
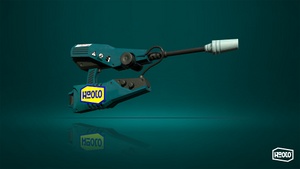
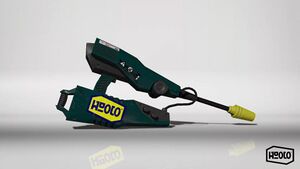
Competitive:Custom Jet Squelcher
- For information about the Custom Jet Squelcher, see Custom Jet Squelcher.
Splatoon
| Abbreviations | CJS, Jet |
| Sub | |
| Special | |
| Base damage | 31 |
| Ink consumption | 1.6% |
| Special depletion |
Gear abilities
Gear abilities provide different effects in battle that benefit the player with their equipped weapon. This is a guide to gear abilities in relation to the weapon. Strategy, synergy, viability, and purpose may be written here.
The Custom Jet Squelcher excels in long range confrontations, increasing the damage to both its shots and its splash damage of the Burst Bombs makes it easier to splat the opponents.
Reduces the special points needed for Kraken, making the special available more frequently in battle for both offensive and defensive maneuvers.
Splatoon 2
| Abbreviations | CJS, Jet |
| Sub | |
| Special | |
| Base damage | 32 |
| Ink consumption | 1.6% |
| Special points | 190p |
| Role | Anchor[1] |
| Strengths | Mobility, quicker draw than most other anchor weapons, Fastest Sting Ray farming |
| Weaknesses | less damage and range than chargers, less turfing than splatlings or Exploshers |
Use
- The long range and kit of the Custom Jet Squelcher make it an anchor weapon. While it lacks the one-hit-splat damage and range of a charger, the rapid turfing and firing rate of a splatling, and the heavy damage and turfing of an Explosher, the Custom Jet Squelcher's primary advantage over all three is its mobility.
- Burst Bombs allow for quicker movement around the stage, especially when fleeing an opposing slayer.
- The Custom Jet Squelcher fires at a much higher rate than an Explosher and, unlike a Charger or Splatling, does not need to charge, making it less vulnerable in close-quarters combat. Still, avoid close-quarters combat against a slayer's weapon.
- As with most anchor weapons, Quick Super Jump and Tenacity can be beneficial to the Custom Jet Squelcher.
- The primary weaknesses of the Custom Jet Squelcher are its middling fire rate (no better than that of the Splattershot Pro), relatively low ink efficiency (worse than that of the .52 Gal), and mediocre turfing. Pay close attention to the ink tank, focus on splatting with the main weapon, and use Burst Bombs when turfing.
- Thanks to their instant explosion and good ink efficiency, Burst Bombs have a variety of uses:
- Quickly turfing various inkable surfaces for quick maneuvering and building of the special gauge.
- Pelting opponents that get too close before splatting them with the main weapon. Sub Power Up can increase the throwing range, keeping opponents at bay.
- The Sting Ray excels on stages that are long, narrow, closed, and relatively flat, especially Port Mackerel and Walleye Warehouse, particularly in Tower Control and Rainmaker. Special Charge Up and Tenacity can help hasten the building of the special gauge.
- Before starting the Sting Ray, it is advised to keep a safe distance from battles, as firing a Sting Ray too close to an opponent can leave one vulnerable to attack.
- While the Sting Ray cannot be fired from within the Spawn point as of Version 3.0.0, super jumping back there still offers a safer location from which to fire.
- Quick Super Jump can not only hasten reaching the Spawn point, it can allow a faster escape from pursuing opponents.
- When firing the Sting Ray, if an opponent escapes from the ray, bring up the map with
 . An opponent who has taken any damage will be visible on the map until completely healed. Redirect the Sting Ray until the popping sound is heard.
- Before starting the Sting Ray, it is advised to keep a safe distance from battles, as firing a Sting Ray too close to an opponent can leave one vulnerable to attack.
Countermeasures
- While less vulnerable than a charger, splatling, or Explosher at short range, the Custom Jet Squelcher is still at a disadvantage against a slayer's weapon in close-quarters combat, such as any variants of the Splattershot or the Splat Dualies. However, a slayer should be wary of any Burst Bombs the opponent might use.
- Matchups between the Custom Jet Squelcher and other anchor weapons are generally situational, due to the former's better mobility and slight advantage in close-quarters combat. Zoning out the opposing Custom Jet Squelcher is usually recommended.
- All variants of the Splat Charger and E-liter 4K – with or without scope – both outrange and overpower the Custom Jet Squelcher.
- Both variants each of the Hydra Splatling and the Ballpoint Splatling's second stage both outrange, outfire, and out-turf the Custom Jet Squelcher.
- All variants of the Heavy Splatling share the same range (168 units) with the Custom Jet Squelcher and both outfire and out-turf it but are outmaneuvered by it.
- Always be aware of when the opposing team's Custom Jet Squelcher has Sting Ray fully charged on the HUD, particularly when pushing the Tower or Rainmaker.
- Fight fire with fire by using a Sting Ray against an opponent's.
- Tenta Missiles are a quick way to either counter or disrupt an opposing Sting Ray user, as well as displace any anchor from an otherwise safe perch.
- A properly launched and piloted Inkjet can splat an opposing Sting Ray user while being relatively safe from the beam.
- Quickly swimming away from the Sting Ray's beam is generally the best way to avoid getting splatted without using Specials, as users turn relatively slowly while the Sting Ray is active. This is a useful tactic in Tower Control to maintain a Tower push.
Gear abilities
Gear abilities provide different effects in battle that benefit the player with their equipped weapon. This is a guide to gear abilities in relation to the weapon. Strategy, synergy, viability, and purpose may be written here.
Accelerates building up the special gauge for Sting Ray.
Allows Burst Bombs to be thrown farther.
Splatoon 3
| Abbreviations | Cjet |
| Sub | |
| Special | |
| Base damage | 32 |
| Ink consumption | 1.6% |
| Special points | 180p |
| Role | Support/Anchor |
Gear abilities
Gear abilities provide different effects in battle that benefit the player with their equipped weapon. This is a guide to gear abilities in relation to the weapon. Strategy, synergy, viability, and purpose may be written here.
One primary ability of Sub Power Up allows Toxic Mist to be thrown farther, which can slow down enemy pushes.[4]
References
|


