Kensa Splattershot
The Kensa Splattershot is a main weapon in Splatoon 2. It is a Toni Kensa-branded variant of the Splattershot.
Appearance
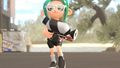
The Kensa Splattershot is a black-and-white Splattershot with the Toni Kensa signature red clothespin attached to the grip under the muzzle. Unlike the Splattershot and the Tentatek Splattershot, the ink reservoir of the Kensa Splattershot does not change with the user's ink color and is always white.
Splatoon 2

| Basic information | |
|---|---|
| Category | Main |
| Class | Shooter |
| Sub | |
| Special | |
| Special points | 180p |
| Range | |
| Damage | |
| Fire rate | |
| Obtainable at | |
| Level | 6 |
| Cost | |
| Specifications | |
| Base damage | 35 |
| Ink consumption | 0.92% |
| Other variants | |
The Kensa Splattershot was released on 14 September 2018 at 02:00 UTC. It comes with Suction Bombs and Tenta Missiles.
Quick facts
A.k.a.: Kensa Shot, K-Shot
Strengths: Splatting, mobility, turfing, safe Anchor pressure (via Tenta Missiles)
Weakness: Slightly short range compared to some other slayer's weapons
Recommended abilities
| Ability | Purpose |
|---|---|
| Increases accuracy while either on the ground or in mid-air | |
| Shortens respawn time after getting splatted (under specific conditions) |
Use
- The Kensa Splattershot is a slayer weapon, designed to splat an opponent in as few as three hits with its rapid firing, good accuracy, and short to medium range.
- Offensively, its good mobility allows its user to force the action and apply pressure onto the opponent, eliminating key defenders during a push.
- Defensively, its rapid rate of fire makes it great at both sharking to pick off unaware opponents and turfing to maintain map control. Its good overall ink efficiency also allows its user to more readily use Suction Bombs to keep opponents at bay.
- Comeback, Quick Respawn, and Stealth Jump are abilities that allow a slayer to play more aggressively.
- Main Power Up can further increase its accuracy, particularly while jumping, preserving more accuracy while jump strafing.
- The Kensa Splattershot is faster and more efficient at turfing than most other slayer weapons, allowing its user to both maintain map control and build up its special weapon more quickly than most other weapons.
- Suction Bombs can be used similarly as Splat Bombs, including clearing areas, such as perches or the Tower, of opponents. However, there are key differences:
- They can attach to surfaces, allowing both more room for error when aiming and the planting of craftier traps, such as underneath a grate.
- They take two seconds after attaching to a surface to detonate, as opposed to one second for a Splat Bomb.
- They inflict more damage from a direct hit and have a larger overall radius of damage.
- The Tenta Missiles can be used to pressure opponents and force them out of position without having to commit too far forward:
- It is recommended to only activate the Tenta Missiles at a safe distance from opponents, not only because a Tenta Missile user is vulnerable to close-range attacks but also because opponents who are further back are easier to track and home missiles on.
- After activating the Tenta Missiles, use its tracking phase as a pseudo-Echolocator to determine the opponents' locations and maximize the number of targets.
- Tenta Missiles can counter an opponent's Sting Ray or Booyah Bomb if anticipated early enough; an opponent will be forced to either delay or interrupt it to avoid getting splatted by the missiles, throwing off their aim.
Countermeasures
- Matchups between Kensa Splattershots on opposing teams are determined by each player's skill, positioning, turf control, and the presence of any teammates.
- Any weapon that has a combination of longer range, better accuracy, or higher damage output without sacrificing too much mobility can counter a Splattershot. For example, both the Splattershot Pro and L-3 Nozzlenose and their respective variants meet all of these requirements.
- A long-ranged weapon, such as a charger or most splatlings, can attack a Splattershot from long distance with impunity. However, once the Splattershot gets close, the tables are turned, as it can outmaneuver and outdraw its less mobile, slower firing opponent.
- When pursued by a Splattershot, using almost any sub weapon (except for Squid Beakons) can either delay their pursuit or deter them from chasing. Weapons that track opponents, such as Point Sensors, temporarily prevent them from sharking and makes them an easier target for long-ranged teammates.
- To prevent sharking, keep track of all four members of the opposing team - which ones are still active, which ones are splatted, and which ones Super Jumped back to their spawn point - and turf suspicious puddles of the opponents' ink, preferably with a sub weapon.
- When pursuing a opposing Kensa Splattershot, be wary of any Suction Bomb traps the opponent may have planted, such as around a corner or underneath a grate.
- Be mindful of both when the opponent has Tenta Missiles ready and when the missiles are launched. When the opponent deploys them, avoid teammates - even when not targeted, as a targeted player crossing paths with a teammate might cause the other to get injured or splatted.
Data
- The Kensa Splattershot is a middleweight weapon.
- The matchmaking range is 125. The game's matchmaking system looks at a team's average matchmaking range value, and matches them against a team with a similar average.
- The ink consumption of 0.92% and ink tank capacity of 100% allows players to fire 108 shots before needing to refill the ink supply.
- This stat can be changed with Ink Saver (Main).
- When initially firing the weapon in humanoid form, the first shot takes 3 frames to come out.
- When firing from swim form, the first shot takes 11 frames to come out.
- The interval between firing and when the player is able to enter swim form or use a sub weapon is 4 frames.
- When firing continuously, it shoots a bullet every 6 frames (10 shots per second).
- When firing while moving, the player's movement speed is set to 0.72 units per frame.
- After firing, there is a 20 frame cooldown before the ink tank starts refilling.
- Each shot has a base damage of 36.
- If a shot is in the air for more than 8 frames after being fired, it loses 0.5625 damage per frame until it reaches 18 damage at frame 40.
- The bullet hitbox has a radius of 2 units.
- The angle its shots can deviate while on the ground is 6 degrees.
- The angle its shots can deviate while in the air is 12 degrees.
- The outer reticle immediately expands after jumping. After 25 frames, the outer reticle will start shrinking, and will finish shrinking after 70 frames.
- The Kensa Splattershot starts off having a 1% chance to shoot towards the outer reticle instead of the inner reticle.
- This chance increases by 1% per shot, and maximizes at a 25% chance to shoot towards the outer reticle, meaning that it takes 24 shots to reach minimum accuracy.
- When jumping, the chance to shoot towards the outer reticle instead of the inner reticle is immediately set to 40%.
- Accuracy starts recovering 6 frames after the player stops shooting. The chance to shoot towards the outer reticle decreases by 1.5% per frame, if the chance is not already at the minimum, meaning that it takes 22 frames to reach maximum accuracy. (32 after shooting while jumping.)
- Shots initially travel straight at a rate of 22 units per frame for 4 frames. Shots travel straight for 88 distance units.
- After that, the shot's velocity is set to 14.495 units per frame if it is not already lower than the listed value, and decreases further as it travels.
- Ink droplets occur every 92 units.
- The frequency at which ink drips from a shot occurs at a rate of 1.5 droplets per shot.
- There are a total of 6 different droplet patterns that can be created while firing this weapon.
- Droplets that occur within 11 units of the player have a radius of 18 units, and a width of 12 units.
- These droplets have their radius multiplied by a value ranging from 1.2 if they fell from a height above 100 units to 1.4 if they fell from a height below 30 units.
- Droplets that occur when they travel past 200 units of the player have a radius of 16 units.
- All other ink droplets have a radius of 12.8 units.
- Droplets that are far from the player and all other droplets have their radius multiplied by a value ranging from 1 if they fell from a height above 100 units to 1.2 if they fell from a height below 30 units.
Version history
| Version | Adjustments |
|---|---|
| 4.2.0 |
|
| 4.4.0 |
|
| 4.7.0 |
|
| 5.0.0 |
|
| 5.1.0 |
|
Quotes
 |
Sheldon's Introduction
The Kensa Splattershot is a limited edition, custom Splattershot created in collaboration with Toni Kensa! It has the same specs as the standard model, but its |
Gallery
-
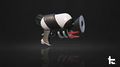
Promo render.
-
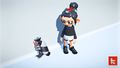
An Octoling girl with the Kensa Splattershot.
-
-

-