The Kettle for this mission is on a tower in the far right corner of Beaker's Depot. To get to it, after landing on the lower level, find a block with a Propeller, use it to get to a higher platform. Swim up a wall and break a Taped Box to find a Ride Rail. Ride it, then switch to another rail, then ride though a Grate in squid form. Behind the Grate is the kettle.
Take the ride rail to some Bounce Pads and get to the other side. Defeat the Octotrooper there, and get up with the Bounce Pad up front. Then defeat the two Shielded Octotroopers circling a stack of crates. Take the launchpad behind them and head to the next checkpoint.
Checkpoint 1
Ahead are two sets of moving walls and Bounce Pads, and an Octotrooper sits on the second one. Make your way over there, grab the key on the second wall, and take it to vault to reveal the launchpad to the next checkpoint. There is also a Splat-Switch on the right side of second moving wall, where activating it spawn three balloons.
Checkpoint 2
Ahead is a set of Bounce Pad leading to a path to the left, and a cycle of inkable blocks moving on the Bounce Pads to the right and dipping into the water at the end of the path. Navigate to the other side, while keep an eye on the Flooder and Octotrooper there. Continue to move along the path, down the inked slope and onto the Bounce Pads. Defeat the Octotroopers bouncing on the Bounce Pads, and get on the platform on the right. Next is a huge area of Bounce Pads, cycling inkable blocks to the right, and a flooder and an Octotrooper on the platform on the other side. Navigate through all these, and get to the next checkpoint ahead.
Checkpoint 3
This checkpoint is more of like a bonus room. Take the launchpad ahead to a high-up Bounce Pad. Move down the series of Bounce Pads slowly to maximize Power Eggs gained. When at the bottom, take the launchpad to head to the final checkpoint.
Final Checkpoint
Ahead is a large area of Bounce Pads with an uninkable wall sweeping across. A block is suspended to the wall, and an Octotrooper sits on top. Get to the platform on the other side, where another Octotrooper awaits. Climb up with the Bounce Pads ahead. Next are another set of Bounce Pads and uninkable moving wall. On the wall are two blocks on the sides, three Octotroopers on top, and an Octosniper behind them all. After making it to the other side, get on the Bounce Pads, ink the wall ahead, and climb up it to get to the Zapfish.
Collectibles
Sunken Scroll
“
These must be photographs taken by some young-adult Inklings. Are these so-called Tweenklings trying to convince their peers that their lives are exciting and full of meaning? Or are they trying to convince themselves?
Location:
On the left hand side of checkpoint three, there is a platform, which is higher than the checkpoint platform. It has a crate on top, which will reveal the Sunken Scroll after its destruction.
Scroll location
Armor
Octo-Resort has 3 pieces of armor to collect.
Armor 1 Location:
At the first checkpoint, on top of the first moving wall.
Armor 2 Location:
At second checkpoint, there will be a path, after which one can go left or right. The armor piece is located on the right hand side.
Armor 3 Location:
At last checkpoint, on top of the second moving wall.
Sardinium
Location:
At the second checkpoint, climb up the wall next to the first Flooder. On top is a crate with the Sardinium.
"Als je ingedrukt houdt op een luchtbed, spring je een stuk hoger!" (If you hold pressed on a Bounce Pad, you jump a bit higher!)
"Gebruik het luchtbed om de vijanden daarboven eens flink te verrassen!" (Use the Bounce Pad to surprise the enemies up there!)
"Spring niet tegen muren op, dan kun je te pletter vallen. Moet je mee oppassen." (Don't jump against the walls, then you can fall to pieces. You have to be careful.)
"Ballonnen!" (Balloons!)
"Goed gedaan!" (Well done!)
"Houd ingedrukt voor een extra machtige sprong!" (Hold pressed for an extra mighty jump!)
"Niet slecht!" (Not bad!)
"Knap, hoor!" (Impressive, I say!)
"Mooi!" (Beautiful!)
After beating the mission for the first time:
"Lekker bezig. Succes met de volgende!" (Doing well. Good luck with the next one!)


 ingedrukt houdt op een luchtbed, spring je een stuk hoger!"
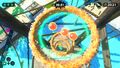

 Black Urchin Rock Tee,
  White Urchin Rock Tee,
  Urchins Cap and
  Woolly Urchins Classic.