Drop down to the path below. Ahead is a large square platform with four paths branching off its four sides. A Octotrooper spawns in front of the row of crates at the other end of the path. Defeat it and break the crates. This spawns three more Octotroopers at the opposite side of the platform in front of the other row of crates. Defeat them. At this point, the player has to collect two keys from the left and right paths to open two vaults in the front path. Once two keys have been collected and the player returning to the area, the center of the main platform will lower, triggering a fight with an Octoling. Once defeated the Octoling, the player should take the front path to open the vault in front containing the Propeller, hit the propeller to raise the platform they are on, then get on the platform on top to open the other vault containing the launchpad to the next checkpoint.
Left Path
Beginning Area
To the left of the main platform is a smaller platform with a broken Flooder and four Octopods. Defeat them and advance along the path. An Octocommander will spawn ahead. Defeat it and take the launchpad there to the next checkpoint.
Checkpoint 1
Ahead is a "T"-shaped platform with a propeller on the center of the platform that lowers the platform when powered, a Flooder moving along the top side and crates on the bottom end containing two Octocopters and a pack of canned power eggs. The player has to hit the propeller to lower the platform, get onto the Flooder and reach the stable elevated platform at the other side. From there the player should take a left turn and continue along the path. Ahead is another Flooder on a long platform with a propeller on the other end that lowers the platform when powered. The player must lower the platform to get onto the Flooder and grab the key on top. Doing so activates a launchpad at the end of the path to the next checkpoint.
Checkpoint 2
The player lands on top of the broken Flooder. Three Octopods spawn below. Defeat them and return to the main platform, to either take the right path for the other key or take the front path with two keys to proceed.
Right path
Beginning Area
To the right of the main platform is a smaller platform covered in Octarian ink. Within hides two Octodivers and one Twintacle Octodiver. Defeat them and advance. An Octosniper will spawn ahead. Defeat it and take the launchpad ahead.
Checkpoint 1
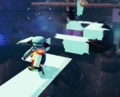
The player lands on an Invisible platform. The player must navigate through the series of invisible platforms. Ahead are three crates in a row and another row of power eggs behind them. The path diverges to the sides there. Break the crates and turn right at the eggs. Two Octocopters will spawn to the left when touching the eggs. Continue along the path and turn left when an Octotrooper spawns to the left. The Octotrooper will start to fire, revealing a lowered straight path up to it. Follow the path and defeat it. To the right of the Octotrooper is a wall. Climb up, turn around, and get onto the platform with power eggs and a key at the end. Upon collecting the key an Octotrooper spawns behind the wall. Go back to there, defeat it, and take the launchpad there to the next checkpoint.
Checkpoint 2
The player lands on another invisible platform above the previous pool of Octarian ink. Three Octopods on balloons spawn. Defeat them and either take the left path for the other key or take the front path with two keys to proceed.
Checkpoint 1
The player lands on a stable platform with a propeller-powered structure ahead. The structure consists of one main platform and two paths branching out from the front, right and back sides. The front and back branches are empty, the right branch, longer than the other branches, has a Gusher at the end. The main platform has a propeller in the middle that moves the structure to the right, covered by two short walls to its left and back. There are crates extended from those walls, and uninkable blocks in the corners (excluding the close right one, where is empty). An Octotrooper sits on the far right block, another spawns on the far left block when the player approaches the front branch, and two Octocopters spawn when the propeller is hit. The player needs to power the propeller all the way then get on the next structure ahead through the front branch to the final checkpoint.
Final Checkpoint
The player is introduced to another structure, consisting of one main platform with the checkpoint in the middle and four poles around it, plus three branches off its left, right, and bottom side. The left and bottom branches are empty, while the right branch connects to another platform with a hollowed center, a propeller that elevates the entire structure within, and Ink Pistons partially covering the hole. The game intends the player to use the Hero Brella's canopy onto the Dash track to the right of the checkpoint to hit the propeller, although a Curling Bomb can also complete the task. The player can also go around the ink pistons and get to the opposite side of the platform and hit the propeller themselves, while spawning balloons nearby and three waves of enemies when they return (1st wave: four Octopods on balloons; 2nd wave: three Octotroopers on balloons; 3rd wave: two Twintacle Octotroopers on balloons). The player then has to get onto the platform ahead through the left branch while the structure is powered. The platform is a square loop with inkable blocks littered throughout the path. There are two Octosnipers on lowered uninkable platforms in far right and close left corners, and a propeller in a vault in the far left corner. Defeating both Octosnipers will cause platforms below the loop to move, such that a new path with a key at the end is formed over the empty hole in the center. Unlock the propeller, then hit both this propeller and the other one suspended on the bottom of the platform above. This will allow the player to get enough height to get onto the platform above, where sits the Zapfish.
Collectibles
Sunken Scroll
“
Don't miss Problem Solved: Studying with Marie! on SBS this Thursday night (and every week thereafter!) at 25:00 sharp! Tune in for a few study tips and a whole lot of procrastination!
Location: A Splat-Switch is present on the side of the propeller platform in the front path of the starting area. Get onto the platform with the launchpad locked by the vault, hit the propeller, and hit the splat-switch. This moves a pathway from below the platform to behind the platform, with the Scroll at the other end.
Scroll location
Sardinium
Location: Power the propeller all the way in checkpoint 1, and get on the gusher on the right branch. The Sardinium is in the air and can be grabbed if the player is fast enough, along with some squid rings, which can be obtained by the same method.
Sardinium location
Armor
Propellerland has 4 pieces of armor to collect.
Armor 1 Location: There are two large crates in the corners of the large platform in the beginning area. The one in the close left corner holds the armor.
Armor 2 Location: In the middle crate of the row of crates in right path checkpoint 1.
Armor 3 Location: In the left taped crate of the wall of crates behind checkpoint 1.
Armor 4 Location: In the right crate beside the final checkpoint.
Crust Bucket Ticket
Location:
On a platform above the starting area. Use the propeller in the front path and get to the platform before the propeller platform drops too much with help of the path moving along with the platform. Bombs are necessary if the weapon does not have enough range and not quick enough.


