Category:Return of the Mammalians screenshots
From Inkipedia, the Splatoon wiki
Subcategories
This category has only the following subcategory.
Media in category "Return of the Mammalians screenshots"
The following 200 files are in this category, out of 538 total.
(previous page) (next page)-
 After Alterna.jpg 1,280 × 720; 269 KB
-
 Agent 3 holding smallfry.jpg 639 × 720; 105 KB
-
 Agent 3 on rocket.jpg 1,280 × 720; 181 KB
-
 Agent 3 using a Gusher.png 692 × 556; 437 KB
-
 Alterna blue record.png 560 × 560; 309 KB
-
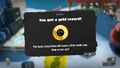 Alterna Get Gold Record.jpg 1,280 × 720; 116 KB
-
 Alterna Gold Record.jpg 560 × 540; 35 KB
-
 Alterna Log004 half-complete.jpg 1,280 × 720; 202 KB
-
 Alterna Parabolic Antennas.png 2,560 × 1,440; 3.82 MB
-
 Alterna Rocket Debris 1.png 2,560 × 1,440; 4.45 MB
-
 Alterna Rocket Debris 2.png 2,560 × 1,440; 3.84 MB
-
 Alterna site 2 pipe entrance sign.png 199 × 517; 169 KB
-
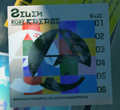
 Alterna Site 2 QR code sticker.png 498 × 310; 131 KB
-
 Alterna Site 2 vat text.png 860 × 700; 123 KB
-
 Alterna Site 2 yellow sign.png 500 × 446; 200 KB
-
 Alterna site 3 goru da sign.png 1,570 × 650; 1.09 MB
-
 Alterna site 3 hiak da sign.png 1,580 × 600; 1.05 MB
-
 Alterna site 3 housing door text.png 350 × 350; 62 KB
-
 Alterna site 3 purnt da sign.png 1,420 × 530; 1,004 KB
-
 Alterna Space Center 1 - Entrance.png 2,560 × 1,440; 3.57 MB
-
 Alterna Space Center 2 - Hangar.png 2,560 × 1,440; 3.74 MB
-
 Alterna Space Center 3 - Lift.png 935 × 1,427; 2.03 MB
-
 Alterna Space Center Entrance.jpg 1,280 × 720; 216 KB
-
 Alterna Space Center Gantry.png 2,560 × 1,440; 4.16 MB
-
 Alterna Space Center Hangar.jpg 1,280 × 720; 200 KB
-
 Alterna Space Center Lift.jpg 1,280 × 720; 84 KB
-
 Alterna Space Center Overview.png 2,560 × 1,440; 3.98 MB
-
 Alterna Thinker.png 2,560 × 1,440; 3.4 MB
-
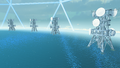 Alterna Transmission Towers.png 2,560 × 1,440; 4.15 MB
-
 Alterna Unknown Building Wreckage.png 2,560 × 1,440; 3.5 MB
-
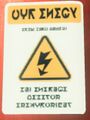 AlternaOutEnergy.jpg 473 × 630; 41 KB
-
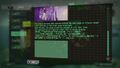
 AlternaScriptExampleSeven.png 578 × 530; 326 KB
-
 AlternaScriptExampleSPECA.jpg 601 × 240; 24 KB
-
 AlternaScriptExampleTheMessiah.png 345 × 368; 202 KB
-
 Amped Finale Hangar.png 1,280 × 720; 1.45 MB
-
 Amped Finale RotM Mission.png 1,280 × 720; 1.04 MB
-
 Amped Site1 Lvl10.png 1,280 × 720; 1.3 MB
-
 Anxiety Society in Happiness Research Lab.png 1,280 × 720; 1,002 KB
-
 Armor breaking RotM.png 590 × 413; 545 KB
-
 Armor case RotM.png 423 × 415; 313 KB
-
 ASC from above.jpg 1,280 × 720; 306 KB
-
 Blue Spirit Lifter.jpg 1,280 × 720; 151 KB
-
 CallieS3.jpg 787 × 720; 190 KB
-
 Cozy&Safe Horizontal Silo Tank.png 2,560 × 1,440; 3.3 MB
-
 Cozy&Safe Inside Buried Printer.png 2,560 × 1,440; 2.22 MB
-
 Cozy&Safe Overview.png 1,707 × 1,440; 3.54 MB
-
 Cozy&Safe Protected Spools.png 2,560 × 1,440; 3.3 MB
-
 Crater Clear Subsequent.jpg 1,280 × 720; 264 KB
-
 Crater level complete (doll).png 1,920 × 1,080; 2.41 MB
-
 Cryogenic Hopetown Overview.png 2,075 × 1,439; 4.07 MB
-
 Cryogenic Hopetown Shelter.png 2,560 × 1,440; 2.66 MB
-
 Dehydrated Cuttlefish.png 682 × 1,067; 687 KB
-
 Disheartened Deep Cut.png 1,560 × 893; 1 MB
-
 Diving OctoHopper.jpg 1,280 × 720; 214 KB
-
 Earth From Space.jpg 1,280 × 720; 261 KB
-
 Eco-Forest Overview.png 1,522 × 1,440; 2.89 MB
-
 Eco-Forest Parabolic Antenna.png 2,560 × 1,440; 3.28 MB
-
 Eco-Forest Tomato Planter.png 2,560 × 1,440; 2.37 MB
-
 Eco-Forest Unique Logo.png 2,560 × 1,440; 2.4 MB
-
 End of the Credits.jpg 1,280 × 720; 212 KB
-
 Equipper (above) RotM.png 454 × 434; 238 KB
-
 Equipper (full) RotM.png 612 × 513; 425 KB
-
 Erupting Gusher and Agent 3.png 618 × 720; 654 KB
-
 Erupting Gusher Eco-Forest Treehills.png 743 × 720; 914 KB
-
 Firefly in Landfill Dreamland.png 1,280 × 720; 1.08 MB
-
 Future Utopia Moai Row.png 2,560 × 1,440; 4.3 MB
-
 Future Utopia Overview.png 1,684 × 1,439; 3.38 MB
-
 Fuzzy Blobby Octotrooper Crater 1.png 429 × 556; 291 KB
-
 Fuzzy Blobby Octotrooper Crater 2.png 364 × 839; 455 KB
-
 Fuzzy Octoling Octobrush.png 585 × 498; 431 KB
-
 Fuzzy Octomissile Platform.jpg 439 × 439; 84 KB
-
 Fuzzy Octomissile.jpg 389 × 389; 65 KB
-
 FuzzyBlobbyOctotrooper.jpg 172 × 263; 20 KB
-
 FuzzyEliteOctoling.png 402 × 487; 264 KB
-
 FuzzyInkPiston.jpg 336 × 133; 15 KB
-
 FuzzyOctocommanderCharge.jpg 198 × 276; 20 KB
-
 FuzzyOctodiver.jpg 266 × 355; 17 KB
-
 FuzzyOctowasher.jpg 123 × 129; 10 KB
-
 FuzzyRocketOctobomber.jpg 162 × 184; 14 KB
-
 FuzzyRocketOctocopter.jpg 170 × 174; 14 KB
-
 FuzzyRocketTwintacleOctotrooper.jpg 175 × 206; 17 KB
-
 FuzzyShieldedBlobbyOctotrooper.jpg 264 × 430; 33 KB
-
 FuzzyShieldedRocketTwintacleOctotrooper.jpg 180 × 259; 20 KB
-
 FuzzyShieldedTwintacleOctotrooper.jpg 83 × 143; 9 KB
-
 FuzzyTwintacleOctodiver.jpg 187 × 337; 19 KB
-
 Get to Know Alterna, Your Only Choice Checkpoint 1.png 1,920 × 1,080; 1.93 MB
-
 Get to Know Alterna, Your Only Choice Checkpoint 2.png 1,920 × 1,080; 1.97 MB
-
 Get to Know Alterna, Your Only Choice Checkpoint 3.png 1,920 × 1,080; 1.9 MB
-
 Get to Know Alterna, Your Only Choice Checkpoint 4.png 1,920 × 1,080; 1.58 MB
-
 Goal animation 1 RotM.png 702 × 690; 814 KB
-
 Goal animation 2 RotM.png 1,195 × 708; 1.21 MB
-
 Goal getting inked RotM.png 562 × 689; 552 KB
-
 Goal ready to be collected RotM.png 580 × 538; 398 KB
-
 Goal shield being hit RotM.png 1,280 × 720; 1.51 MB
-
 Goal shield reforming RotM.png 599 × 685; 613 KB
-
 Gusher from above lit RotM.png 575 × 575; 513 KB
-
 Gusher from above unlit RotM.png 575 × 575; 508 KB
-
 Gusher lit RotM.png 720 × 720; 758 KB
-
 Gusher unlit RotM.png 720 × 720; 741 KB
-
 Happiness Research Lab Overview.png 1,301 × 1,440; 2.08 MB
-
 Happiness Research Lab Window Server Room.png 1,280 × 720; 818 KB
-
 Hero-gear.png 754 × 1,076; 1.1 MB
-
 HoppyOctodiver.jpg 259 × 498; 39 KB
-
 Hugefry Bun.jpg 1,280 × 720; 142 KB
-
 Hugefry Default.jpg 1,280 × 720; 134 KB
-
 Hugefry Mohawk.jpg 1,280 × 720; 151 KB
-
 Hugefry Pineapple.jpg 1,280 × 720; 190 KB
-
 Hugefry Pompadour.jpg 1,280 × 720; 145 KB
-
 Hugefry Spiky.jpg 1,280 × 720; 168 KB
-
 Hugefry Swept.jpg 1,280 × 720; 148 KB
-
 Hugefry vs. Mr. Grizz.jpg 1,280 × 720; 218 KB
-
 Ink Wheel.png 850 × 850; 893 KB
-
 InkfurlerGlitch.jpg 1,280 × 720; 290 KB
-
 Landfill Dreamland Overview.png 1,985 × 1,439; 4.24 MB
-
 Landfill Dreamland Snowmobile.png 2,560 × 1,440; 3.14 MB
-
 Landfill Dreamland Submarine.png 2,560 × 1,440; 4.43 MB
-
 Landfill Dreamland two ink wheels.png 1,600 × 900; 1.4 MB
-
 Loot anchor (in ink).png 579 × 509; 345 KB
-
 Lvl1 hero shot s3.jpg 248 × 247; 17 KB
-
 Lvl2 hero shot s3.jpg 357 × 357; 32 KB
-
 Marie Introducing the Shel-drone.jpg 1,280 × 720; 136 KB
-
 MarieS3.jpg 750 × 720; 177 KB
-
 Mastermega.jpg 798 × 555; 87 KB
-
 Mimicry in Cozy & Safe Factory.png 1,280 × 720; 1.24 MB
-
 Mr. Grizz.png 1,280 × 720; 787 KB
-
 Octostomp on boss battle area.png 700 × 700; 342 KB
-
 Octostomp spinning around.png 814 × 814; 626 KB
-
 On The Clock in Eco-Forest Treehills.png 1,280 × 720; 980 KB
-
 Propeller (shot at).png 388 × 576; 394 KB
-
 Ride rail end RotM.png 979 × 671; 1.1 MB
-
 RotM A Compulsive Collector's Paradise Spawn.jpg 1,280 × 720; 290 KB
-
 RotM A Compulsive Collector's Paradise Weapon Select.jpg 1,280 × 720; 170 KB
-
 RotM Absorbency and You Checkpoint 1.jpg 1,280 × 720; 217 KB
-
 RotM Absorbency and You Checkpoint 2.jpg 1,280 × 720; 239 KB
-
 RotM Absorbency and You Spawn.jpg 1,280 × 720; 237 KB
-
 RotM Absorbency and You Weapon Select.jpg 1,280 × 720; 171 KB
-
 RotM After Alterna Spawn.jpg 1,280 × 720; 299 KB
-
 RotM Agent 3 Hero Suit Space Version.jpg 1,280 × 720; 188 KB
-
 RotM Agent 3 treasure grab 1.png 1,606 × 904; 1.64 MB
-
 RotM Agent 3 treasure grab 2.png 1,606 × 904; 1.52 MB
-
 RotM Alterna Mission Clear 1.png 1,920 × 1,080; 1.63 MB
-
 RotM Alterna Mission Clear 2.png 1,920 × 1,080; 1.64 MB
-
 RotM Alterna Mission Clear 3.png 1,920 × 1,080; 1.62 MB
-
 RotM Alterna Mission Clear 4.png 1,920 × 1,080; 1.65 MB
-
 RotM Alterna Mission Clear 5.png 1,920 × 1,080; 1.56 MB
-
 RotM Alterna Mission Clear 6.png 1,920 × 1,080; 1.59 MB
-
 RotM Alterna Mission Clear 7.png 1,920 × 1,080; 1.68 MB
-
 RotM Alterna Mission Clear 8.png 1,920 × 1,080; 1.54 MB
-
 RotM Alterna Space Center Entrance Checkpoint 1.jpg 1,280 × 720; 197 KB
-
 RotM Alterna Space Center Entrance Checkpoint 2.jpg 1,280 × 720; 189 KB
-
 RotM Alterna Space Center Entrance Weapon Select.jpg 1,280 × 720; 146 KB
-
 RotM Alterna Space Center Hangar Checkpoint 1.jpg 1,280 × 720; 233 KB
-
 RotM Alterna Space Center Hangar Checkpoint 2.jpg 1,280 × 720; 204 KB
-
 RotM Alterna Space Center Hangar Spawn.jpg 1,280 × 720; 229 KB
-
 RotM Alterna Space Center Lift Checkpoint.jpg 1,280 × 720; 155 KB
-
 RotM Alterna Space Center Lift Spawn.jpg 1,280 × 720; 193 KB
-
 RotM Amusing a Bemused Muse Checkpoint.jpg 1,280 × 720; 292 KB
-
 RotM Amusing a Bemused Muse Finished.jpg 1,280 × 720; 325 KB
-
 RotM Amusing a Bemused Muse Spawn.jpg 1,280 × 720; 270 KB
-
 RotM Amusing a Bemused Muse Weapon Select.jpg 1,280 × 720; 173 KB
-
 RotM armor upgrade 1.png 320 × 450; 167 KB
-
 RotM armor upgrade 2.png 290 × 450; 155 KB
-
 RotM Armored and large plain crates.png 652 × 528; 517 KB
-
 RotM Armored orange crate.png 639 × 626; 602 KB
-
 RotM Bankara Dam.png 898 × 362; 393 KB
-
 RotM Barriers! They've Got You Covered Spawn.jpg 1,280 × 720; 227 KB
-
 RotM Barriers! They've Got You Covered Weapon Select.jpg 1,280 × 720; 169 KB
-
 RotM Become One with Your Smallfry Checkpoint 1.jpg 1,280 × 720; 259 KB
-
 RotM Become One with Your Smallfry Checkpoint 2.jpg 1,280 × 720; 247 KB
-
 RotM Become One with Your Smallfry Checkpoint 3.jpg 1,280 × 720; 252 KB
-
 RotM Become One with Your Smallfry Checkpoint 4.jpg 1,280 × 720; 252 KB
-
 RotM Become One with Your Smallfry Spawn.jpg 1,280 × 720; 275 KB
-
 RotM Become One with Your Smallfry Weapon Select.jpg 1,280 × 720; 153 KB
-
 RotM Bet You Mist Us! Checkpoint.jpg 1,280 × 720; 143 KB
-
 RotM Bet You Mist Us! Spawn.jpg 1,280 × 720; 159 KB
-
 RotM Bet You Mist Us! Weapon Select.jpg 1,280 × 720; 164 KB
-
 RotM Big Man boss intro.png 1,920 × 1,080; 1.75 MB
-
 RotM Big Man Color Lock body.png 1,920 × 1,080; 1.58 MB
-
 RotM Big Man Color Lock ink.png 1,920 × 1,080; 1.63 MB
-
 RotM Big Man ink color.png 1,920 × 1,080; 2.07 MB
-
 RotM Boss Kettle Back.png 633 × 543; 566 KB
-
 RotM Boxes Locked! Keys, Please! Checkpoint.jpg 1,280 × 720; 272 KB
-
 RotM Breathe In, Breathe Out Spawn.jpg 1,280 × 720; 226 KB
-
 RotM Breathe In, Breathe Out Weapon Select.jpg 1,280 × 720; 172 KB
-
 RotM Captain Charged Up.jpg 1,280 × 720; 221 KB
-
 RotM Charge Now, Splat Later Checkpoint 1.jpg 1,280 × 720; 280 KB
-
 RotM Charge Now, Splat Later Checkpoint 2.jpg 1,280 × 720; 251 KB
-
 RotM Charge Now, Splat Later Checkpoint 3.jpg 1,280 × 720; 265 KB
-
 RotM Charge Now, Splat Later Spawn.jpg 1,280 × 720; 282 KB
-
 RotM Charge Now, Splat Later Weapon Select.jpg 1,280 × 720; 154 KB
-
 RotM Checkpoint.png 390 × 167; 111 KB
-
 RotM Climbing the Corporate Splatter Checkpoint 1.jpg 1,280 × 720; 295 KB
-
 RotM Climbing the Corporate Splatter Checkpoint 2.jpg 1,280 × 720; 274 KB
-
 RotM Climbing the Corporate Splatter Spawn.jpg 1,280 × 720; 225 KB
-
 RotM Climbing the Corporate Splatter Weapon Select.jpg 1,280 × 720; 178 KB
-
 RotM Conserve Ink—Splat Sustainably Dialogue 1.jpg 1,280 × 720; 254 KB
-
 RotM Conserve Ink—Splat Sustainably Dialogue 2.jpg 1,280 × 720; 261 KB
-
 RotM Conserve Ink—Splat Sustainably Octosniper.jpg 1,280 × 720; 254 KB
-
 RotM Conserve Ink—Splat Sustainably Spawn.jpg 1,280 × 720; 258 KB
-
 RotM Conserve Ink—Splat Sustainably Weapon Select.jpg 1,280 × 720; 160 KB


.png)


_RotM.png)
_RotM.png)


.png)


.png)


