Platform Madhouse
|
|
|
˜ Please Mind the Gap ˜
| Number | 25 |
| Area | 5 |
| Sheldon's Request | |
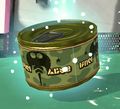
| Items | 1 Scroll, 1 Sardinium, 3 Armor, 1 Ink Storm, 1 Crust Bucket Ticket |
| Music | Shooting Starfish |
| StrategyWiki has an article about: Platform Madhouse |
Platform Madhouse is the twenty-fifth mission of Splatoon 2's single-player mode, Octo Canyon.
Octo Canyon
Take a yellow saucer and transfer to a green one. Drop off at the platform with a Ink Switch and a checkpoint. Do not hit it yet as it will cause the walls on the sides to close in, obstructing the path. Get onto the thin moving platform on the other side, then hit the Ink Switch. This will bring you an inkable wall to get on top. Get on to the wall closer to the Ink Switch as it returns to its original position, and the kettle is on a platform nearby.
Gameplay
Walkthrough
| Area | Enemies | Armor | Special Weapon | Sunken Scroll | Sardinium | Crust Bucket Ticket |
|---|---|---|---|---|---|---|
| Beginning Area | 4x Octodivers, 1x Shieled Octotrooper | N/A | N/A | N/A | N/A | Yes |
| Checkpoint 1 | 2x Twintacle Octotroopers, 2x Octocommanders | N/A | N/A | N/A | N/A | Yes |
| Checkpoint 2 | 6x Octotroopers | N/A | 1x Ink Storm | N/A | N/A | N/A |
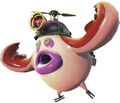
| Checkpoint 3 | 2x Octocopters, 1x Octobomber, 8x Octotroopers, 1x Shielded Octotrooper | N/A | N/A | N/A | N/A | N/A |
| Checkpoint 4 | 2x Octocopters, 1x Rocket Twintacle Octotrooper | 1x Armor | N/A | N/A | N/A | N/A |
| Checkpoint 5 | 2x Octocommanders | 1x Armor | N/A | N/A | Yes | N/A |
| Checkpoint 6 | 2x Octocopters | 1x Armor | N/A | N/A | N/A | N/A |
| Final Checkpoint | 1x Octobomber, 1x Octostamp DX | N/A | N/A | Yes | N/A | N/A |
Beginning
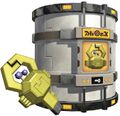
Drop down to the large platform below. Cross the two sets of moving platforms and splat the Octodivers and Octotroopers, then break the crates ahead and pick up the key. Doing so will trigger the first checkpoint and spawn in more Octarians.
Checkpoint 1
Turn back towards the large platform you just dropped on. There will now be two Twintacle Octotroopers in front of the moving platforms and two Octocommanders behind them. Splat them and take the key to the vault on the large platform, revealing a launchpad to the next checkpoint.
Checkpoint 2
Drop off and break the crates for a canned Ink Storm. The player will now have to platform to the other side on moving platforms moving against them, with large gaps needed to be made. There will also be Octotroopers on uninkable blocks shooting the player, and taking them out before crossing a gap is advised. At the corner where the moving platforms change direction, a small stable platform with the next checkpoint floats above them.
Checkpoint 3
The player has to platform just like the previous checkpoint, but now with additional barriers, Octocopters and Octobombers interfering with their jumps and two stable platforms with Octotroopers sitting on uninkable blocks nearby (the left one shielded), and Splat-Switches on both sides of the wall nearby. The player has to traverse and activate both Splat-Switches to move the walls aside to reveal a team of Octotroopers with an Octocommander in the middle. After splatting them all, a launchpad appears, taking the player to the next checkpoint.
Checkpoint 4
Below is a set of moving platforms moving similarly to conveyor belts, towards the right. There are two Octocopters, a row of uninkable blocks and a block on the other side to the left. Make your way to the block and board the next conveyor belt-like set of platforms moving to the right. There are Ink Pistons to restrict the path, so move around them. There will be a Rocket Twintacle Octotrooper on the other side. Defeat it with the help of the balloon fish nearby and get to the next checkpoint.
Checkpoint 5
At this point the path takes a left turn, so now the player is moving against the conveyor belt. There are two Octocommanders on uninkable blocks on the side, 2 barriers to hide from them, and two balloon fish in the middle of the conveyor to help turf. Make your way to the other side and climb up the next conveyor moving upwards. Drop down and land on the next checkpoint.
Checkpoint 6
There are Ink Switches littered throughout this section. Hit any of them to power a moving block and ride it. Several rows of uninkable blocks will be placed to help you reach the Ink Switches and board the block. The player will come across several obstacles along the way, first 2 Octocopters spawn to interfere with the progress, then there is a grate that can sweep the player off. After that, the block gains height and reaches the final checkpoint.
Final Checkpoint
The block then continues to move around an Ink Switch with an Octobomber nearby. Barriers provide footing for the player to hit the Ink Switch but may also push the player off. When the block takes its next turn, it starts rotating horizontally anticlockwise, and on the next, it starts rotating vertically. The player must get to the top before it flips or they will fall into the abyss. A stable platform at the same level as the top of the block when it is done rotating has the Zapfish sitting on it.
Collectibles
Sunken Scroll
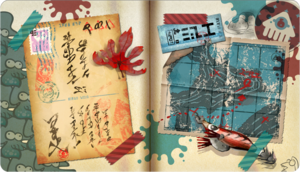
| “ | My dearest Callie and Marie -(STOP)- On a research trip to the cape with Agt 3 -(STOP)- May be late, but left dinner in the fridge -(STOP)- | ” |
— Sunken Scroll 25
| ||
Location: The platform with the Zapfish on it will have a splat-switch on the side. Inking it will reveal a launchpad to what Sheldon calls a "Deserted Island". Get onto the Octostamp DX and destroy the boxes to get the scroll, the launchpad will take you back to the Zapfish.

Sardinium
Location: Climb over the giant moving wall in checkpoint 5. Look to your left and look down. There will be a small grassy platform with the Sardinium.

Armor
Platform Madhouse has 3 pieces of armor to collect.
Armor 1 Location: Immediately in a crate to the right of Checkpoint 4.
Armor 2 Location: Immediately to the right of Checkpoint 5.
Armor 3 Location: In a crate next to the first Ink Switch of Checkpoint 6.
Special Weapon
Ink Storm Location: In the third crate to the right of the wall of crates in front of Checkpoint 2.
Crust Bucket Ticket
Location: Drop below the rotating platforms in the beginning area or checkpoint 1. There will be a still platform underneath with a crate containing the ticket. Use a Ride rail to get back.

Enemies and Mechanics
Previously Introduced
Quotes
English
 Marie's Quotes
| “ | Hmm... Where's that key hiding? | ” |
| “ | More baddies. How many do you have to cook before they just give up? | ” |
| “ | You're one cold-blooded squid, kid. | ” |
| “ | I spy switches ahead! | ” |
| “ | More slobs ahead! | ” |
| “ | Take cove behind that wall! | ” |
| “ | Launchpad! | ” |
| “ | Don't let those moving platforms throw you for a loop! | ” |
| “ | Get fried, shrimp! | ” |
| “ | Stick to that wall like stink on Octo ink! | ” |
| “ | Ink Switch over there! | ” |
| “ | Phew. Nice work. | ” |
 Sheldon's Request Quotes
| “ | I could REALLY use some more data on this weapon. Can you use it for a bit? | ” |
- Mission quotes:
| “ | Wuh... Is this like some long-forgotten deserted island? | ” |
Dutch
 Marie's Quotes
- "Hmm... Waar is die sleutel nou?"
(Hmm... Where is that key now?) - "Nog meer vijanden. Wat een verrassing."
(Even more enemies. What a surprise.) - "Ja, zó doe je dat!"
(Yes, that is how you do that!) - "Ik wist wel dat je het in je had, agent."
(I knew you had it in you, Agent.) - "Ik zie schakelaars!"
(I see switches!) - "Nu wordt het serieus!"
(Now it becomes serious!) - "Zoek even dekking achter die muur!"
(Seek cover behind that wall for a bit!) - "Daar is het lanceerpunt!"
(There is the launchpad!) - "Laat niet met je sollen!"
(Don't let anyone mess with you!) - "Probeer altijd alle hoeken in de gaten te houden."
(Always try to keep an eye on every corner.) - "Volhouden, agent 4!"
(Hold on, Agent 4!) - "Daar is de inktschakelaar!"
(There is the Ink Switch!) - "Ik wist wel dat je het in je had, agent."
(I knew you had it in you, Agent.) - "Goed gedaan!"
(Well done!)
- After beating the mission for the first time:
- "En nog eentje erbij! Het wordt er niet makkelijker op, of wel?"
(And another one! It doesn't become any easier, does it?)
 Krabbert's Quotes
- Order van Krabbert:
- "Gebruik dit wapen maar snel, dan kan ik de gegevens ervan analyseren!"
(Use this weapon quickly, then I can analyze the data of it!)
- Mission quotes:
- "Wat is dit? Een verlaten eiland dat door iedereen vergeten is?"
(What is this? A deserted island that is forgotten by everyone?)
Gallery
-
Level icon
Trivia
- Mind the Gap could be a reference to London's underground.
Names in other languages
| Language | Name | Meaning |
|---|---|---|
| 激走! ベルトコンベヤー # 流し流され ベルコン人生 Gekisō! Beruto Konbeyā # Nagashi Nagasare Beru-Kon Jinsei |
Flat-out Run on the Belt Conveyors: Carrying and Being Carried Bel-Con Life | |
| Aan de lopende band | On the conveyor belt[note 1] | |
| - Festival stellaire - Attention, sol glissant |
- Stellar festival - Attention, slippery floor | |
| Verschiebung gen Wahnsinn | Shift towards madness | |
| In bilico sui nastri trasportatori! | Balancing on conveyor belts! | |
| Поточное производство «Пальцы конвейером» Potochnoye proizvodstvo «Pal'tsy konveyyerom» |
Line production «Conveyor fingers» | |
| Casa de las plataformas ˜Destino desconocido˜ |
Platform house ˜Unknown fate˜ | |
| Deslizándose entre enemigos | Sliding between enemies |
Translation notes
- ↑ "Aan de lopende band" is a Dutch phrase for "on end" or "all the time"


