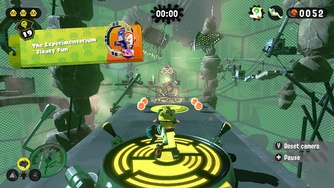
The Experimentorium
|
|
|
˜ Floaty Fun ˜
| Number | 19 |
| Area | 4 |
| Sheldon's Request | |
| Items | 1 Scroll, 1 Sardinium, 3 Armor, 1 Crust Bucket Ticket |
| Music | The Girl from Inkopolis |
| StrategyWiki has an article about: The Experimentorium |
The Experimentorium is the nineteenth mission of Splatoon 2 single player mode Octo Canyon and is the first mission to take multiple routes to proceed into the mission. It is the first and only mission in which the player is requested to use the Hero Blaster.
Octo Canyon
There are two ways to reach this kettle. The official way to reach it is to climb up the block to the right near the center of the map, and unfurl the Inkfurler on the left. Then take the path with the Bounce Pads. Jump over the uninkable wall with the last one. The kettle is at the end of the platform. There is also a workaround of standing on the nearby platform and using the Hero Charger to ink the kettle from afar. The kettle can then be super jumped to.
Gameplay
Walkthrough
| Area | Enemies | Armor | Special Weapon | Sunken Scroll | Sardinium | Crust Bucket Ticket |
|---|---|---|---|---|---|---|
| Beginning Area | 1x Shielded Octotrooper | N/A | N/A | N/A | N/A | N/A |
| Left path Checkpoint 1 | 1x Tentakook | N/A | N/A | N/A | Yes | N/A |
| Left path Checkpoint 2 | 3x Octocopters, 2x Rocket Octocopters | 1x Armor | N/A | N/A | N/A | N/A |
| Left path Checkpoint 3 | N/A | N/A | N/A | N/A | N/A | N/A |
| Middle path Checkpoint 1 | N/A | N/A | N/A | N/A | N/A | N/A |
| Middle path Checkpoint 2 | N/A | N/A | N/A | Yes | N/A | N/A |
| Middle path Checkpoint 3 | N/A | N/A | N/A | Yes | N/A | N/A |
| Right path Checkpoint 1 | 4x Octotroopers, 3x Shielded Octotroopers, 1x Octostamp | 1x Armor | N/A | N/A | N/A | N/A |
| Right path Checkpoint 2 | 4x Shielded Octotroopers, 1x Octostamp | N/A | N/A | N/A | N/A | N/A |
| Right path Checkpoint 3 | N/A | N/A | N/A | N/A | N/A | N/A |
| Final Checkpoint | 16x Octotroopers, 1x Shielded Octotrooper, 5x Flooders | 1x Armor | N/A | N/A | N/A | Yes |
Beginning Area
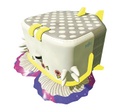
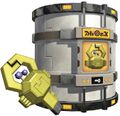
Take the launchpad and break the crates ahead. Behind the crates is a Shielded Octotrooper on a vault in the center of the platform. To the sides are two more of such vaults, and behind it are three launchpads on walls. The player has to take all three launchpads to three different sections in whichever order they desire. At the end of each section is a key, a checkpoint to save progress, and a launchpad back to this area. Upon completing a path the respective wall with the respective launchpad lowers to indicate completion. The player must gather all three keys to activate all three Splat-Switches. Doing so raises the block with the middle Splat-Switch to reveal a launchpad on its back side to the final checkpoint.
Left path Checkpoint 1
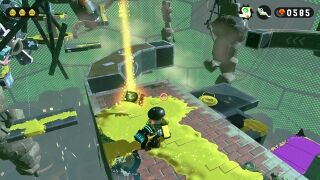
Taking the left launchpad in the beginning area takes the player here. Ahead is a weird structure with curvy narrow paths branching from a central block. The player has to climb up to that block and hit the Splat-Switch ahead, causing the branches to the side to rotate, forming an upwards path to the right which the player takes. From there the player is introduced to a circular loop platform with a block in the center. The player has to get on the block and hit the Tentakook running on the loop. Upon defeating the Tentakook, the block rises to introduce two blocks above, both can be hit by the player's weapon but not the player themselves. The right one does not have anything interactable, while the left one has a Splat-Switch on its side. Hitting it will cause the structure ahead to rotate, allowing access when the movement is complete. The next checkpoint is on the structure.
Left path Checkpoint 2
Ahead are three Octocopters above another circular loop platform with two blocks suspended on inner opposite sides. Defeating them will cause the further block to rise and move towards the closer block, revealing a Splat-Switch on its back side. Hitting it will cause the aforementioned block to the right to rotate, revealing a Splat-Switch on its back side. The player must go back and hit it, causing the structure behind it to deform and assemble into a curvy path upwards. From there the player has to go along the path, defeating Rocket Octocopters on the way. At the top is a checkpoint, a key, and a launchpad back at the beginning area.
Left path Checkpoint 3
Pick up the key and take the launchpad to return to the beginning area.
Middle path Checkpoint 1
Taking the middle launchpad in the beginning area takes the player here. Ahead are two Grapplinks lined up such that the next one is behind and lower than the previous one. The player must hit the Grapplinks successively before they fall too far to reach the next Grapplink. If the player succeeds in making it to the end of the Grapplink path they fall onto a platform with a launchpad to the next checkpoint, and if they fail they fall on another platform with a launchpad back to the beginning of the section.
Middle path Checkpoint 2
Ahead is another Grapplink path with five Grapplinks. The player must hit the Grapplinks successively to make it to the end. If the player succeeds in hitting the fifth Grapplink they land on a platform with the next checkpoint, if they fall after hitting the third or fourth Grapplink they land on a platform with a launchpad back to the beginning of the section, and if they fail to do neither they fall to their death.
Middle path Checkpoint 3
Drop down to pick up the key, then cross the gap, collect the Scroll if the Splat-Switch has been hit (see Collectibles) and take the launchpad back to the beginning area.
Right path Checkpoint 1
Taking the launchpad to the right in the beginning area takes the player here. Ahead is a platform with two Shielded Octotroopers on a path of Octarian ink circling a platform of the same level in the middle. Defeating them makes the platform in the middle raise, revealing a hole the player can jump down. Below is a path leading up to a platform with four Octotroopers circling a raised block in the middle with a Shielded Octotrooper on top. Defeat the whole lot and the Octostamp behind the bumper ahead. Climb up the block behind the bumper and activate the Splat-Switches to the side. Doing so activates the next checkpoint and reforms the path.
Right path Checkpoint 2
The player now has to take the same path again with the newly spawned enemies. Getting onto the narrow path spawns a Shielded Octotrooper at the other end, then two more Shielded Octotroopers to the side of the raised block, with another Shielded Octotrooper on top. Behind the whole lot is another Octostamp behind the bumper, and behind that is the next checkpoint. The player has to navigate and defeat the enemies and reach the next checkpoint.
Right path Checkpoint 3
Pick up the key and take the launchpad back to the beginning area.
Final Checkpoint
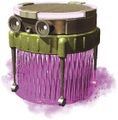
The player lands in front of a large platform with three Industrial Squee-Gs, two large inkable blocks on the left and right ledge, two uninkable blocks on the sides of the far ledge, and a smaller inkable block in the middle with a Shielded Octotrooper on top. Upon boarding the Industrial Squee-G docked in front of the checkpoint, eight Octotroopers spawn throughout the field, and the Industrial Squee-Gs proceed to take them down. The player has to use the Squee-Gs to reach the uninkable blocks, first the left one to pick up the key, then the right one to unlock the vault with the launchpad to the Zapfish. Upon picking up the key eight more Octotroopers spawn, promptly distracting the Squee-Gs. The player can go out and board another Industrial Squee-G, or simply wait for the Squee-G docked at the corner nearby to return. The player can also take down the Shielded Octotrooper if necessary, which activates a launchpad there, but the launchpad is an unnecessary detour to an area with five Flooders patrolling an area with four blocks in the middle, and more suspended in the air. The player can simply take the launchpad behind to go back, landing on the Industrial Squee-G docked on the right corner of the platform.
Collectibles
Sunken Scroll
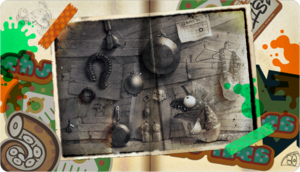
| “ | Salmonids are known to keep their weapons in tip-top shape. The frying pans they wield have often been passed down from generation to generation. You can see the unwavering pride of these fierce warriors in their (somewhat crazed) eyes. | ” |
— Sunken Scroll 19
| ||
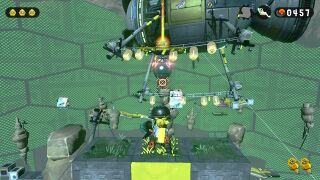
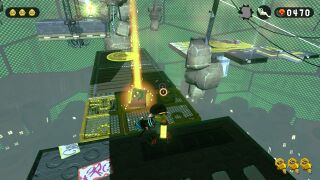
Location: To the left of the fourth Grapplink in middle path checkpoint 2 is a Splat-Switch suspended in the air. The player has to hit it after hitting the fourth Grapplink. Doing so moves the grate with the Scroll on top to the gap in middle path checkpoint 3. After activating the Splat-Switch the player has to take the launchpad below and redo the section.
Sardinium
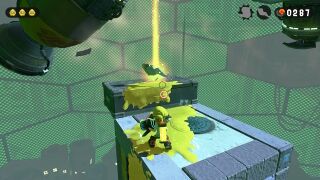
Location: At left path checkpoint 1, take the left path instead after hitting the first Splat-Switch. Another Splat-Switch can be found on the block with the first Splat-Switch. Hitting it will lower the block, allowing the player to get on top and uncovering the crate behind holding the Sardinium.
Armor
The Experimentorium has 3 pieces of armor to collect.
Armor 1 Location: In the lone crate on the left side of the loop in left path checkpoint 2.
Armor 2 Location: In the crate on the block to the right of the platform with a hole in right path checkpoint 1.
Armor 3 Location: In the crate on top of the Industrial Squee-G docked in front of the final checkpoint.
Crust Bucket Ticket
Location: Take the launchpad on the block in the middle of the area in the final checkpoint to the detour area with Flooders. Navigate through the Flooders across the block to the large block on the other side. Climb up on it and get on a Flooder. From there navigate across the Flooders to the large block on the left. On top is a lone crate with the ticket. From there the player can take the curved plank walk to the launchpad back.
Enemies and Mechanics
Previously Introduced
Quotes
English
 Marie's Quotes
| “ | Use the blast radius of the Blaster's shots to your advantage. | ” |
| “ | OK. Three lockboxes, three launchpads. | ” |
| “ | Going uuuup! | ” |
| “ | The blocks are doing their creepy shifting thing again. | ” |
| “ | And now that block in the distance is spinning! | ” |
| “ | Key: check. Launchpad ahoy! | ” |
| “ | Left switch is on! | ” |
| “ | Got the key. Now head to the Launchpad! | ” |
| “ | Middle switch is on! | ” |
| “ | Gotta play it smart to take out those shielded baddies. | ” |
| “ | I...guess we're going down. | ” |
| “ | Got the key. Next stop: launchpad! | ” |
| “ | Right switch is on! | ” |
| “ | Ooh, I see a key! | ” |
| “ | Whoa. What is this place? | ” |
| “ | It's like your own private island. Except full of deadly Flooders. | ” |
| “ | *sigh* Callie always hated Flooders... | ” |
 Sheldon's Quotes
- Requesting the Hero Blaster:
| “ | OK, take this with you. It'll help me gather some practical battle data. | ” |
| “ | Boom! Bam! It's the crowd pleasing face popper...the Hero Blaster! | ” |
| “ | Even enemies behind walls aren't safe from the Blaster's exploding shots! | ” |
| “ | It doesn't really do rapid fire, so make sure not to get splatted between shots! | ” |
- During the Level:
| “ | Get around those shields with the burst from the Blaster's shots! | ” |
| “ | You can use the burst from the Blaster's shots to reach the Grapplink! | ” |
Dutch
 Marie's Quotes
- "Gebruik de explosieradius van de Blaster in je voordeel!"
(Use the explosion radius of the Blaster to your advantage!) - "Drie kluizen, drie lanceerpunten... Dat lijkt logisch!"
(Three vaults, three launchpads... That seems logical!) - "En omhooooog!"
(And uuuuup!) - "Die platforms zijn weer aan het bewegen..."
(Those platforms are moving again...) - "En nu is dat blok daar in de verte aan het draaien geslagen!"
(And now that block in the distance there has been starting to spin!) - "Hier is de sleutel, en nu op naar het lanceerpunt!"
(Here is the key, and now on to the launchpad!) - "De linker schakelaar is om!"
(The left switch is on!) - "Je hebt de sleutel! Op naar het lanceerpunt."
(You have the key! On to the launchpad!) - "De middelste schakelaar is om!"
(The middlemost switch is on!) - "Je zult slim moeten zijn om die vijanden met schilden onschadelijk te maken."
(You will have to be smart to render those enemies with shields harmless.) - "Je zult naar beneden moeten, geloof ik."
(You will have to go down, I belief.) - "Je hebt de sleutel! Nu op naar het lanceerpunt!"
(You have the key! Now on to the launchpad!) - "De rechter schakelaar is om!"
(The right switch is on!) - "O, ik zie daar een sleutel!"
(Oh, I see a key there!) - "Hè, wat is dit voor plek?"
(Huh, what kind of place is this?) - "Het is alsof je je eigen privé-eiland hebt. Maar dan vol met dodelijke Douchers."
(It is as if you have your own private island. But then full of deadly Flooders.) - "Ach, Callie had altijd zo'n hekel aan Douchers..."
(Oh, Callie always had such a hatred for Flooders...)
- After beating the mission for the first time:
- "Gaaf! Zo doe je dat!"
(Awesome! That is how you do that!)
 Krabbert's Quotes
- Order van Krabbert:
- "Oké, hier, neem mee! Je kunt er gegevens mee verzamelen die mij goed van pas komen!"
(Okay, here, take with you! You can collect data with it which is of use to me!) - "Bam! Bam! De Heldenblaster slaat in als een bom!"
(Bam! Bam! The Hero Blaster hits like a bomb!) - "Zelfs achter een muur is geen vijand veilig voor de explosieve kracht van de Blaster!"
(Even behind a wall no enemy is safe from the explosive power of the Blaster!) - "Je moet wel even wachten voordat je opnieuw kunt schieten..."
(You do have to wait a bit before you can shoot again...)
- Mission quotes:
- "Veroorzaak explosies met de Blaster om die schilden te omzeilen!"
(Cause explosions with the Blaster to get around those shields!) - "Met een schot uit de blaster[sic] kun je het ankerpunt activeren!"
(You can activate the Grapplink with a shot from the Blaster!)
- After beating the mission for the first time:
- "Eens zien hoe je wapengegevens binnenkomen... Ja, helemaal in orde!"
(Let's see how your weapon data comes in... Yes, completely fine!) - "Dit soort data levert een schat aan informatie op!"
(This kind of data provides a wealth of information!) - "Hoe meer gegevens je genereert, des te eerder kan dit wapen op de markt worden gebracht!"
(The more data you generate, the sooner this weapon can be marketed!) - "Tot dan mag je het dus alleen lenen. Ik kan niet zomaar van alles cadeau doen!"
(You can only borrow it until then. I can't just give everything away!) - "Oké, succes!"
(Okay, good luck!)
Gallery
-
Level icon
-
Trivia
- This is the only stage in Octo Canyon with the Hero Blaster as Sheldon's Request.
Names in other languages
| Language | Name | Meaning |
|---|---|---|
| 浮遊大陸の実験場 # ユカイ ツーカイ スカイウォーク Fuyū Tairiku no Jikkenjō # Yukai Tsūkai Sukai-Wōku |
The Floating Laboratory: Pleasurable and Enjoyable Sky-Walking | |
| Het extravagante Experimentorium | The extravagant Experimentorium | |
| - L'expérimentorium - Plate-formes amusantes |
- The experimentorium - Fun platforms | |
| - L'Expérimentorium - Plateformes protéiformes |
- The Experimentorium - Protean platforms | |
| Das Experimentorium | The experimentorium | |
| Esperimenti in aria: qua gira tutto! |
Experiments in the air: everything spins here! | |
| Экспериментарий «Береги крышу!» Eksperimentariy «Beregi kryshu!» |
Experimentorium «Protect the roof!»[a] | |
| El experimentorio ˜Maquinaria flotante˜ |
The experimentorium ˜Floating machinery˜ | |
| El experimentorio flotante | The floating experimentorium |
Translation notes
- ↑ As the word крыша krysha ("roof") is also a Russian slang word for "head" and "mental state", the stage name can also mean "Watch your head!"
