Spongy Observatory: Difference between revisions
m (→Beginning) |
GloverMist (talk | contribs) m (Correcting redirect links and cleanup) |
||
| Line 1: | Line 1: | ||
{{OctoValleyPrevNext | prevnum=22 | nextnum=24 | prev=Splat-Switch Revolution | next=Pinwheel Power Plant }} | {{OctoValleyPrevNext | prevnum=22 | nextnum=24 | prev=Splat-Switch Revolution | next=Pinwheel Power Plant }} | ||
{{InfoboxMission | {{InfoboxMission | ||
|subtitle=More Ink, Less Shrink! | |subtitle=More Ink, Less Shrink! | ||
| Line 11: | Line 10: | ||
|image=Hm m23.jpg | |image=Hm m23.jpg | ||
}} | }} | ||
'''Spongy Observatory''' is the twenty-third mission available in singleplayer [[Octo Valley (mode)|Octo Valley]]. The mission is named as such because of its heavy use of [[Sponge Block]]s. | '''Spongy Observatory''' is the twenty-third mission available in singleplayer [[Octo Valley (mode)|Octo Valley]]. The mission is named as such because of its heavy use of [[Sponge Block]]s. | ||
== Octo Valley== | == Octo Valley== | ||
Starting in the entry of [[Area 5]], Head to the right, use the | Starting in the entry of [[Area 5]], Head to the right, use the entryway, but it's blocked off by a grate, in Which Agent 3 can simply clip through it In Squid form. There is a Propeller-Lift. Use t and get up the wall it stops at. Now get up the grate slope. there is an Inkrail but don't take it. There is a wall behind the Inkrail. Using the wall, there are 2 dry sponges. Use the Sponges, and get up the small wall. | ||
== Mission Briefing == | == Mission Briefing == | ||
===Gameplay=== | ===Gameplay=== | ||
<embedvideo service="youtube">https://www.youtube.com/watch?v=XOBAnJoRDxI</embedvideo> | <embedvideo service="youtube">https://www.youtube.com/watch?v=XOBAnJoRDxI</embedvideo> | ||
=== Map === | === Map === | ||
=== Mission Briefing === | === Mission Briefing === | ||
| Line 48: | Line 48: | ||
|- | |- | ||
! Checkpoint 3 | ! Checkpoint 3 | ||
| 4x Octotrooper | | 4x Octotrooper | ||
1x Twintacle Octotrooper | 1x Twintacle Octotrooper | ||
| {{N/A}} | | {{N/A}} | ||
| Line 90: | Line 90: | ||
==Walkthrough== | ==Walkthrough== | ||
=== Beginning === | === Beginning === | ||
Starting | Starting mission 23, there is a balloon fish, which can wet the 4 Sponges, getting Agent 3 to another Checkpoint. | ||
=== Checkpoint 1 === | === Checkpoint 1 === | ||
There are 2 | There are 2 Octostamps to fight off. They're standing in Sponges, so if they do attack, they'll shrink the Sponge. Splat both of the Octostamps to reveal a Launchpad. | ||
=== Checkpoint 2 === | === Checkpoint 2 === | ||
| Line 102: | Line 102: | ||
=== Checkpoint 4 === | === Checkpoint 4 === | ||
Another Ink Balloon can be used. There are also 3 crates on the right, one crate holds armor. Still going, another Ink balloon can be found, and also an Octobomber. Take out the Octobomber, so that | Another Ink Balloon can be used. There are also 3 crates on the right, one crate holds armor. Still going, another Ink balloon can be found, and also an Octobomber. Take out the Octobomber, so that it won't shrink the Sponges. | ||
=== Checkpoint 5 === | === Checkpoint 5 === | ||
| Line 108: | Line 108: | ||
=== Checkpoint 6 === | === Checkpoint 6 === | ||
Using another Ink Balloon, Agent 3 has to make | Using another Ink Balloon, Agent 3 has to make their way up on the Mission but will meet about 2 Octobombers. One is Just flying around but will chuck a [[Splat Bomb]] if found, and one guarding an area, which can shrink a sponge if caught, toss a Splat Bomb at the sponge. Once Agent 3 passes them, the mission continues. | ||
=== Checkpoint 7 === | === Checkpoint 7 === | ||
Wet the Sponge and get on it. Start putting ink on the Wall to swim down and reach the Launchpad. It is also possible without putting ink on the wall, just | Wet the Sponge and get on it. Start putting ink on the Wall to swim down and reach the Launchpad. It is also possible without putting ink on the wall, just perform a swimming squid jump off the Sponge, and face toward the wall while still in Squid Form, Agent 3 will automatically activate the Launchpad, going into the final checkpoint. | ||
===Final Checkpoint === | ===Final Checkpoint === | ||
| Line 124: | Line 124: | ||
{{Quote|The customary chorus of Calamari County. Nowadays, this song and dance may as well be carved into the very DNA of all Inklings. It began as a way to celebrate and show respect for the bounty of the sea.|[[Sunken Scroll]] {{color|23|green}}}} | {{Quote|The customary chorus of Calamari County. Nowadays, this song and dance may as well be carved into the very DNA of all Inklings. It began as a way to celebrate and show respect for the bounty of the sea.|[[Sunken Scroll]] {{color|23|green}}}} | ||
[[File:Spongy Observatory Checkpoint 1-Sunken Scroll Location.jpg|thumb|left|300px]] '''Location:''' At the first checkpoint underneath the platform | [[File:Spongy Observatory Checkpoint 1-Sunken Scroll Location.jpg|thumb|left|300px]] | ||
'''Location:''' At the first checkpoint underneath the starting platform. Upon reaching this checkpoint, proceed to the [[Sponge Block]], but do not inflate it. Look down past it to find two lower sponges. Inflate one of them and jump on it. From squid form, jump off of it onto the platform under the one that holds the checkpoint to receive the scroll. | |||
{{Clr}} | {{Clr}} | ||
=== Armor === | === Armor === | ||
[[File:Spongy Observatory Checkpoint 3-Armor -1.jpg|thumb|left|300px]]'''Location of Armor:''' | [[File:Spongy Observatory Checkpoint 3-Armor -1.jpg|thumb|left|300px]] | ||
'''Location of Armor:''' | |||
{{Clr}} | {{Clr}} | ||
=== Special Weapon === | === Special Weapon === | ||
[[File:Spongy Observatory Checkpoint 2-Inkzooka -1.jpg|thumb|left|300px]]'''Location of Inkzooka 1:''' | [[File:Spongy Observatory Checkpoint 2-Inkzooka -1.jpg|thumb|left|300px]] | ||
'''Location of Inkzooka 1:''' | |||
{{Clr}} | {{Clr}} | ||
[[File:Spongy Observatory Final Checkpoint-Inkzooka -2.jpg|thumb|left|300px]]'''Location of Inkzooka 2:''' | [[File:Spongy Observatory Final Checkpoint-Inkzooka -2.jpg|thumb|left|300px]] | ||
'''Location of Inkzooka 2:''' | |||
{{Clr}} | {{Clr}} | ||
== Quotes == | == Quotes == | ||
{{Clr}} | {{Clr}} | ||
| Line 139: | Line 147: | ||
{{Clr}} | {{Clr}} | ||
<gallery> | <gallery> | ||
Spongy Observatory Beginning Area-Agent 1's First Quote.jpg|{{Quote|{{color-link|Sponge|orange | Spongy Observatory Beginning Area-Agent 1's First Quote.jpg|{{Quote|{{color-link|Sponge Block|orange|Sponges}}! Watch for shrinkage...}} | ||
Spongy Observatory Beginning Area-Agent 1's Second Quote.jpg|{{Quote|Yayer!}} | Spongy Observatory Beginning Area-Agent 1's Second Quote.jpg|{{Quote|Yayer!}} | ||
Spongy Observatory Checkpoint 2-Agent 1's Third Quote.jpg|{{Quote|An {{color-link|Inkzooka|orange}}! Nice.}} | Spongy Observatory Checkpoint 2-Agent 1's Third Quote.jpg|{{Quote|An {{color-link|Inkzooka|orange}}! Nice.}} | ||
Spongy Observatory Checkpoint 3-Agent 1's Fourth Quote.jpg|{{Quote|Whoa! Watch out for that one!}} | Spongy Observatory Checkpoint 3-Agent 1's Fourth Quote.jpg|{{Quote|Whoa! Watch out for that one!}} | ||
Spongy Observatory Checkpoint 4-Agent 1's Fifth Quote.jpg|{{Quote|Watch your step here!}} | Spongy Observatory Checkpoint 4-Agent 1's Fifth Quote.jpg|{{Quote|Watch your step here!}} | ||
Spongy Observatory Final Checkpoint-Agent 1's Sixth Quote.jpg|{{Quote|Yippee! We found the {{Button|Z}} {{color-link|Zapfish|orange}}!}} | Spongy Observatory Final Checkpoint-Agent 1's Sixth Quote.jpg|{{Quote|Yippee! We found the {{Button|Z}} {{color-link|Zapfish|orange}}!}} | ||
Spongy Observatory Final Checkpoint-Agent 1's Seventh Quote.jpg|{{Quote|Another {{color-link|Octoling|orange}}!}} | Spongy Observatory Final Checkpoint-Agent 1's Seventh Quote.jpg|{{Quote|Another {{color-link|Octoling|orange}}!}} | ||
| Line 154: | Line 162: | ||
Spongy Observatory Checkpoint 1-Agent 2's Second Quote.jpg|{{Quote|Easy does it now...}} | Spongy Observatory Checkpoint 1-Agent 2's Second Quote.jpg|{{Quote|Easy does it now...}} | ||
Spongy Observatory Checkpoint 2-Agent 2's Third Quote.jpg|{{Quote|That's the ticket!}} | Spongy Observatory Checkpoint 2-Agent 2's Third Quote.jpg|{{Quote|That's the ticket!}} | ||
Spongy Observatory Checkpoint 3-Agent 2's Third Quote.jpg|{{Quote|[[ | Spongy Observatory Checkpoint 3-Agent 2's Third Quote.jpg|{{Quote|[[Bomb]]s incoming!}} | ||
Spongy Observatory Checkpoint 4-Agent 2's Fifth Quote.jpg|{{Quote|Just shoot the sponges! What could go wrong?}} | Spongy Observatory Checkpoint 4-Agent 2's Fifth Quote.jpg|{{Quote|Just shoot the sponges! What could go wrong?}} | ||
Spongy Observatory Final Checkpoint-Agent2's Fifth Quote.jpg|{{Quote|Don't let your guard down, now.}} | Spongy Observatory Final Checkpoint-Agent2's Fifth Quote.jpg|{{Quote|Don't let your guard down, now.}} | ||
Spongy Observatory Final Checkpoint-Agent 2's Sixth Quote.jpg|{{Quote|Lookin' good, [[Agent 3]]!}} | Spongy Observatory Final Checkpoint-Agent 2's Sixth Quote.jpg|{{Quote|Lookin' good, [[Agent 3]]!}} | ||
</gallery> | </gallery> | ||
| Line 167: | Line 175: | ||
Spongy Observatory Beginning Area-Enemy Octostamps.jpg|Spongy Observatory Beginning Area-Enemy [[Octostamp]]s | Spongy Observatory Beginning Area-Enemy Octostamps.jpg|Spongy Observatory Beginning Area-Enemy [[Octostamp]]s | ||
Spongy Observatory Checkpoint 1-Enemy Twintacle Octotrooper.jpg|Spongy Observatory Checkpoint 1-Enemy [[Twintacle Octotrooper]] | Spongy Observatory Checkpoint 1-Enemy Twintacle Octotrooper.jpg|Spongy Observatory Checkpoint 1-Enemy [[Twintacle Octotrooper]] | ||
Spongy Observatory Checkpoint 2-Enemy Octarians.jpg|Spongy Observatory Checkpoint 2-Enemy [[Octarians]] | Spongy Observatory Checkpoint 2-Enemy Octarians.jpg|Spongy Observatory Checkpoint 2-Enemy [[Octarians]] | ||
Spongy Observatory Checkpoint 3-Enemy Octobomber.jpg|Spongy Observatory Checkpoint 3-Enemy [[Octobomber]] | Spongy Observatory Checkpoint 3-Enemy Octobomber.jpg|Spongy Observatory Checkpoint 3-Enemy [[Octobomber]] | ||
Spongy Observatory Checkpoint 3-Enemy Octobombers.jpg|Observatory Checkpoint 3-Enemy Octobombers | Spongy Observatory Checkpoint 3-Enemy Octobombers.jpg|Observatory Checkpoint 3-Enemy Octobombers | ||
| Line 189: | Line 197: | ||
|GerM=Sponges in the Crossfire | |GerM=Sponges in the Crossfire | ||
|Ita=Percorso ad alto tasso<br>di spugnosità! | |Ita=Percorso ad alto tasso<br>di spugnosità! | ||
|ItaM=Route with | |ItaM=Route with a high level<br>of sponginess! | ||
|SpaA=Observatorio Esponjoso | |SpaA=Observatorio Esponjoso | ||
|SpaAM=Spongy Observatory | |SpaAM=Spongy Observatory | ||
Revision as of 12:04, 25 October 2020
|
|
|
Template:InfoboxMission Spongy Observatory is the twenty-third mission available in singleplayer Octo Valley. The mission is named as such because of its heavy use of Sponge Blocks.
Octo Valley
Starting in the entry of Area 5, Head to the right, use the entryway, but it's blocked off by a grate, in Which Agent 3 can simply clip through it In Squid form. There is a Propeller-Lift. Use t and get up the wall it stops at. Now get up the grate slope. there is an Inkrail but don't take it. There is a wall behind the Inkrail. Using the wall, there are 2 dry sponges. Use the Sponges, and get up the small wall.
Mission Briefing
Gameplay
Map
Mission Briefing
| Area | Enemies | Armor | Special Weapon | Sunken Scroll |
|---|---|---|---|---|
| Beginning Area | N/A | N/A | N/A | N/A |
| Checkpoint 1 | 2x Octostamps | N/A | N/A | N/A |
| Checkpoint 2 | 1x Octotrooper | N/A | N/A | Yes |
| Checkpoint 3 | 4x Octotrooper
1x Twintacle Octotrooper |
N/A | 1x Inkzooka | N/A |
| Checkpoint 4 | 1x Octobomber | 1x Piece of armor | N/A | N/A |
| Checkpoint 5 | 2x Octobomber | N/A | N/A | N/A |
| Checkpoint 6 | 2x Octobombers | N/A | N/A | N/A |
| Checkpoint 7 | N/A | N/A | N/A | N/A |
| Final Checkpoint | 2x Octolings | N/A | 1x Inkzooka | N/A |
Mechanics
This Mission holds about 50 Sponges.
Walkthrough
Beginning
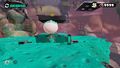
Starting mission 23, there is a balloon fish, which can wet the 4 Sponges, getting Agent 3 to another Checkpoint.
Checkpoint 1
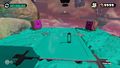
There are 2 Octostamps to fight off. They're standing in Sponges, so if they do attack, they'll shrink the Sponge. Splat both of the Octostamps to reveal a Launchpad.
Checkpoint 2
An Octotrooper guards a platform which to get across, Agent 3 has to go through 2 sponges. If the Octotrooper starts shooting, the Sponge will shrink. Be careful of staying up on the sponges to get across. Throw a Splat Bomb to the Octotrooperand it'll stop bothering Agent 3 from getting across.
Checkpoint 3
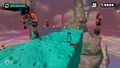
After Wetting the 2 Sponger to get to the next platform, Agent 3's is going to have to get across a Sponge ally, guarded by 5 Octotroopers. There is an Inkzooka to help get across easier. Not using the Inkzooka can be challenging, due to enemy ink Shrinking a wet sponge. If chosen to not use the Inkzooka, take out the Octotroopers to make it easier, but be cautious they can shoot it at a high fire rate, making a wet sponge shrink faster.
Checkpoint 4
Another Ink Balloon can be used. There are also 3 crates on the right, one crate holds armor. Still going, another Ink balloon can be found, and also an Octobomber. Take out the Octobomber, so that it won't shrink the Sponges.
Checkpoint 5
Yet another Ink Balloon can be found wetting 4 Sponges, it can also be used to take out the 2 Octobombers. Wet 2 more Sponges to go to the next checkpoint.
Checkpoint 6
Using another Ink Balloon, Agent 3 has to make their way up on the Mission but will meet about 2 Octobombers. One is Just flying around but will chuck a Splat Bomb if found, and one guarding an area, which can shrink a sponge if caught, toss a Splat Bomb at the sponge. Once Agent 3 passes them, the mission continues.
Checkpoint 7
Wet the Sponge and get on it. Start putting ink on the Wall to swim down and reach the Launchpad. It is also possible without putting ink on the wall, just perform a swimming squid jump off the Sponge, and face toward the wall while still in Squid Form, Agent 3 will automatically activate the Launchpad, going into the final checkpoint.
Final Checkpoint
A small crate holds an Inkzooka, going into the area will trigger an Octoling fight. Using the Inkzooka, Agent 3 can Insta-splat the 2 Octolings. Once both of the Octolings are defeated, a Launchpad will reveal, and the Zapfish is all to Agent 3.
Mission 23 Complete!
Collectibles
Sunken Scroll
| “ | The customary chorus of Calamari County. Nowadays, this song and dance may as well be carved into the very DNA of all Inklings. It began as a way to celebrate and show respect for the bounty of the sea. | ” |
— Sunken Scroll 23
| ||

Location: At the first checkpoint underneath the starting platform. Upon reaching this checkpoint, proceed to the Sponge Block, but do not inflate it. Look down past it to find two lower sponges. Inflate one of them and jump on it. From squid form, jump off of it onto the platform under the one that holds the checkpoint to receive the scroll.
Armor

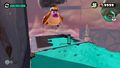
Location of Armor:
Special Weapon

Location of Inkzooka 1:

Location of Inkzooka 2:
Quotes
-
“ Sponges! Watch for shrinkage... ” -
“ Yayer! ” -
“ An Inkzooka! Nice. ” -
“ Whoa! Watch out for that one! ” -
“ Watch your step here! ” -
“ Yippee! We found the  Zapfish!
” -
“ Another Octoling! ”
-
“ Just shoot the sponges! What could go wrong? ” -
“ Easy does it now... ” -
“ That's the ticket! ” -
“ Bombs incoming! ” -
“ Just shoot the sponges! What could go wrong? ” -
“ Don't let your guard down, now. ” -
“ Lookin' good, Agent 3! ”
Gallery
-
Level icon
-
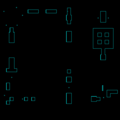
In-game map
-
Spongy Observatory Beginning Area-Balloon Fish
-
Spongy Observatory Beginning Area-Enemy Octostamps
-
Spongy Observatory Checkpoint 1-Enemy Twintacle Octotrooper
-
Spongy Observatory Checkpoint 2-Enemy Octarians
-
Spongy Observatory Checkpoint 3-Enemy Octobomber
-
Observatory Checkpoint 3-Enemy Octobombers
-
Spongy Observatory Checkpoint 3-Patrolling Octobomber
-
Spongy Observatory Checkpoint 3-Another Octobomber


