Floor: Difference between revisions
(→Names in other languages: Dutch) |
m (Text replacement - "SO Icon portal" to "SO Icon Portal") |
||
| (19 intermediate revisions by 10 users not shown) | |||
| Line 6: | Line 6: | ||
The floors available to the player during Floor Selection depend on the segment of the tower the player is on, with the available options skewing towards harder floors the more progress is made in the segment. Certain floors in a segment share the same root name and basic geometry, and are differentiated by different difficulty ratings, objectives, or name prefixes describing the floor's particular hazards. | The floors available to the player during Floor Selection depend on the segment of the tower the player is on, with the available options skewing towards harder floors the more progress is made in the segment. Certain floors in a segment share the same root name and basic geometry, and are differentiated by different difficulty ratings, objectives, or name prefixes describing the floor's particular hazards. | ||
If the player has not played a floor before, or if the boss is not revealed, the floor's name | If the player has not played a floor before, or if the boss is not revealed, the floor's name displays as "???". An "Updated" splash displays next to the player's completion time if they beat their recorded personal best for that floor. | ||
===1F-9F=== | ===1F-9F=== | ||
{| class="wikitable sitecolor-so" | {| class="wikitable sitecolor-so mw-collapsible sortable" style="text-align:center" | ||
!Floor Name | !Floor Name | ||
!Objective | |||
!Difficulty | |||
!Base Reward | |||
|- | |- | ||
|[[Bowl.Floor]] | |[[Bowl.Floor]] | ||
|[[File:SO Icon Infinity ball.png|50px]]<br>[[Sink the ∞-ball!]] | |||
|Easy | |||
|{{Cost|S3|25|mb}} | |{{Cost|S3|25|mb}} | ||
|- | |- | ||
|[[High-Tower.Floor]] | |[[High-Tower.Floor]] | ||
|[[File:SO Icon Infinity ball.png|50px]]<br>[[Sink the ∞-ball!]] | |||
|Easy | |||
|{{Cost|S3|25|mb}} | |{{Cost|S3|25|mb}} | ||
|- | |- | ||
|[[Pyramid.Floor]] | |[[Pyramid.Floor]] | ||
|[[File:SO Icon Infinity ball.png|50px]]<br>[[Sink the ∞-ball!]] | |||
|Easy | |||
|{{Cost|S3|25|mb}} | |{{Cost|S3|25|mb}} | ||
|- | |- | ||
|[[Forward-Momentum.Floor]] | |[[Forward-Momentum.Floor]] | ||
|[[File:SO Icon Infinity ball.png|50px]]<br>[[Sink the ∞-ball!]] | |||
|Easy | |||
|{{Cost|S3|30|mb}} | |{{Cost|S3|30|mb}} | ||
|- | |- | ||
|[[Rising-Ground.Floor]] | |[[Rising-Ground.Floor]] | ||
|[[File:SO Icon Portal.png|50px]]<br>[[Destroy the portal!]] | |||
|Easy | |||
|{{Cost|S3|30|mb}} | |{{Cost|S3|30|mb}} | ||
|- | |- | ||
|[[Wide-Open.Floor]] | |[[Wide-Open.Floor]] | ||
|[[File:SO Icon Turbine tower.png|50px]]<br>[[Escort the turbine tower!]] | |||
|Easy | |||
|{{Cost|S3|30|mb}} | |{{Cost|S3|30|mb}} | ||
|- | |- | ||
|[[High-Tower.Floor]] | |[[High-Tower.Floor]] | ||
|[[File:SO Icon Portal.png|50px]]<br>[[Destroy the portal!]] | |||
|Easy | |||
|{{Cost|S3|35|mb}} | |{{Cost|S3|35|mb}} | ||
|- | |- | ||
|[[Orbit-Rail.Floor]] | |[[Orbit-Rail.Floor]] | ||
|[[File:SO Icon Panicking Alla Mambo.png|50px]]<br>[[Defeat the fleeing foe!]] | |||
|Easy | |||
|{{Cost|S3|35|mb}} | |{{Cost|S3|35|mb}} | ||
|- | |- | ||
|[[Wide-Open.Floor]] | |[[Wide-Open.Floor]] | ||
|[[File:SO Icon Infinity ball.png|50px]]<br>[[Sink the ∞-ball!]] | |||
|Easy | |||
|{{Cost|S3|35|mb}} | |{{Cost|S3|35|mb}} | ||
|- | |- | ||
|[[Bowl.Floor]] | |[[Bowl.Floor]] | ||
|[[File:SO Icon Turbine tower.png|50px]]<br>[[Escort the turbine tower!]] | |||
|Easy | |||
|{{Cost|S3|40|mb}} | |{{Cost|S3|40|mb}} | ||
|- | |- | ||
|[[Wide-Open.Floor]] | |[[Wide-Open.Floor]] | ||
|[[File:SO Icon Portal.png|50px]]<br>[[Destroy the portal!]] | |||
|Easy | |||
|{{Cost|S3|40|mb}} | |{{Cost|S3|40|mb}} | ||
|- | |- | ||
|[[Rising-Ground.Floor]] | |[[Rising-Ground.Floor]] | ||
|[[File:SO Icon Infinity ball.png|50px]]<br>[[Sink the ∞-ball!]] | |||
|Easy | |||
|{{Cost|S3|45|mb}} | |{{Cost|S3|45|mb}} | ||
|- | |- | ||
|[[Steamroller.Floor]] | |[[Steamroller.Floor]] | ||
|[[File:SO Icon Infinity ball.png|50px]]<br>[[Sink the ∞-ball!]] | |||
|Easy | |||
|{{Cost|S3|45|mb}} | |{{Cost|S3|45|mb}} | ||
|- | |- | ||
|[[Stepping-Stones.Floor]] | |[[Stepping-Stones.Floor]] | ||
|[[File:SO Icon Turbine tower.png|50px]]<br>[[Escort the turbine tower!]] | |||
|Easy | |||
|{{Cost|S3|45|mb}} | |{{Cost|S3|45|mb}} | ||
|- | |- | ||
|[[Bowl.Floor]] | |[[Bowl.Floor]] | ||
|[[File:SO Icon Portal.png|50px]]<br>[[Destroy the portal!]] | |||
|Normal | |||
|{{Cost|S3|100|mb}} | |{{Cost|S3|100|mb}} | ||
|- | |- | ||
|[[Rising-Ground.Floor]] | |[[Rising-Ground.Floor]] | ||
|[[File:SO Icon Panicking Alla Mambo.png|50px]]<br>[[Defeat the fleeing foe!]] | |||
|Normal | |||
|{{Cost|S3|100|mb}} | |{{Cost|S3|100|mb}} | ||
|- | |- | ||
|[[High-Tower.Floor]] | |[[High-Tower.Floor]] | ||
|[[File:SO Icon Portal.png|50px]]<br>[[Destroy the portal!]] | |||
|Normal | |||
|{{Cost|S3|105|mb}} | |{{Cost|S3|105|mb}} | ||
|- | |- | ||
|[[Pyramid.Floor]] | |[[Pyramid.Floor]] | ||
|[[File:SO Icon Portal.png|50px]]<br>[[Destroy the portal!]] | |||
|Normal | |||
|{{Cost|S3|110|mb}} | |{{Cost|S3|110|mb}} | ||
|- | |- | ||
|[[Bowl.Floor]] | |[[Bowl.Floor]] | ||
|[[File:SO Icon Panicking Alla Mambo.png|50px]]<br>[[Defeat the fleeing foe!]] | |||
|Normal | |||
|{{Cost|S3|115|mb}} | |{{Cost|S3|115|mb}} | ||
|- | |- | ||
|[[Pyramid.Floor]] | |[[Pyramid.Floor]] | ||
|[[File:SO Icon Zone.png|50px]]<br>[[Protect the zone!]] | |||
|Normal | |||
|{{Cost|S3|120|mb}} | |{{Cost|S3|120|mb}} | ||
|- | |- | ||
|[[Wide-Open.Floor]] | |[[Wide-Open.Floor]] | ||
|[[File:SO Icon Zone.png|50px]]<br>[[Protect the zone!]] | |||
|Normal | |||
|{{Cost|S3|120|mb}} | |{{Cost|S3|120|mb}} | ||
|- | |- | ||
|[[High-Tower.Floor]] | |[[High-Tower.Floor]] | ||
|[[File:SO Icon Zone.png|50px]]<br>[[Protect the zone!]] | |||
|Normal | |||
|{{Cost|S3|125|mb}} | |{{Cost|S3|125|mb}} | ||
|- | |- | ||
|[[Pyramid.Floor]] | |[[Pyramid.Floor]] | ||
|[[File:SO Icon Turbine tower.png|50px]]<br>[[Escort the turbine tower!]] | |||
|Normal | |||
|{{Cost|S3|125|mb}} | |{{Cost|S3|125|mb}} | ||
|- | |- | ||
|[[High-Tower.Floor]] | |[[High-Tower.Floor]] | ||
|[[File:SO Icon Turbine tower.png|50px]]<br>[[Escort the turbine tower!]] | |||
|Normal | |||
|{{Cost|S3|130|mb}} | |{{Cost|S3|130|mb}} | ||
|- | |- | ||
|[[Careful-Aim.Floor]] | |[[Careful-Aim.Floor]] | ||
|[[File:SO Icon Panicking Alla Mambo.png|50px]]<br>[[Defeat the fleeing foe!]] | |||
|Normal | |||
|{{Cost|S3|130|mb}} | |{{Cost|S3|130|mb}} | ||
|- | |- | ||
|[[Rising-Ground.Floor]] | |[[Rising-Ground.Floor]] | ||
|[[File:SO Icon Turbine tower.png|50px]]<br>[[Escort the turbine tower!]] | |||
|Normal | |||
|{{Cost|S3|135|mb}} | |{{Cost|S3|135|mb}} | ||
|- | |- | ||
|[[Uphill-Push.Floor]] | |[[Uphill-Push.Floor]] | ||
|[[File:SO Icon Infinity ball.png|50px]]<br>[[Sink the ∞-ball!]] | |||
|Normal | |||
|{{Cost|S3|140|mb}} | |{{Cost|S3|140|mb}} | ||
|- | |- | ||
|[[Whirling(Crowd).Floor]] | |[[Whirling(Crowd).Floor]] | ||
|[[File:SO Icon Zone.png|50px]]<br>[[Protect the zone!]] | |||
|Normal | |||
|{{Cost|S3|145|mb}} | |{{Cost|S3|145|mb}} | ||
|- | |- | ||
|[[Pyramid.Floor|Field-Day_Pyramid.Floor]] | |||
|[[File:SO Icon Panicking Alla Mambo.png|50px]]<br>[[Defeat the fleeing foe!]] | |||
|[[Field-Day_Pyramid.Floor]] | |Hard | ||
|{{Cost|S3|200|mb}} | |{{Cost|S3|200|mb}} | ||
|- | |- | ||
|[[Assault(Incoming)_Bowl.Floor]] | |[[Bowl.Floor|Assault(Incoming)_Bowl.Floor]] | ||
|[[File:SO Icon Zone.png|50px]]<br>[[Protect the zone!]] | |||
|Hard | |||
|{{Cost|S3|205|mb}} | |{{Cost|S3|205|mb}} | ||
|- | |- | ||
|[[Shelterless_Wide-Open.Floor]] | |[[Wide-Open.Floor|Shelterless_Wide-Open.Floor]] | ||
|[[File:SO Icon Portal.png|50px]]<br>[[Destroy the portal!]] | |||
|Hard | |||
|{{Cost|S3|210|mb}} | |{{Cost|S3|210|mb}} | ||
|- | |- | ||
|[[Up-and-Down_High-Tower.Floor]] | |[[High-Tower.Floor|Up-and-Down_High-Tower.Floor]] | ||
|[[File:SO Icon Panicking Alla Mambo.png|50px]]<br>[[Defeat the fleeing foe!]] | |||
|Hard | |||
|{{Cost|S3|215|mb}} | |{{Cost|S3|215|mb}} | ||
|- | |- | ||
|[[Pursuit(All-Out)_Wide-Open.Floor]] | |[[Wide-Open.Floor|Pursuit(All-Out)_Wide-Open.Floor]] | ||
|[[File:SO Icon Panicking Alla Mambo.png|50px]]<br>[[Defeat the fleeing foe!]] | |||
|Hard | |||
|{{Cost|S3|220|mb}} | |{{Cost|S3|220|mb}} | ||
|- | |- | ||
|[[Launching_Pyramid.Floor]] | |[[Pyramid.Floor|Launching_Pyramid.Floor]] | ||
|[[File:SO Icon Portal.png|50px]]<br>[[Destroy the portal!]] | |||
|Hard | |||
|{{Cost|S3|225|mb}} | |{{Cost|S3|225|mb}} | ||
|- | |- | ||
|[[Danger-Magnet_Bowl.Floor]] | |[[Bowl.Floor|Danger-Magnet_Bowl.Floor]] | ||
|[[File:SO Icon Portal.png|50px]]<br>[[Destroy the portal!]] | |||
|Hard | |||
|{{Cost|S3|230|mb}} | |{{Cost|S3|230|mb}} | ||
|- | |- | ||
|[[Explosion-Festival.Floor]] | |[[Explosion-Festival.Floor]] | ||
|[[File:SO Icon Portal.png|50px]]<br>[[Destroy the portal!]] | |||
|Hard | |||
|{{Cost|S3|235|mb}} | |{{Cost|S3|235|mb}} | ||
|- | |- | ||
|[[Exposed_Rising-Ground.Floor]] | |[[Rising-Ground.Floor|Exposed_Rising-Ground.Floor]] | ||
|[[File:SO Icon Zone.png|50px]]<br>[[Protect the zone!]] | |||
|Hard | |||
|{{Cost|S3|240|mb}} | |{{Cost|S3|240|mb}} | ||
|- | |- | ||
|[[Coverage(Between-Crosshairs).Floor]] | |[[Coverage(Between-Crosshairs).Floor]] | ||
|[[File:SO Icon Zone.png|50px]]<br>[[Protect the zone!]] | |||
|Rigorous | |||
|{{Cost|S3|500|mb}} | |{{Cost|S3|500|mb}} | ||
|- | |- | ||
|[[Acrobatic_Triangular.Floor]] | |[[Acrobatic_Triangular.Floor]] | ||
|[[File:SO Icon Portal.png|50px]]<br>[[Destroy the portal!]] | |||
|Rigorous | |||
|{{Cost|S3|520|mb}} | |{{Cost|S3|520|mb}} | ||
|- | |- | ||
|[[Bombarded(Relentless)_Rising-Ground.Floor]] | |[[Rising-Ground.Floor|Bombarded(Relentless)_Rising-Ground.Floor]] | ||
|[[File:SO Icon Portal.png|50px]]<br>[[Destroy the portal!]] | |||
|Rigorous | |||
|{{Cost|S3|540|mb}} | |{{Cost|S3|540|mb}} | ||
|} | |} | ||
===11F-19F=== | ===11F-19F=== | ||
{| class="wikitable sitecolor-so" | {| class="wikitable sitecolor-so mw-collapsible sortable" style="text-align:center" | ||
!Floor Name | !Floor Name | ||
!Objective | |||
!Difficulty | |||
!Base Reward | |||
|- | |- | ||
|[[Crisscross.Floor]] | |[[Crisscross.Floor]] | ||
|[[File:SO Icon Panicking Alla Mambo.png|50px]]<br>[[Defeat the fleeing foe!]] | |||
|Easy | |||
|{{Cost|S3|35|mb}} | |{{Cost|S3|35|mb}} | ||
|- | |- | ||
|[[Rotational.Floor]] | |[[Rotational.Floor]] | ||
|[[File:SO Icon Infinity ball.png|50px]]<br>[[Sink the ∞-ball!]] | |||
|Easy | |||
|{{Cost|S3|40|mb}} | |{{Cost|S3|40|mb}} | ||
|- | |- | ||
|[[Double-Hill.Floor]] | |[[Double-Hill.Floor]] | ||
|[[File:SO Icon Panicking Alla Mambo.png|50px]]<br>[[Defeat the fleeing foe!]] | |||
|Easy | |||
|{{Cost|S3|45|mb}} | |{{Cost|S3|45|mb}} | ||
|- | |- | ||
|[[Fortress.Floor]] | |[[Fortress.Floor]] | ||
|[[File:SO Icon Infinity ball.png|50px]]<br>[[Sink the ∞-ball!]] | |||
|Easy | |||
|{{Cost|S3|45|mb}} | |{{Cost|S3|45|mb}} | ||
|- | |- | ||
|[[Crisscross.Floor]] | |[[Crisscross.Floor]] | ||
|[[File:SO Icon Portal.png|50px]]<br>[[Destroy the portal!]] | |||
|Easy | |||
|{{Cost|S3|50|mb}} | |{{Cost|S3|50|mb}} | ||
|- | |- | ||
|[[Switchback.Floor]] | |[[Switchback.Floor]] | ||
|[[File:SO Icon Infinity ball.png|50px]]<br>[[Sink the ∞-ball!]] | |||
|Easy | |||
|{{Cost|S3|55|mb}} | |{{Cost|S3|55|mb}} | ||
|- | |- | ||
|[[Uneven.Floor|Danger-Magnet_Uneven.Floor]] | |||
|[[File:SO Icon Infinity ball.png|50px]]<br>[[Sink the ∞-ball!]] | |||
|[[Danger-Magnet_Uneven.Floor]] | |Normal | ||
|{{Cost|S3|135|mb}} | |{{Cost|S3|135|mb}} | ||
|- | |- | ||
|[[Rolling_Double-Hill.Floor]] | |[[Double-Hill.Floor|Rolling_Double-Hill.Floor]] | ||
|[[File:SO Icon Infinity ball.png|50px]]<br>[[Sink the ∞-ball!]] | |||
|Normal | |||
|{{Cost|S3|140|mb}} | |{{Cost|S3|140|mb}} | ||
|- | |- | ||
|[[Field-Day_Fortress.Floor]] | |[[Fortress.Floor|Field-Day_Fortress.Floor]] | ||
|[[File:SO Icon Panicking Alla Mambo.png|50px]]<br>[[Defeat the fleeing foe!]] | |||
|Normal | |||
|{{Cost|S3|145|mb}} | |{{Cost|S3|145|mb}} | ||
|- | |- | ||
|[[Open-Season_Fortress.Floor]] | |[[Fortress.Floor|Open-Season_Fortress.Floor]] | ||
|[[File:SO Icon Turbine tower.png|50px]]<br>[[Escort the turbine tower!]] | |||
|Normal | |||
|{{Cost|S3|150|mb}} | |{{Cost|S3|150|mb}} | ||
|- | |- | ||
|[[Danger-Magnet_Crisscross.Floor]] | |[[Crisscross.Floor|Danger-Magnet_Crisscross.Floor]] | ||
|[[File:SO Icon Turbine tower.png|50px]]<br>[[Escort the turbine tower!]] | |||
|Normal | |||
|{{Cost|S3|155|mb}} | |{{Cost|S3|155|mb}} | ||
|- | |- | ||
|[[Springing_Double-Hill.Floor]] | |[[Double-Hill.Floor|Springing_Double-Hill.Floor]] | ||
|[[File:SO Icon Turbine tower.png|50px]]<br>[[Escort the turbine tower!]] | |||
|Normal | |||
|{{Cost|S3|160|mb}} | |{{Cost|S3|160|mb}} | ||
|- | |- | ||
|[[Springing_Uneven.Floor]] | |[[Uneven.Floor|Springing_Uneven.Floor]] | ||
|[[File:SO Icon Panicking Alla Mambo.png|50px]]<br>[[Defeat the fleeing foe!]] | |||
|Normal | |||
|{{Cost|S3|165|mb}} | |{{Cost|S3|165|mb}} | ||
|- | |- | ||
|[[Open-Season_Switchback.Floor]] | |[[Switchback.Floor|Open-Season_Switchback.Floor]] | ||
|[[File:SO Icon Turbine tower.png|50px]]<br>[[Escort the turbine tower!]] | |||
|Normal | |||
|{{Cost|S3|170|mb}} | |{{Cost|S3|170|mb}} | ||
|- | |- | ||
|[[Open-Season_Crisscross.Floor]] | |[[Crisscross.Floor|Open-Season_Crisscross.Floor]] | ||
|[[File:SO Icon Infinity ball.png|50px]]<br>[[Sink the ∞-ball!]] | |||
|Normal | |||
|{{Cost|S3|175|mb}} | |{{Cost|S3|175|mb}} | ||
|- | |- | ||
|[[Reckless_Switchback.Floor]] | |[[Switchback.Floor|Reckless_Switchback.Floor]] | ||
|[[File:SO Icon Panicking Alla Mambo.png|50px]]<br>[[Defeat the fleeing foe!]] | |||
|Normal | |||
|{{Cost|S3|180|mb}} | |{{Cost|S3|180|mb}} | ||
|- | |- | ||
|[[Exposed_Switchback.Floor]] | |[[Switchback.Floor|Exposed_Switchback.Floor]] | ||
|[[File:SO Icon Zone.png|50px]]<br>[[Protect the zone!]] | |||
|Normal | |||
|{{Cost|S3|185|mb}} | |{{Cost|S3|185|mb}} | ||
|- | |- | ||
|[[Danger-Magnet_Switchback.Floor]] | |[[Switchback.Floor|Danger-Magnet_Switchback.Floor]] | ||
|[[File:SO Icon Portal.png|50px]]<br>[[Destroy the portal!]] | |||
|Normal | |||
|{{Cost|S3|190|mb}} | |{{Cost|S3|190|mb}} | ||
|- | |- | ||
|[[Carefully-Aimed-Reversal.Floor]] | |[[Carefully-Aimed-Reversal.Floor]] | ||
|[[File:SO Icon Portal.png|50px]]<br>[[Destroy the portal!]] | |||
|Normal | |||
|{{Cost|S3|195|mb}} | |{{Cost|S3|195|mb}} | ||
|- | |- | ||
|[[Uneven.Floor|Outstretched-Neck_Uneven.Floor]] | |||
|[[File:SO Icon Portal.png|50px]]<br>[[Destroy the portal!]] | |||
|[[Outstretched-Neck_Uneven.Floor]] | |Hard | ||
|{{Cost|S3|340|mb}} | |{{Cost|S3|340|mb}} | ||
|- | |- | ||
|[[Bombarded(Constant)_Exposed.Floor]] | |[[Bombarded(Constant)_Exposed.Floor]] | ||
|[[File:SO Icon Zone.png|50px]]<br>[[Protect the zone!]] | |||
|Hard | |||
|{{Cost|S3|345|mb}} | |{{Cost|S3|345|mb}} | ||
|- | |- | ||
|[[Ceaseless_Open-Season_Uneven.Floor]] | |[[Uneven.Floor|Ceaseless_Open-Season_Uneven.Floor]] | ||
|[[File:SO Icon Turbine tower.png|50px]]<br>[[Escort the turbine tower!]] | |||
|Hard | |||
|{{Cost|S3|350|mb}} | |{{Cost|S3|350|mb}} | ||
|- | |- | ||
|[[Onrushing_Shelterless_Fortress.Floor]] | |[[Fortress.Floor|Onrushing_Shelterless_Fortress.Floor]] | ||
|[[File:SO Icon Portal.png|50px]]<br>[[Destroy the portal!]] | |||
|Hard | |||
|{{Cost|S3|355|mb}} | |{{Cost|S3|355|mb}} | ||
|- | |- | ||
|[[Projectile-Spam(High)_Uneven.Floor]] | |[[Uneven.Floor|Projectile-Spam(High)_Uneven.Floor]] | ||
|[[File:SO Icon Zone.png|50px]]<br>[[Protect the zone!]] | |||
|Hard | |||
|{{Cost|S3|360|mb}} | |{{Cost|S3|360|mb}} | ||
|- | |- | ||
|[[Springing(Swarmed)_Double-Hill.Floor]] | |[[Double-Hill.Floor|Springing(Swarmed)_Double-Hill.Floor]] | ||
|[[File:SO Icon Portal.png|50px]]<br>[[Destroy the portal!]] | |||
|Hard | |||
|{{Cost|S3|365|mb}} | |{{Cost|S3|365|mb}} | ||
|- | |- | ||
|[[Ping-Ponging_Double-Hill.Floor]] | |[[Double-Hill.Floor|Ping-Ponging_Double-Hill.Floor]] | ||
|[[File:SO Icon Zone.png|50px]]<br>[[Protect the zone!]] | |||
|Hard | |||
|{{Cost|S3|370|mb}} | |{{Cost|S3|370|mb}} | ||
|- | |- | ||
|[[Springing_Jamboree.Floor]] | |[[Springing_Jamboree.Floor]] | ||
|[[File:SO Icon Zone.png|50px]]<br>[[Protect the zone!]] | |||
|Hard | |||
|{{Cost|S3|375|mb}} | |{{Cost|S3|375|mb}} | ||
|- | |- | ||
|[[Frantic_Double-Decker_Crisscross.Floor]] | |[[Crisscross.Floor|Frantic_Double-Decker_Crisscross.Floor]] | ||
|[[File:SO Icon Zone.png|50px]]<br>[[Protect the zone!]] | |||
|Hard | |||
|{{Cost|S3|380|mb}} | |{{Cost|S3|380|mb}} | ||
|- | |- | ||
|[[On-the-Run(Circles)_Eternally-Hunted.Floor]] | |[[On-the-Run(Circles)_Eternally-Hunted.Floor]] | ||
|[[File:SO Icon Turbine tower.png|50px]]<br>[[Escort the turbine tower!]] | |||
|Rigorous | |||
|{{Cost|S3|550|mb}} | |{{Cost|S3|550|mb}} | ||
|- | |- | ||
|[[Ferocious_Invading-Droves_Fortress.Floor]] | |[[Fortress.Floor|Ferocious_Invading-Droves_Fortress.Floor]] | ||
|[[File:SO Icon Zone.png|50px]]<br>[[Protect the zone!]] | |||
|Rigorous | |||
|{{Cost|S3|570|mb}} | |{{Cost|S3|570|mb}} | ||
|- | |- | ||
|[[Unreasonable_Shelterless_Up-and-Down.Floor]] | |[[Unreasonable_Shelterless_Up-and-Down.Floor]] | ||
|[[File:SO Icon Portal.png|50px]]<br>[[Destroy the portal!]] | |||
|Rigorous | |||
|{{Cost|S3|590|mb}} | |{{Cost|S3|590|mb}} | ||
|} | |} | ||
===21F-29F=== | ===21F-29F=== | ||
{| class="wikitable sitecolor-so" | {| class="wikitable sitecolor-so mw-collapsible sortable" style="text-align:center" | ||
!Floor Name | !Floor Name | ||
!Objective | |||
!Difficulty | |||
!Base Reward | |||
|- | |- | ||
|[[Covered.Floor|Danger-Magnet_Covered.Floor]] | |||
|[[File:SO Icon Infinity ball.png|50px]]<br>[[Sink the ∞-ball!]] | |||
|[[Danger-Magnet_Covered.Floor]] | |Easy | ||
|{{Cost|S3|80|mb}} | |{{Cost|S3|80|mb}} | ||
|- | |- | ||
|[[Springing_Gateway.Floor]] | |[[Gateway.Floor|Springing_Gateway.Floor]] | ||
|[[File:SO Icon Infinity ball.png|50px]]<br>[[Sink the ∞-ball!]] | |||
|Easy | |||
|{{Cost|S3|85|mb}} | |{{Cost|S3|85|mb}} | ||
|- | |- | ||
|[[Field-of-Explosions.Floor]] | |[[Field-of-Explosions.Floor]] | ||
|[[File:SO Icon Zone.png|50px]]<br>[[Protect the zone!]] | |||
|Easy | |||
|{{Cost|S3|90|mb}} | |{{Cost|S3|90|mb}} | ||
|- | |- | ||
|[[Two-Bridge.Floor|Frantic_Scampering_Two-Bridge.Floor]] | |||
|- | |[[File:SO Icon Panicking Alla Mambo.png|50px]]<br>[[Defeat the fleeing foe!]] | ||
| | |Normal | ||
|{{Cost|S3|250|mb}} | |{{Cost|S3|250|mb}} | ||
|- | |- | ||
|[[Open-Season_Ink-Spattered_Two-Bridge.Floor]] | |[[Two-Bridge.Floor|Open-Season_Ink-Spattered_Two-Bridge.Floor]] | ||
|[[File:SO Icon Infinity ball.png|50px]]<br>[[Sink the ∞-ball!]] | |||
|Normal | |||
|{{Cost|S3|255|mb}} | |{{Cost|S3|255|mb}} | ||
|- | |- | ||
|[[Projectile-Spam(Med)_Divided.Floor]] | |[[Divided.Floor|Projectile-Spam(Med)_Divided.Floor]] | ||
|[[File:SO Icon Panicking Alla Mambo.png|50px]]<br>[[Defeat the fleeing foe!]] | |||
|Normal | |||
|{{Cost|S3|260|mb}} | |{{Cost|S3|260|mb}} | ||
|- | |- | ||
|[[Bombarded_Whirling_Divided.Floor]] | |[[Divided.Floor|Bombarded_Whirling_Divided.Floor]] | ||
|[[File:SO Icon Infinity ball.png|50px]]<br>[[Sink the ∞-ball!]] | |||
|Normal | |||
|{{Cost|S3|265|mb}} | |{{Cost|S3|265|mb}} | ||
|- | |- | ||
|[[Surrounded(All-Sides)_Covered.Floor]] | |[[Covered.Floor|Surrounded(All-Sides)_Covered.Floor]] | ||
|[[File:SO Icon Zone.png|50px]]<br>[[Protect the zone!]] | |||
|Normal | |||
|{{Cost|S3|270|mb}} | |{{Cost|S3|270|mb}} | ||
|- | |- | ||
|[[Whirling-Enemies(High)_Two-Bridge.Floor]] | |[[Two-Bridge.Floor|Whirling-Enemies(High)_Two-Bridge.Floor]] | ||
|[[File:SO Icon Portal.png|50px]]<br>[[Destroy the portal!]] | |||
|Normal | |||
|{{Cost|S3|275|mb}} | |{{Cost|S3|275|mb}} | ||
|- | |- | ||
|[[Ink-Drenched_Gateway.Floor]] | |[[Gateway.Floor|Ink-Drenched_Gateway.Floor]] | ||
|[[File:SO Icon Panicking Alla Mambo.png|50px]]<br>[[Defeat the fleeing foe!]] | |||
|Normal | |||
|{{Cost|S3|280|mb}} | |{{Cost|S3|280|mb}} | ||
|- | |- | ||
|[[Large-Underpass_Covered.Floor]] | |[[Covered.Floor|Large-Underpass_Covered.Floor]] | ||
|[[File:SO Icon Portal.png|50px]]<br>[[Destroy the portal!]] | |||
|Normal | |||
|{{Cost|S3|285|mb}} | |{{Cost|S3|285|mb}} | ||
|- | |- | ||
|[[Gateway.Floor|Targeted(Giants)_Open-Season_Gateway.Floor]] | |||
|[[File:SO Icon Portal.png|50px]]<br>[[Destroy the portal!]] | |||
|[[Targeted(Giants)_Open-Season_Gateway.Floor]] | |Hard | ||
|{{Cost|S3|465|mb}} | |{{Cost|S3|465|mb}} | ||
|- | |- | ||
|[[Scampering(Between-Crosshairs)_Covered.Floor]] | |[[Covered.Floor|Scampering(Between-Crosshairs)_Covered.Floor]] | ||
|[[File:SO Icon Panicking Alla Mambo.png|50px]]<br>[[Defeat the fleeing foe!]] | |||
|Hard | |||
|{{Cost|S3|470|mb}} | |{{Cost|S3|470|mb}} | ||
|- | |- | ||
|[[Intense_Homing(Swarm)_Gateway.Floor]] | |[[Gateway.Floor|Intense_Homing(Swarm)_Gateway.Floor]] | ||
|[[File:SO Icon Turbine tower.png|50px]]<br>[[Escort the turbine tower!]] | |||
|Hard | |||
|{{Cost|S3|475|mb}} | |{{Cost|S3|475|mb}} | ||
|- | |- | ||
|[[Shelterless_Swarmed_Two-Bridge.Floor]] | |[[Two-Bridge.Floor|Shelterless_Swarmed_Two-Bridge.Floor]] | ||
|[[File:SO Icon Turbine tower.png|50px]]<br>[[Escort the turbine tower!]] | |||
|Hard | |||
|{{Cost|S3|480|mb}} | |{{Cost|S3|480|mb}} | ||
|- | |- | ||
|[[Threatened(All-Sides)_Two-Bridge.Floor]] | |[[Two-Bridge.Floor|Threatened(All-Sides)_Two-Bridge.Floor]] | ||
|[[File:SO Icon Zone.png|50px]]<br>[[Protect the zone!]] | |||
|Hard | |||
|{{Cost|S3|485|mb}} | |{{Cost|S3|485|mb}} | ||
|- | |- | ||
|[[Extensively-Circuitous_Covered.Floor]] | |[[Covered.Floor|Extensively-Circuitous_Covered.Floor]] | ||
|[[File:SO Icon Turbine tower.png|50px]]<br>[[Escort the turbine tower!]] | |||
|Hard | |||
|{{Cost|S3|490|mb}} | |{{Cost|S3|490|mb}} | ||
|- | |- | ||
|[[Springing_Open-Season_Divided.Floor]] | |[[Divided.Floor|Springing_Open-Season_Divided.Floor]] | ||
|[[File:SO Icon Portal.png|50px]]<br>[[Destroy the portal!]] | |||
|Hard | |||
|{{Cost|S3|495|mb}} | |{{Cost|S3|495|mb}} | ||
|- | |- | ||
|[[All-the-Way-Down(Then-Up-Again).Floor]] | |[[All-the-Way-Down(Then-Up-Again).Floor]] | ||
|[[File:SO Icon Turbine tower.png|50px]]<br>[[Escort the turbine tower!]] | |||
|Hard | |||
|{{Cost|S3|500|mb}} | |{{Cost|S3|500|mb}} | ||
|- | |- | ||
|[[Dizzying_Unstable-Footing(Bounce-Pad).Floor]] | |[[Dizzying_Unstable-Footing(Bounce-Pad).Floor]] | ||
|[[File:SO Icon Portal.png|50px]]<br>[[Destroy the portal!]] | |||
|Hard | |||
|{{Cost|S3|505|mb}} | |{{Cost|S3|505|mb}} | ||
|- | |- | ||
|[[Eternally-Vigilant_Soaker-Blockade.Floor]] | |[[Eternally-Vigilant_Soaker-Blockade.Floor]] | ||
|[[File:SO Icon Zone.png|50px]]<br>[[Protect the zone!]] | |||
|Hard | |||
|{{Cost|S3|510|mb}} | |{{Cost|S3|510|mb}} | ||
|- | |- | ||
|[[Powerful_Danger-Magnet_Divided.Floor]] | |[[Divided.Floor|Powerful_Danger-Magnet_Divided.Floor]] | ||
|[[File:SO Icon Zone.png|50px]]<br>[[Protect the zone!]] | |||
|Hard | |||
|{{Cost|S3|515|mb}} | |{{Cost|S3|515|mb}} | ||
|- | |- | ||
|[[Unreasonable_Mountain_Battlefield(Ascent).Floor]] | |[[Unreasonable_Mountain_Battlefield(Ascent).Floor]] | ||
|[[File:SO Icon Portal.png|50px]]<br>[[Destroy the portal!]] | |||
|Rigorous | |||
|{{Cost|S3|720|mb}} | |{{Cost|S3|720|mb}} | ||
|- | |- | ||
|[[Flying_Springing_Open-Season_Divided.Floor]] | |[[Divided.Floor|Flying_Springing_Open-Season_Divided.Floor]] | ||
|[[File:SO Icon Turbine tower.png|50px]]<br>[[Escort the turbine tower!]] | |||
|Rigorous | |||
|{{Cost|S3|740|mb}} | |{{Cost|S3|740|mb}} | ||
|- | |- | ||
|[[Eternally-Shelterless_Nightmare_Gateway.Floor]] | |[[Gateway.Floor|Eternally-Shelterless_Nightmare_Gateway.Floor]] | ||
|[[File:SO Icon Zone.png|50px]]<br>[[Protect the zone!]] | |||
|Rigorous | |||
|{{Cost|S3|760|mb}} | |{{Cost|S3|760|mb}} | ||
|- | |- | ||
|[[Cruel_Sisyphean_Eight-Shaped.Floor]] | |[[Cruel_Sisyphean_Eight-Shaped.Floor]] | ||
|[[File:SO Icon Zone.png|50px]]<br>[[Protect the zone!]] | |||
|Rigorous | |||
|{{Cost|S3|780|mb}} | |{{Cost|S3|780|mb}} | ||
|- | |- | ||
|[[Combined-Forces(Striking-in-Unison).Floor]] | |[[Combined-Forces(Striking-in-Unison).Floor]] | ||
|[[File:SO Icon Portal.png|50px]]<br>[[Destroy the portal!]] | |||
|Rigorous | |||
|{{Cost|S3|800|mb}} | |{{Cost|S3|800|mb}} | ||
|} | |} | ||
| Line 440: | Line 524: | ||
===Special floors=== | ===Special floors=== | ||
*[[Control Room]] | *[[Control Room]] | ||
:: | :: The final floor that the player has to reach in a run. In the tutorial, the player fights [[Marina Agitando]], and on subsequent runs, [[Overlorder]]. | ||
*[[Elusive-Bounder.Floor]] | *[[Elusive-Bounder.Floor]] | ||
:: This is the floor | :: This is the floor where the player fights [[Pinging Marciale]]. | ||
*[[Intensifying-Harmony.Floor]] | *[[Intensifying-Harmony.Floor]] | ||
:: This is the floor | :: This is the floor where the player fights [[Parallel Canon]]. | ||
*[[Layered-Rotator.Floor]] | *[[Layered-Rotator.Floor]] | ||
:: This is the floor | :: This is the floor where the player fights [[Asynchronous Rondo]]. | ||
*[[Vending-Machine Corner]] | *[[Vending-Machine Corner]] | ||
:: This is the floor | :: This is the floor where the player can access the [[Vending Machine]].<!-- note: please replace this bulleted list with the pretty template once ready --> | ||
<!-- note: please replace this bulleted list with the pretty template once ready --> | |||
===First climb=== | ===First climb=== | ||
When playing ''Side Order'' for the first time, the player has to go through a 10-floor first climb before they are given access to the full 30 floors of the [[Spire of Order]]. This effectively functions as the tutorial of ''Side Order''. During this first climb, the floors and the [[color chip]]s given are not randomized, the player starts with three lives, the damage taken is set to 100% and color chips have double the efficacy that they do on subsequent runs (e.g., two Ink Saver (Main) chips on the first climb reduce ink consumption to 50%, equivalent to four Ink Saver (Main) chips normally). The player can choose to play 7F to 9F in any order. On 10F, the player faces [[Marina Agitando]]. The initial completion of the first climb gives a flat {{cost|so|50|pl}} as the score is not calculated. | When playing ''Side Order'' for the first time, the player has to go through a 10-floor first climb before they are given access to the full 30 floors of the [[Spire of Order]]. This effectively functions as the tutorial of ''Side Order''. During this first climb, the floors and the [[color chip]]s given are not randomized, the player starts with three lives, the damage taken is set to 100% and color chips have double the efficacy that they do on subsequent runs (e.g., two Ink Saver (Main) chips on the first climb reduce ink consumption to 50%, equivalent to four Ink Saver (Main) chips normally). The player can choose to play 7F to 9F in any order. On 10F, the player faces [[Marina Agitando]]. The initial completion of the first climb gives a flat {{cost|so|50|pl}} as the score is not calculated. | ||
The first | The first nine floors in the first climb are unique to the tutorial and do not appear in subsequent runs. | ||
{| class="wikitable sitecolor-so" | {| class="wikitable sitecolor-so mw-collapsible" style="text-align:center" | ||
!Floor No. | !Floor No. | ||
!Floor Name | |||
!Objective | |||
!Difficulty | |||
!Reward | |||
!Color Chip | |||
|- | |- | ||
|1F | |1F | ||
|[[First.Floor]] | |||
|[[File:SO Icon Portal.png|50px|center]]<br>[[Destroy the portal!]] | |||
|Easy | |Easy | ||
|{{Cost|S3|10|mb}} | |{{Cost|S3|10|mb}} | ||
|{{Color chip|Main Damage (Distant)}} | |style="text-align:left" |{{Color chip|Main Damage (Distant)}} | ||
|- | |- | ||
|2F | |2F | ||
|[[Home-Turf.Floor]] | |||
|[[File:SO Icon Portal.png|50px]]<br>[[Destroy the portal!]] | |||
|Normal | |Normal | ||
|{{Cost|S3|60|mb}} | |{{Cost|S3|60|mb}} | ||
|{{Color chip|Poison Ink}} | |style="text-align:left" |{{Color chip|Poison Ink}} | ||
|- | |- | ||
|3F | |3F | ||
|[[Special-Surprise.Floor]] | |||
|[[File:SO Icon Portal.png|50px]]<br>[[Destroy the portal!]] | |||
|Hard | |Hard | ||
|{{Cost|S3|120|mb}} | |{{Cost|S3|120|mb}} | ||
|{{Color chip|Lucky Bomb Drop}} | |style="text-align:left" |{{Color chip|Lucky Bomb Drop}} | ||
|- | |- | ||
|4F | |4F | ||
|[[Gliding.Floor]] | |||
|[[File:SO Icon Zone.png|50px]]<br>[[Protect the zone!]] | |||
|Easy | |Easy | ||
|{{Cost|S3|20|mb}} | |{{Cost|S3|20|mb}} | ||
|{{Color chip|Ink Saver (Main)}} x2 | |style="text-align:left" |{{Color chip|Ink Saver (Main)}} x2 | ||
|- | |- | ||
|5F | |5F | ||
|[[Springing.Floor]] | |||
|[[File:SO Icon Turbine tower.png|50px]]<br>[[Escort the turbine tower!]] | |||
|Normal | |Normal | ||
|{{Cost|S3|80|mb}} | |{{Cost|S3|80|mb}} | ||
|{{Color chip|Drone Killer Wail}} | |style="text-align:left" |{{Color chip|Drone Killer Wail}} | ||
|- | |- | ||
|6F | |6F | ||
|[[Double-Zoned.Floor]] | |||
|[[File:SO Icon Zone.png|50px]]<br>[[Protect the zone!]] | |||
|Normal | |Normal | ||
|{{Cost|S3|80|mb}} | |{{Cost|S3|80|mb}} | ||
|{{Color chip|Main Range}} x2 | |style="text-align:left" |{{Color chip|Main Range}} x2 | ||
|- | |- | ||
|rowspan=3|7F-9F | |rowspan=3|7F-9F | ||
|[[Rolling.Floor]] | |||
|[[File:SO Icon Infinity ball.png|50px]]<br>[[Sink the ∞-ball!]] | |||
|Easy | |Easy | ||
|{{Cost|S3|30|mb}} | |{{Cost|S3|30|mb}} | ||
|{{Color chip|Dodge Roll Attack}} | |style="text-align:left" |{{Color chip|Dodge Roll Attack}} | ||
|- | |- | ||
|[[Escape-Artist.Floor]] | |||
|[[File:SO Icon Panicking Alla Mambo.png|50px]]<br>[[Defeat the fleeing foe!]] | |||
|Normal | |Normal | ||
|{{Cost|S3|90|mb}} | |{{Cost|S3|90|mb}} | ||
|{{Color chip|Main Ink Coverage}} | |style="text-align:left" |{{Color chip|Main Ink Coverage}} | ||
|- | |- | ||
|[[Whirling-Shell.Floor]] | |||
|[[File:SO Icon Portal.png|50px]]<br>[[Destroy the portal!]] | |||
|Hard | |Hard | ||
|{{Cost|S3|130|mb}} | |{{Cost|S3|130|mb}} | ||
|{{Color chip|Max Lucky Chain}} | |style="text-align:left" |{{Color chip|Max Lucky Chain}} | ||
|- | |- | ||
|10F | |10F | ||
|[[Control Room]] | |||
|''Liberate Marina!'' | |||
|N/A | |N/A | ||
|N/A | |N/A | ||
|N/A | |N/A | ||
| Line 531: | Line 618: | ||
==Floor selection== | ==Floor selection== | ||
[[File:SO Promo screenshot 27.png|thumb|Agent 8 on the floor selection screen during the first climb.]] | [[File:SO Promo screenshot 27.png|thumb|Agent 8 on the floor selection screen during the first climb.]] | ||
Upon selection of a floor, the player | During a 30-floor run, the player is given the option of three floors with varying difficulty, objectives, and rewards. Each selection has a difficulty, objective, and [[color chip]] reward, with a small chance of awarding two instances of the given color chip. [[Membux]] are earned based on the difficulty of the floor the player selects; bonus floors offer the chance to gain additional Membux by imposing optional restrictions or fill the player's empty Palette slots with temporary Color Chips of a random color. The color chip is applied before the start of a floor. | ||
Upon selection of a floor, the player spawns onto a starting platform while the objective text is displayed to the player. The cage spawns at the end of this starting platform, where the player can ride the cage above the main platform, which allows players to strategically plan where they will land on the floor platform using [[Pearl Drone]] to glide down. After landing, the player can glide using the drone by pressing {{Button|B|Switch}} while in midair. | |||
==Spire of Order map== | ==Spire of Order map== | ||
[[File:SO spire map F18.png|thumb|The Spire of Order's map as Agent 8 ascends a floor]] | [[File:SO spire map F18.png|thumb|The Spire of Order's map as Agent 8 ascends a floor]] | ||
The background of the Spire map | After selecting a floor, the Spire's map appears and shows a few completed floors below the player, future floors above the player, and the player moving from the previous floor to the selected floor. | ||
The background of the Spire map changes colors depending on what third of the spire has been reached. The first ten floors have a dark gray background, 11F through 20F have a dark turquoise background, and 21F through 30F have a dark purple background. | |||
11F and 21F are always guaranteed to have a Vending Machine as an option, while 5F is guaranteed to have a Vending Machine if the last run made it past 5F, and a guaranteed Vending Machine can be unlocked on 15F and 25F using [[Marina's Hacks]]. | 11F and 21F are always guaranteed to have a Vending Machine as an option, while 5F is guaranteed to have a Vending Machine if the last run made it past 5F, and a guaranteed Vending Machine can be unlocked on 15F and 25F using [[Marina's Hacks]]. | ||
| Line 551: | Line 640: | ||
</gallery> | </gallery> | ||
==Floor objectives== | ==Floor objectives== | ||
Floors can have one of five different objective types, although some floors are limited as to which objectives they can have due to being designed with a specific objective in mind. | Floors can have one of five different objective types, although some floors are limited as to which objectives they can have due to being designed with a specific objective in mind. | ||
<!-- Table version --> | <!-- Table version --> | ||
{| class="wikitable sitecolor-so" | {| class="wikitable sitecolor-so mw-collapsible" | ||
!Objective!!Icon!!Description<!--!!Floors--> | !Objective!!Icon!!Description<!--!!Floors--> | ||
|- | |- | ||
|style="text-align:center;"|[[File:SO Promo screenshot 35.png|250px|center]]''[[Destroy the | |style="text-align:center;"|[[File:SO Promo screenshot 35.png|250px|center]]''[[Destroy the portal!]]'' | ||
|[[File:SO Icon | |[[File:SO Icon Portal.png|100px]] | ||
|[[Agent 8]] must destroy all [[Jelleton]] [[portal]]s found on a given floor. | |[[Agent 8]] must destroy all [[Jelleton]] [[portal]]s found on a given floor. | ||
|- | |- | ||
|style="text-align:center;"|[[File:SO Promo screenshot 29.png|250px|center]]''[[Defeat the fleeing foe!|Defeat the fleeing | |style="text-align:center;"|[[File:SO Promo screenshot 29.png|250px|center]]''[[Defeat the fleeing foe!|Defeat the fleeing foe!]]'' | ||
|[[File:SO Icon Panicking Alla Mambo.png|100px]] | |[[File:SO Icon Panicking Alla Mambo.png|100px]] | ||
|[[Agent 8]] must pursue and defeat [[Panicking Alla Mambo]]s that flee from them. | |[[Agent 8]] must pursue and defeat [[Panicking Alla Mambo]]s that flee from them. | ||
|- | |- | ||
|style="text-align:center;"|[[File:SO Promo screenshot 21.png|250px|center]]''[[Sink the ∞- | |style="text-align:center;"|[[File:SO Promo screenshot 21.png|250px|center]]''[[Sink the ∞-ball!]]'' | ||
|[[file:SO Icon Infinity ball.png|100px]] | |[[file:SO Icon Infinity ball.png|100px]] | ||
|[[Agent 8]] must guide one or more [[∞-ball]]s; this mode is similar to {{OE}}'s [[8-ball]] stations. | |[[Agent 8]] must guide one or more [[∞-ball]]s; this mode is similar to {{OE}}'s [[8-ball]] stations. | ||
|- | |- | ||
|style="text-align:center;"|[[File:SO Promo screenshot 36.png|250px|center]]''[[Protect the | |style="text-align:center;"|[[File:SO Promo screenshot 36.png|250px|center]]''[[Protect the zone!]]'' | ||
|[[File:SO Icon Zone.png|100px]] | |[[File:SO Icon Zone.png|100px]] | ||
|[[Agent 8]] must keep one or two [[zone]]s inked for a timed duration while [[Jelleton]]s attempt to attack and claim the Zone. | |[[Agent 8]] must keep one or two [[zone]]s inked for a timed duration while [[Jelleton]]s attempt to attack and claim the Zone. | ||
| Line 579: | Line 669: | ||
==Boss floors== | ==Boss floors== | ||
{| class="wikitable sitecolor-so mw-collapsible" | |||
{| class="wikitable sitecolor-so" | !Bos!!Icon!!Description<!--!!Floors--> | ||
! | |||
|- | |- | ||
|style="text-align:center;"|[[File:SO Promo screenshot 22.png|250px|center]][[Pinging Marciale]] | |style="text-align:center;"|[[File:SO Promo screenshot 22.png|250px|center]][[Pinging Marciale]] | ||
|[[File:SO Icon Pinging Marciale.png|100px]] | |[[File:SO Icon Pinging Marciale.png|100px]] | ||
| | |Pinging Marciale is a large Jelleton similar to both the [[Octowhirl]] and an [[8-ball]]. Its arena has bumpers at the edges; if Pinging Marciale hits them, a [[Wave Breaker]]-like shockwave spawns when it hits the ground, many [[Jelleton]]s are summoned, and Pinging Marciale periodically loses its outer shell, exposing weak points that the player can hit to deal more damage. | ||
|- | |- | ||
|style="text-align:center;"|[[File:SO Promo screenshot 13.jpg|250px|center]][[Asynchronous Rondo]] | |style="text-align:center;"|[[File:SO Promo screenshot 13.jpg|250px|center]][[Asynchronous Rondo]] | ||
|[[File:SO Icon Asynchronous Rondo.png|100px]] | |[[File:SO Icon Asynchronous Rondo.png|100px]] | ||
| | |Asynchronous Rondo has layers that rotate around itself, with rectangular weak points that slightly protrude from each layer. The player must defeat it by knocking down each glowing layer while avoiding floodlights, Jelletons, and bombs summoned by the boss. | ||
|- | |- | ||
|style="text-align:center;"|[[File:SO Parallel Canon Promo Screenshot.jpg|250px|center]][[Parallel Canon]] | |style="text-align:center;"|[[File:SO Parallel Canon Promo Screenshot.jpg|250px|center]][[Parallel Canon]] | ||
|[[File:SO Icon Parallel Canon.png|100px]] | |[[File:SO Icon Parallel Canon.png|100px]] | ||
|Parallel Canon takes the form of Jelleton-like ink blobs in the shape of Inklings that attack using weapons, resembling Splatoon's playable characters. The boss is fought in three waves of one to five such creatures at a time. Its appearance can be influenced by the player's [[Splatoon 2]] save data previously imported, specifically the appearance of their [[Agent 4]]. | |Parallel Canon takes the form of Jelleton-like ink blobs in the shape of Inklings that attack using weapons, resembling ''Splatoon''{{'s}} playable characters. The boss is fought in three waves of one to five such creatures at a time. Its appearance can be influenced by the player's ''[[Splatoon 2]]'' save data previously imported, specifically the appearance of their [[Agent 4]]. | ||
|- | |||
|style="text-align:center;"|[[File:SO Sprite Marina Agitando.png|250px|center]][[Marina Agitando]] | |||
|[[File:SO Icon Marina Agitando.png|100px]] | |||
|Marina Agitando serves as the tutorial boss, using mobile portals to keep a barrier up, and using speakers to fire off various attacks. | |||
|- | |- | ||
|style="text-align:center;"|[[File:SO Sprite Overlorder.png|250px|center]][[Overlorder]] | |||
|[[File:SO Icon Overlorder.png|100px]] | |||
|Overlorder serves as the final boss of a climb, being a Jelleton octopus who uses mobile portals to protect itself through a barrier, and fires off attacks including tentacle slamming and special weapons. | |||
|} | |} | ||
==Floor features== | ==Floor features== | ||
Features that can appear on a floor within [[Spire of Order | Features that can appear on a floor within the [[Spire of Order]]. | ||
{| class="wikitable sitecolor-so" | |||
{| class="wikitable sitecolor-so mw-collapdible" | |||
!Floor Feature!!Description | !Floor Feature!!Description | ||
|- | |- | ||
| Line 605: | Line 702: | ||
|An [[Inkrail]] found within the [[Spire of Order]] | |An [[Inkrail]] found within the [[Spire of Order]] | ||
|- | |- | ||
|style="text-align:center;"|[[File:SO Dash Track. | |style="text-align:center;"|[[File:SO Dash Track.png|80px|center]][[Dash track|Dash Track]] | ||
|A [[dash track]] within the Spire of Order | |A [[dash track]] within the Spire of Order | ||
|- | |- | ||
| Line 618: | Line 715: | ||
|- | |- | ||
|style="text-align:center;"|[[File:SO Ink refiller.png|80px|center]][[Ink refiller]] | |style="text-align:center;"|[[File:SO Ink refiller.png|80px|center]][[Ink refiller]] | ||
|A Ink refiller within the Spire of Order, which refills 50% of the player's ink when collected. | |A Ink refiller within the Spire of Order, which refills 50% of the player's ink when collected. | ||
|- | |- | ||
|style="text-align:center;"|[[File:SO Canned Special Screenshot.png|80px|center]][[Canned Special]] | |style="text-align:center;"|[[File:SO Canned Special Screenshot.png|80px|center]][[Canned Special]] | ||
| Line 624: | Line 721: | ||
|- | |- | ||
|style="text-align:center;"|[[File:SO Disc Piece.png|80px|center]][[Disc Piece]] | |style="text-align:center;"|[[File:SO Disc Piece.png|80px|center]][[Disc Piece]] | ||
|A piece of an audio disc within the Spire of Order. Collecting three allows Pearl to play her "Step-Off Song", which temporarily disables portals, knocks back enemies, and stuns bosses. | |A piece of an audio disc within the Spire of Order. Collecting three allows Pearl to play her "Step-Off Song", which temporarily disables portals, knocks back enemies, and stuns bosses. | ||
|- | |- | ||
|style="text-align:center;"|[[File:SO Drone Batteries.png|80px|center]]Drone Batteries | |style="text-align:center;"|[[File:SO Drone Batteries.png|80px|center]]Drone Batteries | ||
|A battery pack within the Spire of Order that partially fills up the drone gauge by 100p. | |A battery pack within the Spire of Order that partially fills up the drone gauge by 100p. | ||
|- | |- | ||
|style="text-align:center;"|[[File:SO Whirling Accelerando Shell.png|80px|center]]Whirling Accelerando shell | |style="text-align:center;"|[[File:SO Whirling Accelerando Shell.png|80px|center]]Whirling Accelerando shell | ||
| Line 634: | Line 731: | ||
==Bonus effects== | ==Bonus effects== | ||
Bonus effects are special events that can occur on any given floor, and are marked as such inside the floor selection screen. A bonus event can consist of one of two potential options: ''Color Chip Saturation'' and ''Bonus Objective'' | Bonus effects are special events that can occur on any given floor, and are marked as such inside the floor selection screen. A bonus event can consist of one of two potential options: ''Color Chip Saturation'' and ''Bonus Objective''. | ||
===Color Chip Saturation=== | ===Color Chip Saturation=== | ||
If a Bonus Event is a Color Chip Saturation, any empty slots in the Palette | If a Bonus Event is a Color Chip Saturation, any empty slots in the Palette are filled with random chips from the same tone. | ||
If it is a Drone Chip Saturation, these chips can bypass any limits on the Drone, granting them up to a full suite of five Drone skills even if the hack for drone slots isn't maxed out, and including all potential Drone skills, even those which are currently not brought or active. | If it is a Drone Chip Saturation, these chips can bypass any limits on the Drone, granting them up to a full suite of five Drone skills even if the hack for drone slots isn't maxed out, and including all potential Drone skills, even those which are currently not brought or active. | ||
Note that if the Palette is | Note that if the Palette is filled, a Color Chip Saturation event can never happen. | ||
===Bonus Objective=== | ===Bonus Objective=== | ||
{{Stub}} | {{Stub}} | ||
If a Bonus Event is a Bonus Objective, an objective | |||
Bonus objectives | If a Bonus Event is a Bonus Objective, an objective is chosen to act as an optional limitation. Completing the floor while adhering to the limitation imposed by the Bonus Objective yields an additional Membux reward equal to the floor's advertised completion reward, with a minimum bonus of {{Cost|S3|100|mb}} for floors of sufficiently small value. Actions taken which violate the Bonus Objective reduce the bonus reward given upon floor completion, indicated by a counter in the top-left corner of the HUD. Bonus objectives do not spawn until the player has reached 12F for the first time. | ||
{| class="wikitable sitecolor-so" | |||
!Bonus Objective | {| class="wikitable sitecolor-so mw-collapsible" | ||
!Bonus Objective | |||
!Breach Limit | !Breach Limit | ||
!Information | !Information | ||
| Line 654: | Line 752: | ||
|Don't use your main weapon! | |Don't use your main weapon! | ||
| | | | ||
|This objective | |This objective has the Membux reward tied to using the main weapon—using sub weapons, specials and the Pearl Drone does not reduce the reward, but each shot of the main weapon reduces the reward accordingly. | ||
|- | |- | ||
|Don't use your sub weapon! | |Don't use your sub weapon! | ||
|6 Uses | |6 Uses | ||
|This objective | |This objective tells the player how many times they can use the sub equipped before forfeiting the reward fully, and each use of one reduces the reward accordingly. | ||
|- | |- | ||
|Don't use special | |Don't use special weapon! | ||
|3 Uses | |3 Uses | ||
|This objective is akin to the sub weapon one as it | |This objective is akin to the sub weapon one as it tells the player how many times they can use the special equipped before forfeiting the reward fully and using one reduces the reward accordingly. | ||
|- | |- | ||
|Don't take damage! | |Don't take damage! | ||
| | | | ||
|If the player takes damage with this objective, the Membux reward | |If the player takes damage with this objective, the Membux reward decreases. | ||
|- | |- | ||
|Don't move in Octoling form! | |Don't move in Octoling form! | ||
| Line 686: | Line 784: | ||
==Danger effects== | ==Danger effects== | ||
Danger effects are debuff events that can occur on any given floor | Danger effects are debuff events that can occur on any given floor and are marked as such inside the floor selection screen. Danger level floors contain an augmentation similar to {{SRNW}}'s [[Known Occurrence]]s. If a player decides to avoid a floor marked with danger upon its initial appearance, the danger augmentation is more likely to re-appear over more floors in the player's floor selection screen throughout the run until a floor with the danger effect is selected. It is possible for a danger effect to become unavoidable and persist for the rest of a run. Danger effects do not spawn until 15F is reached for the first time during a run. | ||
There are a total of nine different danger effects, or which any one could spawn on any floor: six single danger effects, and three combo danger effects that combine two danger effects together. | There are a total of nine different danger effects, or which any one could spawn on any floor: six single danger effects, and three combo danger effects that combine two danger effects together. | ||
{| class="wikitable sitecolor-so" | |||
{| class="wikitable sitecolor-so mw collapsible" | |||
!Danger augment!!Description | !Danger augment!!Description | ||
|- | |- | ||
|style="text-align:center;"|[[File:SO Danger Icon Lights Out.png|center|50px]]Lights Out | |style="text-align:center;"|[[File:SO Danger Icon Lights Out.png|center|50px]]Lights Out | ||
|The stage is dark, making it difficult to see the terrain and enemies. | |The stage is dark, making it difficult to see the terrain and enemies. | ||
|- | |- | ||
|style="text-align:center;"|[[File:SO Danger Icon Ink Coating.png|center|50px]]Ink Coating | |style="text-align:center;"|[[File:SO Danger Icon Ink Coating.png|center|50px]]Ink Coating | ||
| Line 699: | Line 798: | ||
|- | |- | ||
|style="text-align:center;"|[[File:SO Danger Icon No Drone.png|center|50px]]No Pearl Drone | |style="text-align:center;"|[[File:SO Danger Icon No Drone.png|center|50px]]No Pearl Drone | ||
| | |Agent 8 must fight without the help of the [[Pearl Drone]] (this includes gliding and the Step-Off song). | ||
|- | |- | ||
|style="text-align:center;"|[[File:SO Danger Icon No Item Drops.png|center|50px]]No Item Drops | |style="text-align:center;"|[[File:SO Danger Icon No Item Drops.png|center|50px]]No Item Drops | ||
| Line 705: | Line 804: | ||
|- | |- | ||
|style="text-align:center;"|[[File:SO Danger Icon Stronger Jelletons.png|center|50px]]Stronger Jelletons | |style="text-align:center;"|[[File:SO Danger Icon Stronger Jelletons.png|center|50px]]Stronger Jelletons | ||
| | |Agent 8 must battle [[Jelleton]]s that are in their tougher form immediately, rather than after some time left alive. | ||
|- | |- | ||
|style="text-align:center;"|[[File:SO Danger Icon Arpeggio Barrage.png|center|50px]]Arpeggio Barrage | |style="text-align:center;"|[[File:SO Danger Icon Arpeggio Barrage.png|center|50px]]Arpeggio Barrage | ||
|[[Homing Arpeggio]]s | |[[Homing Arpeggio]]s continuously spawn and attack at unpredictable intervals. | ||
|- | |- | ||
!colspan=2|Combined Danger Augments | !colspan=2|Combined Danger Augments | ||
| Line 716: | Line 815: | ||
|- | |- | ||
|style="text-align:center;"|[[File:SO Danger Icon No Drone.png|50px]] [[File:SO Danger Icon No Item Drops.png|50px]]<br>No Pearl Drone + No Item Drops | |style="text-align:center;"|[[File:SO Danger Icon No Drone.png|50px]] [[File:SO Danger Icon No Item Drops.png|50px]]<br>No Pearl Drone + No Item Drops | ||
|Not only is the Pearl Drone disabled, but the Jelletons | |Not only is the Pearl Drone disabled, but the Jelletons do not drop any items. Items still drop from crates. | ||
|- | |- | ||
|style="text-align:center;"|[[File:SO Danger Icon Stronger Jelletons.png|50px]] [[File:SO Danger Icon Arpeggio Barrage.png|50px]]<br>Stronger Jelletons + Arpeggio Barrage | |style="text-align:center;"|[[File:SO Danger Icon Stronger Jelletons.png|50px]] [[File:SO Danger Icon Arpeggio Barrage.png|50px]]<br>Stronger Jelletons + Arpeggio Barrage | ||
|Not only are all Jelletons in their tougher forms | |Not only are all Jelletons in their tougher forms immediately, but Homing Arpeggios continuously spawn and attack Eight. | ||
|} | |} | ||
== Trivia == | == Trivia == | ||
* In the [[Nintendo Direct#Nintendo Direct: 14th September 2023|September 2023 Nintendo Direct]] trailer of ''Side Order'', the names of the floors do not have their formatting seen in the final game, now being shown to be written plainly rather than being formatted similar to a computer file. | * In the [[Nintendo Direct#Nintendo Direct: 14th September 2023|September 2023 Nintendo Direct]] trailer of ''Side Order'', the names of the floors do not have their formatting seen in the final game, now being shown to be written plainly rather than being formatted similar to a computer file. | ||
* The jingles that play after clearing a floor (excluding the Control Room) reference various songs by [[Off the Hook]]. | * The jingles that play after clearing a floor (excluding the Control Room) reference various songs by [[Off the Hook]]. | ||
| Line 729: | Line 827: | ||
** Outside of the first climb, the jingle on clearing a non-boss floor references ''[[Spectrum Obligato ~ Ebb & Flow (Out of Order)]]''. | ** Outside of the first climb, the jingle on clearing a non-boss floor references ''[[Spectrum Obligato ~ Ebb & Flow (Out of Order)]]''. | ||
** The jingle on clearing a [[#Boss floors|boss floor]] references ''[[We're So Back]]''. | ** The jingle on clearing a [[#Boss floors|boss floor]] references ''[[We're So Back]]''. | ||
*It is possible to revisit the first climb by interacting with the headset found to the left of the elevator. However, no Prlz | * It is possible to revisit the first climb by interacting with the headset found to the left of the elevator. However, no Prlz are rewarded for completing the first climb again, and the Palette equipped is set to Pearl's. | ||
==Names in other languages== | ==Names in other languages== | ||
{{Localized name | {{Localized name | ||
| Line 771: | Line 870: | ||
|Ger= | |Ger= | ||
|GerM= | |GerM= | ||
|Ita= | |Ita=Saturazione schede colore | ||
|ItaM= | |ItaM=Color chip saturation | ||
|Rus=Тональный овердрайв | |Rus=Тональный овердрайв | ||
|RusR=Tonal'nyy overdrayv | |RusR=Tonal'nyy overdrayv | ||
| Line 794: | Line 893: | ||
==References== | ==References== | ||
<references /> --> | <references /> --> | ||
{{Navbox/Floors}} | |||
{{Navbox/Side Order}} | {{Navbox/Side Order}} | ||
[[Category:Side Order]] | [[Category:Side Order]] | ||
[[Category:Side Order floors | [[Category:Side Order floors]] | ||
Latest revision as of 09:46, 25 April 2024

Can you help us get it done?
- For the terrain, see Ground.
Floors are levels in Side Order. The level system of Side Order consists of individual floors in the Spire of Order, which are randomly selected on each run, except for the first climb.
List of floors
The floors available to the player during Floor Selection depend on the segment of the tower the player is on, with the available options skewing towards harder floors the more progress is made in the segment. Certain floors in a segment share the same root name and basic geometry, and are differentiated by different difficulty ratings, objectives, or name prefixes describing the floor's particular hazards.
If the player has not played a floor before, or if the boss is not revealed, the floor's name displays as "???". An "Updated" splash displays next to the player's completion time if they beat their recorded personal best for that floor.
1F-9F
11F-19F
21F-29F
Special floors
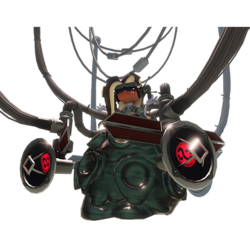
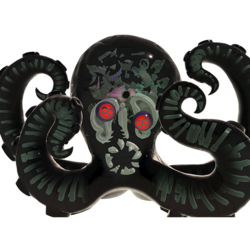
- The final floor that the player has to reach in a run. In the tutorial, the player fights Marina Agitando, and on subsequent runs, Overlorder.
- This is the floor where the player fights Pinging Marciale.
- This is the floor where the player fights Parallel Canon.
- This is the floor where the player fights Asynchronous Rondo.
- This is the floor where the player can access the Vending Machine.
First climb
When playing Side Order for the first time, the player has to go through a 10-floor first climb before they are given access to the full 30 floors of the Spire of Order. This effectively functions as the tutorial of Side Order. During this first climb, the floors and the color chips given are not randomized, the player starts with three lives, the damage taken is set to 100% and color chips have double the efficacy that they do on subsequent runs (e.g., two Ink Saver (Main) chips on the first climb reduce ink consumption to 50%, equivalent to four Ink Saver (Main) chips normally). The player can choose to play 7F to 9F in any order. On 10F, the player faces Marina Agitando. The initial completion of the first climb gives a flat ![]() 50 as the score is not calculated.
50 as the score is not calculated.
The first nine floors in the first climb are unique to the tutorial and do not appear in subsequent runs.
| Floor No. | Floor Name | Objective | Difficulty | Reward | Color Chip |
|---|---|---|---|---|---|
| 1F | First.Floor | Destroy the portal! |
Easy | ||
| 2F | Home-Turf.Floor | Destroy the portal! |
Normal | ||
| 3F | Special-Surprise.Floor | Destroy the portal! |
Hard | ||
| 4F | Gliding.Floor | Protect the zone! |
Easy | ||
| 5F | Springing.Floor | Escort the turbine tower! |
Normal | ||
| 6F | Double-Zoned.Floor | Protect the zone! |
Normal | ||
| 7F-9F | Rolling.Floor | Sink the ∞-ball! |
Easy | ||
| Escape-Artist.Floor | Defeat the fleeing foe! |
Normal | |||
| Whirling-Shell.Floor | Destroy the portal! |
Hard | |||
| 10F | Control Room | Liberate Marina! | N/A | N/A | N/A |
Floor selection
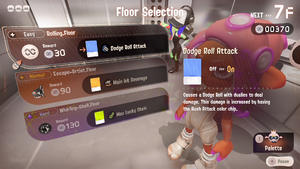
During a 30-floor run, the player is given the option of three floors with varying difficulty, objectives, and rewards. Each selection has a difficulty, objective, and color chip reward, with a small chance of awarding two instances of the given color chip. Membux are earned based on the difficulty of the floor the player selects; bonus floors offer the chance to gain additional Membux by imposing optional restrictions or fill the player's empty Palette slots with temporary Color Chips of a random color. The color chip is applied before the start of a floor.
Upon selection of a floor, the player spawns onto a starting platform while the objective text is displayed to the player. The cage spawns at the end of this starting platform, where the player can ride the cage above the main platform, which allows players to strategically plan where they will land on the floor platform using Pearl Drone to glide down. After landing, the player can glide using the drone by pressing while in midair.
Spire of Order map
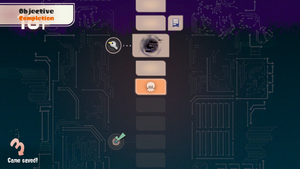
After selecting a floor, the Spire's map appears and shows a few completed floors below the player, future floors above the player, and the player moving from the previous floor to the selected floor.
The background of the Spire map changes colors depending on what third of the spire has been reached. The first ten floors have a dark gray background, 11F through 20F have a dark turquoise background, and 21F through 30F have a dark purple background.
11F and 21F are always guaranteed to have a Vending Machine as an option, while 5F is guaranteed to have a Vending Machine if the last run made it past 5F, and a guaranteed Vending Machine can be unlocked on 15F and 25F using Marina's Hacks.
Spire map icons
-
A key icon
-
A vending machine icon located next to one of the floors of the spire map
-
A Player icon indicating what floor a player is located on within the spire map
-
A (hidden) boss icon indicating a boss floor on the spire map
Floor objectives
Floors can have one of five different objective types, although some floors are limited as to which objectives they can have due to being designed with a specific objective in mind.
| Objective | Icon | Description |
|---|---|---|
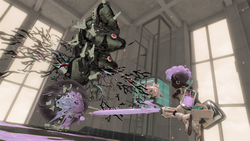 |
Agent 8 must destroy all Jelleton portals found on a given floor. | |
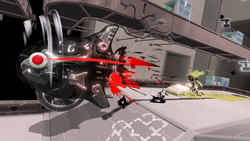 |
Agent 8 must pursue and defeat Panicking Alla Mambos that flee from them. | |
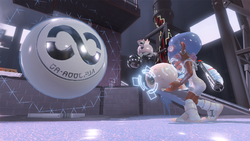 |
Agent 8 must guide one or more ∞-balls; this mode is similar to Octo Expansion's 8-ball stations. | |
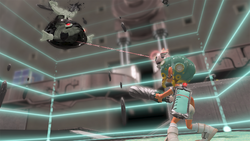 |
Agent 8 must keep one or two zones inked for a timed duration while Jelletons attempt to attack and claim the Zone. | |
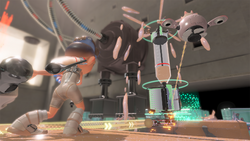 |
Agent 8 must ink a turbine tower to move it along its fixed path; this mode is similar to Tower Control. |
Boss floors
| Bos | Icon | Description |
|---|---|---|
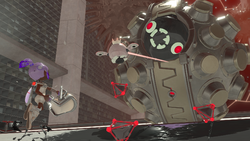 |
Pinging Marciale is a large Jelleton similar to both the Octowhirl and an 8-ball. Its arena has bumpers at the edges; if Pinging Marciale hits them, a Wave Breaker-like shockwave spawns when it hits the ground, many Jelletons are summoned, and Pinging Marciale periodically loses its outer shell, exposing weak points that the player can hit to deal more damage. | |
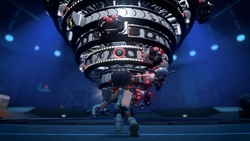 |
Asynchronous Rondo has layers that rotate around itself, with rectangular weak points that slightly protrude from each layer. The player must defeat it by knocking down each glowing layer while avoiding floodlights, Jelletons, and bombs summoned by the boss. | |
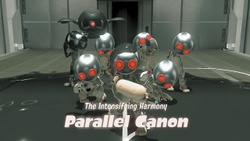 |
Parallel Canon takes the form of Jelleton-like ink blobs in the shape of Inklings that attack using weapons, resembling Splatoon's playable characters. The boss is fought in three waves of one to five such creatures at a time. Its appearance can be influenced by the player's Splatoon 2 save data previously imported, specifically the appearance of their Agent 4. | |
| Marina Agitando serves as the tutorial boss, using mobile portals to keep a barrier up, and using speakers to fire off various attacks. | ||
| Overlorder serves as the final boss of a climb, being a Jelleton octopus who uses mobile portals to protect itself through a barrier, and fires off attacks including tentacle slamming and special weapons. |
Floor features
Features that can appear on a floor within the Spire of Order.
| Floor Feature | Description |
|---|---|
 |
An Inkrail found within the Spire of Order |
 |
A dash track within the Spire of Order |
 |
A balloon fish within the Spire of Order |
 |
A crate within the Spire of Order |
 |
A case of Armor within the Spire of Order |
 |
A Ink refiller within the Spire of Order, which refills 50% of the player's ink when collected. |
 |
A can, featuring Marina's poster, that fills up 50% of the player's special gauge within the Spire of Order |
 |
A piece of an audio disc within the Spire of Order. Collecting three allows Pearl to play her "Step-Off Song", which temporarily disables portals, knocks back enemies, and stuns bosses. |
 |
A battery pack within the Spire of Order that partially fills up the drone gauge by 100p. |
 |
A type of top-shaped mechanism found within the Spire of Order that when attacked, rapidly pierces through nearby enemies for high damage and can bounce off walls. Dropped by defeated Whirling Accelerandos. |
Bonus effects
Bonus effects are special events that can occur on any given floor, and are marked as such inside the floor selection screen. A bonus event can consist of one of two potential options: Color Chip Saturation and Bonus Objective.
Color Chip Saturation
If a Bonus Event is a Color Chip Saturation, any empty slots in the Palette are filled with random chips from the same tone.
If it is a Drone Chip Saturation, these chips can bypass any limits on the Drone, granting them up to a full suite of five Drone skills even if the hack for drone slots isn't maxed out, and including all potential Drone skills, even those which are currently not brought or active.
Note that if the Palette is filled, a Color Chip Saturation event can never happen.
Bonus Objective
If a Bonus Event is a Bonus Objective, an objective is chosen to act as an optional limitation. Completing the floor while adhering to the limitation imposed by the Bonus Objective yields an additional Membux reward equal to the floor's advertised completion reward, with a minimum bonus of ![]() 100 for floors of sufficiently small value. Actions taken which violate the Bonus Objective reduce the bonus reward given upon floor completion, indicated by a counter in the top-left corner of the HUD. Bonus objectives do not spawn until the player has reached 12F for the first time.
100 for floors of sufficiently small value. Actions taken which violate the Bonus Objective reduce the bonus reward given upon floor completion, indicated by a counter in the top-left corner of the HUD. Bonus objectives do not spawn until the player has reached 12F for the first time.
| Bonus Objective | Breach Limit | Information |
|---|---|---|
| Don't use your main weapon! | This objective has the Membux reward tied to using the main weapon—using sub weapons, specials and the Pearl Drone does not reduce the reward, but each shot of the main weapon reduces the reward accordingly. | |
| Don't use your sub weapon! | 6 Uses | This objective tells the player how many times they can use the sub equipped before forfeiting the reward fully, and each use of one reduces the reward accordingly. |
| Don't use special weapon! | 3 Uses | This objective is akin to the sub weapon one as it tells the player how many times they can use the special equipped before forfeiting the reward fully and using one reduces the reward accordingly. |
| Don't take damage! | If the player takes damage with this objective, the Membux reward decreases. | |
| Don't move in Octoling form! | Moving around in Octoling form reduces the reward, including hovering with the drone and most movement involving special weapons. The player is not penalised if they use a weapon that does not make them move. | |
| Don't move in swim form! | Like above, but this time moving in swim form reduces the reward. This includes any movement during Kraken Royale or Crab Tank's ball form. The player can turn into swim form on an ink patch of their color and stay still without losing any Membux. | |
| Don't glide! | The reward is tied to how long the player glides using the Pearl Drone. The automatic switch to glide mode after a certain amount of airtime can be overridden by entering swim form, attacking with a main weapon, or readying a sub weapon. | |
| Don't jump! | 10 Jumps | The reward is tied to how many times the player jumps or Squid Rolls. This only counts successful manual jump inputs—airtime gained from level elements such as dash tracks and inkrails, Spiccato springs, climbing walls in swim form, or simply walking off ledges are not counted, so long as the player did not jump to reach them. |
Danger effects
Danger effects are debuff events that can occur on any given floor and are marked as such inside the floor selection screen. Danger level floors contain an augmentation similar to Salmon Run Next Wave's Known Occurrences. If a player decides to avoid a floor marked with danger upon its initial appearance, the danger augmentation is more likely to re-appear over more floors in the player's floor selection screen throughout the run until a floor with the danger effect is selected. It is possible for a danger effect to become unavoidable and persist for the rest of a run. Danger effects do not spawn until 15F is reached for the first time during a run.
There are a total of nine different danger effects, or which any one could spawn on any floor: six single danger effects, and three combo danger effects that combine two danger effects together.
| Danger augment | Description |
|---|---|
| The stage is dark, making it difficult to see the terrain and enemies. | |
| Agent 8 must fight on a main platform that is fully covered in enemy ink (excluding zones if applicable). | |
| Agent 8 must fight without the help of the Pearl Drone (this includes gliding and the Step-Off song). | |
| Enemies do not drop items when killed. Crates still drop items, and the Drone Items chips still work as well. | |
| Agent 8 must battle Jelletons that are in their tougher form immediately, rather than after some time left alive. | |
| Homing Arpeggios continuously spawn and attack at unpredictable intervals. | |
| Combined Danger Augments | |
Lights Out + Ink Coating |
Not only is the stage darkened, making it hard to see, but (barring any Zones) the entire floor is covered in enemy ink. |
No Pearl Drone + No Item Drops |
Not only is the Pearl Drone disabled, but the Jelletons do not drop any items. Items still drop from crates. |
Stronger Jelletons + Arpeggio Barrage |
Not only are all Jelletons in their tougher forms immediately, but Homing Arpeggios continuously spawn and attack Eight. |
Trivia
- In the September 2023 Nintendo Direct trailer of Side Order, the names of the floors do not have their formatting seen in the final game, now being shown to be written plainly rather than being formatted similar to a computer file.
- The jingles that play after clearing a floor (excluding the Control Room) reference various songs by Off the Hook.
- On the first climb, the jingle references Color Pulse.
- Outside of the first climb, the jingle on clearing a non-boss floor references Spectrum Obligato ~ Ebb & Flow (Out of Order).
- The jingle on clearing a boss floor references We're So Back.
- It is possible to revisit the first climb by interacting with the headset found to the left of the elevator. However, no Prlz are rewarded for completing the first climb again, and the Palette equipped is set to Pearl's.
Names in other languages
| Language | Name | Meaning |
|---|---|---|
| フロア Furoa |
Floor | |
| Etage | Floor | |
| Étage | Floor | |
| Etage | Floor | |
| Piano | Floor | |
| Этаж Etazh |
Floor | |
| Piso | Floor | |
| 플로어 peullo-eo |
Floor |
| Language | Name | Meaning |
|---|---|---|
| Tintenverzadiging | Tint saturation / satiety | |
| Monochromisme | Monochromism | |
| Saturazione schede colore | Color chip saturation | |
| Тональный овердрайв Tonal'nyy overdrayv |
Tone overdrive |
|
|

