Ranked Battle: Difference between revisions
(→Trivia) Tags: mobile edit mobile web edit |
GloverMist (talk | contribs) m (Text replacement - "nintendo.pt" to "nintendo.com/pt-pt") |
||
| (53 intermediate revisions by 22 users not shown) | |||
| Line 1: | Line 1: | ||
{{ | {{For|the similar mode in [[Splatoon 3]]|Anarchy Battle}} | ||
{{Infobox/Mode | |||
| color = {{SiteColor|Generic}} | | color = {{SiteColor|Generic}} | ||
| title = Ranked Battle | | title = Ranked Battle | ||
| image = | | image = S2 Icon Ranked Battle.svg | ||
| caption = Face off in more competitive battles.{{NA}}<br/>Face off in a more competitive battle.{{EUOC}} | | caption = Face off in more competitive battles.{{NA}}<br/>Face off in a more competitive battle.{{EUOC}} | ||
| type = Online multiplayer [[mode]] | | type = Online multiplayer [[mode]] | ||
| Line 11: | Line 13: | ||
| release = '''''Splatoon'''''<br>{{date|2015-06-02}}<br>'''''Splatoon 2'''''<br>Launch | | release = '''''Splatoon'''''<br>{{date|2015-06-02}}<br>'''''Splatoon 2'''''<br>Launch | ||
}} | }} | ||
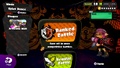
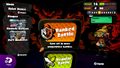
'''Ranked Battle''' is one of the multiplayer [[mode]] categories in | '''Ranked Battle''' is one of the multiplayer [[mode]] categories in {{S}} and {{S2}}. Unlike [[Regular Battle]]s, which only feature [[Turf War]]s, Ranked Battles come in multiple different modes that cycle along with [[stage]]s. Ranked Battles can last for up to five minutes, unlike the unchanging three-minute time limit in Turf Wars. Ranked Battles are accessible only once a player reaches [[level]] 10. Wins and losses in Ranked Battles are counted toward players' [[rank]]s, which are used for matchmaking in the mode. [[Squad Battle]]s in ''Splatoon'' and [[League Battle]]s in ''Splatoon 2'' are variants of Ranked Battles that can be played with friends and a different ranking system. In {{S3}}, Ranked Battles are replaced by the similar [[Anarchy Battle]]s. | ||
== History == | == History == | ||
| Line 20: | Line 20: | ||
=== ''Splatoon 2'' === | === ''Splatoon 2'' === | ||
Ranked Battles were available at launch with ''[[Splatoon 2]]'', though players still must obtain Level 10 to play. All modes were kept from the previous games, with minor improvements made. Along with version {{Ver|S2|2.1.0}} on {{date|2017-12-13}}, a new mode called [[Clam Blitz]] was added. A new rank, [[Rank X]], was added on {{date|2018-04-25}} with version {{Ver|S2|3.0.0}}. | Ranked Battles were available at launch with ''[[Splatoon 2]]'', though players still must obtain Level 10 to play. All modes were kept from the previous games, with minor improvements made. Along with version {{Ver|S2|2.1.0}} on {{date|2017-12-13}}, a new mode called [[Clam Blitz]] was added. A new rank, [[Rank#Rank X|Rank X]], was added on {{date|2018-04-25}} with version {{Ver|S2|3.0.0}}. | ||
==List of ranked modes== | ==List of ranked modes== | ||
{| class="wikitable sitecolor-generic" | {| class="wikitable sitecolor-generic" | ||
|- | |- | ||
! style="width: 7em;" rowspan=" | ! style="width: 7em;" rowspan="2"| Mode | ||
! rowspan="2" | Description | ! rowspan="2" | Description | ||
! rowspan="2" | Release date (UTC) | ! rowspan="2" | Release date (UTC) | ||
! colspan=" | ! colspan="3" | Games | ||
|- | |- | ||
! style="width: 3em;" | [[File:Splatoon "S" icon.svg|x35px|link=Splatoon]] | ! style="width: 3em;" | [[File:Splatoon "S" icon.svg|x35px|link=Splatoon]] | ||
! style="width: 3em;" | [[File:Splatoon 2 "2" icon.svg|x35px|link=Splatoon 2]] | ! style="width: 3em;" | [[File:Splatoon 2 "2" icon.svg|x35px|link=Splatoon 2]] | ||
|- | |- | ||
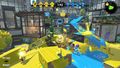
| style="text-align: center;" | [[File:Mode Icon Splat Zones.png|64px|link=Splat Zones]]<br>'''[[Splat Zones]]''' | | style="text-align: center;" | [[File:Mode Icon Splat Zones.png|64px|link=Splat Zones]]<br>'''[[Splat Zones]]''' | ||
| Plays similarly to the King of the Hill mode from other video games. It revolves around a central "zone" or "zones", which players must attempt to cover in [[ink]]. Whoever retains the zone for a certain amount of time wins. | | Plays similarly to the King of the Hill mode from other video games. It revolves around a central "zone" or "zones", which players must attempt to cover in [[ink]]. Whoever retains the zone for a certain amount of time wins. | ||
| {{date|2015-06-02}} | | {{date|2015-06-02}} | ||
| {{ | | {{yea}} | ||
| {{ | | {{yea}} | ||
|- | |- | ||
| style="text-align: center;" | [[File:Mode Icon Tower Control.png|64px|link=Tower Control]]'''<br>[[Tower Control]]''' | | style="text-align: center;" | [[File:Mode Icon Tower Control.png|64px|link=Tower Control]]'''<br>[[Tower Control]]''' | ||
| A player must take control of a tower located in the center of a map and ride it towards the enemy base. The first team to get the tower to their enemy's base wins. | | A player must take control of a tower located in the center of a map and ride it towards the enemy base. The first team to get the tower to their enemy's base wins. | ||
| {{date|2015-07-02}} | | {{date|2015-07-02}} | ||
| {{ | | {{yea}} | ||
| {{ | | {{yea}} | ||
|- | |- | ||
| style="text-align: center;" | [[File:Mode Icon Rainmaker.png|64px|link=Rainmaker]]<br>'''[[Rainmaker]]''' | | style="text-align: center;" | [[File:Mode Icon Rainmaker.png|64px|link=Rainmaker]]<br>'''[[Rainmaker]]''' | ||
| A player must grab and take the Rainmaker weapon to a pedestal near the enemy team's spawn point. The team who carries the Rainmaker furthest towards their respective pedestal wins. | | A player must grab and take the Rainmaker weapon to a pedestal near the enemy team's spawn point. The team who carries the Rainmaker furthest towards their respective pedestal wins. | ||
| {{date|2015-08-15}} | | {{date|2015-08-15}} | ||
| {{ | | {{yea}} | ||
| {{ | | {{yea}} | ||
|- | |- | ||
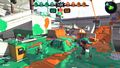
| style="text-align: center;" | [[File:Mode Icon Clam Blitz.png|64px|link=Clam Blitz]]<br>'''[[Clam Blitz]]''' | | style="text-align: center;" | [[File:Mode Icon Clam Blitz.png|64px|link=Clam Blitz]]<br>'''[[Clam Blitz]]''' | ||
| Players pick up clams scattered around the stage and try to score as many points as they can by throwing the clams in their respective goal. | | Players pick up clams scattered around the stage and try to score as many points as they can by throwing the clams in their respective goal. | ||
| {{date|2017-12-13}} | | {{date|2017-12-13}} | ||
! | |||
| {{yea}} | |||
| {{ | |||
|} | |} | ||
==Stage schedule== | ==Stage schedule== | ||
===''Splatoon''=== | ===''Splatoon''=== | ||
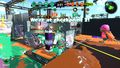
Stages rotate out every four hours along with the stages from [[Turf War]], at 02:00, 06:00, 10:00, 14:00, 18:00, and 22:00 UTC. The change in stages is accompanied by an announcement from the [[Squid Sisters]]. This announcement also | Stages rotate out every four hours along with the stages from [[Turf War]], at 02:00, 06:00, 10:00, 14:00, 18:00, and 22:00 UTC. The change in stages is accompanied by an announcement from the [[Squid Sisters]]. This announcement also kicks all players out of the [[lobby|lobby]] after they finish their current match. The mode also rotates between Splat Zones, Tower Control, and Rainmaker at the same time. | ||
===''Splatoon 2''=== | ===''Splatoon 2''=== | ||
Similar to ''Splatoon'', ''Splatoon 2'' features stage rotation every two hours, where [[Off the Hook]] gives an announcement when the stages and mode change. Players can also view the stage schedule from their smart device using [[SplatNet 2]] on the Nintendo Switch Online app. However, since Version {{Ver|S2|3.0.0}}, the stages chosen each come from a list of eight stages per Ranked Battle mode that change every month with the X Power reset. | Similar to ''Splatoon'', ''Splatoon 2'' features stage rotation every two hours, where [[Off the Hook]] gives an announcement when the stages and mode change. Players can also view the stage schedule from their smart device using [[SplatNet 2]] on the Nintendo Switch Online app. However, since Version {{Ver|S2|3.0.0}}, the stages chosen each come from a list of eight stages per Ranked Battle mode that change every month with the X Power reset. | ||
==== | =====Monthly Rotations===== | ||
The rotations in the last year since the stages were revamped have been being recycled so here they are by month below: | |||
{| class="wikitable mw-collapsible mw-collapsed" | {| class="wikitable mw-collapsible mw-collapsed" | ||
|- | |- | ||
! scope="col"| | ! scope="col"| Month | ||
! scope="col"| Splat Zones | ! scope="col"| Splat Zones | ||
! scope="col"| Tower Control | ! scope="col"| Tower Control | ||
| Line 127: | Line 75: | ||
! scope="col"| Clam Blitz | ! scope="col"| Clam Blitz | ||
|- | |- | ||
! scope="row"| | ! scope="row"| January | ||
| | | | ||
*[[ | * [[The Reef]] | ||
*[[ | * [[Inkblot Art Academy]] | ||
*[[ | * [[Sturgeon Shipyard]] | ||
*[[ | * [[Manta Maria]] | ||
*[[ | * [[Blackbelly Skatepark]] | ||
*[[ | * [[MakoMart]] | ||
*[[ | * [[Shellendorf Institute]] | ||
*[[ | * [[Arowana Mall]] | ||
| | | | ||
*[[ | * [[Musselforge Fitness]] | ||
*[[ | * [[Inkblot Art Academy]] | ||
*[[ | * [[Moray Towers]] | ||
*[[ | * [[Manta Maria]] | ||
*[[ | * [[Snapper Canal]] | ||
*[[ | * [[Goby Arena]] | ||
*[[Wahoo World]] | * [[Wahoo World]] | ||
*[[ | * [[Skipper Pavilion]] | ||
| | | | ||
*[[ | * [[The Reef]] | ||
*[[ | * [[Musselforge Fitness]] | ||
*[[ | * [[Humpback Pump Track]] | ||
*[[ | * [[Walleye Warehouse]] | ||
*[[ | * [[Piranha Pit]] | ||
*[[ | * [[Camp Triggerfish]] | ||
*[[ | * [[New Albacore Hotel]] | ||
*[[ | * [[Ancho-V Games]] | ||
| | | | ||
*[[ | * [[Starfish Mainstage]] | ||
*[[ | * [[Humpback Pump Track]] | ||
*[[ | * [[Port Mackerel]] | ||
*[[ | * [[Kelp Dome]] | ||
*[[ | * [[MakoMart]] | ||
*[[ | * [[Piranha Pit]] | ||
*[[ | * [[Ancho-V Games]] | ||
*[[ | * [[Skipper Pavilion]] | ||
|- | |- | ||
! scope="row"| | ! scope="row"| February | ||
| | | | ||
*[[Starfish Mainstage]] | *[[Starfish Mainstage]] | ||
| Line 963: | Line 151: | ||
*[[New Albacore Hotel]] | *[[New Albacore Hotel]] | ||
|- | |- | ||
! scope="row"| | ! scope="row"| March | ||
| | | | ||
*[[The Reef]] | *[[The Reef]] | ||
| Line 1,001: | Line 189: | ||
*[[Ancho-V Games]] | *[[Ancho-V Games]] | ||
|- | |- | ||
! scope="row"| | ! scope="row"| April | ||
| | | | ||
*[[Starfish Mainstage]] | *[[Starfish Mainstage]] | ||
| Line 1,039: | Line 227: | ||
*[[Skipper Pavilion]] | *[[Skipper Pavilion]] | ||
|- | |- | ||
! scope="row"| | ! scope="row"| May | ||
| | | | ||
*[[Musselforge Fitness]] | *[[Musselforge Fitness]] | ||
| Line 1,063: | Line 251: | ||
*[[Starfish Mainstage]] | *[[Starfish Mainstage]] | ||
*[[Humpback Pump Track]] | *[[Humpback Pump Track]] | ||
*[[Manta Maria]] | *[[Manta Maria]] | ||
*[[Shellendorf Institute]] | |||
*[[Piranha Pit]] | *[[Piranha Pit]] | ||
*[[Camp Triggerfish]] | *[[Camp Triggerfish]] | ||
| Line 1,077: | Line 265: | ||
*[[Ancho-V Games]] | *[[Ancho-V Games]] | ||
|- | |- | ||
! scope="row"| | ! scope="row"| June | ||
| | | | ||
*[[The Reef]] | *[[The Reef]] | ||
| Line 1,115: | Line 303: | ||
*[[Skipper Pavilion]] | *[[Skipper Pavilion]] | ||
|- | |- | ||
! scope="row"| | ! scope="row"| July | ||
| | | | ||
*[[Musselforge Fitness]] | *[[Musselforge Fitness]] | ||
| Line 1,137: | Line 325: | ||
*[[Musselforge Fitness]] | *[[Musselforge Fitness]] | ||
*[[Starfish Mainstage]] | *[[Starfish Mainstage]] | ||
*[[Manta Maria]] | *[[Manta Maria]] | ||
*[[Snapper Canal]] | *[[Snapper Canal]] | ||
| Line 1,143: | Line 330: | ||
*[[Goby Arena]] | *[[Goby Arena]] | ||
*[[Piranha Pit]] | *[[Piranha Pit]] | ||
*[[Camp Triggerfish]] | |||
| | | | ||
*[[The Reef]] | *[[The Reef]] | ||
| Line 1,153: | Line 341: | ||
*[[New Albacore Hotel]] | *[[New Albacore Hotel]] | ||
|- | |- | ||
! scope="row"| | ! scope="row"| August | ||
| | | | ||
*[[The Reef]] | *[[The Reef]] | ||
*[[Humpback Pump Track]] | *[[Humpback Pump Track]] | ||
*[[ | *[[Inkblot Art Academy]] | ||
*[[ | *[[Kelp Dome]] | ||
*[[ | *[[Arowana Mall]] | ||
*[[Piranha Pit]] | *[[Piranha Pit]] | ||
*[[ | *[[Wahoo World]] | ||
*[[Skipper Pavilion]] | *[[Skipper Pavilion]] | ||
| | | | ||
| Line 1,191: | Line 379: | ||
*[[Camp Triggerfish]] | *[[Camp Triggerfish]] | ||
|- | |- | ||
! scope="row"| | ! scope="row"| September | ||
| | | | ||
*[[Starfish Mainstage]] | *[[Starfish Mainstage]] | ||
| Line 1,213: | Line 401: | ||
*[[Musselforge Fitness]] | *[[Musselforge Fitness]] | ||
*[[Humpback Pump Track]] | *[[Humpback Pump Track]] | ||
*[[Manta Maria]] | *[[Manta Maria]] | ||
*[[Kelp Dome]] | *[[Kelp Dome]] | ||
*[[Snapper Canal]] | *[[Snapper Canal]] | ||
*[[Shellendorf Institute]] | *[[Shellendorf Institute]] | ||
*[[Goby Arena]] | |||
*[[Piranha Pit]] | *[[Piranha Pit]] | ||
| | | | ||
| Line 1,229: | Line 417: | ||
*[[New Albacore Hotel]] | *[[New Albacore Hotel]] | ||
|- | |- | ||
! scope="row"| | ! scope="row"| October | ||
| | | | ||
*[[The Reef]] | *[[The Reef]] | ||
| Line 1,240: | Line 428: | ||
*[[Camp Triggerfish]] | *[[Camp Triggerfish]] | ||
| | | | ||
*[[Starfish Mainstage]] | * [[Starfish Mainstage]] | ||
* [[Humpback Pump Track]] | |||
* [[Sturgeon Shipyard]] | |||
* [[Kelp Dome]] | |||
* [[MakoMart]] | |||
* [[Shellendorf Institute]] | |||
* [[Wahoo World]] | |||
* [[Ancho-V Games]] | |||
| | |||
* [[Starfish Mainstage]] | |||
* [[Sturgeon Shipyard]] | |||
* [[Blackbelly Skatepark]] | |||
* [[MakoMart]] | |||
* [[Walleye Warehouse]] | |||
* [[Wahoo World]] | |||
* [[New Albacore Hotel]] | |||
* [[Skipper Pavilion]] | |||
| | |||
* [[Musselforge Fitness]] | |||
* [[Inkblot Art Academy]] | |||
* [[Moray Towers]] | |||
* [[Snapper Canal]] | |||
* [[Walleye Warehouse]] | |||
* [[Shellendorf Institute]] | |||
* [[Arowana Mall]] | |||
* [[Goby Arena]] | |||
|- | |||
! scope="row"| November | |||
| | |||
* [[Starfish Mainstage]] | |||
* [[Inkblot Art Academy]] | |||
* [[Sturgeon Shipyard]] | |||
* [[Snapper Canal]] | |||
* [[Blackbelly Skatepark]] | |||
* [[MakoMart]] | |||
* [[Arowana Mall]] | |||
* [[Wahoo World]] | |||
| | |||
* [[Musselforge Fitness]] | |||
* [[Inkblot Art Academy]] | |||
* [[Manta Maria]] | |||
* [[Snapper Canal]] | |||
* [[Walleye Warehouse]] | |||
* [[Goby Arena]] | |||
* [[New Albacore Hotel]] | |||
* [[Skipper Pavilion]] | |||
| | |||
* [[The Reef]] | |||
* [[Humpback Pump Track]] | |||
* [[Moray Towers]] | |||
* [[Port Mackerel]] | |||
* [[Shellendorf Institute]] | |||
* [[Piranha Pit]] | |||
* [[Camp Triggerfish]] | |||
* [[Ancho-V Games]] | |||
| | |||
* [[Starfish Mainstage]] | |||
* [[Humpback Pump Track]] | |||
* [[Kelp Dome]] | |||
* [[Blackbelly Skatepark]] | |||
* [[MakoMart]] | |||
* [[Piranha Pit]] | |||
* [[Ancho-V Games]] | |||
* [[Skipper Pavilion]] | |||
|- | |||
! scope="row"| December | |||
| | |||
* [[Musselforge Fitness]] | |||
* [[Humpback Pump Track]] | |||
* [[Moray Towers]] | |||
* [[Port Mackerel]] | |||
* [[Walleye Warehouse]] | |||
* [[Piranha Pit]] | |||
* [[Ancho-V Games]] | |||
* [[Skipper Pavilion]] | |||
| | |||
* [[The Reef]] | |||
* [[Starfish Mainstage]] | |||
* [[Humpback Pump Track]] | |||
* [[Sturgeon Shipyard]] | |||
* [[Kelp Dome]] | |||
* [[MakoMart]] | |||
* [[Piranha Pit]] | |||
* [[Camp Triggerfish]] | |||
| | |||
* [[Inkblot Art Academy]] | |||
* [[Sturgeon Shipyard]] | |||
* [[Manta Maria]] | |||
* [[Kelp Dome]] | |||
* [[Blackbelly Skatepark]] | |||
* [[MakoMart]] | |||
* [[Arowana Mall]] | |||
* [[Wahoo World]] | |||
| | |||
* [[The Reef]] | |||
* [[Inkblot Art Academy]] | |||
* [[Manta Maria]] | |||
* [[Snapper Canal]] | |||
* [[Shellendorf Institute]] | |||
* [[Goby Arena]] | |||
* [[Wahoo World]] | |||
* [[New Albacore Hotel]] | |||
|} | |||
=====Previous Ranked stages since 3.0.0===== | |||
The rotations for a given month are the same month-on-month, as described above. However when a [[stage]] is newly released or changed, the rotation for the month also changes to show it off: | |||
{| class="wikitable mw-collapsible mw-collapsed" | |||
|- | |||
! scope="col" | Month | |||
! scope="col" | Splat Zones | |||
! scope="col" | Tower Control | |||
! scope="col" | Rainmaker | |||
! scope="col" | Clam Blitz | |||
|- | |||
! scope="row" |May 2018 | |||
<sup>New Stage: Camp Triggerfish</sup> | |||
[[File:S2 Stage Camp Triggerfish.png|Camp Triggerfish|300px]] | |||
| | |||
*[[The Reef]] | |||
*[[Humpback Pump Track]] | |||
*[[Inkblot Art Academy]] | |||
*[[MakoMart]] | |||
*[[Walleye Warehouse]] | |||
*[[Goby Arena]] | |||
*[[Piranha Pit]] | |||
*[[Camp Triggerfish]]<sup>New!</sup> | |||
| | |||
*[[The Reef]] | |||
*[[Humpback Pump Track]] | *[[Humpback Pump Track]] | ||
*[[Sturgeon Shipyard]] | *[[Sturgeon Shipyard]] | ||
*[[Manta Maria]] | |||
*[[Kelp Dome]] | *[[Kelp Dome]] | ||
*[[ | *[[Snapper Canal]] | ||
*[[ | *[[Arowana Mall]] | ||
*[[ | *[[Camp Triggerfish]]<sup>New!</sup> | ||
| | | | ||
*[[Sturgeon Shipyard]] | *[[Sturgeon Shipyard]] | ||
*[[ | *[[Moray Towers]] | ||
*[[Port Mackerel]] | |||
*[[Manta Maria]] | |||
*[[Kelp Dome]] | |||
*[[MakoMart]] | *[[MakoMart]] | ||
*[[ | *[[Shellendorf Institute]] | ||
*[[ | *[[Camp Triggerfish]]<sup>New!</sup> | ||
| | | | ||
*[[Musselforge Fitness]] | *[[Musselforge Fitness]] | ||
*[[Starfish Mainstage]] | |||
*[[Inkblot Art Academy]] | *[[Inkblot Art Academy]] | ||
*[[Snapper Canal]] | *[[Snapper Canal]] | ||
*[[ | *[[Blackbelly Skatepark]] | ||
*[[Arowana Mall]] | *[[Arowana Mall]] | ||
*[[ | *[[Piranha Pit]] | ||
*[[Camp Triggerfish]]<sup>New!</sup> | |||
|- | |- | ||
! scope="row"| | ! scope="row" |June 2018 | ||
<sup>New Stage: Wahoo World</sup> | |||
[[File:S2 Stage Wahoo World.png|Wahoo World|300px]] | |||
| | | | ||
*[[Starfish Mainstage]] | *[[Starfish Mainstage]] | ||
*[[Inkblot Art Academy]] | *[[Inkblot Art Academy]] | ||
*[[Sturgeon Shipyard]] | *[[Sturgeon Shipyard]] | ||
*[[Port Mackerel]] | |||
*[[Manta Maria]] | |||
*[[Snapper Canal]] | *[[Snapper Canal]] | ||
*[[Shellendorf Institute]] | |||
*[[Wahoo World]]<sup>New!</sup> | |||
| | |||
*[[Inkblot Art Academy]] | |||
*[[Moray Towers]] | |||
*[[Blackbelly Skatepark]] | *[[Blackbelly Skatepark]] | ||
*[[MakoMart]] | *[[MakoMart]] | ||
*[[ | *[[Goby Arena]] | ||
*[[Wahoo World]] | *[[Piranha Pit]] | ||
*[[Camp Triggerfish]] | |||
*[[Wahoo World]]<sup>New!</sup> | |||
| | | | ||
*[[The Reef]] | |||
*[[Musselforge Fitness]] | *[[Musselforge Fitness]] | ||
*[[Snapper Canal]] | *[[Snapper Canal]] | ||
*[[Walleye Warehouse]] | *[[Walleye Warehouse]] | ||
*[[Arowana Mall]] | |||
*[[Goby Arena]] | *[[Goby Arena]] | ||
*[[Camp Triggerfish]] | *[[Camp Triggerfish]] | ||
*[[ | *[[Wahoo World]]<sup>New!</sup> | ||
| | | | ||
*[[Humpback Pump Track]] | *[[Humpback Pump Track]] | ||
*[[Sturgeon Shipyard]] | |||
*[[Manta Maria]] | |||
*[[Kelp Dome]] | *[[Kelp Dome]] | ||
*[[MakoMart]] | *[[MakoMart]] | ||
*[[Walleye Warehouse]] | |||
*[[Piranha Pit]] | *[[Piranha Pit]] | ||
*[[ | *[[Wahoo World]]<sup>New!</sup> | ||
|- | |- | ||
! scope="row"| | ! scope="row" |July 2018 | ||
<sup>New Stage: New Albacore Hotel</sup> | |||
[[File:S2 Stage New Albacore Hotel.png|New Albacore Hotel|300px]] | |||
| | | | ||
*[[Musselforge Fitness]] | *[[Musselforge Fitness]] | ||
*[[Humpback Pump Track]] | *[[Humpback Pump Track]] | ||
*[[ | *[[Kelp Dome]] | ||
*[[ | *[[Blackbelly Skatepark]] | ||
*[[ | *[[MakoMart]] | ||
*[[ | *[[Arowana Mall]] | ||
*[[ | *[[Camp Triggerfish]] | ||
*[[ | *[[New Albacore Hotel]]<sup>New!</sup> | ||
| | | | ||
*[[ | *[[Musselforge Fitness]] | ||
*[[Starfish Mainstage]] | *[[Starfish Mainstage]] | ||
*[[Sturgeon Shipyard]] | *[[Sturgeon Shipyard]] | ||
*[[ | *[[Manta Maria]] | ||
*[[ | *[[Snapper Canal]] | ||
*[[ | *[[Walleye Warehouse]] | ||
*[[ | *[[Wahoo World]] | ||
*[[New Albacore Hotel]]<sup>New!</sup> | |||
| | | | ||
*[[Humpback Pump Track]] | |||
*[[Inkblot Art Academy]] | *[[Inkblot Art Academy]] | ||
*[[Sturgeon Shipyard]] | *[[Sturgeon Shipyard]] | ||
*[[Manta Maria]] | *[[Manta Maria]] | ||
*[[Kelp Dome]] | *[[Kelp Dome]] | ||
*[[MakoMart]] | *[[MakoMart]] | ||
*[[Piranha Pit]] | |||
*[[New Albacore Hotel]]<sup>New!</sup> | |||
| | |||
*[[The Reef]] | |||
*[[Moray Towers]] | |||
*[[Port Mackerel]] | |||
*[[Shellendorf Institute]] | |||
*[[Arowana Mall]] | *[[Arowana Mall]] | ||
*[[Goby Arena]] | |||
*[[Wahoo World]] | *[[Wahoo World]] | ||
*[[New Albacore Hotel]]<sup>New!</sup> | |||
|- | |||
! scope="row" |August 2018 | |||
<sup>New Stage: Ancho-V Games</sup> | |||
[[File:S2 Stage Ancho-V Games.png|Ancho-V Games|300px]] | |||
| | | | ||
*[[ | *[[Sturgeon Shipyard]] | ||
*[[Manta Maria]] | *[[Manta Maria]] | ||
*[[Snapper Canal]] | *[[Snapper Canal]] | ||
*[[ | *[[Walleye Warehouse]] | ||
*[[Goby Arena]] | *[[Goby Arena]] | ||
*[[Piranha Pit]] | |||
*[[Wahoo World]] | *[[Wahoo World]] | ||
*[[ | *[[Ancho-V Games]]<sup>New!</sup> | ||
! | |||
| | | | ||
*[[The Reef]] | *[[The Reef]] | ||
*[[Inkblot Art Academy]] | *[[Inkblot Art Academy]] | ||
*[[ | *[[Port Mackerel]] | ||
*[[MakoMart]] | *[[MakoMart]] | ||
*[[Shellendorf Institute]] | *[[Shellendorf Institute]] | ||
*[[ | *[[Piranha Pit]] | ||
*[[New Albacore Hotel]] | |||
*[[Ancho-V Games]]<sup>New!</sup> | |||
| | | | ||
*[[Musselforge Fitness]] | *[[Musselforge Fitness]] | ||
*[[Moray Towers]] | *[[Moray Towers]] | ||
*[[Walleye Warehouse]] | *[[Walleye Warehouse]] | ||
*[[ | *[[Arowana Mall]] | ||
*[[Camp Triggerfish]] | *[[Camp Triggerfish]] | ||
*[[Wahoo World]] | |||
*[[New Albacore Hotel]] | *[[New Albacore Hotel]] | ||
*[[Ancho-V Games]] | *[[Ancho-V Games]]<sup>New!</sup> | ||
| | | | ||
*[[Starfish Mainstage]] | *[[Starfish Mainstage]] | ||
*[[Humpback Pump Track]] | *[[Humpback Pump Track]] | ||
*[[ | *[[Inkblot Art Academy]] | ||
*[[Sturgeon Shipyard]] | |||
*[[Kelp Dome]] | *[[Kelp Dome]] | ||
*[[Blackbelly Skatepark]] | |||
*[[MakoMart]] | *[[MakoMart]] | ||
*[[Ancho-V Games]]<sup>New!</sup> | |||
*[[Ancho-V Games]] | |||
|- | |- | ||
! scope="row"| | ! scope="row" |September 2018 | ||
<sup>Stage Rennovation: Starfish Mainstage</sup> | |||
[[File:S2 Stage Starfish Mainstage.png|Starfish Mainstage|300px]] | |||
| | | | ||
*[[Starfish Mainstage]] | *[[The Reef]] | ||
*[[ | *[[Starfish Mainstage]]<sup>Revamped!</sup> | ||
*[[Inkblot Art Academy]] | |||
*[[Moray Towers]] | *[[Moray Towers]] | ||
*[[ | *[[Port Mackerel]] | ||
*[[ | *[[MakoMart]] | ||
*[[ | *[[Arowana Mall]] | ||
*[[Ancho-V Games]] | *[[Ancho-V Games]] | ||
| | | | ||
*[[Starfish Mainstage]]<sup>Revamped!</sup> | |||
*[[Starfish Mainstage]] | |||
*[[Humpback Pump Track]] | *[[Humpback Pump Track]] | ||
*[[Sturgeon Shipyard]] | *[[Sturgeon Shipyard]] | ||
*[[ | *[[Kelp Dome]] | ||
*[[ | *[[Blackbelly Skatepark]] | ||
*[[ | *[[Goby Arena]] | ||
*[[ | *[[Wahoo World]] | ||
*[[Ancho-V Games]] | |||
| | | | ||
*[[Starfish Mainstage]]<sup>Revamped!</sup> | |||
*[[Inkblot Art Academy]] | *[[Inkblot Art Academy]] | ||
*[[Sturgeon Shipyard]] | *[[Sturgeon Shipyard]] | ||
*[[Manta Maria]] | *[[Manta Maria]] | ||
*[[Kelp Dome]] | |||
*[[Snapper Canal]] | *[[Snapper Canal]] | ||
*[[ | *[[MakoMart]] | ||
*[[ | *[[Piranha Pit]] | ||
| | | | ||
*[[Musselforge Fitness]] | *[[Musselforge Fitness]] | ||
*[[ | *[[Starfish Mainstage]]<sup>Revamped!</sup> | ||
*[[Snapper Canal]] | |||
*[[Walleye Warehouse]] | *[[Walleye Warehouse]] | ||
*[[ | *[[Shellendorf Institute]] | ||
*[[ | *[[Camp Triggerfish]] | ||
*[[Wahoo World]] | *[[Wahoo World]] | ||
*[[New Albacore Hotel]] | *[[New Albacore Hotel]] | ||
|- | |- | ||
! scope="row"| | ! scope="row" |October 2018 | ||
<sup>New Stage: Skipper Pavilion</sup> | |||
[[File:S2 Stage Skipper Pavilion.png|Skipper Pavilion|300px]] | |||
| | | | ||
*[[Musselforge Fitness]] | *[[Musselforge Fitness]] | ||
*[[ | *[[Manta Maria]] | ||
*[[ | *[[Kelp Dome]] | ||
*[[Blackbelly Skatepark]] | *[[Blackbelly Skatepark]] | ||
*[[ | *[[Goby Arena]] | ||
*[[Piranha Pit]] | *[[Piranha Pit]] | ||
*[[Skipper Pavilion]] | *[[Wahoo World]] | ||
*[[Skipper Pavilion]]<sup>New!</sup> | |||
| | | | ||
*[[ | *[[Port Mackerel]] | ||
*[[Snapper Canal]] | *[[Snapper Canal]] | ||
*[[ | *[[MakoMart]] | ||
*[[ | *[[Walleye Warehouse]] | ||
*[[ | *[[Shellendorf Institute]] | ||
*[[Arowana Mall]] | |||
*[[Camp Triggerfish]] | |||
*[[Skipper Pavilion]]<sup>New!</sup> | |||
| | | | ||
*[[The Reef]] | *[[The Reef]] | ||
*[[ | *[[Starfish Mainstage]] | ||
*[[Humpback Pump Track]] | *[[Humpback Pump Track]] | ||
*[[Walleye Warehouse]] | *[[Walleye Warehouse]] | ||
*[[ | *[[Wahoo World]] | ||
*[[New Albacore Hotel]] | *[[New Albacore Hotel]] | ||
*[[Ancho-V Games]] | |||
*[[Skipper Pavilion]]<sup>New!</sup> | |||
| | | | ||
*[[Inkblot Art Academy]] | *[[Inkblot Art Academy]] | ||
*[[Sturgeon Shipyard]] | |||
*[[Moray Towers]] | |||
*[[Manta Maria]] | *[[Manta Maria]] | ||
*[[MakoMart]] | *[[MakoMart]] | ||
*[[ | *[[Piranha Pit]] | ||
*[[Ancho-V Games]] | *[[Ancho-V Games]] | ||
*[[Skipper Pavilion]]<sup>New!</sup> | |||
|- | |- | ||
! scope="row"| | ! scope="row" |November 2018 | ||
<sup>Stage Rennovation: The Reef</sup> | |||
[[File:S2 Stage The Reef.png|The Reef|300px]] | |||
| | |||
*[[The Reef]]<sup>Revamped!</sup> | |||
*[[Starfish Mainstage]] | |||
*[[Sturgeon Shipyard]] | |||
*[[MakoMart]] | |||
*[[Walleye Warehouse]] | |||
*[[Arowana Mall]] | |||
*[[Ancho-V Games]] | |||
*[[Skipper Pavilion]] | |||
| | | | ||
*[[The Reef]]<sup>Revamped!</sup> | |||
*[[Musselforge Fitness]] | |||
*[[Starfish Mainstage]] | *[[Starfish Mainstage]] | ||
*[[ | *[[Moray Towers]] | ||
*[[Manta Maria]] | *[[Manta Maria]] | ||
*[[Wahoo World]] | *[[Wahoo World]] | ||
*[[New Albacore Hotel]] | *[[New Albacore Hotel]] | ||
*[[Ancho-V Games]] | *[[Ancho-V Games]] | ||
| | | | ||
*[[ | *[[The Reef]]<sup>Revamped!</sup> | ||
*[[Inkblot Art Academy]] | |||
*[[Sturgeon Shipyard]] | *[[Sturgeon Shipyard]] | ||
*[[ | *[[Snapper Canal]] | ||
*[[MakoMart]] | *[[MakoMart]] | ||
*[[Shellendorf Institute]] | *[[Shellendorf Institute]] | ||
*[[ | *[[Goby Arena]] | ||
*[[ | *[[Piranha Pit]] | ||
| | | | ||
*[[ | *[[The Reef]]<sup>Revamped!</sup> | ||
*[[ | *[[Humpback Pump Track]] | ||
*[[Port Mackerel]] | *[[Port Mackerel]] | ||
*[[Kelp Dome]] | *[[Kelp Dome]] | ||
*[[Blackbelly Skatepark]] | *[[Blackbelly Skatepark]] | ||
*[[ | *[[Camp Triggerfish]] | ||
*[[ | *[[Wahoo World]] | ||
*[[Skipper Pavilion]] | |||
|- | |||
! scope="row" |December 2018 | |||
<sup>Stage Rennovation: Blackbelly Skatepark</sup> | |||
[[File:S2 Stage Blackbelly Skatepark.png|The Reef|300px]] | |||
| | | | ||
*[[The Reef]] | *[[The Reef]] | ||
*[[Musselforge Fitness]] | *[[Musselforge Fitness]] | ||
*[[ | *[[Port Mackerel]] | ||
*[[ | *[[Manta Maria]] | ||
*[[ | *[[Kelp Dome]] | ||
*[[ | *[[Blackbelly Skatepark]]<sup>Revamped!</sup> | ||
*[[Wahoo World]] | *[[Wahoo World]] | ||
*[[ | *[[New Albacore Hotel]] | ||
| | | | ||
*[[ | *[[Inkblot Art Academy]] | ||
*[[Sturgeon Shipyard]] | *[[Sturgeon Shipyard]] | ||
*[[ | *[[Blackbelly Skatepark]]<sup>Revamped!</sup> | ||
*[[MakoMart]] | *[[MakoMart]] | ||
*[[ | *[[Walleye Warehouse]] | ||
*[[Arowana Mall]] | |||
*[[Piranha Pit]] | *[[Piranha Pit]] | ||
*[[Skipper Pavilion]] | *[[Skipper Pavilion]] | ||
| | | | ||
*[[The Reef]] | *[[The Reef]] | ||
*[[Starfish Mainstage]] | *[[Starfish Mainstage]] | ||
*[[Humpback Pump Track]] | *[[Humpback Pump Track]] | ||
*[[ | *[[Moray Towers]] | ||
*[[ | *[[Blackbelly Skatepark]]<sup>Revamped!</sup> | ||
*[[Camp Triggerfish]] | *[[Camp Triggerfish]] | ||
*[[Wahoo World]] | |||
*[[Skipper Pavilion]] | |||
| | | | ||
*[[ | *[[Sturgeon Shipyard]] | ||
*[[ | *[[Manta Maria]] | ||
*[[Snapper Canal]] | *[[Snapper Canal]] | ||
*[[Blackbelly Skatepark]] | *[[Blackbelly Skatepark]]<sup>Revamped!</sup> | ||
*[[ | *[[MakoMart]] | ||
*[[Shellendorf Institute]] | *[[Shellendorf Institute]] | ||
*[[Goby Arena]] | |||
*[[Ancho-V Games]] | *[[Ancho-V Games]] | ||
|- | |- | ||
! scope="row"| | ! scope="row" |August 2019 | ||
<sup>Stage Rennovation: Shellendorf Institute</sup> | |||
[[File:S2 Stage Shellendorf Institute.png|Shellendorf Institute|300px]] | |||
| | | | ||
*[[The Reef]] | *[[The Reef]] | ||
*[[Humpback Pump Track]] | *[[Humpback Pump Track]] | ||
*[[Manta Maria]] | *[[Manta Maria]] | ||
*[[Blackbelly Skatepark]] | *[[Blackbelly Skatepark]] | ||
*[[ | *[[Shellendorf Institute]]<sup>Revamped!</sup> | ||
*[[ | *[[Piranha Pit]] | ||
*[[Camp Triggerfish]] | *[[Camp Triggerfish]] | ||
*[[New Albacore Hotel]] | |||
| | | | ||
*[[ | *[[Musselforge Fitness]] | ||
*[[ | *[[Starfish Mainstage]] | ||
*[[Humpback Pump Track]] | |||
*[[Kelp Dome]] | *[[Kelp Dome]] | ||
*[[MakoMart]] | *[[MakoMart]] | ||
*[[ | *[[Shellendorf Institute]]<sup>Revamped!</sup> | ||
*[[Arowana Mall]] | |||
*[[New Albacore Hotel]] | *[[New Albacore Hotel]] | ||
| | | | ||
*[[Sturgeon Shipyard]] | *[[Sturgeon Shipyard]] | ||
*[[Blackbelly Skatepark]] | *[[Blackbelly Skatepark]] | ||
*[[MakoMart]] | *[[MakoMart]] | ||
*[[ | *[[Shellendorf Institute]]<sup>Revamped!</sup> | ||
*[[Goby Arena]] | |||
*[[Wahoo World]] | |||
*[[Ancho-V Games]] | *[[Ancho-V Games]] | ||
*[[Skipper Pavilion]] | |||
| | | | ||
*[[Inkblot Art Academy]] | *[[Inkblot Art Academy]] | ||
*[[ | *[[Moray Towers]] | ||
*[[ | *[[Port Mackerel]] | ||
*[[Manta Maria]] | *[[Manta Maria]] | ||
*[[Snapper Canal]] | *[[Snapper Canal]] | ||
*[[ | *[[Walleye Warehouse]] | ||
*[[ | *[[Shellendorf Institute]]<sup>Revamped!</sup> | ||
*[[Piranha Pit]] | *[[Piranha Pit]] | ||
|} | |} | ||
==Audio== | ==Audio== | ||
{{main|Music}} | {{main|Music}} | ||
Unlike in [[Regular Battle]]s, the music in a Ranked Battle does not change to ''[[Now or Never!]]'' when there is one minute left. | |||
===''Splatoon''=== | ===''Splatoon''=== | ||
{ | {{#section:Music|S1 Multiplayer}} | ||
| | |||
===''Splatoon 2''=== | ===''Splatoon 2''=== | ||
{ | {{#section:Music|S2 Multiplayer}} | ||
==Trivia== | ==Trivia== | ||
| Line 1,746: | Line 940: | ||
===''Splatoon''=== | ===''Splatoon''=== | ||
<gallery> | <gallery> | ||
S Lobby pre 2.0.0.jpg|Selecting Ranked Battle in the [[lobby]] pre-version {{Ver|S|2.0.0}} | |||
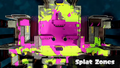
Splat Zones.jpg|Selecting Ranked Battle in the lobby | |||
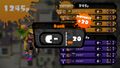
Blue vs orange knockout.gif|[[Judd]] declaring a knockout win for a Ranked Battle. <small>''(Click to animate)''</small> | Blue vs orange knockout.gif|[[Judd]] declaring a knockout win for a Ranked Battle. <small>''(Click to animate)''</small> | ||
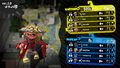
Ranked Battle rank up C-.jpg|An early screenshot of receiving [[Battle Points]] after a Ranked Battle. | Ranked Battle rank up C-.jpg|An early screenshot of receiving [[Battle Points]] after a Ranked Battle. | ||
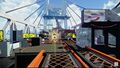
Splat Zone from above.png|[[Splat Zones]] at [[Saltspray Rig]]. | Splat Zone from above.png|[[Splat Zones]] at [[Saltspray Rig]]. | ||
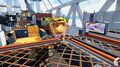
Tower Control | S Tower Control promo screenshot.jpg|[[Tower Control]] at [[Urchin Underpass]]. | ||
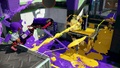
RainmakerNewp2.jpg|An [[Inkling]] carrying the [[Rainmaker]] at [[Hammerhead Bridge]]. | RainmakerNewp2.jpg|An [[Inkling]] carrying the [[Rainmaker]] at [[Hammerhead Bridge]]. | ||
RainmakerNewp3.jpg|The Rainmaker charging up. | RainmakerNewp3.jpg|The Rainmaker charging up. | ||
RainmakerNewp5.jpg|The Rainmaker firing. | RainmakerNewp5.jpg|The Rainmaker firing. | ||
Symbol RankedF.svg|Ranked | S Ranked Battle Icon.png|Ranked Battle logo. | ||
Symbol RankedF.svg|Ranked Battle logo in the lobby. | |||
S icon Ranked Battle symbol.png|Alternate version of the logo used on a KOG-brand badge. | |||
</gallery> | </gallery> | ||
| Line 1,763: | Line 960: | ||
Tower Control Splatoon 2 promo image 1.jpg|Tower Control [[Starfish Mainstage]]. | Tower Control Splatoon 2 promo image 1.jpg|Tower Control [[Starfish Mainstage]]. | ||
Nintendo Direct 18-3-8 Results Screen.png|The result screen after winning with a knockout. | Nintendo Direct 18-3-8 Results Screen.png|The result screen after winning with a knockout. | ||
SplatNet 2 icon Ranked Battle.png|[[SplatNet 2]] icon | |||
</gallery> | </gallery> | ||
<gallery widths="320px" heights="180px"> | <gallery widths="320px" heights="180px"> | ||
| Line 1,769: | Line 967: | ||
== Names in other languages == | == Names in other languages == | ||
{{ | {{Localized name | ||
|Jap=ガチマッチ | |Jap=ガチマッチ | ||
|JapR=Gachi Matchi | |JapR=Gachi Matchi | ||
|JapM=Competitive Match | |JapM=Competitive Match | ||
|Dut=Profgevecht<br>Ranglijstgevecht<ref>[https://www.nintendo.nl/Games/Wii-U/Splatoon-892510.html#gameDetails {{NES}} From ''Splatoon'''s electronic manual on nintendo.nl]</ref> | |Dut=Profgevecht (''Splatoon 2'')<br>Ranglijstgevecht (''Splatoon''<ref>[https://www.nintendo.com/nl-nl/Games/Wii-U/Splatoon-892510.html#gameDetails {{NES}} From ''Splatoon'''s electronic manual on nintendo.com/nl-nl]</ref>) | ||
|DutM=Pro battle<br>Ranking list battle | |DutM=Pro battle<br>Ranking list battle | ||
|Fre=Match pro | |Fre=Match pro | ||
| Line 1,786: | Line 984: | ||
|Spa=Combate competitivo | |Spa=Combate competitivo | ||
|SpaM=Competitive Combat | |SpaM=Competitive Combat | ||
|Por=Batalha competitiva<ref>[https://www.nintendo.com/pt-pt/Jogos/Jogos-para-a-Wii-U/Splatoon-892510.html#gameDetails {{NES}} From ''Splatoon'''s electronic manual on nintendo.com/pt-pt]</ref> | |||
|PorM=Competitive battle | |||
}} | }} | ||
Latest revision as of 11:15, 12 April 2024
- For the similar mode in Splatoon 3, see Anarchy Battle.
| Type | Online multiplayer mode |
| Players | 8 (4v4) |
| Ranked | Yes |
| Weapons | All |
| Controllers | Splatoon Splatoon 2 |
| Release Date | Splatoon 2 June 2015 Splatoon 2 Launch |
Ranked Battle is one of the multiplayer mode categories in Splatoon and Splatoon 2. Unlike Regular Battles, which only feature Turf Wars, Ranked Battles come in multiple different modes that cycle along with stages. Ranked Battles can last for up to five minutes, unlike the unchanging three-minute time limit in Turf Wars. Ranked Battles are accessible only once a player reaches level 10. Wins and losses in Ranked Battles are counted toward players' ranks, which are used for matchmaking in the mode. Squad Battles in Splatoon and League Battles in Splatoon 2 are variants of Ranked Battles that can be played with friends and a different ranking system. In Splatoon 3, Ranked Battles are replaced by the similar Anarchy Battles.
History
Splatoon
Ranked Battle was released when a large amount of Splatoon players reached Level 10 on 2 June 2015. Ranks originally ranged from C- to A+. On 6 August 2015, version 2.0.0 increased the rank cap. Ranks then ranged from C- to S+.
Splatoon 2
Ranked Battles were available at launch with Splatoon 2, though players still must obtain Level 10 to play. All modes were kept from the previous games, with minor improvements made. Along with version 2.1.0 on 13 December 2017, a new mode called Clam Blitz was added. A new rank, Rank X, was added on 25 April 2018 with version 3.0.0.
List of ranked modes
| Mode | Description | Release date (UTC) | Games | ||
|---|---|---|---|---|---|
Splat Zones |
Plays similarly to the King of the Hill mode from other video games. It revolves around a central "zone" or "zones", which players must attempt to cover in ink. Whoever retains the zone for a certain amount of time wins. | 2 June 2015 | ✓ | ✓ | |
Tower Control |
A player must take control of a tower located in the center of a map and ride it towards the enemy base. The first team to get the tower to their enemy's base wins. | 2 July 2015 | ✓ | ✓ | |
Rainmaker |
A player must grab and take the Rainmaker weapon to a pedestal near the enemy team's spawn point. The team who carries the Rainmaker furthest towards their respective pedestal wins. | 15 August 2015 | ✓ | ✓ | |
Clam Blitz |
Players pick up clams scattered around the stage and try to score as many points as they can by throwing the clams in their respective goal. | 13 December 2017 | ✓ | ||
Stage schedule
Splatoon
Stages rotate out every four hours along with the stages from Turf War, at 02:00, 06:00, 10:00, 14:00, 18:00, and 22:00 UTC. The change in stages is accompanied by an announcement from the Squid Sisters. This announcement also kicks all players out of the lobby after they finish their current match. The mode also rotates between Splat Zones, Tower Control, and Rainmaker at the same time.
Splatoon 2
Similar to Splatoon, Splatoon 2 features stage rotation every two hours, where Off the Hook gives an announcement when the stages and mode change. Players can also view the stage schedule from their smart device using SplatNet 2 on the Nintendo Switch Online app. However, since Version 3.0.0, the stages chosen each come from a list of eight stages per Ranked Battle mode that change every month with the X Power reset.
Monthly Rotations
The rotations in the last year since the stages were revamped have been being recycled so here they are by month below:
| Month | Splat Zones | Tower Control | Rainmaker | Clam Blitz |
|---|---|---|---|---|
| January | ||||
| February | ||||
| March | ||||
| April | ||||
| May | ||||
| June | ||||
| July | ||||
| August | ||||
| September | ||||
| October | ||||
| November | ||||
| December |
Previous Ranked stages since 3.0.0
The rotations for a given month are the same month-on-month, as described above. However when a stage is newly released or changed, the rotation for the month also changes to show it off:
| Month | Splat Zones | Tower Control | Rainmaker | Clam Blitz |
|---|---|---|---|---|
| May 2018
New Stage: Camp Triggerfish
|
||||
| June 2018
New Stage: Wahoo World
|
||||
| July 2018
New Stage: New Albacore Hotel
|
||||
| August 2018
New Stage: Ancho-V Games
|
||||
| September 2018
Stage Rennovation: Starfish Mainstage
|
||||
| October 2018
New Stage: Skipper Pavilion
|
||||
| November 2018
Stage Rennovation: The Reef
|
||||
| December 2018
Stage Rennovation: Blackbelly Skatepark
|
||||
| August 2019
Stage Rennovation: Shellendorf Institute
|


Audio
- Main article: Music
Unlike in Regular Battles, the music in a Ranked Battle does not change to Now or Never! when there is one minute left.
Splatoon
| Fictional Band | Song Name | Audio |
|---|---|---|
| N/A | Inkopolis Lobby | |
 |
Dubble Bath | |
 |
Opening | |
| Splattack! | ||
| Ink or Sink | ||
| Seaskape | ||
| Kraken Up | ||
| Metalopod | ||
| Now or Never! | ||
 |
Shellfie | |
| Split & Splat | ||
 |
Hooked | |
| Sucker Punch | ||
| N/A | Victory! – Jingle | |
| Battle Victory | ||
| Defeat – Jingle | ||
| Battle Defeat |
Splatoon 2
| Fictional Band | Song Name | Audio |
|---|---|---|
| N/A | Without a Dop Doubt | |
| The Shoal | ||
|
Dubble Bath (DIY Remix) | |
 |
Opening | |
| Inkoming! | ||
| Rip Entry | ||
| Undertow | ||
| Don't Slip | ||
| Endolphin Surge | ||
| Now or Never! | ||
 |
Shipwreckin' | |
| Fins & Fiddles | ||
| Seafoam Shanty | ||
 |
Broken Coral | |
| Riptide Rupture | ||
 |
Blitz It! | |
| Wave Prism | ||
 |
Seasick | |
| Kinetosis | ||
| Chopscrewey | ||
| Entropical | ||
|
Victory! – Jingle | |
| Turf Master | ||
| Defeat – Jingle | ||
| Ink Another Day |
Trivia
- Once a player's rank changes after a match, a message saying "RANK CHANGED! Re-enter the lobby to pit your skills against players closer to you on rank!" appears and the player is forced to exit.
- Certain stages had stopped appearing in the stage rotation pool for Ranked Battles, as well as other online modes featuring Ranked modes. However, these stages are still playable in Private Battles.
- In Splatoon, data spanning from August 2015 - December 2016 shows the following stages hadn't appeared in those modes for a long period:[1]
- Saltspray Rig Tower Control (October 2015 - November 2016) and Rainmaker (October 2015 - November 2015, February 2016 - December 2016)
- Blackbelly Skatepark Rainmaker (October 2015 - December 2015, February 2016 - November 2016)
- Piranha Pit Rainmaker (February 2016 - December 2016)
- Port Mackerel Tower Control (October 2015 - November 2016)
- In Splatoon, data spanning from August 2015 - December 2016 shows the following stages hadn't appeared in those modes for a long period:[1]
- There was a scrapped Ranked mode, 8-Ball. Much like in the Octo Expansion, teams would shoot a ball and try to get into the enemy's goal.
- It also seems that extra walls and ramps were added, to prevent the ball from falling off the stage.
- In Splatoon 2, a player's weapon will shine at the beginning of a Ranked Battle if they are on a winning streak.[2]
Gallery
Splatoon
-
-
Selecting Ranked Battle in the lobby
-
Judd declaring a knockout win for a Ranked Battle. (Click to animate)
-
An early screenshot of receiving Battle Points after a Ranked Battle.
-
-
-
An Inkling carrying the Rainmaker at Hammerhead Bridge.
-
The Rainmaker charging up.
-
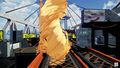
The Rainmaker firing.
-

Ranked Battle logo.
-
Ranked Battle logo in the lobby.
-

Alternate version of the logo used on a KOG-brand badge.


Splatoon 2
-
Splat Zones at Moray Towers.
-
Rainmaker at The Reef.
-
Tower Control Starfish Mainstage.
-
The result screen after winning with a knockout.
-

SplatNet 2 icon


-
Video of a rank meter being cracked for the fourth time. (link to file)
Names in other languages
| Language | Name | Meaning |
|---|---|---|
| ガチマッチ Gachi Matchi |
Competitive Match | |
| Profgevecht (Splatoon 2) Ranglijstgevecht (Splatoon[3]) |
Pro battle Ranking list battle | |
| Match pro | Pro Match | |
| Rangkampf | Rank battle | |
| Partita pro | Pro Match | |
| Бой элиты Boy elity |
Elite battle | |
| Combate competitivo | Competitive Combat | |
| Batalha competitiva[4] | Competitive battle |
Notes
References
|
|
