Sub weapon: Difference between revisions
TheTrueInky (talk | contribs) m (Edited revision 68278 by TheIdiotGamer (talk)) |
m (Tidied links + Fixed References to include titles and icons + Hide empty Notes section) |
||
| (141 intermediate revisions by 53 users not shown) | |||
| Line 1: | Line 1: | ||
[[File:Sub- | [[File:Sub-weapon (1).png|thumb|225px]] | ||
{{Quote|Divert the enemy with weapons like Splat Bombs or the Sprinkler.<br> | |||
< | Pro tip: You can try out the weapons at Ammo Knights before you buy.|{{S}}{{'s}} official website|<ref>[https://web.archive.org/web/20150525003345/https://splatoon.nintendo.com/fresh-gear/ {{NES}} Fresh gear - ''Splatoon''™ for Wii U - Items, weapons, power-ups (Archived)]</ref>}} | ||
'''Sub weapons''' are secondary [[weapon]]s in the {{Ss}}. They use considerably more [[ink]] than a [[main weapon]], and as such, are less often used and usually serve more specialized purposes. Each main weapon has one type of sub weapon that it can use. | |||
== | ==Usage== | ||
Sub weapons are deployed by pressing {{button|R}}. If the sub weapon is throwable, holding down {{button|R}} will display a trajectory to help the player aim the weapon. If the sub weapon is not throwable, it will be placed on the ground. | |||
Sub weapons consume a great deal of ink, so it may be necessary to monitor the ink supply before and after deployment of a sub weapon. When the ink supply becomes sufficient for using a sub weapon, a sound effect will play and a red light will show on the [[ink tank]]. | |||
== List of | ==List of sub weapons== | ||
{| class="wikitable sitecolor-generic" | |||
! rowspan="2" style="width: 9.8em;" | Weapon | |||
! rowspan="2" | Description | |||
! colspan="3" | Games | |||
{| class=" | |||
! | |||
! | |||
! | |||
|- | |- | ||
! style="width: 3em;" | [[File:Splatoon "S" icon.svg|x35px|link=Splatoon]] | |||
| | ! style="width: 3em;" | [[File:Splatoon 2 "2" icon.svg|x35px|link=Splatoon 2]] | ||
! style="width: 3em;" | [[File:Splatoon 3 "3" icon.svg|x35px|link=Splatoon 3]] | |||
| | |||
| | |||
|- | |- | ||
| | | '''{{Weapon|S3|Sub|Splat Bomb|32}}''' | ||
| A basic bomb that explodes after a short period of time. It can be rolled or thrown. The explosion timer will only progress while the bomb is touching the ground. | |||
| | | {{yea}} | ||
| | | {{yea}} | ||
| {{ | | {{yea}} | ||
| {{ | |||
| {{ | |||
|- | |- | ||
| | | '''{{Weapon|S3|Sub|Suction Bomb|32}}''' | ||
| A bomb that can be attached to any surface. It explodes after a moderate period of time and has a larger blast radius than the Splat Bomb. | |||
| | | {{yea}} | ||
| | | {{yea}} | ||
| | | {{yea}} | ||
| {{ | |||
| {{ | |||
| {{ | |||
|- | |- | ||
| | | '''{{Weapon|S3|Sub|Burst Bomb|32}}''' | ||
| | | A bomb that explodes on impact. Multiple Burst Bombs can be thrown without having to refill the ink tank. They deal less damage than other bombs; two direct hits or three indirect hits will splat an opponent, or they can be used in combination with the main weapon. | ||
| | | {{yea}} | ||
| | | {{yea}} | ||
| {{ | | {{yea}} | ||
| {{ | |||
| {{ | |||
|- | |- | ||
| | | '''{{Weapon|S|Sub|Seeker|32}}''' | ||
| | | A bomb that chases a target before exploding. It leaves a trail of ink that the player can use to travel quickly. | ||
| {{yea}} | |||
| | ! | ||
| {{ | ! | ||
|- | |- | ||
| | | '''{{Weapon|S3|Sub|Curling Bomb|32}}''' | ||
| A bomb that travels in a straight line across the floor, leaving a trail of ink and bouncing off of walls and obstacles. It explodes after its timer expires. The maximum distance of the Curling Bomb can be shortened by holding the deployment button to 'cook' the timer before release. This makes the blast radius larger. | |||
! | |||
| {{yea}} | |||
| {{yea}} | |||
| | |||
| | |||
| {{ | |||
| {{ | |||
|- | |- | ||
| | | '''{{Weapon|S3|Sub|Autobomb|32}}''' | ||
| A bomb that walks towards any nearby enemies before exploding. | |||
! | |||
| {{yea}} | |||
| {{yea}} | |||
| | |||
| | |||
| | |||
| {{ | |||
| {{ | |||
|- | |- | ||
| | | '''{{Weapon|S3|Sub|Ink Mine|32}}''' | ||
| | | A bomb that hides in ink once planted. It deals damage to enemies that get too close. As of ''Splatoon 2'', the Ink Mine gives significantly less damage, but also applies a tracking effect to its victims, letting everyone on the user's team know where the victim is. | ||
| {{yea}} | |||
| | | {{yea}} | ||
| {{ | | {{yea}} | ||
| {{ | |||
| {{ | |||
|- | |- | ||
| | | '''{{Weapon|S|Sub|Disruptor|32}}''' | ||
| | | A bomb that gives negative status effects to opponents. Affected enemies will suffer from reduced mobility and a reduced ink recovery rate. | ||
| {{yea}} | |||
| | ! | ||
| {{ | ! | ||
|- | |- | ||
| | | '''{{Weapon|S3|Sub|Toxic Mist|32}}''' | ||
| A bomb that releases a poison mist which causes negative status effects to opponents that come into contact with it. Affected enemies will suffer from reduced mobility and gradual loss of ink supply. Unlike the Disruptor, the mist remains active for a short time after being used. | |||
! | |||
| {{yea}} | |||
| {{yea}} | |||
| | |||
| | |||
| {{ | |||
| {{ | |||
|- | |- | ||
| | | '''{{Weapon|S3|Sub|Point Sensor|32}}''' | ||
| | | When thrown, this object explodes in a spherical cloud. The cloud tags enemies with a tracking effect that shows their location to everyone on the user's team. | ||
| {{yea}} | |||
| | | {{yea}} | ||
| {{ | | {{yea}} | ||
| {{ | |||
| {{ | |||
|- | |- | ||
| | | '''{{Weapon|S3|Sub|Splash Wall|32}}''' | ||
| | | A barrier made of falling ink. It blocks enemy movement and enemy fire. | ||
| {{yea}} | |||
| | | {{yea}} | ||
| {{ | | {{yea}} | ||
| {{ | |||
| {{ | |||
|- | |- | ||
| | | '''{{Weapon|S3|Sub|Sprinkler|32}}''' | ||
| | | Continually sprays ink in a circular area around itself in a staggering motion, until it is broken by enemy fire or the deployer gets splatted. It can be thrown onto virtually any surface. | ||
| {{yea}} | |||
| | | {{yea}} | ||
| {{ | | {{Yea}} | ||
| {{ | |||
| {{ | |||
|- | |- | ||
| | | '''{{Weapon|S3|Sub|Squid Beakon|32}}''' | ||
| | | A device that allows the user and their teammates to Super Jump directly to its location. | ||
| {{yea}} | |||
| | | {{yea}} | ||
| {{ | | {{yea}} | ||
| {{ | |||
| {{ | |||
|- | |- | ||
| | | '''{{Weapon|S3|Sub|Fizzy Bomb|32}}''' | ||
| A bomb that is capable of exploding multiple times. The bomb can be held and shaken like a soda in order to increase the weapon's explosive potency, increasing the number of times it can explode. | |||
| | ! | ||
| | | {{yea}} | ||
| {{Yea}} | |||
| {{ | |||
| {{ | |||
|- | |- | ||
| | | '''{{Weapon|S3|Sub|Torpedo|32}}''' | ||
| A device that transforms into a floating homing missile when within range of a target. The missile itself is incapable of splatting an opponent alone but will deal a large amount of damage. The missile can be shot down by opposing players. | |||
! | |||
| {{yea}} | |||
| {{Yea}} | |||
| | |||
| | |||
| {{ | |||
| {{ | |||
|- | |- | ||
| | |'''{{Weapon|S3|Sub|Angle Shooter|32}}''' | ||
| A marker-shaped projectile that shows an opponent's position if hit directly or by the trail it produces when thrown. It bounces off any wall it hits, leaving a small splash of ink behind. It deals the least damage of any sub weapon on a direct hit, and the trail deals no damage. | |||
| | ! | ||
| | ! | ||
| {{yea}} | |||
| {{ | |||
|- | |- | ||
| | |'''[[File:RotM Render Smallfry.png|32px|link=Smallfry (character)]] [[Smallfry (character)|Smallfry]]''' | ||
| A [[Smallfry]] that deals consecutive damage if directly thrown at an enemy or destructible object. If no enemy is hit it will instead distract nearby foes. | |||
! | |||
! | |||
| {{Sorta|Only in {{RotM}}}} | |||
|} | |||
==Abilities== | |||
[[gear ability|Abilities]] on a player's [[gear]] can affect sub weapons. The following abilities have effects that specifically focus on improving the performance of sub weapons. | |||
{| class="wikitable sitecolor-generic" | |||
| | |||
| {{ | |||
| {{ | |||
| | |||
| | |||
| | |||
|- | |- | ||
| | ! rowspan="2" | Ability !! rowspan="2" | Effect !! colspan="3" | Games | ||
|- | |- | ||
! style="width: 3em;" | [[File:Splatoon "S" icon.svg|x35px|link=Splatoon]] | |||
| | ! style="width: 3em;" | [[File:Splatoon 2 "2" icon.svg|x35px|link=Splatoon 2]] | ||
! style="width: 3em;" | [[File:Splatoon 3 "3" icon.svg|x35px|link=Splatoon 3]] | |||
| | |||
| | |||
|- | |- | ||
| {{Ability|S|Bomb Range Up|32}} | |||
| Allows [[bombs]], Point Sensors, and Disruptors to travel farther when thrown. | |||
| {{yea}} | |||
! | |||
| {{ | ! | ||
| | |||
| | |||
| {{ | |||
|- | |- | ||
| {{Ability|S|Damage Up|32}} | |||
| Increases damage dealt by weapons. | |||
| {{yea}} | |||
! | |||
! | |||
| {{ | |||
| | |||
| | |||
| {{ | |||
|- | |- | ||
| {{Ability|S3|Ink Saver (Sub)|32}} | |||
| Reduces the amount of ink consumed by sub weapons. | |||
| {{yea}} | |||
| {{yea}} | |||
| {{ | | {{yea}} | ||
| | |||
| | |||
| {{ | |||
| {{ | |||
| {{ | |||
|- | |- | ||
| {{Ability|S3|Sub Power Up|32}} | |||
| | | Improves the performance of each sub weapon in multiple ways. | ||
| | ! | ||
| {{yea}} | |||
| {{yea}} | |||
| {{ | |||
| {{ | |||
|- | |- | ||
| {{Ability|S3|Sub Resistance Up|32}} | |||
| Reduces effects and damage from sub weapons. | |||
! | |||
! | |||
| {{yea}} | |||
| {{ | |||
| | |||
| | |||
| {{ | |||
|- | |- | ||
|} | |} | ||
</ | |||
</ | ==Gallery== | ||
===''Splatoon''=== | |||
<gallery> | |||
Splat Bomb HQ.png|[[Splat Bomb]] | |||
Suction Bomb HQ.png|[[Suction Bomb]] | |||
Burst Bomb HQ.png|[[Burst Bomb]] | |||
Seeker HQ.png|[[Seeker]] | |||
Ink Mine HQ.png|[[Ink Mine]] | |||
Disruptor HQ.png|[[Disruptor]] | |||
Point Sensor HQ.png|[[Point Sensor]] | |||
Splash Wall HQ.png|[[Splash Wall]] | |||
Sprinkler HQ.png|[[Sprinkler]] | |||
Squid Beakon HQ.png|[[Squid Beakon]] | |||
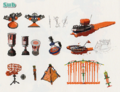
Concept Art - Sub Weapons.png|Concept art of various sub weapons. | |||
</gallery> | |||
===''Splatoon 2''=== | |||
<gallery> | |||
S2 Weapon Sub Splat Bomb.png|[[Splat Bomb]] | |||
S2 Weapon Sub Suction Bomb.png|[[Suction Bomb]] | |||
S2 Weapon Sub Burst Bomb.png|[[Burst Bomb]] | |||
S2 Weapon Sub Curling Bomb.png|[[Curling Bomb]] | |||
S2 Weapon Sub Autobomb.png|[[Autobomb]] | |||
S2 Weapon Sub Ink Mine.png|[[Ink Mine]] | |||
S2 Weapon Sub Toxic Mist.png|[[Toxic Mist]] | |||
S2 Weapon Sub Point Sensor.png|[[Point Sensor]] | |||
S2 Weapon Sub Splash Wall.png|[[Splash Wall]] | |||
S2 Weapon Sub Sprinkler.png|[[Sprinkler]] | |||
S2 Weapon Sub Squid Beakon.png|[[Squid Beakon]] | |||
S2 Weapon Sub Fizzy Bomb.png|[[Fizzy Bomb]] | |||
S2 Weapon Sub Torpedo.png|[[Torpedo]] | |||
</gallery> | |||
===''Splatoon 3''=== | |||
<gallery> | |||
S3 Weapon Sub Splat Bomb.png|[[Splat Bomb]] | |||
S3 Weapon Sub Suction Bomb.png|[[Suction Bomb]] | |||
S3 Weapon Sub Burst Bomb.png|[[Burst Bomb]] | |||
S3 Weapon Sub Curling Bomb.png|[[Curling Bomb]] | |||
S3 Weapon Sub Autobomb.png|[[Autobomb]] | |||
S3 Weapon Sub Ink Mine.png|[[Ink Mine]] | |||
S3 Weapon Sub Toxic Mist.png|[[Toxic Mist]] | |||
S3 Weapon Sub Point Sensor.png|[[Point Sensor]] | |||
S3 Weapon Sub Splash Wall.png|[[Splash Wall]] | |||
S3 Weapon Sub Sprinkler.png|[[Sprinkler]] | |||
S3 Weapon Sub Squid Beakon.png|[[Squid Beakon]] | |||
S3 Weapon Sub Fizzy Bomb.png|[[Fizzy Bomb]] | |||
S3 Weapon Sub Torpedo.png|[[Torpedo]] | |||
S3 Weapon Sub Angle Shooter.png|[[Angle Shooter]] | |||
RotM Render Smallfry.png|[[Smallfry (character)|Smallfry]] | |||
</gallery> | |||
==Trivia== | |||
[[File:Splatoon LINE sticker - OK audio.mp3|thumb|Audio from a LINE sticker with the thrown Sub Weapon sound]] | |||
[[File:Splatoon 2 LINE sticker - OK audio.mp3|thumb|Audio from a LINE sticker of a Burst Bomb]] | |||
*The Seeker and Angle Shooter are the only sub weapons that don't share the sound effect that plays when they are used with any other sub weapons. The majority of them use a distinctive 'throw' sound effect, while the Ink Mine and Squid Beakon use a different 'deploy' sound effect instead. These differences also reflect the different ways these weapons are used. | |||
*There are two [[LINE]] stickers that feature the sound of a thrown Sub Weapon; one is of a Burst Bomb while the other does not explicitly feature any Sub Weapon. | |||
*In a [[Nintendo Direct]] presentation about {{S}} just before the game's release, it erroneously states that there are 9 sub weapons, when ''Splatoon'' has 10.<ref>[https://www.youtube.com/watch?v=kQsZPYB0vMw&t=781 {{YT}} Nintendo Direct Presentation - ''Splatoon'' Game Overview (5/7/15)]</ref> | |||
==Names in other languages== | ==Names in other languages== | ||
{{ | {{Localized name | ||
|Jap=サブウェポン | |Jap=サブウェポン | ||
|JapR= | |JapR=sabu wepon | ||
|JapM=Sub | |JapM=Sub weapon | ||
|Dut=Subwapen | |||
|DutM=Sub weapon | |||
|Fre=Arme secondaire | |||
|FreM=Secondary weapon | |||
|Ger=Sekundärwaffe | |||
|GerM=Secondary weapon | |||
|Ita=Arma secondaria | |||
|ItaM=Secondary weapon | |||
|Rus=Запасное оружие | |||
|RusR=Zapasnoye oruzhiye | |||
|RusM=Spare weapon | |||
|SpaE=Arma secundaria | |SpaE=Arma secundaria | ||
|SpaEM=Secondary weapon | |SpaEM=Secondary weapon | ||
}} | |Chi=次要武器 | ||
|ChiR=cìyào wǔqì (Mandarin) | |||
|ChiM=Sub Weapon | |||
|Dan=Sekundær våben<br>Sekundærvåben | |||
|DanM=Secondary weapon | |||
|Por=Arma secundária | |||
|PorM=Secondary weapon | |||
|Nor=Sekundærvåpen | |||
|NorM=Secondary weapon | |||
|Swe=Sekundärvapen | |||
|SweM=Secondary weapon | |||
|Kor=서브 웨펀|KorM=Sub Weapon}} | |||
==See also== | |||
Sub weapons come in sets with main weapons. These lists show which sub weapons come with each main weapon. | |||
* [[List of sub weapon sets in Splatoon|List of sub weapon sets in ''Splatoon'']] | |||
* [[List of sub weapon sets in Splatoon 2|List of sub weapon sets in ''Splatoon 2'']] | |||
* [[List of sub weapon sets in Splatoon 3|List of sub weapon sets in ''Splatoon 3'']] | |||
<!--==Notes== | |||
<references group="notes"/> | |||
--> | |||
==References== | |||
<references/> | |||
{{Navbox/S Weapons}} | |||
{{Navbox/S2 Weapons}} | |||
{{Navbox/S3 Weapons}} | |||
[[Category:Sub weapons]] | |||
[[Category:Sub | |||
Latest revision as of 16:04, 17 May 2024
.png)
| “ | Divert the enemy with weapons like Splat Bombs or the Sprinkler. Pro tip: You can try out the weapons at Ammo Knights before you buy. |
” |
Sub weapons are secondary weapons in the Splatoon series. They use considerably more ink than a main weapon, and as such, are less often used and usually serve more specialized purposes. Each main weapon has one type of sub weapon that it can use.
Usage
Sub weapons are deployed by pressing ![]() . If the sub weapon is throwable, holding down
. If the sub weapon is throwable, holding down ![]() will display a trajectory to help the player aim the weapon. If the sub weapon is not throwable, it will be placed on the ground.
will display a trajectory to help the player aim the weapon. If the sub weapon is not throwable, it will be placed on the ground.
Sub weapons consume a great deal of ink, so it may be necessary to monitor the ink supply before and after deployment of a sub weapon. When the ink supply becomes sufficient for using a sub weapon, a sound effect will play and a red light will show on the ink tank.
List of sub weapons
| Weapon | Description | Games | ||
|---|---|---|---|---|
| A basic bomb that explodes after a short period of time. It can be rolled or thrown. The explosion timer will only progress while the bomb is touching the ground. | ✓ | ✓ | ✓ | |
| A bomb that can be attached to any surface. It explodes after a moderate period of time and has a larger blast radius than the Splat Bomb. | ✓ | ✓ | ✓ | |
| A bomb that explodes on impact. Multiple Burst Bombs can be thrown without having to refill the ink tank. They deal less damage than other bombs; two direct hits or three indirect hits will splat an opponent, or they can be used in combination with the main weapon. | ✓ | ✓ | ✓ | |
| A bomb that chases a target before exploding. It leaves a trail of ink that the player can use to travel quickly. | ✓ | |||
| A bomb that travels in a straight line across the floor, leaving a trail of ink and bouncing off of walls and obstacles. It explodes after its timer expires. The maximum distance of the Curling Bomb can be shortened by holding the deployment button to 'cook' the timer before release. This makes the blast radius larger. | ✓ | ✓ | ||
| A bomb that walks towards any nearby enemies before exploding. | ✓ | ✓ | ||
| A bomb that hides in ink once planted. It deals damage to enemies that get too close. As of Splatoon 2, the Ink Mine gives significantly less damage, but also applies a tracking effect to its victims, letting everyone on the user's team know where the victim is. | ✓ | ✓ | ✓ | |
| A bomb that gives negative status effects to opponents. Affected enemies will suffer from reduced mobility and a reduced ink recovery rate. | ✓ | |||
| A bomb that releases a poison mist which causes negative status effects to opponents that come into contact with it. Affected enemies will suffer from reduced mobility and gradual loss of ink supply. Unlike the Disruptor, the mist remains active for a short time after being used. | ✓ | ✓ | ||
| When thrown, this object explodes in a spherical cloud. The cloud tags enemies with a tracking effect that shows their location to everyone on the user's team. | ✓ | ✓ | ✓ | |
| A barrier made of falling ink. It blocks enemy movement and enemy fire. | ✓ | ✓ | ✓ | |
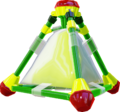
| Continually sprays ink in a circular area around itself in a staggering motion, until it is broken by enemy fire or the deployer gets splatted. It can be thrown onto virtually any surface. | ✓ | ✓ | ✓ | |
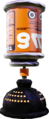
| A device that allows the user and their teammates to Super Jump directly to its location. | ✓ | ✓ | ✓ | |
| A bomb that is capable of exploding multiple times. The bomb can be held and shaken like a soda in order to increase the weapon's explosive potency, increasing the number of times it can explode. | ✓ | ✓ | ||
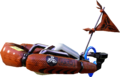
| A device that transforms into a floating homing missile when within range of a target. The missile itself is incapable of splatting an opponent alone but will deal a large amount of damage. The missile can be shot down by opposing players. | ✓ | ✓ | ||
| A marker-shaped projectile that shows an opponent's position if hit directly or by the trail it produces when thrown. It bounces off any wall it hits, leaving a small splash of ink behind. It deals the least damage of any sub weapon on a direct hit, and the trail deals no damage. | ✓ | |||
| A Smallfry that deals consecutive damage if directly thrown at an enemy or destructible object. If no enemy is hit it will instead distract nearby foes. | Only in Return of the Mammalians | |||
Abilities
Abilities on a player's gear can affect sub weapons. The following abilities have effects that specifically focus on improving the performance of sub weapons.
| Ability | Effect | Games | ||
|---|---|---|---|---|
| Allows bombs, Point Sensors, and Disruptors to travel farther when thrown. | ✓ | |||
| Increases damage dealt by weapons. | ✓ | |||
| Reduces the amount of ink consumed by sub weapons. | ✓ | ✓ | ✓ | |
| Improves the performance of each sub weapon in multiple ways. | ✓ | ✓ | ||
| Reduces effects and damage from sub weapons. | ✓ | |||
Gallery
Splatoon
-
-
-

-
-

-
-
-
-
-
-
Concept art of various sub weapons.


Splatoon 2


Splatoon 3


Trivia
- The Seeker and Angle Shooter are the only sub weapons that don't share the sound effect that plays when they are used with any other sub weapons. The majority of them use a distinctive 'throw' sound effect, while the Ink Mine and Squid Beakon use a different 'deploy' sound effect instead. These differences also reflect the different ways these weapons are used.
- There are two LINE stickers that feature the sound of a thrown Sub Weapon; one is of a Burst Bomb while the other does not explicitly feature any Sub Weapon.
- In a Nintendo Direct presentation about Splatoon just before the game's release, it erroneously states that there are 9 sub weapons, when Splatoon has 10.[2]
Names in other languages
| Language | Name | Meaning |
|---|---|---|
| サブウェポン sabu wepon |
Sub weapon | |
| Subwapen | Sub weapon | |
| Arme secondaire | Secondary weapon | |
| Sekundärwaffe | Secondary weapon | |
| Arma secondaria | Secondary weapon | |
| Запасное оружие Zapasnoye oruzhiye |
Spare weapon | |
| Arma secundaria | Secondary weapon | |
| 次要武器 cìyào wǔqì (Mandarin) |
Sub Weapon | |
| Sekundær våben Sekundærvåben |
Secondary weapon | |
| 서브 웨펀 | Sub Weapon | |
| Sekundærvåpen | Secondary weapon | |
| Arma secundária | Secondary weapon | |
| Sekundärvapen | Secondary weapon |
See also
Sub weapons come in sets with main weapons. These lists show which sub weapons come with each main weapon.
- List of sub weapon sets in Splatoon
- List of sub weapon sets in Splatoon 2
- List of sub weapon sets in Splatoon 3
