|
|
| (44 intermediate revisions by 26 users not shown) |
| Line 1: |
Line 1: |
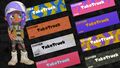
| [[File:Splatoon 3 Player Banners Promo 1.jpeg|thumb|Promo image showing various designs for Splashtags]] | | [[File:Splatoon 3 Player Banners Promo 1.jpg|thumb|Promo image showing various designs for Splashtags]] |
| {{Construction}}
| | {{Quote|Residents of Splatsville won't step (or swim) outside with a Splashtag. They function like a business card does for us humans. In the midst of battle, on the job, or even just in the plaza, Inklings and Octolings will have their Splashtags at the ready.|[[Squid Research Lab]]<ref name="srl">[https://splatoon.nintendo.com/en/news/squid-research-lab-dives-deep-into-the-splatlands/ {{SRL}} CONFIDENTIAL REPORT: SQUID RESEARCH LAB DIVES DEEP INTO THE SPLATLANDS]</ref>}} |
| {{Quote|Residents of Splatsville won't step (or swim) outside with a Splashtag. They function like a business card does for us humans. In the midst of battle, on the job, or even just in the plaza, Inklings and Octolings will have their Splashtags at the ready.|[[Live from Squid Research Lab]]<ref name="srl">[https://splatoon.nintendo.com/en/news/squid-research-lab-dives-deep-into-the-splatlands/ {{SRL}} CONFIDENTIAL REPORT: SQUID RESEARCH LAB DIVES DEEP INTO THE SPLATLANDS]</ref>}} | |
|
| |
|
| '''Splashtags''' are a [[player customization]] option in ''[[Splatoon 3]]''. They are used to display players' in-game nicknames and can be customized with different designs, badges, and title combinations. Players can unlock new options as they play through {{S3}}. Banners additionally feature a four-digit ID number to identify players with the same nickname, which will be changed when the player changes their nickname. | | '''Splashtags''' are a [[Player Settings]] option in ''[[Splatoon 3]]''. They are used to display players' in-game nicknames and can be customized with different designs, badges, and title combinations. Players can unlock new options as they play through {{S3}}. |
|
| |
|
| Players can edit their Splashtag's appearance through the Status tab of the menu. After playing their first battle, players can register their Splashtag and pick their nickname at the [[Lobby Terminal]] located in the [[Battle Lobby]]. Players can update their nickname but must wait 30 days to change it again. | | ==Details== |
| | [[File:Splatoon 3 Splattershot Jr. and Splashtag inside box.png|thumb|A box found in the initial tutorial containing a Splashtag.]] |
| | Players can edit their Splashtag's appearance through the Status tab of the menu. After playing their first battle, players can register their Splashtag and pick their nickname at the [[Lobby Terminal]] located in the [[lobby]]. Players may then pick another nickname at any time, but must wait at least 30 days between changes. Splashtags additionally feature a four- or five-digit ID number to identify players with the same nickname, which is changed whenever the player changes their nickname. |
| | |
| | Splashtags appear to be physical objects in-universe, as a Splashtag with the default banner can be seen during the tutorial in the same box the [[Splattershot Jr.]] is collected from. It is further implied that the player's starting Splashtag is this same Splashtag, as the former is mentioned to already contain "older data" when the player is first given the ability to set their name, and clear signs of wear are visible on the latter. |
|
| |
|
| ==Banners== | | ==Banners== |
| | {{Main|Banner}} |
| [[File:S3 Banners screen.jpg|thumb|Various banners]] | | [[File:S3 Banners screen.jpg|thumb|Various banners]] |
| {{stub}}
| |
| {{Todo|Add more banners}}
| |
|
| |
| Banners are the pattern found on Splashtags, consisting of a background color, pattern, or image with text color. They can be obtained from the [[Catalog]], the [[Shell-Out Machine]], the Salmon Run Shop, or via [[QR Code]].
| |
|
| |
|
| ===List of Banners===
| | Banners are the pattern found on Splashtags, consisting of a background color, pattern, or image with text color. They can be obtained from the [[Catalog]], the [[Shell-Out Machine]], the Salmon Run Shop, [[QR code]], or via the Nintendo Switch News app. |
| {| class="wikitable sitecolor-s3 mw-collapsible mw-collapsed"
| |
| !Banner
| |
| !How to Obtain
| |
| |-
| |
| |[[File:Sg-image-splatoon-3-banner-00.jpg|center|frameless]]
| |
| |Starting Banner
| |
| |-
| |
| |[[File:Sg-image-splatoon-3-banner-01.jpg|center|frameless]]
| |
| |[https://twitter.com/SplatoonJP/status/1568070900490338304 Promo QR Code]
| |
| |-
| |
| ! colspan="2" |Tableturf Battle Banners
| |
| |-
| |
| |[[File:Sg-image-splatoon-3-banner-02.jpg|center|frameless]]
| |
| |Reach level 10 in Tableturf Battle
| |
| |-
| |
| |[[File:Sg-image-splatoon-3-banner-28.jpg|center|frameless]]
| |
| |Reach level 25 in Tableturf Battle
| |
| |-
| |
| |[[File:Npl Mng Lv03.webp|center|frameless]]
| |
| |Reach level 46 in Tableturf Battle
| |
| |-
| |
| ! colspan="2" |Catalog Banners
| |
| |-
| |
| |[[File:Sg-image-splatoon-3-banner-04.jpg|center|frameless]]
| |
| | Reach level 1 Catalog
| |
| |-
| |
| |Random
| |
| |Reach level 13 Catalog
| |
| |-
| |
| |Random
| |
| |Reach level 26 Catalog
| |
| |-
| |
| |Random
| |
| |Reach level 37 Catalog
| |
| |-
| |
| |Random
| |
| |Reach level 44 Catalog
| |
| |-
| |
| |Random
| |
| |Reach level 64 Catalog
| |
| |-
| |
| |Random
| |
| |Reach level 78 Catalog
| |
| |-
| |
| |[[File:Sg-image-splatoon-3-banner-20.jpg|center|frameless]]
| |
| |Reach level 97 Catalog
| |
| |-
| |
| ! colspan="2" |Shell-Out Machine Banners
| |
| |-
| |
| |[[File:Sg-image-splatoon-3-banner-10.jpg|center|frameless]]
| |
| |Shell-Out Machine
| |
| |-
| |
| |[[File:Sg-image-splatoon-3-banner-11.jpg|center|frameless]]
| |
| |Shell-Out Machine
| |
| |-
| |
| |[[File:Sg-image-splatoon-3-banner-12.jpg|center|frameless]]
| |
| |Shell-Out Machine
| |
| |-
| |
| |[[File:Sg-image-splatoon-3-banner-13.jpg|center|frameless]]
| |
| |Shell-Out Machine
| |
| |-
| |
| |[[File:Sg-image-splatoon-3-banner-15.jpg|center|frameless]]
| |
| |Shell-Out Machine
| |
| |-
| |
| |[[File:Sg-image-splatoon-3-banner-16.jpg|center|frameless]]
| |
| |Shell-Out Machine
| |
| |-
| |
| |[[File:Sg-image-splatoon-3-banner-14.jpg|center|frameless]]
| |
| |Shell-Out Machine
| |
| |-
| |
| |[[File:Sg-image-splatoon-3-banner-05.jpg|center|frameless]]
| |
| |Shell-Out Machine
| |
| |-
| |
| |[[File:Sg-image-splatoon-3-banner-17.jpg|center|frameless]]
| |
| |Shell-Out Machine
| |
| |-
| |
| |[[File:Sg-image-splatoon-3-banner-06.jpg|center|frameless]]
| |
| |Shell-Out Machine
| |
| |-
| |
| |[[File:Sg-image-splatoon-3-banner-18.jpg|center|frameless]]
| |
| |Shell-Out Machine
| |
| |-
| |
| |[[File:Sg-image-splatoon-3-banner-19.jpg|center|frameless]]
| |
| |Shell-Out Machine
| |
| |-
| |
| |[[File:Sg-image-splatoon-3-banner-29.jpg|center|frameless]]
| |
| |Shell-Out Machine
| |
| |-
| |
| |[[File:Fire banner.png|center|frameless]]
| |
| |Shell-Out Machine
| |
| |-
| |
| |[[File:Fire banner 2.png|center|frameless]]
| |
| |Shell-Out Machine
| |
| |-
| |
| |[[File:Fire banner 3.png|center|frameless]]
| |
| |Shell-Out Machine
| |
| |-
| |
| |[[File:Banner 1.png|center|frameless]]
| |
| |Shell-Out Machine
| |
| |-
| |
| |[[File:Banner 2.png|center|frameless]]
| |
| |Shell-Out Machine
| |
| |-
| |
| |[[File:Banner 3.png|center|frameless]]
| |
| |Shell-Out Machine
| |
| |-
| |
| |[[File:Banner 4.png|center|frameless]]
| |
| |Shell-Out Machine
| |
| |-
| |
| |[[File:Banner 5.png|center|frameless]]
| |
| |Shell-Out Machine
| |
| |-
| |
| |[[File:Banner 6.png|center|frameless]]
| |
| |Shell-Out Machine
| |
| |-
| |
| |[[File:Banner 7.png|center|frameless]]
| |
| |Shell-Out Machine
| |
| |-
| |
| |[[File:Banner 8.png|center|frameless]]
| |
| |Shell-Out Machine
| |
| |-
| |
| |[[File:Banner 9.png|center|frameless]]
| |
| |Shell-Out Machine
| |
| |-
| |
| |[[File:Banner 10.png|center|frameless]]
| |
| |Shell-Out Machine
| |
| |-
| |
| |[[File:Banner 11.png|center|frameless]]
| |
| |Shell-Out Machine
| |
| |-
| |
| |[[File:Banner 12.png|center|frameless]]
| |
| |Shell-Out Machine
| |
| |-
| |
| |[[File:Banner 13.png|center|frameless]]
| |
| |Shell-Out Machine
| |
| |-
| |
| |[[File:Banner 14.png|center|frameless]]
| |
| |Shell-Out Machine
| |
| |-
| |
| |[[File:Banner 15.png|center|frameless]]
| |
| |Shell-Out Machine
| |
| |-
| |
| |[[File:Banner 16.png|center|frameless]]
| |
| |Shell-Out Machine
| |
| |-
| |
| |[[File:Banner 17.png|center|frameless]]
| |
| |Shell-Out Machine
| |
| |-
| |
| |[[File:Banner 18.png|center|frameless]]
| |
| |Shell-Out Machine
| |
| |-
| |
| |[[File:Banner 19.png|center|frameless]]
| |
| |Shell-Out Machine
| |
| |-
| |
| |[[File:Banner 20.png|center|frameless]]
| |
| |Shell-Out Machine
| |
| |-
| |
| |[[File:Banner 21.png|center|frameless]]
| |
| |Shell-Out Machine
| |
| |-
| |
| |[[File:Banner 22.png|center|frameless]]
| |
| |Shell-Out Machine
| |
| |-
| |
| |[[File:Banner 23.png|center|frameless]]
| |
| |Shell-Out Machine
| |
| |-
| |
| |[[File:Banner 24.png|center|frameless]]
| |
| |Shell-Out Machine
| |
| |-
| |
| |[[File:Banner 25.png|center|frameless]]
| |
| |Shell-Out Machine
| |
| |-
| |
| |[[File:Banner 26.png|center|frameless]]
| |
| |Shell-Out Machine
| |
| |-
| |
| |[[File:Banner 27.png|center|frameless]]
| |
| |Shell-Out Machine
| |
| |-
| |
| |[[File:Banner 28.png|center|frameless]]
| |
| |Shell-Out Machine
| |
| |-
| |
| |[[File:Banner 29.png|center|frameless]]
| |
| |Shell-Out Machine
| |
| |-
| |
| |[[File:Banner 30.png|center|frameless]]
| |
| |Shell-Out Machine
| |
| |-
| |
| |[[File:Banner 31.png|center|frameless]]
| |
| |Shell-Out Machine
| |
| |-
| |
| |[[File:Banner 32.png|center|frameless]]
| |
| |Shell-Out Machine
| |
| |-
| |
| |[[File:Banner 33.png|center|frameless]]
| |
| |Shell-Out Machine
| |
| |-
| |
| |[[File:Banner 34.png|center|frameless]]
| |
| |Shell-Out Machine
| |
| |-
| |
| |[[File:Banner 35.png|center|frameless]]
| |
| |Shell-Out Machine
| |
| |-
| |
| |[[File:Banner 36.png|center|frameless]]
| |
| |Shell-Out Machine
| |
| |-
| |
| ! colspan="2" |Salmon Run Banners
| |
| |-
| |
| |[[File:Sg-image-splatoon-3-banner-07.jpg|center|frameless]]
| |
| |10x [[File:Bronze Fish Scale.png|frameless|20x20px|link=Fish_scale]] from the [[Salmon Run Next Wave|Salmon Run]] shop
| |
| |-
| |
| |[[File:Sg-image-splatoon-3-banner-08.jpg|center|frameless]]
| |
| |100x [[File:Bronze Fish Scale.png|frameless|20x20px|link=Fish_scale]] from the [[Salmon Run Next Wave|Salmon Run]] shop
| |
| |-
| |
| |[[File:Sg-image-splatoon-3-banner-22.jpg|center|frameless]]
| |
| |250x [[File:Bronze Fish Scale.png|frameless|20x20px|link=Fish_scale]] from the [[Salmon Run Next Wave|Salmon Run]] shop
| |
| |-
| |
| |[[File:Sg-image-splatoon-3-banner-21.jpg|center|frameless]]
| |
| |250x [[File:Bronze Fish Scale.png|frameless|20x20px|link=Fish_scale]] from the [[Salmon Run Next Wave|Salmon Run]] shop
| |
| |-
| |
| |[[File:Sg-image-splatoon-3-banner-24.jpg|center|frameless]]
| |
| |600x [[File:Bronze Fish Scale.png|frameless|20x20px|link=Fish_scale]] from the [[Salmon Run Next Wave|Salmon Run]] shop
| |
| |-
| |
| |[[File:Sg-image-splatoon-3-banner-23.jpg|center|frameless]]
| |
| |600x [[File:Bronze Fish Scale.png|frameless|20x20px|link=Fish_scale]] from the [[Salmon Run Next Wave|Salmon Run]] shop
| |
| |-
| |
| |[[File:Sg-image-splatoon-3-banner-27.jpg|center|frameless]]
| |
| |999x [[File:Bronze Fish Scale.png|frameless|20x20px|link=Fish_scale]] from the [[Salmon Run Next Wave|Salmon Run]] shop
| |
| |-
| |
| |[[File:Sg-image-splatoon-3-banner-09.jpg|center|frameless]]
| |
| |3x [[File:Gold Fish Scale.png|frameless|20x20px|link=Fish_scale]] from the [[Salmon Run Next Wave|Salmon Run]] shop
| |
| |-
| |
| |[[File:Sg-image-splatoon-3-banner-25.jpg|center|frameless]]
| |
| |5x [[File:Gold Fish Scale.png|frameless|20x20px|link=Fish_scale]] from the [[Salmon Run Next Wave|Salmon Run]] shop
| |
| |-
| |
| |[[File:Sg-image-splatoon-3-banner-26.jpg|center|frameless]]
| |
| |20x [[File:Gold Fish Scale.png|frameless|20x20px|link=Fish_scale]] from the [[Salmon Run Next Wave|Salmon Run]] shop
| |
| |-
| |
| ! colspan="2" |Other (?)
| |
| |-
| |
| |[[File:Other banner.png|center|frameless]]
| |
| |(?)
| |
| |}
| |
| {{Clr}} | | {{Clr}} |
|
| |
|
| ==Badges== | | ==Badges== |
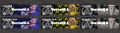
| [[File:Splashtag weapon badges.jpg|thumb|Various badges]]{{Todo|Add icons for weapon, special weapon, and gear badges to the respective separate tables below.}} | | {{main|Badge}} |
| A variety of badges can be earned through achievements and playing the game, and up to three of them can be displayed on a Splashtag at once. These badges appear in the bottom-right corner of the Splashtag. | | [[File:Splashtag weapon badges.jpg|thumb|Various Badges]] |
| | | A variety of ''Badges'' can be earned through achievements and playing the game, and up to three of them can be displayed at once on the bottom-right corner of a player's Splashtag. |
| Examples of achievements that earn badges include: getting 50 Regular Battle wins, earning 10,000 Grizzco points, and defeating DJ Octavio in [[Return of the Mammalians]]. Some achievements have multiple tiers of badges, for example Weapon badges for 4- and 5-star freshness.
| | {{clr}} |
| | |
| The table below lists badges available in the game. Some groups of badges are too numerous to list in the main table, and have been broken out into separate tables for [[Weapon|weapons]], [[Special weapon|special weapons]], [[Boss Salmonid|Boss Salmonids]], and [[gear brands]]. A summary of these badges’ requirements are still included in the main table.
| |
| ===List of badges===
| |
| {| class="wikitable sitecolor-s3 mw-collapsible mw-collapsed"
| |
| !Badge group
| |
| !Method
| |
| ! colspan="2" |Tier 1
| |
| ! colspan="2" |Tier 2
| |
| ! colspan="2" |Tier 3
| |
| ! colspan="2" |Tier 4
| |
| |-
| |
| ! colspan="10" |Salmon Run Badges
| |
| |-
| |
| |Grizzco Badge
| |
| |Earn a specific number of total Grizzco Points in [[Salmon Run Next Wave]]
| |
| | [[File:Grizzco Badge 10k.webp|center|frameless|50x50px]]Bronze Grizzco Badge
| |
| |10,000 points
| |
| | [[File:Grizzco Badge 100k.webp|center|frameless|50x50px]]Silver Grizzco Badge
| |
| |100,000 points
| |
| | [[File:Grizzco Badge 10M.webp|center|frameless|50x50px]]Gold Grizzco Badge
| |
| |9,999,999 points
| |
| |colspan=2 {{N/A}}
| |
| |-
| |
| |Gone Fission Hydroplant Badge
| |
| |Reach a specific job title on [[Gone Fission Hydroplant]] in [[Salmon Run Next Wave]]
| |
| |[[File:Hydroplant Badge 200.webp|center|frameless|50x50px]]Gone Fission Hydroplant Badge
| |
| | Eggsecutive VP 200
| |
| |[[File:Hydroplant Badge 400.webp|center|frameless|50x50px]]Bronze Gone Fission Hydroplant Badge
| |
| | Eggsecutive VP 400
| |
| |[[File:Hydroplant Badge 600.webp|center|frameless|50x50px]]Silver Gone Fission Hydroplant Badge
| |
| | Eggsecutive VP 600
| |
| |[[File:Hydroplant Badge 999.webp|center|frameless|50x50px]]Gold Gone Fission Hydroplant Badge
| |
| |Eggsecutive VP 999
| |
| |-
| |
| |Spawning Grounds Badge
| |
| |Reach a specific job title on [[Spawning Grounds]] in [[Salmon Run Next Wave]]
| |
| |[[File:Spawning Badge 200.webp|center|frameless|50x50px]]Spawning Grounds Badge
| |
| | Eggsecutive VP 200
| |
| |[[File:Spawning Badge 400.webp|center|frameless|50x50px]]Bronze Spawning Grounds Badge
| |
| | Eggsecutive VP 400
| |
| |[[File:Spawning Badge 600.webp|center|frameless|50x50px]]Silver Spawning Grounds Badge
| |
| | Eggsecutive VP 600
| |
| |[[File:Spawning Badge 999.webp|center|frameless|50x50px]]Gold Spawning Grounds Badge
| |
| | Eggsecutive VP 999
| |
| |-
| |
| |Sockeye Station Badge
| |
| |Reach a specific job title on [[Sockeye Station]] in [[Salmon Run Next Wave]]
| |
| | [[File:Sockeye Badge 200.webp|center|frameless|50x50px]]Sockeye Station Badge
| |
| | Eggsecutive VP 200
| |
| | [[File:Sockeye Badge 400.webp|center|frameless|50x50px]]Bronze Sockeye Station Badge
| |
| | Eggsecutive VP 400
| |
| | [[File:Sockeye Badge 600.webp|center|frameless|50x50px]]Silver Sockeye Station Badge
| |
| |Eggsecutive VP 600
| |
| | [[File:Sockeye Badge 999.webp|center|frameless|50x50px]]Gold Sockeye Station Badge
| |
| |Eggsecutive VP 999
| |
| |-
| |
| |Hazard Level MAX Badge
| |
| |Clear a [[Salmon Run Next Wave]] shift at [[Hazard level|Hazard Level MAX]]
| |
| |[[File:Hazard Badge.webp|center|frameless|50x50px]]Hazard Level MAX Badge
| |
| |
| |
| |colspan=6 {{N/A}}
| |
| |-
| |
| |{Boss Salmonid} Badge
| |
| |Splat a specific [[Boss Salmonid]] a specific number of times in [[Salmon Run Next Wave]]. (See table below)
| |
| |{Boss Salmonid} Badge
| |
| |Splat 100
| |
| |Silver {Boss Salmonid} Badge
| |
| |Splat 1000
| |
| |Gold {Boss Salmonid} Badge
| |
| |Splat 10,000
| |
| |colspan=2 {{N/A}}
| |
| |-
| |
| |Cohozuna Badge
| |
| |Defeat a specific number of [[Cohozuna|Cohozunas]] in [[Salmon Run Next Wave]]
| |
| |[[File:Zuna Badge 10.webp|center|frameless|50x50px]]Cohozuna Badge
| |
| |10 Cohozunas
| |
| |[[File:Zuna Badge 100.webp|center|frameless|50x50px]]Silver Cohozuna Badge
| |
| |100 Cohozunas
| |
| |[[File:Zuna Badge 1000.webp|center|frameless|50x50px]]Gold Cohozuna Badge
| |
| |1000 Cohozunas
| |
| |colspan=2 {{N/A}}
| |
| |-
| |
| ! colspan="10" |Return of the Mammalians Badges
| |
| |-
| |
| |DJ Octavio Badge
| |
| |Defeat DJ Octavio in [[Return of the Mammalians]]
| |
| |[[File:DJ Octavio Badge.png|center|frameless|50x50px]]DJ Octavio Badge
| |
| |
| |
| |colspan=6 {{N/A}}
| |
| |-
| |
| |Marie Badge
| |
| |Reach exploration level 99 in [[Return of the Mammalians]]
| |
| |[[File:Marie Badge.png|center|frameless|50x50px]]Marie Badge
| |
| |
| |
| |colspan=6 {{N/A}}
| |
| |-
| |
| | Callie Badge
| |
| |Reach exploration level 99 in [[Return of the Mammalians]]
| |
| |[[File:Callie Badge.png|center|frameless|50x50px]]Callie Badge
| |
| |
| |
| |colspan=6 {{N/A}}
| |
| |-
| |
| |Cap'n Cuttlefish Badge
| |
| |Beat [[Return of the Mammalians]]
| |
| | [[File:Captain Cuttlefish Badge.png|center|frameless|50x50px]]Cap'n Cuttlefish Badge
| |
| |
| |
| |colspan=6 {{N/A}}
| |
| |-
| |
| |Secret Badge
| |
| |Beat the Secret Kettle in [[Return of the Mammalians]]
| |
| |[[File:Secret badge.png|center|frameless|50x50px]]Secret Badge
| |
| |
| |
| |colspan=6 {{N/A}}
| |
| |-
| |
| ! colspan="10" |Shop and Gear Badges
| |
| |-
| |
| |Naut Couture Club Badge
| |
| |Spend a certain amount of [[Cash]] at [[Naut Couture]]
| |
| |[[File:Naut Badge 100k.webp|center|frameless|50x50px]]100K Naut Couture Club Badge
| |
| |100,000 Cash
| |
| |[[File:Naut Badge 1M.webp|center|frameless|50x50px]]1M Naut Couture Club Badge
| |
| |1,000,000 Cash
| |
| |colspan=4 {{N/A}}
| |
| |-
| |
| |Man-o'-Wardrobe Club Badge
| |
| |Spend a certain amount of [[Cash]] at [[Man-o'-Wardrobe]]
| |
| |[[File:Wardrobe Badge 100k.webp|center|frameless|50x50px]]100K Man-o'-Wardrobe Club Badge
| |
| |100,000 Cash
| |
| |[[File:Wardrobe Badge 1M.webp|center|frameless|50x50px]]1M Man-o'-Wardrobe Club Badge
| |
| |1,000,000 Cash
| |
| |colspan=4 {{N/A}}
| |
| |-
| |
| | Crush Station Club Badge
| |
| |Spend a certain amount of [[Cash]] at [[Crush Station]]
| |
| |[[File:Crush Badge 100k.webp|center|frameless|50x50px]]100K Crush Station Club Badge
| |
| |100,000 Cash
| |
| |[[File:Crush Badge 1M.webp|center|frameless|50x50px]]1M Crush Station Club Badge
| |
| |1,000,000 Cash
| |
| |colspan=4 {{N/A}}
| |
| |-
| |
| | Hotlantis Club Badge
| |
| |Spend a certain amount of [[Cash]] at [[Hotlantis]]
| |
| |[[File:Hotlantis Badge 100k.webp|center|frameless|50x50px]]100K Hotlantis Club Badge
| |
| |100,000 Cash
| |
| |[[File:Hotlantis Badge 1M.webp|center|frameless|50x50px]]1M Hotlantis Club Badge
| |
| |1,000,000 Cash
| |
| |colspan=4 {{N/A}}
| |
| |-
| |
| |Marigold Badge
| |
| | Buy a specific number of concession items using food or drink tickets
| |
| |[[File:Sg-icon-splatoon-3-badge-concessions-01.jpg|50x50px|center|frameless]]Marigold Badge
| |
| |10 concessions
| |
| |[[File:Marigold Badge 100.webp|center|frameless|50x50px]]Silver Marigold Badge
| |
| |100 concessions
| |
| |[[File:Marigold Badge 1000.webp|center|frameless|50x50px]]Gold Marigold Badge
| |
| |1000 concessions
| |
| |colspan=2 {{N/A}}
| |
| |-
| |
| |Murch Badge
| |
| |Make a specific number of orders with [[Murch]]
| |
| |[[File:Murch Badge 10.webp|center|frameless|50x50px]]Murch Badge
| |
| |10 orders
| |
| |[[File:Murch Badge 100.webp|center|frameless|50x50px]]Gold Murch Badge
| |
| |100 orders
| |
| |colspan=4 {{N/A}}
| |
| |-
| |
| |Catalog Badge
| |
| |Reach a specific level in the [[Catalog]]
| |
| | [[File:Catalog Badge 50.webp|center|frameless|50x50px]]Catalog Badge
| |
| |Catalog level 50
| |
| |[[File:Catalog Badge 100.webp|center|frameless|50x50px]]Gold Catalog Badge
| |
| |Catalog level 100
| |
| |colspan=4 {{N/A}}
| |
| |-
| |
| |{Brand} Badge
| |
| |Collect [[gear]] from a specific brand totaling a specific number of stars
| |
| |{Brand} Badge
| |
| | 30 stars
| |
| |Gold {Brand} Badge
| |
| |100+ stars
| |
| |colspan=4 {{N/A}}
| |
| |-
| |
| ! colspan="10" |Battle Badges
| |
| |-
| |
| |Judd Badge
| |
| |Win a certain number of [[Turf War]] battles.
| |
| |[[File:Judd Badge 50.webp|center|frameless|50x50px]]Judd Badge
| |
| |50 wins
| |
| |[[File:Judd Badge 250.webp|center|frameless|50x50px]]Silver Judd Badge
| |
| |250 wins
| |
| |[[File:Judd Badge 1200.webp|center|frameless|50x50px]]Gold Judd Badge
| |
| |1200 wins
| |
| |colspan=2 {{N/A}}
| |
| |-
| |
| |Rank Badge
| |
| |Reach a specific rank in [[Anarchy Battle]]
| |
| |[[File:Anarchy Badge A.webp|center|frameless|50x50px]]Anarchy Badge
| |
| |Reach A Rank
| |
| |[[File:Anarchy Badge S.webp|center|frameless|50x50px]]Silver Anarchy Badge
| |
| | Reach S Rank
| |
| |[[File:Anarchy Badge Plus.webp|center|frameless|50x50px]]Gold Anarchy Badge
| |
| |Reach S+ Rank
| |
| |colspan=2 {{N/A}}
| |
| |-
| |
| |Clam Blitz Badge
| |
| |Win a certain number of [[Clam Blitz]] games in [[Anarchy Battle]]
| |
| |[[File:Clam Badge 100.webp|center|frameless|50x50px]]Clam Blitz Badge
| |
| |100 wins
| |
| |[[File:Clam Badge 1000.webp|center|frameless|50x50px]]Gold Clam Blitz Badge
| |
| |1000 wins
| |
| |colspan=4 {{N/A}}
| |
| |-
| |
| |Rainmaker Badge
| |
| |Win a certain number of [[Rainmaker]] games in [[Anarchy Battle]]
| |
| |[[File:Rainmaker Badge 100.webp|center|frameless|50x50px]]Rainmaker Badge
| |
| |100 wins
| |
| |[[File:Rainmaker Badge 1000.webp|center|frameless|50x50px]]Gold Rainmaker Badge
| |
| |1000 wins
| |
| |colspan=4 {{N/A}}
| |
| |-
| |
| |Splat Zones Badge
| |
| |Win a certain number of [[Splat Zones]] games in [[Anarchy Battle]]
| |
| |[[File:Zones Badge 100.webp|center|frameless|50x50px]]Splat Zones Badge
| |
| |100 wins
| |
| |[[File:Zones Badge 1000.webp|center|frameless|50x50px]]Gold Splat Zones Badge
| |
| |1000 wins
| |
| |colspan=4 {{N/A}}
| |
| |-
| |
| |Tower Control Badge
| |
| |Win a certain number of [[Tower Control]] games in [[Anarchy Battle]]
| |
| |[[File:Tower Badge 100.webp|center|frameless|50x50px]]Tower Control Badge
| |
| |100 wins
| |
| |[[File:Tower Badge 1000.webp|center|frameless|50x50px]]Gold Tower Control Badge
| |
| |1000 wins
| |
| |colspan=4 {{N/A}}
| |
| |-
| |
| | Tableturf Rank Badge
| |
| |Reach a certain rank in [[Tableturf Battle]]
| |
| |[[File:Tableturf Badge 30.webp|center|frameless|50x50px]]Tableturf Rank Badge
| |
| |Rank 30
| |
| |[[File:Tableturf Badge 40.webp|center|frameless|50x50px]]Silver Tableturf Rank Badge
| |
| |Rank 40
| |
| |[[File:Tableturf Badge 50.webp|center|frameless|50x50px]]Gold Tableturf Rank Badge
| |
| |Rank 50
| |
| |[[File:Tableturf Badge Max.webp|center|frameless|50x50px]]Deep Cut Tableturf Rank Badge
| |
| | Tableturf Dojo Max Level Champ
| |
| |-
| |
| |Tableturf Collection Badge
| |
| |Collect a certain number of unique cards in [[Tableturf Battle]]
| |
| |[[File:Cards Badge 90.webp|center|frameless|50x50px]]Tableturf Collection Badge
| |
| |90 unique cards
| |
| |[[File:Cards Badge 120.webp|center|frameless|50x50px]]Silver Tableturf Collection Badge
| |
| |120 unique cards
| |
| |[[File:Cards Badge 150.webp|center|frameless|50x50px]]Gold Tableturf Collection Badge
| |
| |150 unique cards
| |
| |colspan=2 {{N/A}}
| |
| |-
| |
| ! colspan="10" |Splatfest Badges
| |
| |-
| |
| |Splatfest Ruler Badge
| |
| |Reach the title of [[Splatfest]] Ruler
| |
| |[[File:Splatfest Ruler Badge.webp|center|frameless|50x50px]]Splatfest Ruler Badge
| |
| |Reach Splatfest Ruler
| |
| |colspan=6 {{N/A}}
| |
| |-
| |
| |Tricolor Turf War (Attacker) Badge
| |
| | Win [[Tricolor Turf War]] battles on an attacking team
| |
| |[[File:Tricolor Attack Badge 1.webp|center|frameless|50x50px]]Tricolor Turf War Badge - Attacker
| |
| |1 win
| |
| |[[File:Tricolor Attack Badge 10.webp|center|frameless|50x50px]]Gold Tricolor Turf War Badge - Attacker
| |
| |10 wins
| |
| |colspan=4 {{N/A}}
| |
| |-
| |
| | Tricolor Turf War (Defender) Badge
| |
| | Win [[Tricolor Turf War]] battles on the defending team
| |
| |[[File:Tricolor Defend Badge 1.webp|center|frameless|50x50px]]Tricolor Turf War Badge - Defender
| |
| |1 win
| |
| |[[File:Tricolor Defend Badge 10.webp|center|frameless|50x50px]]Gold Tricolor Turf War Badge - Defender
| |
| |10 wins
| |
| |colspan=4 {{N/A}}
| |
| |-
| |
| ! colspan="10" |Weapon Badges
| |
| |-
| |
| |{Weapon} Badge
| |
| |Reach a specific [[Freshness]] level (Points awarded for performance at the end of a match) with a specific [[weapon]]. (See table below)
| |
| |4★ {Weapon} Badge
| |
| |4 stars (160,000p)
| |
| |5★ {Weapon} Badge
| |
| |5 stars (1,160,000p)
| |
| |colspan=4 {{N/A}}
| |
| |-
| |
| |{Special Weapon} Badge
| |
| | Win a specific number of battles using a kit with a specific [[Special weapon]]. (See table below)
| |
| |{Special Weapon} Badge
| |
| |30 wins
| |
| |Silver {Special Weapon} Badge
| |
| | 180 wins
| |
| |Gold {Special Weapon} Badge
| |
| |1200 wins
| |
| |colspan=2 {{N/A}}
| |
| |}
| |
| | |
| ===List of Boss Salmonid badges===
| |
| Boss Salmonid badges are obtained by splatting 100, 1000, and 10,000 of a specific [[Boss Salmonid]].
| |
| {| class="wikitable sitecolor-s3 mw-collapsible mw-collapsed"
| |
| !Boss Salmonid
| |
| !100 splatted
| |
| !1000 splatted
| |
| !10,000 splatted
| |
| |-
| |
| |[[Big Shot]]
| |
| |[[File:Shot Badge 100.webp|center|frameless|50x50px]]Big Shot Badge
| |
| |[[File:Shot Badge 1000.webp|center|frameless|50x50px]]Silver Big Shot Badge
| |
| |[[File:Shot Badge 10000.webp|center|frameless|50x50px]]Gold Big Shot Badge
| |
| |-
| |
| |[[Drizzler]]
| |
| |[[File:Drizzler Badge 100.webp|center|frameless|50x50px]]Drizzler Badge
| |
| |[[File:Drizzler Badge 1000.webp|center|frameless|50x50px]]Silver Drizzler Badge
| |
| |[[File:Drizzler Badge 10000.webp|center|frameless|50x50px]]Gold Drizzler Badge
| |
| |-
| |
| |[[Fish Stick]]
| |
| |[[File:Stick Badge 100.webp|center|frameless|50x50px]]Fish Stick Badge
| |
| |[[File:Stick Badge 1000.webp|center|frameless|50x50px]]Silver Fish Stick Badge
| |
| |[[File:Stick Badge 10000.webp|center|frameless|50x50px]]Gold Fish Stick Badge
| |
| |-
| |
| |[[Flipper-Flopper]]
| |
| | [[File:Flipper Badge 100.webp|center|frameless|50x50px]]Flipper-Flopper Badge
| |
| | [[File:Flipper Badge 1000.webp|center|frameless|50x50px]]Silver Flipper-Flopper Badge
| |
| | [[File:Flipper Badge 10000.webp|center|frameless|50x50px]]Gold Flipper-Flopper Badge
| |
| |-
| |
| |[[Flyfish]]
| |
| | [[File:Flyfish Badge 100.webp|center|frameless|50x50px]]Flyfish Badge
| |
| | [[File:Flyfish Badge 1000.webp|center|frameless|50x50px]]Silver Flyfish Badge
| |
| | [[File:Flyfish Badge 10000.webp|center|frameless|50x50px]]Gold Flyfish Badge
| |
| |-
| |
| |[[Maws]]
| |
| |[[File:Maws Badge 100.webp|center|frameless|50x50px]]Maws Badge
| |
| |[[File:Maws Badge 1000.webp|center|frameless|50x50px]]Silver Maws Badge
| |
| |[[File:Maws Badge 10000.webp|center|frameless|50x50px]]Gold Maws Badge
| |
| |-
| |
| |[[Scrapper]]
| |
| |[[File:Scrapper Badge 100.webp|center|frameless|50x50px]]Scrapper Badge
| |
| |[[File:Scrapper Badge 1000.webp|center|frameless|50x50px]]Silver Scrapper Badge
| |
| |[[File:Scrapper Badge 10000.webp|center|frameless|50x50px]]Gold Scrapper Badge
| |
| |-
| |
| |[[Slammin' Lid]]
| |
| |[[File:Lid Badge 100.webp|center|frameless|50x50px]]Slammin' Lid Badge
| |
| |[[File:Lid Badge 1000.webp|center|frameless|50x50px]]Silver Slammin' Lid Badge
| |
| |[[File:Lid Badge 10000.webp|center|frameless|50x50px]]Gold Slammin' Lid Badge
| |
| |-
| |
| |[[Steel Eel]]
| |
| |[[File:Eel Badge 100.webp|center|frameless|50x50px]]Steel Eel Badge
| |
| |[[File:Eel Badge 1000.webp|center|frameless|50x50px]]Silver Steel Eel Badge
| |
| |[[File:Eel Badge 10000.webp|center|frameless|50x50px]]Gold Steel Eel Badge
| |
| |-
| |
| |[[Steelhead]]
| |
| |[[File:Steelhead Badge 100.webp|center|frameless|50x50px]]Steelhead Badge
| |
| |[[File:Steelhead Badge 1000.webp|center|frameless|50x50px]]Silver Steelhead Badge
| |
| |[[File:Steelhead Badge 10000.webp|center|frameless|50x50px]]Gold Steelhead Badge
| |
| |-
| |
| |[[Stinger]]
| |
| |[[File:Stinger Badge 100.webp|center|frameless|50x50px]]Stinger Badge
| |
| | [[File:Stinger Badge 1000.webp|center|frameless|50x50px]]Silver Stinger Badge
| |
| | [[File:Stinger Badge 10000.webp|center|frameless|50x50px]]Gold Stinger Badge
| |
| |}
| |
| | |
| === List of weapon badges===
| |
| Weapon badges are achieved when reaching Freshness levels 4 (for reaching 160,000p turf inked) and 5 (for reaching 1,160,000p turf inked) with a specific [[Weapon|weapon kit]].
| |
| {| class="wikitable sitecolor-s3 mw-collapsible mw-collapsed"
| |
| ! Weapon
| |
| !4★ (160,000p)
| |
| !5★ (1,160,000p)
| |
| |-
| |
| ! colspan="3" |Shooters
| |
| |-
| |
| |[[.52 Gal]]
| |
| |[[File:Badge_WeaponLevel_Shooter_Gravity_00_Lv00.webp|center|frameless|50x50px]]4★ .52 Gal Badge
| |
| |[[File:Badge_WeaponLevel_Shooter_Gravity_00_Lv01.webp|center|frameless|50x50px]]5★ .52 Gal Badge
| |
| |-
| |
| |[[.96 Gal]]
| |
| |[[File:Badge WeaponLevel Shooter Heavy 00 Lv00.webp|center|frameless|50x50px]]4★ .96 Gal Badge
| |
| |[[File:Badge WeaponLevel Shooter Heavy 00 Lv01.webp|center|frameless|50x50px]]5★ .96 Gal Badge
| |
| |-
| |
| |[[Aerospray MG]]
| |
| |[[File:Aerospray MG Badge 4s.webp|center|frameless|50x50px]]4★ Aerospray MG Badge
| |
| |[[File:Aerospray MG Badge 5.webp|center|frameless|50x50px]]5★ Aerospray MG Badge
| |
| |-
| |
| |[[H-3 Nozzlenose]]
| |
| |[[File:Nozzle h3 4 user.webp|center|frameless|50x50px]]4★ H-3 Nozzlenose Badge
| |
| |[[File:Nozzle h3 5 user.webp|center|frameless|50x50px]]5★ H-3 Nozzlenose Badge
| |
| |-
| |
| |[[Hero Shot Replica]]
| |
| |[[File:Hero 4 user.webp|center|frameless|50x50px]]4★ Hero Shot Replica Badge
| |
| |[[File:Hero 5 user.webp|center|frameless|50x50px]]5★ Hero Shot Replica Badge
| |
| |-
| |
| |[[Jet Squelcher]]
| |
| |[[File:Jet Squelcher 1.png|center|frameless|50x50px]]4★ Jet Squelcher Badge
| |
| |[[File:Jet Squelcher 2.png|center|frameless|50x50px]]5★ Jet Squelcher Badge
| |
| |-
| |
| |[[L-3 Nozzlenose]]
| |
| |[[File:Nozzle l3 4 user.webp|center|frameless|50x50px]]4★ L-3 Nozzlenose Badge
| |
| |[[File:Nozzle L3 5 user.webp|center|frameless|50x50px]]5★ L-3 Nozzlenose Badge
| |
| |-
| |
| |[[N-ZAP '85]]
| |
| |[[File:N-ZAP 85 Badge 4.webp|center|frameless|50x50px]]4★ N-ZAP '85 Badge
| |
| |[[File:N-ZAP 85 Badge 5.webp|center|frameless|50x50px]]5★ N-ZAP '85 Badge
| |
| |-
| |
| |[[Splash-o-matic]]
| |
| |[[File:Splash 4 user.webp|center|frameless|50x50px]]4★ Splash-o-matic Badge
| |
| |[[File:Splash 5 user.webp|center|frameless|50x50px]]5★ Splash-o-matic Badge
| |
| |-
| |
| |[[Splattershot]]
| |
| |[[File:Splat 4.webp|center|frameless|50x50px]]4★ Splattershot Badge
| |
| |[[File:Splat 5.webp|center|frameless|50x50px]]5★ Splattershot Badge
| |
| |-
| |
| |[[Splattershot Jr.]]
| |
| |[[File:Splat jr 4.webp|center|frameless|50x50px]]4★ Splattershot Jr. Badge
| |
| |[[File:Splat jr 5.webp|center|frameless|50x50px]]5★ Splattershot Jr. Badge
| |
| |-
| |
| |[[Sploosh-o-matic]]
| |
| |[[File:Sploosh 4 user.webp|center|frameless|50x50px]]4★ Sploosh-o-matic Badge
| |
| |[[File:Sploosh 5 user.webp|center|frameless|50x50px]]5★ Sploosh-o-matic Badge
| |
| |-
| |
| |[[Splattershot Pro]]
| |
| |[[File:Splat pro 4.webp|center|frameless|50x50px]]★ Splattershot Pro Badge
| |
| |[[File:Splat pro 5.webp|center|frameless|50x50px]]★ Splattershot Pro Badge
| |
| |-
| |
| |[[Squeezer]]
| |
| |[[File:Squeeze 4.webp|center|frameless|50x50px]]4★ Squeezer Badge
| |
| |[[File:Squeeze 5.webp|center|frameless|50x50px]]5★ Squeezer Badge
| |
| |-
| |
| ! colspan="3" |Rollers
| |
| |-
| |
| |[[Carbon Roller]]
| |
| |[[File:Carbon 4.webp|center|frameless|50x50px]]4★ Carbon Roller Badge
| |
| |[[File:Carbon 5.webp|center|frameless|50x50px]]5★ Carbon Roller Badge
| |
| |-
| |
| |[[Dynamo Roller]]
| |
| |[[File:Dynamo 4.webp|center|frameless|50x50px]]4★ Dynamo Roller Badge
| |
| |[[File:Dynamo 5.webp|center|frameless|50x50px]]5★ Dynamo Roller Badge
| |
| |-
| |
| |[[Flingza Roller]]
| |
| |[[File:Flingza 4.webp|center|frameless|50x50px]]4★ Flingza Roller Badge
| |
| |[[File:Flingza 5.webp|center|frameless|50x50px]]5★ Flingza Roller Badge
| |
| |-
| |
| |[[Splat Roller]]
| |
| |[[File:Roller 4.webp|center|frameless|50x50px]]4★ Splat Roller Badge
| |
| |[[File:Roller 5.webp|center|frameless|50x50px]]5★ Splat Roller Badge
| |
| |-
| |
| ! colspan="3" |Chargers
| |
| |-
| |
| |[[Bamboozler 14 Mk I]]
| |
| |[[File:Bamboo 4.webp|center|frameless|50x50px]]4★ Bamboozler 14 Mk I Badge
| |
| |[[File:Bamboo 5.webp|center|frameless|50x50px]]5★ Bamboozler 14 Mk I Badge
| |
| |-
| |
| |[[E-liter 4K]]
| |
| |[[File:Eliter 4k 4.webp|center|frameless|50x50px]]4★ E-liter 4K Badge
| |
| |[[File:Eliter 4k 5.webp|center|frameless|50x50px]]5★ E-liter 4K Badge
| |
| |-
| |
| |[[E-liter 4K Scope]]
| |
| |[[File:Eliter 4k scope4.webp|center|frameless|50x50px]]4★ E-liter 4K Scope Badge
| |
| |[[File:Eliter 4k scope 5.webp|center|frameless|50x50px]]5★ E-liter 4K Scope Badge
| |
| |-
| |
| |[[Goo Tuber]]
| |
| |[[File:Gootuber 4.webp|center|frameless|50x50px]]4★ Goo Tuber Badge
| |
| |[[File:Gootuber 5.webp|center|frameless|50x50px]]5★ Goo Tuber Badge
| |
| |-
| |
| |[[Splat Charger]]
| |
| |[[File:Charger 4.webp|center|frameless|50x50px]]4★ Splat Charger Badge
| |
| |[[File:Charger 5.webp|center|frameless|50x50px]]5★ Splat Charger Badge
| |
| |-
| |
| |[[Splatterscope]]
| |
| |[[File:Scope 4.webp|center|frameless|50x50px]]4★ Splatterscope Badge
| |
| |[[File:Scope 5.webp|center|frameless|50x50px]]5★ Splatterscope Badge
| |
| |-
| |
| |[[Classic Squiffer]]
| |
| |[[File:Classic squiff 4.webp|center|frameless|50x50px]]4★ Classic Squiffer Badge
| |
| |[[File:Classic squiff 5.webp|center|frameless|50x50px]]5★ Classic Squiffer Badge
| |
| |-
| |
| ! colspan="3" |Sloshers
| |
| |-
| |
| |[[Bloblobber]]
| |
| |[[File:Bloblobber Badge 4.webp|center|frameless|50x50px]]4★ Bloblobber Badge
| |
| |[[File:Bloblobber Badge 5.webp|center|frameless|50x50px]]5★ Bloblobber Badge
| |
| |-
| |
| |[[Explosher]]
| |
| |[[File:Explosh 4.webp|center|frameless|50x50px]]4★ Explosher Badge
| |
| |[[File:Explosh 5.webp|center|frameless|50x50px]]5★ Explosher Badge
| |
| |-
| |
| |[[Slosher]]
| |
| |[[File:Slosh 4.webp|center|frameless|50x50px]]4★ Slosher Badge
| |
| |[[File:Slosh 5.webp|center|frameless|50x50px]]5★ Slosher Badge
| |
| |-
| |
| |[[Sloshing Machine]]
| |
| |[[File:Machine 4.webp|center|frameless|50x50px]]4★ Sloshing Machine Badge
| |
| |[[File:Machine 5.webp|center|frameless|50x50px]]5★ Sloshing Machine Badge
| |
| |-
| |
| |[[Tri-Slosher]]
| |
| |[[File:Trislosher_4.webp|center|frameless|50x50px]]4★ Tri-Slosher Badge
| |
| |[[File:Trislosher_5.webp|center|frameless|50x50px]]5★ Tri-Slosher Badge
| |
| |-
| |
| ! colspan="3" |Splatlings
| |
| |-
| |
| |[[Ballpoint Splatling]]
| |
| |[[File:Ballpoint 4.webp|center|frameless|50x50px]]4★ Ballpoint Splatling Badge
| |
| |[[File:Ballpoint 5.webp|center|frameless|50x50px]]5★ Ballpoint Splatling Badge
| |
| |-
| |
| |[[Heavy Splatling]]
| |
| |[[File:Heavy splat 4.webp|center|frameless|50x50px]]4★ Heavy Splatling Badge
| |
| |[[File:Heavy splat 5.webp|center|frameless|50x50px]]5★ Heavy Splatling Badge
| |
| |-
| |
| |[[Hydra Splatling]]
| |
| |[[File:Hydra 4.webp|center|frameless|50x50px]]4★ Hydra Splatling Badge
| |
| |[[File:Hydra 5.webp|center|frameless|50x50px]]5★ Hydra Splatling Badge
| |
| |-
| |
| |[[Mini Splatling]]
| |
| |[[File:Mini splat 4.webp|center|frameless|50x50px]]4★ Mini Splatling Badge
| |
| |[[File:Mini splat 5.webp|center|frameless|50x50px]]5★ Mini Splatling Badge
| |
| |-
| |
| |[[Nautilus 47]]
| |
| |[[File:Naut 47 4.webp|center|frameless|50x50px]]4★ Nautilus 47 Badge
| |
| |[[File:Naut 47 5.webp|center|frameless|50x50px]]5★ Nautilus 47 Badge
| |
| |-
| |
| ! colspan="3" |Dualies
| |
| |-
| |
| |[[Dapple Dualies]]
| |
| |[[File:Dapple 4.webp|center|frameless|50x50px]]4★ Dapple Dualies Badge
| |
| |[[File:Dapple 5.webp|center|frameless|50x50px]]5★ Dapple Dualies Badge
| |
| |-
| |
| |[[Dualie Squelchers]]
| |
| |[[File:Dualie squelch 4.webp|center|frameless|50x50px]]4★ Dualie Squelchers Badge
| |
| |[[File:Dualie squelch 5.webp|center|frameless|50x50px]]5★ Dualie Squelchers Badge
| |
| |-
| |
| |[[Glooga Dualies]]
| |
| |[[File:Glooga 4.webp|center|frameless|50x50px]]4★ Glooga Dualies Badge
| |
| |[[File:Glooga 5.webp|center|frameless|50x50px]]5★ Glooga Dualies Badge
| |
| |-
| |
| |[[Splat Dualies]]
| |
| |[[File:Dualies 4.webp|center|frameless|50x50px]]4★ Splat Dualies Badge
| |
| |[[File:Dualies 5.webp|center|frameless|50x50px]]5★ Splat Dualies Badge
| |
| |-
| |
| |[[Dark Tetra Dualies]]
| |
| |[[File:Dark tetras 4.webp|center|frameless|50x50px]]4★ Dark Tetra Dualies Badge
| |
| |[[File:Dark tetras 5.webp|center|frameless|50x50px]]5★ Dark Tetra Dualies Badge
| |
| |-
| |
| ! colspan="3" |Brellas
| |
| |-
| |
| |[[Splat Brella]]
| |
| |[[File:Brella 4.webp|center|frameless|50x50px]]4★ Splat Brella Badge
| |
| |[[File:Brella 5.webp|center|frameless|50x50px]]5★ Splat Brella Badge
| |
| |-
| |
| |[[Tenta Brella]]
| |
| |[[File:Tenta 4.webp|center|frameless|50x50px]]4★ Tenta Brella Badge
| |
| |[[File:Tenta 5.webp|center|frameless|50x50px]]5★ Tenta Brella Badge
| |
| |-
| |
| |[[Undercover Brella]]
| |
| |[[File:Undercover 4.webp|center|frameless|50x50px]]4★ Undercover Brella Badge
| |
| |[[File:Undercover 5.webp|center|frameless|50x50px]]5★ Undercover Brella Badge
| |
| |-
| |
| ! colspan="3" |Blasters
| |
| |-
| |
| |[[Blaster]]
| |
| |[[File:Blaster 4 star badge.png|center|frameless|60x60px]]4★ Blaster Badge
| |
| |[[File:Blaster 2.png|center|frameless|60x60px]]5★ Blaster Badge
| |
| |-
| |
| |[[Clash Blaster]]
| |
| |[[File:Clash blaster 1.png|center|frameless|60x60px]]4★ Clash Blaster Badge
| |
| |[[File:Clash blaster 2.png|center|frameless|60x60px]]5★ Clash Blaster Badge
| |
| |-
| |
| |[[Luna Blaster]]
| |
| |[[File:Luna Blaster 1.png|center|frameless|50x50px]]4★ Luna Blaster Badge
| |
| |[[File:Luna Blaster 2.png|center|frameless|50x50px]]5★ Luna Blaster Badge
| |
| |-
| |
| |[[Range Blaster]]
| |
| |[[File:Range blaster 1.png|center|frameless|60x60px]]4★ Range Blaster Badge
| |
| |[[File:Range blaster 2.png|center|frameless|60x60px]]5★ Range Blaster Badge
| |
| |-
| |
| |[[Rapid Blaster]]
| |
| |[[File:Rapid blaster 1.png|center|frameless|60x60px]]4★ Rapid Blaster Badge
| |
| |[[File:Rapid blaster 2.png|center|frameless|60x60px]]5★ Rapid Blaster Badge
| |
| |-
| |
| |[[Rapid Blaster Pro]]
| |
| |[[File:Rapid blaster pro 1.png|center|frameless|60x60px]]4★ Rapid Blaster Pro Badge
| |
| |[[File:Rapid blaster pro 2.png|center|frameless|60x60px]]5★ Rapid Blaster Pro Badge
| |
| |-
| |
| ! colspan="3" |Brushes
| |
| |-
| |
| |[[Inkbrush]]
| |
| |[[File:Inkbrush 1.png|center|frameless|50x50px]]4★ Inkbrush Badge
| |
| |[[File:Inkbrush 2.png|center|frameless|50x50px]]5★ Inkbrush Badge
| |
| |-
| |
| |[[Octobrush]]
| |
| |[[File:Octobrush 1.png|center|frameless|50x50px]]4★ Octobrush Badge
| |
| |[[File:Octobrush 2.png|center|frameless|50x50px]]5★ Octobrush Badge
| |
| |-
| |
| ! colspan="3" |Stringers
| |
| |-
| |
| |[[REEF-LUX 450]]
| |
| |[[File:Reeflux 4.webp|center|frameless|50x50px]]4★ REEF-LUX 450 Badge
| |
| |[[File:Reeflux 5.webp|center|frameless|50x50px]]5★ REEF-LUX 450 Badge
| |
| |-
| |
| |[[Tri-Stringer]]
| |
| |[[File:Tristring 4.webp|center|frameless|50x50px]]4★ Tri-Stringer Badge
| |
| |[[File:Tristring 5.webp|center|frameless|50x50px]]5★ Tri-Stringer Badge
| |
| |-
| |
| ! colspan="3" |Splatanas
| |
| |-
| |
| |[[Splatana Stamper]]
| |
| |[[File:Stamper 4.webp|center|frameless|50x50px]]4★ Splatana Stamper Badge
| |
| |[[File:Stamper 5.webp|center|frameless|50x50px]]5★ Splatana Stamper Badge
| |
| |-
| |
| |[[Splatana Wiper]]
| |
| |[[File:Wiper 4.webp|center|frameless|50x50px]]4★ Splatana Wiper Badge
| |
| |[[File:Wiper 5.webp|center|frameless|50x50px]]5★ Splatana Wiper Badge
| |
| |}
| |
| | |
| ===List of special weapon badges===
| |
| Special weapon badges are achieved based on the number of battles won while using a weapon kit including the special weapon. They are awarded at 30, 180, and 1200 battles won.
| |
| {| class="wikitable sitecolor-s3 mw-collapsible mw-collapsed"
| |
| !Special weapon
| |
| !30 battle wins
| |
| !180 battle wins
| |
| !1200 battle wins
| |
| |-
| |
| |[[Big Bubbler]]
| |
| |[[File:Big bubbler badge.png|center|50x50px|frameless]]Big Bubbler Badge
| |
| |[[File:Big Bubbler Silver.png|center|50x50px|frameless]]Silver Big Bubbler Badge
| |
| |[[File:Big Bubbler Gold.png|center|50x50px|frameless]]Gold Big Bubbler Badge
| |
| |-
| |
| |[[Booyah Bomb]]
| |
| |[[File:Booyah Bomb Normal.png|center|frameless|50x50px]]Booyah Bomb Badge
| |
| |[[File:Booyah Bomb Silver.png|center|frameless|50x50px]]Silver Booyah Bomb Badge
| |
| |[[File:Booyah Bomb Gold.png|center|frameless|50x50px]]Gold Booyah Bomb Badge
| |
| |-
| |
| |[[Crab Tank]]
| |
| |[[File:Crab Tank Normal.png|center|frameless|50x50px]]Crab Tank Badge
| |
| |[[File:Crab Tank Silver.png|center|frameless|50x50px]]Silver Crab Tank Badge
| |
| | [[File:Crab Tank Gold.png|center|frameless|50x50px]]Gold Crab Tank Badge
| |
| |-
| |
| |[[Ink Storm]]
| |
| |[[File:Storm Badge 30.webp|center|frameless|50x50px]]Ink Storm Badge
| |
| |[[File:Storm Badge 180.webp|center|frameless|50x50px]]Silver Ink Storm Badge
| |
| |[[File:Storm Badge 1200.webp|center|frameless|50x50px]]Gold Ink Storm Badge
| |
| |-
| |
| |[[Ink Vac]]
| |
| |[[File:Ink Vac Normal.png|center|frameless|50x50px]]Ink Vac Badge
| |
| | [[File:Ink Vac Silver.png|center|frameless|50x50px]]Silver Ink Vac Badge
| |
| |[[File:Ink Vac Gold.png|center|frameless|50x50px]]Gold Ink Vac Badge
| |
| |-
| |
| |[[Inkjet]]
| |
| |[[File:Inkjet Normal.png|center|frameless|50x50px]]Inkjet Badge
| |
| |[[File:Inkjet Silver.png|center|frameless|50x50px]]Silver Inkjet Badge
| |
| |[[File:Inkjet Gold.png|center|frameless|50x50px]]Gold Inkjet Badge
| |
| |-
| |
| |[[Killer Wail 5.1]]
| |
| |[[File:Killer Wail Normal.png|center|frameless|50x50px]]Killer Wail 5.1 Badge
| |
| |[[File:Killer Wail Silver.png|center|frameless|50x50px]]Silver Killer Wail 5.1 Badge
| |
| |[[File:Killer Wail Gold.png|center|frameless|50x50px]]Gold Killer Wail 5.1 Badge
| |
| |-
| |
| |[[Reefslider]]
| |
| |[[File:Reefslider Badge 30.webp|center|frameless|50x50px]]Reefslider Badge
| |
| |[[File:Reefslider Badge 180.webp|center|frameless|50x50px]]Silver Reefslider Badge
| |
| |[[File:Reefslider Badge 1200.webp|center|frameless|50x50px]]Gold Reefslider Badge
| |
| |-
| |
| |[[Tacticooler]]
| |
| |[[File:Tacticooler Normal.png|center|frameless|50x50px]]Tacticooler Badge
| |
| |[[File:Tacticooler Silver.png|center|frameless|50x50px]]Silver Tacticooler Badge
| |
| |[[File:Tacticooler Gold.png|center|frameless|50x50px]]Gold Tacticooler Badge
| |
| |-
| |
| |[[Tenta Missiles]]
| |
| |[[File:Tenta Missle 1.png|center|frameless|50x50px]]Tenta Missiles Badge
| |
| |[[File:Tenta Missile 2.png|center|frameless|50x50px]]Silver Tenta Missiles Badge
| |
| |[[File:Tenta Missile 3.png|center|frameless|50x50px]]Gold Tenta Missiles Badge
| |
| |-
| |
| |[[Triple Inkstrike]]
| |
| |[[File:Triple Inkstrike Normal.png|center|frameless|50x50px]]Triple Inkstrike Badge
| |
| |[[File:Triple Inkstrike Silver.png|center|frameless|50x50px]]Silver Triple Inkstrike Badge
| |
| |[[File:Triple Inkstrike Gold.png|center|frameless|50x50px]]Gold Triple Inkstrike Badge
| |
| |-
| |
| |[[Trizooka]]
| |
| |[[File:Trizooka Normal.png|center|frameless|50x50px]]Trizooka Badge
| |
| |[[File:Trizooka Silver.png|center|frameless|50x50px]]Silver Trizooka Badge
| |
| |[[File:Trizooka Gold.png|center|frameless|50x50px]]Gold Trizooka Badge
| |
| |-
| |
| |[[Ultra Stamp]]
| |
| |[[File:Ultra Stamp Normal.png|center|frameless|50x50px]]Ultra Stamp Badge
| |
| |[[File:Ultra Stamp Silver.png|center|frameless|50x50px]]Silver Ultra Stamp Badge
| |
| |[[File:Ultra Stamp Gold.png|center|frameless|50x50px]]Gold Ultra Stamp Badge
| |
| |-
| |
| |[[Wave Breaker]]
| |
| |[[File:Wave Breaker Normal.png|center|frameless|50x50px]]Wave Breaker Badge
| |
| |[[File:Wave Breaker Silver.png|center|frameless|50x50px]]Silver Wave Breaker Badge
| |
| |[[File:Wave Breaker Gold.png|center|frameless|50x50px]]Gold Wave Breaker Badge
| |
| |-
| |
| |[[Zipcaster]]
| |
| |[[File:Zipcaster Normal.png|center|frameless|50x50px]]Zipcaster Badge
| |
| |[[File:Zipcaster Silver.png|center|frameless|50x50px]]Silver Zipcaster Badge
| |
| | [[File:Zipcaster Gold.png|center|frameless|50x50px]]Gold Zipcaster Badge
| |
| |}
| |
| | |
| ===List of gear badges===
| |
| Gear badges are achieved by reaching a cumulative total of at least 30 or 100 rarity stars across all gear in your inventory.
| |
| {| class="wikitable sitecolor-s3 mw-collapsible mw-collapsed"
| |
| !Brand
| |
| !30+ stars
| |
| !100+ stars
| |
| |-
| |
| |[[Annaki]]
| |
| |Annaki Badge
| |
| |Gold Annaki Badge
| |
| |-
| |
| |[[Barazushi]]
| |
| |Barazushi Badge
| |
| | Gold Barazushi Badge
| |
| |-
| |
| |[[Emberz]]
| |
| |Emberz Badge
| |
| |Gold Emberz Badge
| |
| |-
| |
| |[[Enperry]]
| |
| |Enperry Badge
| |
| |Gold Enperry Badge
| |
| |-
| |
| |[[Firefin]]
| |
| |Firefin Badge
| |
| |Gold Firefin Badge
| |
| |-
| |
| |[[Forge]]
| |
| |Forge Badge
| |
| |Gold Forge Badge
| |
| |-
| |
| |[[Inkline]]
| |
| |Inkline Badge
| |
| |Gold Inkline Badge
| |
| |-
| |
| |[[Krak-On]]
| |
| |Krak-On Badge
| |
| |Gold Krak-On Badge
| |
| |-
| |
| |[[Rockenberg]]
| |
| |Rockenberg Badge
| |
| |Gold Rockenberg Badge
| |
| |-
| |
| |[[Skalop]]
| |
| |Skalop Badge
| |
| |Gold Skalop Badge
| |
| |-
| |
| |[[Splash Mob]]
| |
| |Splash Mob Badge
| |
| | Gold Splashmob Badge
| |
| |-
| |
| |[[SquidForce]]
| |
| |SquidForce Badge
| |
| |Gold SquidForce Badge
| |
| |-
| |
| |[[Takoroka]]
| |
| |Takoroka Badge
| |
| |Gold Takoroka Badge
| |
| |-
| |
| |[[Tentatek]]
| |
| |Tentatek Badge
| |
| |Gold Tentatek Badge
| |
| |-
| |
| |[[Toni Kensa]]
| |
| |Toni Kensa Badge
| |
| |Gold Toni Kensa Badge
| |
| |-
| |
| |[[Zekko]]
| |
| |Zekko Badge
| |
| |Gold Zekko Badge
| |
| |-
| |
| | [[Zink]]
| |
| |Zink Badge
| |
| |Gold Zink Badge
| |
| |}
| |
| {{Clr}} | |
|
| |
|
| ==Titles == | | ==Titles == |
| {{main|Title}} | | {{main|Title}} |
| Titles are displayed in the top-left corner of the Splashtag. They consist of two words or phrases that can be mixed freely to best reflect the player's personality. The player can shuffle titles to obtain a random combination. Aside from some special titles, each player will unlock titles in a different order as they play the game. Titles can also be obtained from the Catalog and Shell-Out Machine. | | [[File:S3 Titles screen.jpg|thumb|Various Titles]] |
| | Titles are displayed in the top-left corner of the Splashtag. They consist of two words or phrases that can be mixed freely to best reflect the player's personality. The player can shuffle titles to obtain a random combination. Aside from some special titles, each player will unlock titles in a different order as they play the game. Titles can also be obtained from the Catalog and Shell-Out Machine. Some specific titles can be obtained by playing [[Tableturf Battle]], [[Side Order]], and the main singleplayer campaign. |
| | {{clr}} |
|
| |
|
| ==Quotes== | | ==Quotes== |
| Line 1,050: |
Line 34: |
| Now that you've got a fresh Splashtag, it's time to get out there and make it famous!|In-game description}} | | Now that you've got a fresh Splashtag, it's time to get out there and make it famous!|In-game description}} |
|
| |
|
| {{Quote|Squid Research Lab here with another monumental discovery! It seems that inhabitants of the [[Splatlands]] utilize these colorful '''banners''' to show off their style. And not just in battles! They're visible in a variety of settings and fully customizable based on gameplay. | | {{Quote|Squid Research Lab here with another monumental discovery! It seems that inhabitants of [[the Splatlands]] utilize these colorful '''banners''' to show off their style. And not just in battles! They're visible in a variety of settings and fully customizable based on gameplay. |
|
| |
|
| For example, you can register a so-called title that reflects your personality. The more [[Turf War]] battles you wage, the more words you'll unlock. We're consulting with our staff mathematician, but we estimate there are a "gazillion" possibilities, scientifically speaking.|@SplatoonNA on Twitter<ref>[https://twitter.com/SplatoonNA/status/1522561847769149440 {{TWI}} @SplatoonNA on Twitter]</ref><ref>[https://twitter.com/SplatoonNA/status/1522562495235301376 {{TWI}} @SplatoonNA on Twitter]</ref>}} | | For example, you can register a so-called title that reflects your personality. The more [[Turf War]] battles you wage, the more words you'll unlock. We're consulting with our staff mathematician, but we estimate there are a "gazillion" possibilities, scientifically speaking.|@SplatoonNA on Twitter<ref>[https://twitter.com/SplatoonNA/status/1522561847769149440 {{TWI}} @SplatoonNA on Twitter]</ref><ref>[https://twitter.com/SplatoonNA/status/1522562495235301376 {{TWI}} @SplatoonNA on Twitter]</ref>}} |
| Line 1,060: |
Line 44: |
| ==Gallery== | | ==Gallery== |
| <gallery> | | <gallery> |
| Splatoon 3 Player Banners Promo 2.jpeg|Promo image showing various title combinations | | File:Splatoon 3 Player Banners Promo 1 JP.jpg|Japanese promo image showing various designs for Splashtags. |
| Splatoon 3 Player Banners Promo 2 JP.jpg|Japanese promo image | | File:Splatoon 3 Player Banners Promo 2.jpg|Promo image showing various title combinations |
| | File:Splatoon 3 Player Banners Promo 2 JP.jpg|Japanese promo image |
| | Deep Cut Anniversary Splashtag Banner.jpg|The Deep Cut Splashtag banners for the [[Shiver vs. Frye vs. Big Man]] Splatfest |
| | Deep Cut Anniversary Splashtag Badges.png|The Deep Cut Splashtag badges for the Shiver vs. Frye vs. Big Man Splatfest |
| | S3 OTH Banner Promo 2.jpg|The Squid Sisters and Off the Hook banners from purchasing [[Splatoon 3: Expansion Pass]] |
| </gallery> | | </gallery> |
| | |
| | == Trivia == |
| | |
| | * The text on Splashtags can display a different color when viewed in-game and on [[SplatNet 3]]. Excluding black and white, the values for RGB do not correspond one-to-one to the values from 0 to 255 in-game. Instead, they follow an unknown curve which brightens the values. |
|
| |
|
| ==Etymology== | | ==Etymology== |
| "Splashtag" is a pun on "splash" and the word "[[wikipedia:Hashtag|hashtag]]". | | "Splashtag" is a portmanteau of the words "splash" and "[[wikipedia:Hashtag|hashtag]]". |
|
| |
|
| === Names in other languages=== | | === Names in other languages=== |
| {{Foreignname | | {{Localized name |
| |color=Splatoon 3 | | |color=Splatoon 3 |
| |Jap=ネームプレート | | |Jap=ネームプレート |
| Line 1,075: |
Line 67: |
| |Dut=Profiel | | |Dut=Profiel |
| |DutM=profile | | |DutM=profile |
| |Fra= | | |Fra=Splatiquette |
| |FraM= | | |FraM=Splattag |
| |Ger=Splashtag | | |Ger=Splashtag |
| |GerM=Splashtag | | |GerM=Splashtag |
| |Ita=Splattargetta | | |Ita=Splattargetta |
| |ItaM=Splatplate | | |ItaM=Splatplate |
| |Spa=
| | |Rus=Именной бейдж |
| |SpaM=
| | |RusR=Imennoy beidzh |
| |ChiT=
| | |RusM=Name badge |
| |ChiTR=
| | |SpaE=Insignia |
| |ChiTM=
| | |SpaEM=Badge |
| |Kor=
| | |ChiT=名牌 |
| |KorR=
| | |ChiTR=Míngpái |
| |KorM=
| | |ChiTM=Name plate |
| |Por=
| | |ChiS=名牌 |
| |PorM=
| | |ChiSR=Míngpái |
| }}
| | |ChiSM=Name plate |
| | | |Kor=네임 플레이트 |
| ''Banner''
| | |KorR=neim peulleiteu |
| | | |KorM=Name plate |
| {{Foreignname
| |
| |color=Splatoon 3
| |
| |Jap=プレート<ref name="srl_report_jp">[https://www.nintendo.co.jp/switch/av5ja/report/index.html#report08 {{NES}} Splatoon 3: Squid Research Lab Confidential Report (JP)]</ref>
| |
| |JapR=purēto
| |
| |JapM=Plate
| |
| |Dut=Achtergrond
| |
| |DutM=background
| |
| |Fra=
| |
| |FraM=
| |
| |Ger=Banner
| |
| |GerM=banner
| |
| |Ita=
| |
| |ItaM=
| |
| |Rus=Баннеры | |
| |RusR=Bannery | |
| |RusM=Banners | |
| |Spa= | |
| |SpaM= | |
| |ChiT= | |
| |ChiTR= | |
| |ChiTM= | |
| |Kor= | |
| |KorR= | |
| |KorM= | |
| |Por=
| |
| |PorM=
| |
| }}
| |
| | |
| ''Title''
| |
| | |
| {{Foreignname
| |
| |color=Splatoon 3
| |
| |Jap=二つ名<ref name="srl_report_jp" />
| |
| |JapR=futatsuna
| |
| |JapM=Alias
| |
| |Dut=Titel
| |
| |DutM=title
| |
| |Fra=
| |
| |FraM=
| |
| |Ger=Titel
| |
| |GerM=title
| |
| |Ita=
| |
| |ItaM=
| |
| |Rus=Титулы
| |
| |RusR=Tituly
| |
| |RusM=Titles
| |
| |Spa=
| |
| |SpaM=
| |
| |ChiT=
| |
| |ChiTR=
| |
| |ChiTM=
| |
| |Kor= | |
| |KorR= | |
| |KorM= | |
| |Por= | | |Por= |
| |PorM= | | |PorM= |
| }}
| | |SpaA=Placa|SpaAM=Plate}} |
| | |
| ''Badge''
| |
| | |
| {{Foreignname
| |
| |color=Splatoon 3
| |
| |Jap=バッジ<ref name="srl_report_jp" />
| |
| |JapR=bajji
| |
| |JapM=Badge
| |
| |Dut=Badge
| |
| |DutM=Same as English
| |
| |Fra=
| |
| |FraM=
| |
| |Ger=Abzeichen
| |
| |GerM=badge
| |
| |Ita=
| |
| |ItaM=
| |
| |Rus=Значки
| |
| |RusR=Znachki
| |
| |RusM=Badges
| |
| |Spa=
| |
| |SpaM=
| |
| |ChiT=
| |
| |ChiTR=
| |
| |ChiTM=
| |
| |Kor=
| |
| |KorR=
| |
| |KorM=
| |
| |Por= | |
| |PorM= | |
| }} | |
| | |
| ===Translation notes===
| |
| <references group="note" />
| |
|
| |
|
| ==References== | | ==References== |
| <references /> | | <references /> |
| [[Category:Game information]] | | [[Category:Game information]] |
| | |
| | [[es:Insignia]] |