Splat-Switch Revolution: Difference between revisions
m (Wording) |
m (→Beginning) |
||
| Line 114: | Line 114: | ||
=== Beginning === | === Beginning === | ||
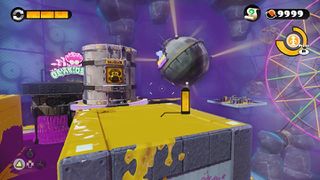
Once you start, there is an Octotrooper on the right side of the block. Take it out, then splat the | Once you start, there is an Octotrooper on the right side of the block. Take it out, then splat the Splat Switch on the block. This makes the block rise and rotate, revealing another block underneath it. As they rise, ink a passage up them and jump onto the next platform. Once you are there, splat the Splat Switch in front of you. It will flip, revealing an Octotrooper on the back of it. Take it out, then jump across the gap to arrive at the first checkpoint. | ||
=== Checkpoint 1 === | === Checkpoint 1 === | ||
Revision as of 04:10, 17 July 2017
|
|
|
Template:Infobox mission
Splat-Switch Revolution is the twenty-second mission in Splatoon's single-player mode, Octo Valley. It is the first mission of the Area 5 after the fourth boss, The Ravenous Octomaw!. The mission gets its name from its heavy use of Splat-Switches.
Octo Valley

Gameplay
Walkthrough
Map
Mission Briefing
Reach the end and rescue the Zapfish using Splat Switches to open up a path for you to take, but be careful: There are a lot of surprises around each corner...
| Splat-Switch Revolution Stats | |||
|---|---|---|---|
| Beginning Area | |||
| Enemies | Armor | Special Weapon | Sunken Scroll |
 1x Octotrooper 1x Octotrooper
|
N/A |  1x Bubbler 1x Bubbler
|
N/A |
| Checkpoint 1 | |||
| Enemies | Armor | Special Weapon | Sunken Scroll |
| File:Octoball.jpeg 3x Octoballs
|
N/A | N/A | N/A |
| Checkpoint 2 | |||
| Enemies | Armor | Special Weapon | Sunken Scroll |
| 4x Octotroopers
|
N/A | N/A | |
| Checkpoint 3 | |||
| Enemies | Armor | Special Weapon | Sunken Scroll |
 3x Twintacle Octotroopers 3x Twintacle Octotroopers
File:Octosniper screenshot.png 2x Octosnipers |
N/A | N/A | N/A |
| Checkpoint 4 | |||
| Enemies | Armor | Special Weapon | Sunken Scroll |
| File:Octoball.jpeg 6x Octoballs
|
N/A | N/A | N/A |
| Final Checkpoint | |||
| Enemies | Armor | Special Weapon | Sunken Scroll |
| 4x Twintacle Octotroopers
File:Flooder.jpeg 3x Flooders
|
N/A | 1x Bubbler
|
N/A |

Mechanics
Splat switch
Beginning
Once you start, there is an Octotrooper on the right side of the block. Take it out, then splat the Splat Switch on the block. This makes the block rise and rotate, revealing another block underneath it. As they rise, ink a passage up them and jump onto the next platform. Once you are there, splat the Splat Switch in front of you. It will flip, revealing an Octotrooper on the back of it. Take it out, then jump across the gap to arrive at the first checkpoint.
Checkpoint 1
Now you will see two canned specials inkzooka to the left, and bubbler to the right, choose one because you will need it, once you jump down the the area below you you will see three octoballs, take them out, but be ready for a surprise...
If you chose inkzooka that means you are brave and ready to take on any challenge, which is good because you got one right here, after you take out the three octoballs, 4 twintacle octotroopers will spawn on 4 different platforms rising and sinking you might want to take them out as fast as possible, or you can play it safe, using the bubbler, and take them out. But wait, there is another surprise! Once you splat the last octotrooper, two octosnipers will spawn, be careful, and I suggest you use the walls for cover as you take them out. Once you splat the two octosnipers a launchpad will a appear in the center of the floor, taking you to the second check point.
Checkpoint 2
Checkpoint 3
Checkpoint 4
Final Checkpoint
Collectibles
1x inkzooka, 2x bubbler
Sunken Scroll
| “ | From the depths of the sea we emerged long ago, seeking the light of the surface. In search of still greater lights, we now send this message into outer space, sealed in a disk. Perhaps one day, we will encounter other intelligent life... | ” |
— Sunken Scroll 21
| ||

Location: At the second checkpoint, behind the Splat Switch contraption. After hitting the second checkpoint, go through it normally until the launchpad on the wall later is available after activating the splat switch. Rather than climbing the wall and jumping into the launchpad, go around it on one of the side platforms and jump to the platform behind the wall where the scroll is located.
Special Weapons

Location of Inkzooka and Bubbler:

Location of Bubbler 2:
Quotes
-
“ A Splat Switch! Haven't seen one of those in a while. ” -
“ Look sharp, Agent 3! ” -
“ Uh... Looks like a dead end. ” -
“ The key! ”
Gallery
-
Splat-Switch Revolution Beginning Area-Enemy Octotrooper and Splat Switch
-
Splat-Switch Revolution Beginning Area-Enemy Octotrooper
-

Splat-Switch Revolution Checkpoint 1-Scuttled Octoballs
-
Splat-Switch Revolution Checkpoint 1-Enemy Twintacle Octotroopers
-
Splat-Switch Revolution Checkpoint 2-Enemy Octotrooper and Splat Switches
-
Splat-Switch Revolution Checkpoint 2-Enemy Octotroopers Hanging Out
-
Splat-Switch Revolution Checkpoint 2-More Octotroopers
-
Splat-Switch Revolution Checkpoint 3-Enemy Twintacle Octotroopers
-
Splat-Switch Revolution Checkpoint 3-Enemy Twintacle Octotrooper
-
Splat-Switch Revolution Checkpoint 3-Enemy Octosnipers
-
Splat Switch Revolution Checkpoint 4-Enemy Octotrooper
-
Splat-Switch Revolution Checkpoint 4-Enemy Octoballs
-
Splat-Switch Revolution Checkpoint 4-Another Octotrooper
-
Splat-Switch Revolution Fifth Checkpoint-Enemy Octarians
-
Splat-Switch Revolution-Enemy Flooder
-
Splat-Switch Revolution Final Checkpoint-Enemy Octotroopers
-
Splat-Switch Revolution Final Checkpoint-Vault
-
Splat-Switch Revolution Final Checkpoint-Vault Key


