List of unarmed missions: Difference between revisions
From Inkipedia, the Splatoon wiki
Chrome Wolf (talk | contribs) (→Octo Expansion: Added link, was missing.) |
Nukleopatra (talk | contribs) m (Text replacement - "RotM Deadly Dance Hall - Jump, Jump! Spawn.jpg" to "RotM Deadly Dance Hall—Jump, Jump! Spawn.jpg") |
||
| (9 intermediate revisions by 7 users not shown) | |||
| Line 1: | Line 1: | ||
These missions in the ''[[Octo Expansion]]'' and [[Return of the Mammalians]] require the player to | These missions in the ''[[Octo Expansion]]'' and [[Return of the Mammalians]] require the player to enter the mission without any [[Main weapon|main]], [[Sub weapon|sub]], or [[special weapon]]. Typically, these missions utilize a mechanic that does not require any equipped weapons (e.g. an [[Ink Cannon]] in {{OctoExpansionStation|I|03}}{{OctoExpansionStation|E|01}} [[No Whammy Station]]), or offer challenges in which a weapon would defeat the point of the challenge (e.g. {{OctoExpansionStation|C|04}} [[Move It Move It Station]]). Some missions that begin unarmed allow the player to collect [[canned weapon]]s or [[canned special]]s over the course of the mission. | ||
Unarmed missions are marked with an icon ([[File:S2 Weapon Main Unarmed.png|20px]]) on the selection screen of the [[equipper]]. | Unarmed missions are marked with an icon ([[File:S2 Weapon Main Unarmed.png|20px]]) on the selection screen of the [[equipper]]. | ||
| Line 10: | Line 10: | ||
| <center>[[File:OE Abandoned Station.jpg|200px]]<br>{{OctoExpansionStation|A|?}} [[Abandoned Station]]||Introductory station. A weapon is granted for one area but returned upon leave. | | <center>[[File:OE Abandoned Station.jpg|200px]]<br>{{OctoExpansionStation|A|?}} [[Abandoned Station]]||Introductory station. A weapon is granted for one area but returned upon leave. | ||
|- | |- | ||
| <center>[[File: | | <center>[[File:OE Deepsea Metro Central Station.jpg|200px]]<br>{{OctoExpansionStation|A|00}} [[Central Station]]||Hub station. | ||
|- | |- | ||
| <center>[[File: | | <center>[[File:OE Deepsea Metro Fly 8-Ball Station.jpg|200px]]<br>{{OctoExpansionStation|B|07}} [[Fly 8-Ball Station]]||Pressure switches used. | ||
|- | |- | ||
| <center>[[File: | | <center>[[File:OE Deepsea Metro Ink from Above Station.jpg|200px]]<br>{{OctoExpansionStation|D|01}}{{OctoExpansionStation|B|15}} [[Ink from Above Station]]||Tactical mission. Canned weapons are collected over the course of the mission. | ||
|- | |- | ||
| <center>[[File: | | <center>[[File:OE Deepsea Metro Move It Move It Station.jpg|200px]]<br>{{OctoExpansionStation|C|04}} [[Move It Move It Station]]||Tactical evasion mission. | ||
|- | |- | ||
| <center>[[File: | | <center>[[File:OE Deepsea Metro No Whammy Station.jpg|200px]]<br>{{OctoExpansionStation|I|03}}{{OctoExpansionStation|E|01}} [[No Whammy Station]]||[[Ink Cannon]] used. | ||
|- | |- | ||
| <center>[[File: | | <center>[[File:OE Deepsea Metro Swass 8-Ball Station.jpg|200px]]<br>{{OctoExpansionStation|E|06}} [[Swass 8-Ball Station]]||[[Ink Cannon]] used. | ||
|- | |- | ||
| <center>[[File: | | <center>[[File:OE Deepsea Metro Coccyx Phase.jpg|200px]]<br>{{OctoExpansionStation|Escape| 01}} [[Coccyx Phase]]||Stealth mission. | ||
|- | |- | ||
| <center>[[File: | | <center>[[File:OE Deepsea Metro Villi Phase.jpg|200px]]<br>{{OctoExpansionStation|Escape| 02}} [[Villi Phase]]||Tactical mission. Canned weapons are collected over the course of the mission. | ||
|} | |} | ||
| Line 31: | Line 31: | ||
!Unarmed kettle||Reason | !Unarmed kettle||Reason | ||
|- | |- | ||
| <center>[[File: | | <center>[[File:RotM Deadly Dance Hall—Jump, Jump! Spawn.jpg|200px]]<br>{{RotMMission|01|10}} [[Deadly Dance Hall—Jump, Jump!]] | ||
|Tactical dodging mission. | |Tactical dodging mission. | ||
|- | |- | ||
| <center>[[File: | | <center>[[File:RotM Enter the Stamp Gauntlet Spawn.jpg|200px]]<br>{{RotMMission|06|12}} [[Enter the Stamp Gauntlet]] | ||
|Uses unlimited [[Ultra Stamp]] | |Uses unlimited canned [[Ultra Stamp]]s. Choosing being unarmed is optional for this mission, but yields more [[Power Egg]]s. | ||
|} | |} | ||
Latest revision as of 16:23, 14 February 2024
These missions in the Octo Expansion and Return of the Mammalians require the player to enter the mission without any main, sub, or special weapon. Typically, these missions utilize a mechanic that does not require any equipped weapons (e.g. an Ink Cannon in I03E01 No Whammy Station), or offer challenges in which a weapon would defeat the point of the challenge (e.g. C04 Move It Move It Station). Some missions that begin unarmed allow the player to collect canned weapons or canned specials over the course of the mission.
Unarmed missions are marked with an icon (![]() ) on the selection screen of the equipper.
) on the selection screen of the equipper.
List of unarmed stations
Octo Expansion
| Unarmed Stations | Reasons |
|---|---|
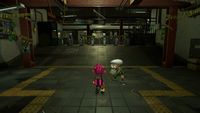 A? Abandoned Station |
Introductory station. A weapon is granted for one area but returned upon leave. |
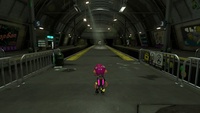 A00 Central Station |
Hub station. |
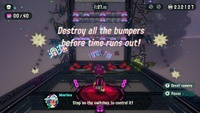 B07 Fly 8-Ball Station |
Pressure switches used. |
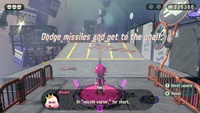 D01B15 Ink from Above Station |
Tactical mission. Canned weapons are collected over the course of the mission. |
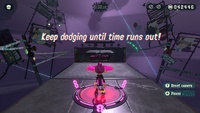 C04 Move It Move It Station |
Tactical evasion mission. |
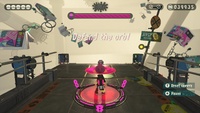 I03E01 No Whammy Station |
Ink Cannon used. |
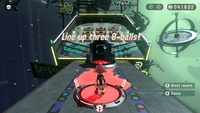 E06 Swass 8-Ball Station |
Ink Cannon used. |
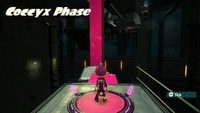 Escape 01 Coccyx Phase |
Stealth mission. |
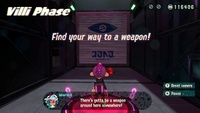 Escape 02 Villi Phase |
Tactical mission. Canned weapons are collected over the course of the mission. |
Return of the Mammalians
| Unarmed kettle | Reason |
|---|---|
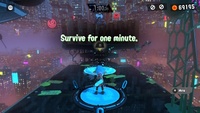 0110 Deadly Dance Hall—Jump, Jump! |
Tactical dodging mission. |
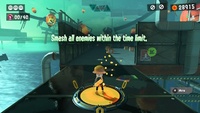 0612 Enter the Stamp Gauntlet |
Uses unlimited canned Ultra Stamps. Choosing being unarmed is optional for this mission, but yields more Power Eggs. |
