Splatoon 3 European Championship 2023 - Germany: Difference between revisions
mNo edit summary |
mNo edit summary |
||
| Line 89: | Line 89: | ||
| 3* || [[File:S2 Icon Regular Battle alt.svg|60px|link=Turf War]]<br>Turf War || [[File:S3 Stage Humpback Pump Track.png|200px|link=Humpback Pump Track]]<br>[[Humpback Pump Track]] | | 3* || [[File:S2 Icon Regular Battle alt.svg|60px|link=Turf War]]<br>Turf War || [[File:S3 Stage Humpback Pump Track.png|200px|link=Humpback Pump Track]]<br>[[Humpback Pump Track]] | ||
|- | |- | ||
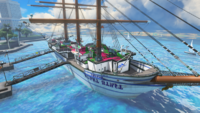
| 1 || [[File:S3 icon Splat Zones.png|60px|link=Splat Zones]]<br>[[Splat Zones]] || [[File:S3 Stage Mincemeat Metalworks. | | 1 || [[File:S3 icon Splat Zones.png|60px|link=Splat Zones]]<br>[[Splat Zones]] || [[File:S3 Stage Mincemeat Metalworks.jpg|200px|link=Mincemeat Metalworks]]<br>[[Mincemeat Metalworks]] | ||
|- | |- | ||
| 2 || [[File:S3 icon Tower Control.png|60px|link=Tower Control]]<br>[[Tower Control]] || [[File:S3 Stage Hagglefish Market.png|200px|link=Hagglefish Market]]<br>[[Hagglefish Market]] | | 2 || [[File:S3 icon Tower Control.png|60px|link=Tower Control]]<br>[[Tower Control]] || [[File:S3 Stage Hagglefish Market.png|200px|link=Hagglefish Market]]<br>[[Hagglefish Market]] | ||
| Line 128: | Line 128: | ||
| 2 || [[File:S3 icon Splat Zones.png|60px|link=Splat Zones]]<br>[[Splat Zones]] || [[File:S3 Stage Humpback Pump Track.png|200px|link=Humpback Pump Track]]<br>[[Humpback Pump Track]] | | 2 || [[File:S3 icon Splat Zones.png|60px|link=Splat Zones]]<br>[[Splat Zones]] || [[File:S3 Stage Humpback Pump Track.png|200px|link=Humpback Pump Track]]<br>[[Humpback Pump Track]] | ||
|- | |- | ||
| 3* || [[File:S3 icon Rainmaker.png|60px|link=Rainmaker]]<br>[[Rainmaker]] || [[File:S3 Stage Mincemeat Metalworks. | | 3* || [[File:S3 icon Rainmaker.png|60px|link=Rainmaker]]<br>[[Rainmaker]] || [[File:S3 Stage Mincemeat Metalworks.jpg|200px|link=Mincemeat Metalworks]]<br>[[Mincemeat Metalworks]] | ||
|- | |- | ||
| colspan="3" | | | colspan="3" | | ||
| Line 163: | Line 163: | ||
| 3* || [[File:S3 icon Clam Blitz.png|60px|link=Clam Blitz]]<br>[[Clam Blitz]] || [[File:S3 Stage Humpback Pump Track.png|200px|link=Humpback Pump Track]]<br>[[Humpback Pump Track]] | | 3* || [[File:S3 icon Clam Blitz.png|60px|link=Clam Blitz]]<br>[[Clam Blitz]] || [[File:S3 Stage Humpback Pump Track.png|200px|link=Humpback Pump Track]]<br>[[Humpback Pump Track]] | ||
|- | |- | ||
| 4* || [[File:S3 icon Rainmaker.png|60px|link=Rainmaker]]<br>[[Rainmaker]] || [[File:S3 Stage Mincemeat Metalworks. | | 4* || [[File:S3 icon Rainmaker.png|60px|link=Rainmaker]]<br>[[Rainmaker]] || [[File:S3 Stage Mincemeat Metalworks.jpg|200px|link=Mincemeat Metalworks]]<br>[[Mincemeat Metalworks]] | ||
|- | |- | ||
| colspan="3" | | | colspan="3" | | ||
| Line 212: | Line 212: | ||
| 2 || [[File:S2 Icon Regular Battle alt.svg|60px|link=Turf War]]<br>Turf War || [[File:S3 Stage Hagglefish Market.png|200px|link=Hagglefish Market]]<br>[[Hagglefish Market]] | | 2 || [[File:S2 Icon Regular Battle alt.svg|60px|link=Turf War]]<br>Turf War || [[File:S3 Stage Hagglefish Market.png|200px|link=Hagglefish Market]]<br>[[Hagglefish Market]] | ||
|- | |- | ||
| 3* || [[File:S2 Icon Regular Battle alt.svg|60px|link=Turf War]]<br>Turf War ||[[File:S3 Stage Mincemeat Metalworks. | | 3* || [[File:S2 Icon Regular Battle alt.svg|60px|link=Turf War]]<br>Turf War ||[[File:S3 Stage Mincemeat Metalworks.jpg|200px|link=Mincemeat Metalworks]]<br>[[Mincemeat Metalworks]] | ||
|- | |- | ||
| 1 || [[File:S3 icon Rainmaker.png|60px|link=Rainmaker]]<br>[[Rainmaker]] || [[File:S3 Stage Humpback Pump Track.png|200px|link=Humpback Pump Track]]<br>[[Humpback Pump Track]] | | 1 || [[File:S3 icon Rainmaker.png|60px|link=Rainmaker]]<br>[[Rainmaker]] || [[File:S3 Stage Humpback Pump Track.png|200px|link=Humpback Pump Track]]<br>[[Humpback Pump Track]] | ||
| Line 447: | Line 447: | ||
| 1 || [[File:S2 Icon Regular Battle alt.svg|60px|link=Turf War]]<br>[[Turf War]] || [[File:S3 Stage Barnacle & Dime.png|200px|link=Barnacle & Dime]]<br>[[Barnacle & Dime]] | | 1 || [[File:S2 Icon Regular Battle alt.svg|60px|link=Turf War]]<br>[[Turf War]] || [[File:S3 Stage Barnacle & Dime.png|200px|link=Barnacle & Dime]]<br>[[Barnacle & Dime]] | ||
|- | |- | ||
| 2 || [[File:S2 Icon Regular Battle alt.svg|60px|link=Turf War]]<br>Turf War || [[File:S3 Stage Mincemeat Metalworks. | | 2 || [[File:S2 Icon Regular Battle alt.svg|60px|link=Turf War]]<br>Turf War || [[File:S3 Stage Mincemeat Metalworks.jpg|200px|link=Mincemeat Metalworks]]<br>[[Mincemeat Metalworks]] | ||
|- | |- | ||
| 3* || [[File:S2 Icon Regular Battle alt.svg|60px|link=Turf War]]<br>Turf War ||[[File:S3 Stage MakoMart.jpg|200px|link=MakoMart]]<br>[[MakoMart]] | | 3* || [[File:S2 Icon Regular Battle alt.svg|60px|link=Turf War]]<br>Turf War ||[[File:S3 Stage MakoMart.jpg|200px|link=MakoMart]]<br>[[MakoMart]] | ||
| Line 503: | Line 503: | ||
======Round 3====== | ======Round 3====== | ||
|- | |- | ||
| 1 || [[File:S3 icon Rainmaker.png|60px|link=Rainmaker]]<br>[[Rainmaker]] || [[File:S3 Stage Mincemeat Metalworks. | | 1 || [[File:S3 icon Rainmaker.png|60px|link=Rainmaker]]<br>[[Rainmaker]] || [[File:S3 Stage Mincemeat Metalworks.jpg|200px|link=Mincemeat Metalworks]]<br>[[Mincemeat Metalworks]] | ||
|- | |- | ||
| 2 || [[File:S3 icon Splat Zones.png|60px|link=Splat Zones]]<br>[[Splat Zones]] || [[File:S3 Stage Museum d'Alfonsino.png|200px|link=Museum d'Alfonsino]]<br>[[Museum d'Alfonsino]] | | 2 || [[File:S3 icon Splat Zones.png|60px|link=Splat Zones]]<br>[[Splat Zones]] || [[File:S3 Stage Museum d'Alfonsino.png|200px|link=Museum d'Alfonsino]]<br>[[Museum d'Alfonsino]] | ||
| Line 583: | Line 583: | ||
| 3* || [[File:S3 icon Splat Zones.png|60px|link=Splat Zones]]<br>[[Splat Zones]] || [[File:S3 Stage Mahi-Mahi Resort.png|200px|link=Mahi-Mahi Resort]]<br>[[Mahi-Mahi Resort]] | | 3* || [[File:S3 icon Splat Zones.png|60px|link=Splat Zones]]<br>[[Splat Zones]] || [[File:S3 Stage Mahi-Mahi Resort.png|200px|link=Mahi-Mahi Resort]]<br>[[Mahi-Mahi Resort]] | ||
|- | |- | ||
| 4* || [[File:S3 icon Rainmaker.png|60px|link=Rainmaker]]<br>[[Rainmaker]] || [[File:S3 Stage Mincemeat Metalworks. | | 4* || [[File:S3 icon Rainmaker.png|60px|link=Rainmaker]]<br>[[Rainmaker]] || [[File:S3 Stage Mincemeat Metalworks.jpg|200px|link=Mincemeat Metalworks]]<br>[[Mincemeat Metalworks]] | ||
|- | |- | ||
| colspan="3" | | | colspan="3" | | ||
| Line 833: | Line 833: | ||
| 2 || [[File:S2 Icon Regular Battle alt.svg|60px|link=Turf War]]<br>Turf War || [[File:S3 Stage Hagglefish Market.png|200px|link=Hagglefish Market]]<br>[[Hagglefish Market]] | | 2 || [[File:S2 Icon Regular Battle alt.svg|60px|link=Turf War]]<br>Turf War || [[File:S3 Stage Hagglefish Market.png|200px|link=Hagglefish Market]]<br>[[Hagglefish Market]] | ||
|- | |- | ||
| 3* || [[File:S2 Icon Regular Battle alt.svg|60px|link=Turf War]]<br>Turf War || [[File:S3 Stage Mincemeat Metalworks. | | 3* || [[File:S2 Icon Regular Battle alt.svg|60px|link=Turf War]]<br>Turf War || [[File:S3 Stage Mincemeat Metalworks.jpg|200px|link=Mincemeat Metalworks]]<br>[[Mincemeat Metalworks]] | ||
|- | |- | ||
| 1 || [[File:S3 icon Rainmaker.png|60px|link=Rainmaker]]<br>[[Rainmaker]] || [[File:S3 Stage Undertow Spillway.jpg|200px|link=Undertow Spillway]]<br>[[Undertow Spillway]] | | 1 || [[File:S3 icon Rainmaker.png|60px|link=Rainmaker]]<br>[[Rainmaker]] || [[File:S3 Stage Undertow Spillway.jpg|200px|link=Undertow Spillway]]<br>[[Undertow Spillway]] | ||
| Line 875: | Line 875: | ||
| 3* || [[File:S3 icon Clam Blitz.png|60px|link=Clam Blitz]]<br>[[Clam Blitz]] || [[File:S3 Stage Sturgeon Shipyard.png|200px|link=Sturgeon Shipyard]]<br>[[Sturgeon Shipyard]] | | 3* || [[File:S3 icon Clam Blitz.png|60px|link=Clam Blitz]]<br>[[Clam Blitz]] || [[File:S3 Stage Sturgeon Shipyard.png|200px|link=Sturgeon Shipyard]]<br>[[Sturgeon Shipyard]] | ||
|- | |- | ||
| 4* || [[File:S3 icon Rainmaker.png|60px|link=Rainmaker]]<br>[[Rainmaker]] || [[File:S3 Stage Mincemeat Metalworks. | | 4* || [[File:S3 icon Rainmaker.png|60px|link=Rainmaker]]<br>[[Rainmaker]] || [[File:S3 Stage Mincemeat Metalworks.jpg|200px|link=Mincemeat Metalworks]]<br>[[Mincemeat Metalworks]] | ||
|} | |} | ||
(* if necessary) | (* if necessary) | ||
| Line 899: | Line 899: | ||
| 2 || [[File:S3 icon Splat Zones.png|60px|link=Splat Zones]]<br>[[Splat Zones]] || [[File:S3 Stage Brinewater Springs.png|200px|link=Brinewater Springs]]<br>[[Brinewater Springs]] | | 2 || [[File:S3 icon Splat Zones.png|60px|link=Splat Zones]]<br>[[Splat Zones]] || [[File:S3 Stage Brinewater Springs.png|200px|link=Brinewater Springs]]<br>[[Brinewater Springs]] | ||
|- | |- | ||
| 3* || [[File:S3 icon Rainmaker.png|60px|link=Rainmaker]]<br>[[Rainmaker]] || [[File:S3 Stage Mincemeat Metalworks. | | 3* || [[File:S3 icon Rainmaker.png|60px|link=Rainmaker]]<br>[[Rainmaker]] || [[File:S3 Stage Mincemeat Metalworks.jpg|200px|link=Mincemeat Metalworks]]<br>[[Mincemeat Metalworks]] | ||
|- | |- | ||
| colspan="3" | | | colspan="3" | | ||
| Line 931: | Line 931: | ||
======Round 6====== | ======Round 6====== | ||
|- | |- | ||
| 1 || [[File:S3 icon Rainmaker.png|60px|link=Rainmaker]]<br>[[Rainmaker]] || [[File:S3 Stage Mincemeat Metalworks. | | 1 || [[File:S3 icon Rainmaker.png|60px|link=Rainmaker]]<br>[[Rainmaker]] || [[File:S3 Stage Mincemeat Metalworks.jpg|200px|link=Mincemeat Metalworks]]<br>[[Mincemeat Metalworks]] | ||
|- | |- | ||
| 2 || [[File:S3 icon Splat Zones.png|60px|link=Splat Zones]]<br>[[Splat Zones]] || [[File:S3 Stage MakoMart.jpg|200px|link=MakoMart]]<br>[[MakoMart]] | | 2 || [[File:S3 icon Splat Zones.png|60px|link=Splat Zones]]<br>[[Splat Zones]] || [[File:S3 Stage MakoMart.jpg|200px|link=MakoMart]]<br>[[MakoMart]] | ||
| Line 1,195: | Line 1,195: | ||
======Round 3====== | ======Round 3====== | ||
|- | |- | ||
| 1 || [[File:S2 Icon Regular Battle alt.svg|60px|link=Turf War]]<br>[[Turf War]] || [[File:S3 Stage Mincemeat Metalworks. | | 1 || [[File:S2 Icon Regular Battle alt.svg|60px|link=Turf War]]<br>[[Turf War]] || [[File:S3 Stage Mincemeat Metalworks.jpg|200px|link=Mincemeat Metalworks]]<br>[[Mincemeat Metalworks]] | ||
|- | |- | ||
| 2 || [[File:S2 Icon Regular Battle alt.svg|60px|link=Turf War]]<br>Turf War || [[File:S3 Stage Humpback Pump Track.png|200px|link=Humpback Pump Track]]<br>[[Humpback Pump Track]] | | 2 || [[File:S2 Icon Regular Battle alt.svg|60px|link=Turf War]]<br>Turf War || [[File:S3 Stage Humpback Pump Track.png|200px|link=Humpback Pump Track]]<br>[[Humpback Pump Track]] | ||
| Line 1,220: | Line 1,220: | ||
| 1 || [[File:S3 icon Clam Blitz.png|60px|link=Clam Blitz]]<br>[[Clam Blitz]] || [[File:S3 Stage Museum d'Alfonsino.png|200px|link=Museum d'Alfonsino]]<br>[[Museum d'Alfonsino]] | | 1 || [[File:S3 icon Clam Blitz.png|60px|link=Clam Blitz]]<br>[[Clam Blitz]] || [[File:S3 Stage Museum d'Alfonsino.png|200px|link=Museum d'Alfonsino]]<br>[[Museum d'Alfonsino]] | ||
|- | |- | ||
| 2 || [[File:S3 icon Rainmaker.png|60px|link=Rainmaker]]<br>[[Rainmaker]] || [[File:S3 Stage Mincemeat Metalworks. | | 2 || [[File:S3 icon Rainmaker.png|60px|link=Rainmaker]]<br>[[Rainmaker]] || [[File:S3 Stage Mincemeat Metalworks.jpg|200px|link=Mincemeat Metalworks]]<br>[[Mincemeat Metalworks]] | ||
|- | |- | ||
| 3* || [[File:S3 icon Splat Zones.png|60px|link=Splat Zones]]<br>[[Splat Zones]] || [[File:S3 Stage Um'ami Ruins.png|200px|link=Um'ami Ruins]]<br>[[Um'ami Ruins]] | | 3* || [[File:S3 icon Splat Zones.png|60px|link=Splat Zones]]<br>[[Splat Zones]] || [[File:S3 Stage Um'ami Ruins.png|200px|link=Um'ami Ruins]]<br>[[Um'ami Ruins]] | ||
| Line 1,261: | Line 1,261: | ||
======Round 2====== | ======Round 2====== | ||
|- | |- | ||
| 1 || [[File:S3 icon Rainmaker.png|60px|link=Rainmaker]]<br>[[Rainmaker]] || [[File:S3 Stage Mincemeat Metalworks. | | 1 || [[File:S3 icon Rainmaker.png|60px|link=Rainmaker]]<br>[[Rainmaker]] || [[File:S3 Stage Mincemeat Metalworks.jpg|200px|link=Mincemeat Metalworks]]<br>[[Mincemeat Metalworks]] | ||
|- | |- | ||
| 2 || [[File:S3 icon Clam Blitz.png|60px|link=Clam Blitz]]<br>[[Clam Blitz]] || [[File:S3 Stage Humpback Pump Track.png|200px|link=Humpback Pump Track]]<br>[[Humpback Pump Track]] | | 2 || [[File:S3 icon Clam Blitz.png|60px|link=Clam Blitz]]<br>[[Clam Blitz]] || [[File:S3 Stage Humpback Pump Track.png|200px|link=Humpback Pump Track]]<br>[[Humpback Pump Track]] | ||
| Line 1,314: | Line 1,314: | ||
| 1 || [[File:S3 icon Rainmaker.png|60px|link=Rainmaker]]<br>[[Rainmaker]] || [[File:S3 Stage MakoMart.jpg|200px|link=MakoMart]]<br>[[MakoMart]] | | 1 || [[File:S3 icon Rainmaker.png|60px|link=Rainmaker]]<br>[[Rainmaker]] || [[File:S3 Stage MakoMart.jpg|200px|link=MakoMart]]<br>[[MakoMart]] | ||
|- | |- | ||
| 2 || [[File:S3 icon Splat Zones.png|60px|link=Splat Zones]]<br>[[Splat Zones]] || [[File:S3 Stage Mincemeat Metalworks. | | 2 || [[File:S3 icon Splat Zones.png|60px|link=Splat Zones]]<br>[[Splat Zones]] || [[File:S3 Stage Mincemeat Metalworks.jpg|200px|link=Mincemeat Metalworks]]<br>[[Mincemeat Metalworks]] | ||
|- | |- | ||
| 3* || [[File:S3 icon Clam Blitz.png|60px|link=Clam Blitz]]<br>[[Clam Blitz]] || [[File:S3 Stage Um'ami Ruins.png|200px|link=Um'ami Ruins]]<br>[[Um'ami Ruins]] | | 3* || [[File:S3 icon Clam Blitz.png|60px|link=Clam Blitz]]<br>[[Clam Blitz]] || [[File:S3 Stage Um'ami Ruins.png|200px|link=Um'ami Ruins]]<br>[[Um'ami Ruins]] | ||
Latest revision as of 19:49, 13 May 2024

Can you help us get it done?

| Organizer | Nintendo DE |
| Type | Online, local |
| Location | Finale Gamescom |
| Format | Qualifiers Double elimination |
| Modes | Turf War Splat Zones Tower Control Rainmaker Clam Blitz |
| Date | Qualifiers 9 July 2023, 15 July 2023, 22 July 2023, 29 July 2023 Finale 25 August 2023 |
The Splatoon 3 European Championship 2023 - Germany is a tournament that is part of the Splatoon 3 European Championship 2023. The tournament was officially announced on 22 June 2023. [1]
Rules
- The tournament has the use of secondary abilities disabled in its entirety.
Qualifiers
Four online qualifying tournaments were held on:
- 9 July 2023
- 15 July 2023
- 22 July 2023
- 29 July 2023
Participating teams
Twenty-three [2], twenty-seven [3], twenty-two [4], and twenty-three [5] teams participated respectively in qualifier 1, qualifier 2, qualifier 3, and qualifier 4.
Format
The qualifiers used a double elimination system consisting of best-of-three series of Splat Zones, Rainmaker, Clam Blitz, or Tower Control matches for several rounds and best-of-five series after that. These best-of-five series consisted of a best-of-three Turf War. One point was earned for winning the best-of-three Turf War matches within the best-of-five series. After that, Splat Zones, Rainmaker, Clam Blitz, or Tower Control matches remained. There were three brackets whose series were played in the rotation below.
Qualifier 1
Winners' bracket
| Serie | Mode | Stage |
|---|---|---|
Round 1 | ||
| 1 | Rainmaker |
 Humpback Pump Track |
| 2 | Splat Zones |
 Inkblot Art Academy |
| 3* | Tower Control |
 Eeltail Alley |
Round 2 | ||
| 1 | Clam Blitz |
 Scorch Gorge |
| 2 | Splat Zones |
 Manta Maria |
| 3* | Rainmaker |
 Hagglefish Market |
Round 3 | ||
| 1 | Tower Control |
 Undertow Spillway |
| 2 | Splat Zones |
 Um'ami Ruins |
| 3* | Clam Blitz |
 Barnacle & Dime |
Round 4 | ||
| 1 | Turf War |
 Mahi-Mahi Resort |
| 2 | Turf War |
 Brinewater Springs |
| 3* | Turf War |
Inkblot Art Academy |
| 1 | Rainmaker |
Scorch Gorge |
| 2 | Clam Blitz |
 MakoMart |
| 3* | Tower Control |
 Sturgeon Shipyard |
| 4* | Splat Zones |
 Flounder Heights |
Round 5 | ||
| 1 | Turf War |
Manta Maria |
| 2 | Turf War |
 Wahoo World |
| 3* | Turf War |
Humpback Pump Track |
| 1 | Splat Zones |
 Mincemeat Metalworks |
| 2 | Tower Control |
Hagglefish Market |
| 3* | Rainmaker |
Undertow Spillway |
| 4* | Clam Blitz |
 Museum d'Alfonsino |
(* if necessary)
Losers' bracket
| Serie | Mode | Stage |
|---|---|---|
Round 1 | ||
| 1 | Tower Control |
Undertow Spillway |
| 2 | Splat Zones |
Um'ami Ruins |
| 3* | Clam Blitz |
Barnacle & Dime |
Round 2 | ||
| 1 | Rainmaker |
Sturgeon Shipyard |
| 2 | Clam Blitz |
Museum d'Alfonsino |
| 3* | Tower Control |
Wahoo World |
Round 3 | ||
| 1 | Clam Blitz |
MakoMart |
| 2 | Splat Zones |
Humpback Pump Track |
| 3* | Rainmaker |
Mincemeat Metalworks |
Round 4 | ||
| 1 | Splat Zones |
Inkblot Art Academy |
| 2 | Clam Blitz |
Manta Maria |
| 3* | Tower Control |
Flounder Heights |
Round 5 | ||
| 1 | Rainmaker |
Eeltail Alley |
| 2 | Splat Zones |
Museum d'Alfonsino |
| 3* | Tower Control |
Hagglefish Market |
Round 6 | ||
| 1 | Turf War |
Barnacle & Dime |
| 2 | Turf War |
Um'ami Ruins |
| 3* | Turf War |
Scorch Gorge |
| 1 | Tower Control |
MakoMart |
| 2 | Splat Zones |
Mahi-Mahi Resort |
| 3* | Clam Blitz |
Humpback Pump Track |
| 4* | Rainmaker |
Mincemeat Metalworks |
Round 7 | ||
| 1 | Turf War |
Eeltail Alley |
| 2 | Turf War |
Sturgeon Shipyard |
| 3* | Turf War |
Hagglefish Market |
| 1 | Splat Zones |
Brinewater Springs |
| 2 | Clam Blitz |
Inkblot Art Academy |
| 3* | Rainmaker |
Wahoo World |
| 4* | Tower Control |
Flounder Heights |
(* if necessary)
Finale bracket
| Serie | Mode | Stage |
|---|---|---|
Finale | ||
| 1 | Turf War |
Undertow Spillway |
| 2 | Turf War |
Museum d'Alfonsino |
| 3* | Turf War |
 Hammerhead Bridge |
| 1 | Clam Blitz |
MakoMart |
| 2 | Tower Control |
Sturgeon Shipyard |
| 3* | Splat Zones |
Um'ami Ruins |
| 4* | Rainmaker |
Eeltail Alley |
Reset | ||
| 1 | Turf War |
Flounder Heights |
| 2 | Turf War |
Hagglefish Market |
| 3* | Turf War |
Mincemeat Metalworks |
| 1 | Rainmaker |
Humpback Pump Track |
| 2 | Splat Zones |
Museum d'Alfonsino |
| 3* | Clam Blitz |
Scorch Gorge |
| 4* | Tower Control |
Inkblot Art Academy |
(* if necessary)
Results
Winners' bracket
| Team | Points | Team |
|---|---|---|
| Legend of Splatoon | 1 - 2 | Hellish Akuma |
| Second Try | 2 - 1 | #TROLOLOL |
| Riementang | 2 - 0 | The Rilders |
| Omega Muffins | 2 - 0 | Sunshine Vampires |
| Sunshine Vampires | 0 - 2 | Jyusou Lickers |
| Angle Shooter Society :) | 0 - 2 | Goofige Gooflords |
| Capybara-Hochadel | 1 - 2 | Suprise Party |
| Team | Points | Team |
|---|---|---|
| Black Lotus | 2 - 0 | Hellish Akuma |
| Ace X | 0 - 2 | Bi-Ba-Butzemänner |
| Yoru | 2 - 0 | Second Try |
| 4 Ever | 2 - 0 | Riementang |
| Enperry Scrimshaw | 2 - 0 | Omega Muffins |
| Reverse | 1 - 2 | Jyusou Lickers |
| Energie Kopfnuss | 2 - 0 | Goofige Gooflords |
| Der Typ mit dem QUETSCHER und der Rest |
2 - 1 | Suprise Party |
| Team | Points | Team |
|---|---|---|
| Black Lotus | 2 - 0 | Bi-Ba-Butzemänner |
| Yoru | 2 - 0 | 4 Ever |
| Enperry Scrimshaw | 2 - 0 | Jyusou Lickers |
| Energie Kopfnuss | 2 - 0 | Der Typ mit dem QUETSCHER und der Rest |
| Team | Points | Team |
|---|---|---|
| Black Lotus | 3 - 0 | Yoru |
| Enperry Scrimshaw | 3 - 1 | Energie Kopfnuss |
| Team | Points | Team |
|---|---|---|
| Black Lotus | 3 - 0 | Enperry Scrimshaw |
Losers' bracket
| Team | Points | Team |
|---|---|---|
| Suprise Party | 1 - 2 | Legend of Splatoon |
| Reverse | 2 - 1 | #TROLOLOL |
| Omega Muffins | 2 - 0 | The Rilders |
| Riementang | 2 - 0 | Sunshine Vampires |
| Second Try | 0 - 2 | Shadow Squids |
| Ace X | 1 - 2 | Angle Shooter Society :) |
| Hellish Akuma | 2 - 0 | Hellish Akuma |
| Team | Points | Team |
|---|---|---|
| Goofige Gooflords | 2 - 0 | Legend of Splatoon |
| Reverse | 2 - 0 | Omega Muffins |
| Riementang | 2 - 1 | Shadow Squids |
| Angle Shooter Society :) | 2 - 0 | Hellish Akuma |
| Team | Points | Team |
|---|---|---|
| 4 Ever | 0 - 2 | Goofige Gooflords |
| Bi-Ba-Butzemänner | 2 - 1 | Reverse |
| Der Typ mit dem QUETSCHER und der Rest |
2 - 1 | Riementang |
| Jyusou Lickers | 2 - 0 | Angle Shooter Society :) |
| Team | Points | Team |
|---|---|---|
| Goofige Gooflords | 1 - 2 | Bi-Ba-Butzemänner |
| Der Typ mit dem QUETSCHER und der Rest |
1 - 2 | Jyusou Lickers |
| Team | Points | Team |
|---|---|---|
| Energie Kopfnuss | 2 - 1 | Bi-Ba-Butzemänner |
| Yoru | 2 - 1 | Jyusou Lickers |
| Team | Points | Team |
|---|---|---|
| Yoru | 2 - 3 | Energie Kopfnuss |
| Team | Points | Team |
|---|---|---|
| Enperry Scrimshaw | 3 - 0 | Energie Kopfnuss |
Finale bracket

| Team | Points | Team |
|---|---|---|
| Black Lotus | 3 - 1 | Enperry Scrimshaw |
Qualifier 2
Winners' bracket
| Serie | Mode | Stage |
|---|---|---|
Round 1 | ||
| 1 | Rainmaker |
MakoMart |
| 2 | Splat Zones |
Humpback Pump Track |
| 3* | Clam Blitz |
Mahi-Mahi Resort |
Round 2 | ||
| 1 | Tower Control |
Sturgeon Shipyard |
| 2 | Splat Zones |
Manta Maria |
| 3* | Rainmaker |
Scorch Gorge |
Round 3 | ||
| 1 | Turf War |
Um'ami Ruins |
| 2 | Turf War |
Brinewater Springs |
| 3* | Turf War |
Inkblot Art Academy |
| 1 | Clam Blitz |
Hagglefish Market |
| 2 | Rainmaker |
Eeltail Alley |
| 3* | Splat Zones |
Flounder Heights |
| 4* | Tower Control |
Undertow Spillway |
Round 4 | ||
| 1 | Turf War |
Barnacle & Dime |
| 2 | Turf War |
Mincemeat Metalworks |
| 3* | Turf War |
MakoMart |
| 1 | Splat Zones |
Wahoo World |
| 2 | Tower Control |
Manta Maria |
| 3* | Rainmaker |
Humpback Pump Track |
| 4* | Clam Blitz |
Hammerhead Bridge |
Round 5 | ||
| 1 | Turf War |
Scorch Gorge |
| 2 | Turf War |
Sturgeon Shipyard |
| 3* | Turf War |
Undertow Spillway |
| 1 | Tower Control |
Inkblot Art Academy |
| 2 | Clam Blitz |
Museum d'Alfonsino |
| 3* | Splat Zones |
Um'ami Ruins |
| 4* | Rainmaker |
Hagglefish Market |
(* if necessary)
Losers' bracket
| Serie | Mode | Stage |
|---|---|---|
Round 1 | ||
| 1 | Clam Blitz |
Hagglefish Market |
| 2 | Rainmaker |
Eeltail Alley |
| 3* | Splat Zones |
Flounder Heights |
Round 2 | ||
| 1 | Tower Control |
Inkblot Art Academy |
| 2 | Splat Zones |
Wahoo World |
| 3* | Clam Blitz |
Hammerhead Bridge |
Round 3 | ||
| 1 | Rainmaker |
Mincemeat Metalworks |
| 2 | Splat Zones |
Museum d'Alfonsino |
| 3* | Tower Control |
MakoMart |
Round 4 | ||
| 1 | Clam Blitz |
Manta Maria |
| 2 | Splat Zones |
Barnacle & Dime |
| 3* | Rainmaker |
Sturgeon Shipyard |
Round 5 | ||
| 1 | Tower Control |
Hagglefish Market |
| 2 | Splat Zones |
Um'ami Ruins |
| 3* | Clam Blitz |
Brinewater Springs |
Round 6 | ||
| 1 | Rainmaker |
Flounder Heights |
| 2 | Splat Zones |
Inkblot Art Academy |
| 3* | Tower Control |
Sturgeon Shipyard |
Round 7 | ||
| 1 | Clam Blitz |
Museum d'Alfonsino |
| 2 | Tower Control |
Brinewater Springs |
| 3* | Splat Zones |
Flounder Heights |
Round 8 | ||
| 1 | Turf War |
Eeltail Alley |
| 2 | Turf War |
Mahi-Mahi Resort |
| 3* | Turf War |
Wahoo World |
| 1 | Rainmaker |
Manta Maria |
| 2 | Splat Zones |
Barnacle & Dime |
| 3* | Clam Blitz |
Humpback Pump Track |
| 4* | Tower Control |
MakoMart |
(* if necessary)
Finale bracket
| Serie | Mode | Stage |
|---|---|---|
Finale | ||
| 1 | Turf War |
Hammerhead Bridge |
| 2 | Turf War |
Flounder Heights |
| 3* | Turf War |
Brinewater Springs |
| 1 | Tower Control |
Eeltail Alley |
| 2 | Clam Blitz |
Inkblot Art Academy |
| 3* | Splat Zones |
Mahi-Mahi Resort |
| 4* | Rainmaker |
Mincemeat Metalworks |
Reset | ||
| 1 | Turf War |
Hagglefish Market |
| 2 | Turf War |
Manta Maria |
| 3* | Turf War |
Humpback Pump Track |
| 1 | Rainmaker |
MakoMart |
| 2 | Clam Blitz |
Barnacle & Dime |
| 3* | Tower Control |
Wahoo World |
| 4* | Splat Zones |
Museum d'Alfonsino |
(* if necessary)
Results
Winners' bracket
| Team | Points | Team |
|---|---|---|
| Second Try | 0 - 2 | #TROLOLOL |
| Angle Shooter Society :D | 2 - 0 | Miiverse Invasion |
| 4Ever | 2 - 0 | Team Gute Nacht |
| Capybara Hochadel | 2 - 1 | Suprise Party |
| Shadow Squids | 2 - 0 | The rilders |
| ACE X | 2 - 1 | Omega Muffins |
| Goofige Gooflords | 2 - 0 | PhantomTroupe |
| Reverse | 2 - 0 | The invincible Monkeys |
| Hagglefresh | 2 - 1 | Legend of Splatoon |
| Bi-Ba-Butzemänner | 2 - 0 | Family Squad TE |
| Riementang | 2 - 0 | Prime Seals |
| Team | Points | Team |
|---|---|---|
| Haarige Hinterländler | 2 - 0 | #TROLOLOL |
| Angle Shooter Society :D | 0 - 2 | 4Ever |
| Yoru | 2 - 0 | Capybara Hochadel |
| Jyusou Lickers | 2 - 0 | Shadow Squids |
| Centopia | 2 - 0 | ACE X |
| Goofige Gooflords | 0 - 2 | Reverse |
| Energie Kopfnuss | 2 - 1 | Hagglefresh |
| Bi-Ba-Butzemänner | 2 - 0 | Riementang |
| Team | Points | Team |
|---|---|---|
| Haarige Hinterländler | 3 - 0 | 4Ever |
| Yoru | 0 - 3 | Jyusou Lickers |
| Centopia | 3 - 2 | Reverse |
| Energie Kopfnuss | 3 - 2 | Bi-Ba-Butzemänner |
| Team | Points | Team |
|---|---|---|
| Haarige Hinterländler | 3 - 0 | Jyusou Lickers |
| Centopia | 3 - 2 | Energie Kopfnuss |
| Team | Points | Team |
|---|---|---|
| Haarige Hinterländler | 3 - 1 | Centopia |
Losers' bracket
| Team | Points | Team |
|---|---|---|
| Miiverse Invasion | 0 - 2 | Team Gute Nacht |
| PhantomTroupe | 2 - 0 | The invincible Monkeys |
| Family Squad TE | 0 - 2 | Prime Seals |
| Team | Points | Team |
|---|---|---|
| Riementang | 2 - 0 | Second Try |
| Hagglefresh | 2 - 0 | Team Gute Nacht |
| Goofige Gooflords | 2 - 0 | Suprise Party |
| ACE X | 2 - 0 | The rilders |
| Shadow Squids | 2 - 0 | Omega Muffins |
| Capybara Hochadel | 1 - 2 | PhantomTroupe |
| Angle Shooter Society :D | 2 - 0 | Legend of Splatoon |
| #TROLOLOL | 0 - 2 | Prime Seals |
| Team | Points | Team |
|---|---|---|
| Riementang | 1 - 2 | Hagglefresh |
| Goofige Gooflords | 2 - 0 | ACE X |
| Shadow Squids | 2 - 0 | PhantomTroupe |
| Angle Shooter Society :D | 2 - 0 | Prime Seals |
| Team | Points | Team |
|---|---|---|
| Yoru | 2 - 0 | Hagglefresh |
| 4Ever | 2 - 1 | Goofige Gooflords |
| Bi-Ba-Butzemänner | 2 - 0 | Shadow Squids |
| Reverse | 2 - 0 | Angle Shooter Society :D |
| Team | Points | Team |
|---|---|---|
| Yoru | 2 - 1 | 4Ever |
| Bi-Ba-Butzemänner | 2 - 1 | Reverse |
| Team | Points | Team |
|---|---|---|
| Energie Kopfnuss | 2 - 0 | Yoru |
| Jyusou Lickers | 1 - 2 | Bi-Ba-Butzemänner |
| Team | Points | Team |
|---|---|---|
| Energie Kopfnuss | 2 - 1 | Bi-Ba-Butzemänner |
| Team | Points | Team |
|---|---|---|
| Centopia | 3 - 1 | Energie Kopfnuss |
Finale bracket
| Team | Points | Team |
|---|---|---|
| Haarige Hinterländler | 3 - 1 | Centopia |
Qualifier 3
Winners' bracket
| Serie | Mode | Stage |
|---|---|---|
Round 1 | ||
| 1 | Tower Control |
Inkblot Art Academy |
| 2 | Splat Zones |
Humpback Pump Track |
| 3* | Rainmaker |
Scorch Gorge |
Round 2 | ||
| 1 | Clam Blitz |
Museum d'Alfonsino |
| 2 | Splat Zones |
MakoMart |
| 3* | Tower Control |
Flounder Heights |
Round 3 | ||
| 1 | Turf War |
Eeltail Alley |
| 2 | Turf War |
Hagglefish Market |
| 3* | Turf War |
Mincemeat Metalworks |
| 1 | Rainmaker |
Undertow Spillway |
| 2 | Tower Control |
Sturgeon Shipyard |
| 3* | Splat Zones |
Wahoo World |
| 4* | Clam Blitz |
Brinewater Springs |
Round 4 | ||
| 1 | Turf War |
Scorch Gorge |
| 2 | Turf War |
Manta Maria |
| 3* | Turf War |
Barnacle & Dime |
| 1 | Splat Zones |
Hammerhead Bridge |
| 2 | Clam Blitz |
Mahi-Mahi Resort |
| 3* | Tower Control |
MakoMart |
| 4* | Rainmaker |
Humpback Pump Track |
Round 5 | ||
| 1 | Turf War |
Um'ami Ruins |
| 2 | Turf War |
Flounder Heights |
| 3* | Turf War |
Inkblot Art Academy |
| 1 | Tower Control |
Eeltail Alley |
| 2 | Splat Zones |
Museum d'Alfonsino |
| 3* | Clam Blitz |
Sturgeon Shipyard |
| 4* | Rainmaker |
Mincemeat Metalworks |
(* if necessary)
Losers' bracket
| Serie | Mode | Stage |
|---|---|---|
Round 1 | ||
| 1 | Rainmaker |
Undertow Spillway |
| 2 | Tower Control |
Sturgeon Shipyard |
| 3* | Splat Zones |
Wahoo World |
Round 2 | ||
| 1 | Clam Blitz |
Mahi-Mahi Resort |
| 2 | Splat Zones |
Brinewater Springs |
| 3* | Rainmaker |
Mincemeat Metalworks |
Round 3 | ||
| 1 | Clam Blitz |
Barnacle & Dime |
| 2 | Splat Zones |
Manta Maria |
| 3* | Tower Control |
Scorch Gorge |
Round 4 | ||
| 1 | Rainmaker |
Humpback Pump Track |
| 2 | Splat Zones |
Hammerhead Bridge |
| 3* | Tower Control |
MakoMart |
Round 5 | ||
| 1 | Clam Blitz |
Sturgeon Shipyard |
| 2 | Splat Zones |
Um'ami Ruins |
| 3* | Rainmaker |
Museum d'Alfonsino |
Round 6 | ||
| 1 | Rainmaker |
Mincemeat Metalworks |
| 2 | Splat Zones |
MakoMart |
| 3* | Clam Blitz |
Wahoo World |
Round 7 | ||
| 1 | Turf War |
Brinewater Springs |
| 2 | Turf War |
Hammerhead Bridge |
| 3* | Turf War |
Hagglefish Market |
| 1 | Clam Blitz |
Humpback Pump Track |
| 2 | Splat Zones |
Barnacle & Dime |
| 3* | Rainmaker |
Manta Maria |
| 4* | Tower Control |
Undertow Spillway |
(* if necessary)
Finale bracket
| Serie | Mode | Stage |
|---|---|---|
Finale | ||
| 1 | Turf War |
Wahoo World |
| 2 | Turf War |
Museum d'Alfonsino |
| 3* | Turf War |
Undertow Spillway |
| 1 | Tower Control |
Inkblot Art Academy |
| 2 | Rainmaker |
Eeltail Alley |
| 3* | Splat Zones |
Um'ami Ruins |
| 4* | Clam Blitz |
Scorch Gorge |
Reset | ||
| 1 | Turf War |
Undertow Spillway |
| 2 | Turf War |
MakoMart |
| 3* | Turf War |
Humpback Pump Track |
| 1 | Splat Zones |
Mahi-Mahi Resort |
| 2 | Tower Control |
Sturgeon Shipyard |
| 3* | Clam Blitz |
Brinewater Springs |
| 4* | Rainmaker |
Hagglefish Market |
(* if necessary)
Results
Winners' bracket
| Team | Points | Team |
|---|---|---|
| Surprise Party?! | 2 - 0 | Sunshine Vampires |
| ACE X | 2 - 0 | Cats ATE |
| Shadow Squids | 2 - 0 | The Rilders |
| Ink Academy | 2 - 0 | Ink Art Lilac |
| #TROLOLOL | 1 - 2 | Sleeping Inklings |
| Hagglefresh | 2 - 0 | Miiverse Invasion |
| Team | Points | Team |
|---|---|---|
| KaiZer | 2 - 0 | Surprise Party?! |
| Angle Shooter Society | 0 - -1 | Not a Matter of Opinion |
| Bi-Ba-Butzemänner | 2 - 0 | ACE X |
| Jyusou Lickers | 2 - 0 | Shadow Squids |
| Energie Kopfnuss | 2 - 0 | Ink Academy |
| Reverse | 2 - 0 | Patent Animals |
| Feuerwehrmänner*innen | 2 - 0 | Sleeping Inklings |
| Yoru | 2 - 1 | Hagglefresh |
| Team | Points | Team |
|---|---|---|
| KaiZer | 3 - 0 | Angle Shooter Society |
| Bi-Ba-Butzemänner | 1 - 3 | Jyusou Lickers |
| Energie Kopfnuss | 2 - 3 | Reverse |
| Feuerwehrmänner*innen | 3 - 2 | Yoru |
| Team | Points | Team |
|---|---|---|
| KaiZer | 3 - 0 | Jyusou Lickers |
| Reverse | 3 - 1 | Feuerwehrmänner*innen |
| Team | Points | Team |
|---|---|---|
| KaiZer | 3 - 0 | Reverse |
Losers' bracket
| Team | Points | Team |
|---|---|---|
| Hagglefresh | 0 - -1 | Sunshine Vampires |
| Patent Animals | 2 - 0 | Cats ATE |
| Ink Academy | 2 - 0 | The Rilders |
| Shadow Squids | 2 - 0 | Ink Art Lilac |
| Not a Matter of Opinion | -1 - 0 | #TROLOLOL |
| Surprise Party?! | 2 - 0 | Miiverse Invasion |
| Team | Points | Team |
|---|---|---|
| Sleeping Inklings | 0 - 2 | Hagglefresh |
| Patent Animals | 0 - 2 | Ink Academy |
| ACE X | 2 - 1 | Shadow Squids |
| #TROLOLOL | 0 - 2 | Surprise Party?! |
| Team | Points | Team |
|---|---|---|
| Bi-Ba-Butzemänner | 2 - 1 | Hagglefresh |
| Angle Shooter Society | 2 - 1 | Ink Academy |
| Yoru | 2 - 1 | ACE X |
| Energie Kopfnuss | 2 - 0 | Surprise Party?! |
| Team | Points | Team |
|---|---|---|
| Bi-Ba-Butzemänner | 2 - 0 | Angle Shooter Society |
| Yoru | 1 - 2 | Energie Kopfnuss |
| Team | Points | Team |
|---|---|---|
| Feuerwehrmänner*innen | 2 - 0 | Bi-Ba-Butzemänner |
| Jyusou Lickers | 0 - 2 | Energie Kopfnuss |
| Team | Points | Team |
|---|---|---|
| Feuerwehrmänner*innen | 1 - 2 | Energie Kopfnuss |
| Team | Points | Team |
|---|---|---|
| Reverse | 1 - 3 | Energie Kopfnuss |
Finale bracket
| Team | Points | Team |
|---|---|---|
| KaiZer | 3 - 0 | Energie Kopfnuss |
Qualifier 4
Winners' bracket
| Serie | Mode | Stage |
|---|---|---|
Round 1 | ||
| 1 | Clam Blitz |
MakoMart |
| 2 | Splat Zones |
Barnacle & Dime |
| 3* | Rainmaker |
Museum d'Alfonsino |
Round 2 | ||
| 1 | Tower Control |
Sturgeon Shipyard |
| 2 | Splat Zones |
Hammerhead Bridge |
| 3* | Clam Blitz |
Scorch Gorge |
Round 3 | ||
| 1 | Turf War |
Mincemeat Metalworks |
| 2 | Turf War |
Humpback Pump Track |
| 3* | Turf War |
Brinewater Springs |
| 1 | Rainmaker |
Eeltail Alley |
| 2 | Splat Zones |
Mahi-Mahi Resort |
| 3* | Tower Control |
Inkblot Art Academy |
| 4* | Clam Blitz |
Flounder Heights |
Round 4 | ||
| 1 | Turf War |
Wahoo World |
| 2 | Turf War |
Hagglefish Market |
| 3* | Turf War |
MakoMart |
| 1 | Clam Blitz |
Museum d'Alfonsino |
| 2 | Rainmaker |
Mincemeat Metalworks |
| 3* | Splat Zones |
Um'ami Ruins |
| 4* | Tower Control |
Manta Maria |
Round 5 | ||
| 1 | Turf War |
Barnacle & Dime |
| 2 | Turf War |
Hammerhead Bridge |
| 3* | Turf War |
Undertow Spillway |
| 1 | Splat Zones |
Brinewater Springs |
| 2 | Tower Control |
Eeltail Alley |
| 3* | Clam Blitz |
Scorch Gorge |
| 4* | Rainmaker |
Sturgeon Shipyard |
(* if necessary)
Losers' bracket
| Serie | Mode | Stage |
|---|---|---|
Round 1 | ||
| 1 | Rainmaker |
Eeltail Alley |
| 2 | Splat Zones |
Mahi-Mahi Resort |
| 3* | Tower Control |
Inkblot Art Academy |
Round 2 | ||
| 1 | Rainmaker |
Mincemeat Metalworks |
| 2 | Clam Blitz |
Humpback Pump Track |
| 3* | Splat Zones |
Brinewater Springs |
Round 3 | ||
| 1 | Tower Control |
Manta Maria |
| 2 | Splat Zones |
Um'ami Ruins |
| 3* | Clam Blitz |
Museum d'Alfonsino |
Round 4 | ||
| 1 | Rainmaker |
Undertow Spillway |
| 2 | Splat Zones |
Wahoo World |
| 3* | Tower Control |
Hagglefish Market |
Round 5 | ||
| 1 | Clam Blitz |
Barnacle & Dime |
| 2 | Splat Zones |
Sturgeon Shipyard |
| 3* | Rainmaker |
Scorch Gorge |
Round 6 | ||
| 1 | Tower Control |
Eeltail Alley |
| 2 | Splat Zones |
Humpback Pump Track |
| 3* | Clam Blitz |
Mahi-Mahi Resort |
Round 7 | ||
| 1 | Turf War |
Manta Maria |
| 2 | Turf War |
Inkblot Art Academy |
| 3* | Turf War |
Museum d'Alfonsino |
| 1 | Rainmaker |
MakoMart |
| 2 | Splat Zones |
Mincemeat Metalworks |
| 3* | Clam Blitz |
Um'ami Ruins |
| 4* | Tower Control |
Hagglefish Market |
(* if necessary)
Finale bracket
| Serie | Mode | Stage |
|---|---|---|
Finale | ||
| 1 | Turf War |
Mahi-Mahi Resort |
| 2 | Turf War |
Flounder Heights |
| 3* | Turf War |
Humpback Pump Track |
| 1 | Splat Zones |
Wahoo World |
| 2 | Tower Control |
Undertow Spillway |
| 3* | Clam Blitz |
Barnacle & Dime |
| 4* | Rainmaker |
Manta Maria |
Reset | ||
| 1 | Turf War |
Um'ami Ruins |
| 2 | Turf War |
Eeltail Alley |
| 3* | Turf War |
Scorch Gorge |
| 1 | Clam Blitz |
Hagglefish Market |
| 2 | Splat Zones |
MakoMart |
| 3* | Tower Control |
Inkblot Art Academy |
| 4* | Rainmaker |
Museum d'Alfonsino |
(* if necessary)
Results
Winners' bracket
| Team | Points | Team |
|---|---|---|
| Prime Seals | 1 - 2 | SurpriseParty?! |
| Hagglefresh | 2 - 0 | Thundersplats |
| Capybara-Hochadel | 1 - 2 | The invincible Monkeys |
| Goofige Gooflords | 2 - 0 | Sleeping Inklings |
| Ace X | 2 - 0 | The Rilders |
| Second Try | 2 - 0 | Chaos Ink |
| Shadow Squids | 2 - 0 | CrystalSquids |
| Team | Points | Team |
|---|---|---|
| Reverse | 2 - 0 | SurpriseParty?! |
| Angle Shooter Society :D | 2 - 1 | Not a Matter of Opinion |
| Bi-Ba-Butzemänner | 2 - 0 | Hagglefresh |
| Jyusou Lickers | 2 - 0 | The invincible Monkeys |
| Feuerwehrmänner*innen | 1 - 2 | Goofige Gooflords |
| 4Ever | 2 - 1 | Ace X |
| Die Randoms | 2 - 0 | Second Try |
| Yoru | 2 - 0 | Shadow Squids |
| Team | Points | Team |
|---|---|---|
| Reverse | 3 - 0 | Angle Shooter Society :D |
| Bi-Ba-Butzemänner | 0 - 3 | Jyusou Lickers |
| Goofige Gooflords | 3 - 0 | 4Ever |
| Die Randoms | 3 - 1 | Yoru |
| Team | Points | Team |
|---|---|---|
| Reverse | 3 - 2 | Jyusou Lickers |
| Goofige Gooflords | 3 - 2 | Die Randoms |
| Team | Points | Team |
|---|---|---|
| Reverse | 3 - 0 | Goofige Gooflords |
Losers' bracket
| Team | Points | Team |
|---|---|---|
| Shadow Squids | 2 - 1 | Prime Seals |
| Ace X | 2 - 0 | Thundersplats |
| Feuerwehrmänner*innen | 2 - 0 | Capybara-Hochadel |
| The invincible Monkeys | 2 - 0 | Sleeping Inklings |
| Hagglefresh | 2 - 0 | The Rilders |
| Not a Matter of Opinion | 2 - 0 | Chaos Ink |
| SurpriseParty?! | 2 - 0 | CrystalSquids |
| Team | Points | Team |
|---|---|---|
| Second Try | 0 - 2 | Shadow Squids |
| Ace X | 1 - 2 | Feuerwehrmänner*innen |
| The invincible Monkeys | 1 - 2 | Hagglefresh |
| Not a Matter of Opinion | 2 - 0 | SurpriseParty?! |
| Team | Points | Team |
|---|---|---|
| Bi-Ba-Butzemänner | 2 - 1 | Shadow Squids |
| Angle Shooter Society :D | 0 - 2 | Feuerwehrmänner*innen |
| Yoru | 2 - 0 | Hagglefresh |
| 4Ever | 2 - 1 | Not a Matter of Opinion |
| Team | Points | Team |
|---|---|---|
| Bi-Ba-Butzemänner | 0 - 2 | Feuerwehrmänner*innen |
| Yoru | 0 - 2 | 4Ever |
| Team | Points | Team |
|---|---|---|
| Die Randoms | 2 - 0 | Feuerwehrmänner*innen |
| Jyusou Lickers | 0 - 2 | 4Ever |
| Team | Points | Team |
|---|---|---|
| Die Randoms | 2 - 0 | 4Ever |
| Team | Points | Team |
|---|---|---|
| Goofige Gooflords | 1 - 3 | Die Randoms |
Finale bracket
| Team | Points | Team |
|---|---|---|
| Reverse | 3 - 1 | Die Randoms |
Quotes
| “ | Deutsche Inklinge und Oktolinge, wärmt eure Tentakeln auf! Die Online-Vorrunden für die #Splatoon3 European Championship 2023 werden im Juli für Deutschland eröffnet! Termine und Informationen zur Anmeldung folgen in Kürze! |
” |
| “ | Startschuss für Deutschland: Das offizielle #Splatoon3 German Championship findet ab dem 09. Juli in mehreren spritzigen Runden statt! Teams aus ganz Deutschland können sich für die Splatoon 3 European Championship 2023 qualifizieren. Info und Anmeldung: http://ntdo.de/601049QPn |
” |
| “ | Das erste Online-Qualifikationsturnier der #Splatoon3 German Championship steigt diesen Sonntag. Noch können sich mutige Inklinge und Oktolinge anmelden! |
” |
| “ | Black Lotus und Enperry Scrimshaw gingen letztes Wochenende als siegreiche Teams der ersten Runde der #Splatoon3 German Championship hervor. Damit qualifizeren sie sich für das große Turnier auf der gamescom! Danke an alle teilnehmenden Teams! |
” |
| “ | Hier eine Momentaufnahme aus dem Finale zwischen den beiden Teams. Livestream von @DappleProd. |
” |
| “ | Das nächste Qualifikationsturnier der #Splatoon3 German Championship ist live! |
” |
| “ | Noch können sich mutige Inklinge und Oktolinge für die noch folgenden Turniere registrieren. Alle Infos dazu auf der Website: |
” |
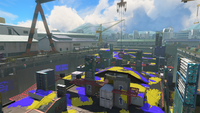
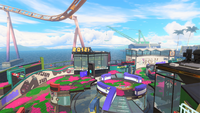
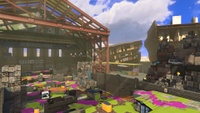
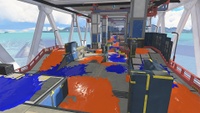
Gallery
Images


Videos
References
- ↑
 @NintendoDE on Twitter
- ↑ challonge.com (qualifier 1)
- ↑ challonge.com (qualifier 2)
- ↑ challonge.com (qualifier 3)
- ↑ challonge.com (qualifier 4)
External sources
 nintendo.com/de-de
- DappleProductions on Twitch (qualifier 1)
- DappleProductions on Twitch (qualifier 2)
- DappleProductions on Twitch (qualifier 3)
- DappleProductions on Twitch (qualifier 4)
