User:Yoshifan52/Sandbox/Guides
images
- For the Salmon Run Next Wave version of this manual in Splatoon 3, see Salmonid Field Guide (Splatoon 3).
- For the Salmon Run version of this manual in Splatoon 2, see Salmonid Field Guide (Splatoon 2).
- Main article: callie
- For the Salmon Run Next Wave version of this manual in Splatoon 3, see Employee Handbook (Splatoon 3).

-

The Employee Handbook as seen in the Grizzco lobby before being approached
-

The Employee Handbook as seen in the Grizzco lobby after being approached


article
2

- For the Salmon Run version of this manual in Splatoon 2, see Employee Handbook (Splatoon 2).
The Employee Handbook is the first part of the eponymous manual for Salmon Run Next Wave that's available inside the Grizzco building. It explains how to play Salmon Run and provides insight into the company culture at Grizzco Industries. This manual is an updated version of Salmon Run's version of the manual featuring new information on how the Splatlands' Grizzco branch's operation differs from Inkopolis', as well as some grammar corrections.
Players interested in learning about the Salmonids encountered in Salmon Run can view the Salmonid Field Guide (Splatoon 3), the other part of the Employee Handbook.
The full text is reproduced below.
Contents
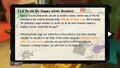
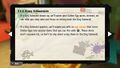
1.1.0 To All My Happy Little Workers
- Here at Grizzco Industries, we aim to create a richer, better way of life for everyone in our society through daily collection of Power Eggs. We're looking for dedicated, eager workers to assist us as we move forward toward a brighter future. Could that be you?
- Collecting Power Eggs can indeed be a risky business, but when standing shoulder to shoulder in the thick of the action alongside coworkers united under the same vision, you may see yourself in a different light—an innovator, a change bringer, one who rises to all challenges.
- Naturally, you will be well rewarded for your efforts. We offer an attractive and competitive remuneration package to all our employees.
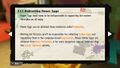
1.1.1 Collecting Power Eggs
- Power Eggs have come to be indispensable in supporting the modern lifestyles we all enjoy.
- Power Eggs can be obtained from creatures called Salmonids.
- Working for Grizzco, you'll be responsible for collecting Golden Eggs and depositing them in the company-issued egg basket. These Golden Eggs are obtained from Boss Salmonids, a far more dangerous type of Salmonid than the Lesser Salmonid variety.
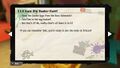
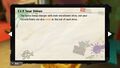
1.1.2 Earn Big Bucks—Fast!
- Steal the Golden Eggs from the Boss Salmonids!
- Take 'em to the egg basket!
- And that's it! No, really—that's all there is to it!
- If you can remember that, you're ready to join the ranks at Grizzco!
- As a new employee, you can rest assured in the knowledge that we offer on-site training—you won't be thrown in at the deep end. After all, no one expects you to memorize everything in your Employee Handbook right away! At Grizzco, we believe experience is the best teacher.
- All you could ever want to know about Salmonids is explained in detail in your Salmonid Field Guide.
1.1.4 Getting Started
- All new Grizzco employees are given a Grizzco Point Card. Please take good care of this card—it's used to commemorate your professional achievements.
- Power Egg collection is done when Salmonids engage in a behavior called a "Salmon Run." This is the Salmonid habit of regularly returning in large numbers from their current habitat to the area where they spawned.
- Because our business NEVER closes here in the the Splatlands, we always have a need for more help collecting Power Eggs. However, where our employees collect those eggs will differ based on the time of day.
- all equipment necessary for collecting Power Eggs (weapons, gear, life ring) will be provided by the company. There is no need for employees to prepare anything themselves, so first-timers needn't worry.
- This job requires the use of specially optimized equipment well suited to the task at hand. This means that workers will be unable to charge their special gauges themselves. Instead, Grizzco will arrange for two uses of a special ability, which you may activate when you deem necessary. Unused special-ability activations are reclaimed at the end of your shift.
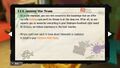
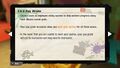
1.1.5 All in a Day's Work
- You'll start your working day by boarding one of our chartered helicopters and departing for the restricted zone. Be aware that once your helicopter departs, there's no turning back. You won't be able to return until your shift is over.
- Upon arriving at the job site, company-issued weapons will be distributed to each employee. After you've received your weaponry, all you have to do is wait for Boss Salmonids to appear.
- You will receive a radio alert when Boss Salmonids are detected in the vicinity. It's not possible to provide precise coordinates, so it's up to you to find the exact location of the Boss Salmonids.
- The restricted zone is subject to a mysterious magnetic field known to have an effect on Inkling and Octoling sensory organs. You will be unable to use the Turf Map to check your surroundings or to perform Super Jumps. You'll have to rely on good old-fashioned eyesight to explore your surroundings.
- Unfortunately, Boss Salmonids are not the only enemy you'll have to contend with. Lesser Salmonids will also interfere with your work and will need to be dealt with in a suitable fashion. However, be aware that the Power Eggs dropped by Lesser Salmonids are far less valuable than the Golden Eggs dropped by Boss Salmonids. Therefore we ask all employees to prioritize the collection of Golden Eggs over Power Eggs.
- The Salmonids' sensory organs have adapted to the contaminants in their habitat, so they will not be hampered in hunting down Inklings and Octolings. Be very careful—you won't be able to hide yourself in ink.
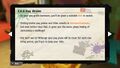
1.1.6 Forming Bonds through Cooperation
- Facing off against a Boss Salmonid on your own is a tall order. If you find yourself fighting one, use your This way! signal to call for help. This will communicate your position wirelessly to your coworkers.
- Carrying the Golden Eggs dropped by Boss Salmonids also requires the cooperation of the whole team, as the equipment provided allows each worker to carry only 1 Golden Egg at a time.
- In the event that you are splatted by a Salmonid, you'll wind up in a life ring, rendering you out of action. To rejoin the fray, you must wait for 1 of your coworkers to revive you with some of their ink.
- While in a life ring, your This way! signal will automatically change to a distress call. Use this to let your coworkers know that you're in a bind so they'll come and revive you as soon as possible.
- If you approac the egg basket while holding a Golden Egg, you can press to deposit it.
- If you're not near the egg basket, you can press to throw a Golden Egg. Use this to deposit eggs from far away, pass them to coworkers, ot put them in places where they're easy to retrieve. While throwing Golden Eggs is an efficient method of transport, please bear in mind that doing so expends ink, so plan accordingly.
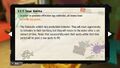
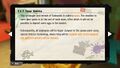
1.1.7 Your Quota
- In order to promote effective Power Egg collection, all teams have a Golden Egg quota.
- The Salmonids exhibit very predictable behavior. They will react aggressively to intruders in their territory, but they will return to the water after a set amount of time. Teams that successfully meet their quota within that time period will be given a new quota to fill.
- This onslaught and retreat of Salmonids is called a wave. The deadline to meet your quota is at the end of each wave, after which it will not be possible to deposit more eggs in the basket.
- Subsequently, all employees will be Super Jumped to the spawn point using special Grizzco technology, where they will be supplied with fresh weapons and splatted workers will be revived.
- Your shift is over at the end of the third wave.
- Unfortunately, in the event that your team is unable to meet its quota, we will have no choice but to terminate your shift early.
- Additionally, if your entire work crew is splatted by Salmonids and wiped out during a wave, we will again have no choice but to terminate your shift early.
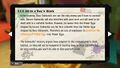
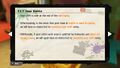
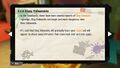
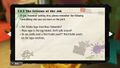
1.1.8 King Salmonids
- In the Splatlands, there have been several reports of King Salmonid sightings. King Salmonids are larger and more dangerous than Boss Salmonids.
- It's said that Kind Salmonids will gradually learn your scent and will appear to chase away intruders that come back over and over again.
- if a King Salmonid shows up, we'll waive your Golden Egg quota. Instead, we ask that you stay calm and focus on driving back the King Salmonid.
- If a King Salmonid appears, we'll supply you with an egg cannon that turns Golden Eggs into special shots that you can fire with . These shots won't consume ink, so don't be shy about using them on the King Salmonid.
- When a King Salmonid appears, all leftover special pouches will be collected and then redistributed so everyone gets one. This rule ensures the most efficient use of limited resources.[a]
- You can obtain durable fish scales from the bodies of King Salmonids. These are a very precious resource!
- In exchange for fish scales, we will provide a variety of limited-edition goods, so you should absolutely try to collect as many as you can.
1.1.9 Your Bonus
- When your shift ends, you'll be awarded Grizzco Points based on how well your shift goes, as well as the number of Golden and Power eggs you and your coworkers have collected. After you have earned a set number of points, you will receive a fabulous bonus, so make sure you work your very hardest to rack up those points!
- You can claim your bonuses from the exchange desk inside Grizzco Industries.
- The bonus lineup changes with each recruitment drive, and your Grizzco Points are also reset at the end of each drive.
1.2.0 Pay Grade
- Grizzco uses an employee-rating system to help workers progress along their chosen career path.
- Your pay grade increases when you meet your quotas for all three waves.
- In the event that you are unable to meet your quotas, your pay grade will not be increased—and may even be decreased.
- As your pay grade increases, you'll be given a suitable title to match.
- Getting better pay grades and titles results in increased bonuses, but even better than that, it gives you the warm, glowy feeling of overcoming a challenge!
- And don't worry! Although your pay grade will be reset for each new hiring period, you'll get to keep your title.
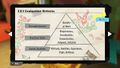
1.2.1 Evaluation Criteria
- Accomplishments: Results at Work
- Practical Skills: Preparedness, Consideration, Communication, Judgment, Initiative
- Innate Qualities: Attitude, Ambition, Experience, Style, Reflexes
1.2.2 The Essence of the Job
- If you remember nothing else, please remember the following (everything else you can learn on the job):
- Get Golden Eggs from Boss Salmonids!
- Place eggs in the egg basket. Don't yolk around!
- Do you really need a third bullet point? Third bullet points are for eggs-ecutives.
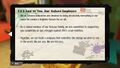
1.2.3 And to You, Our Valued Employee
- We at Grizzco Industries are devoted to doing absolutely everything in our power to create a brighter future for us all.
- As a valued member of our Grizzco family, we are committed to supporting you completely as you struggle against life's cruel realities.
- Together, we can build a company that embodies the change we wish to see in the world. We are one. We are Grizzco.
Gallery
-
Page 1 of the Employee Handbook
-

Page 2 of the Employee Handbook
-
Page 3 of the Employee Handbook
-
Page 4 of the Employee Handbook
-
Page 5 of the Employee Handbook
-
Page 6 of the Employee Handbook
-

Page 7 of the Employee Handbook
-
Page 8 of the Employee Handbook
-
Page 9 of the Employee Handbook
-
Page 10 of the Employee Handbook
-
Page 11 of the Employee Handbook
-
Page 12 of the Employee Handbook
-
Page 13 of the Employee Handbook
-
Page 14 of the Employee Handbook
-
Page 15 of the Employee Handbook
-
Page 16 of the Employee Handbook
-
Page 17 of the Employee Handbook
-
Page 18 of the Employee Handbook
-
Page 19 of the Employee Handbook
-

Page 20 of the Employee Handbook
-

Page 21 of the Employee Handbook
-
Page 22 of the Employee Handbook
-
Page 23 of the Employee Handbook
-
Page 24 of the Employee Handbook
-
Page 25 of the Employee Handbook
-
Page 26 of the Employee Handbook
-
Page 27 of the Employee Handbook
-
The Employee Handbook as seen in the Grizzco lobby before being approached
-
The Employee Handbook as seen in the Grizzco lobby after being approached


See also
Notes
- ↑ *clean up wording Despite what's stated here, at the start of an Xtrawave every player is given one special pouch containing the same special they held previously in the same shift. The amount of leftover pouches between all coworkers before Xtrawave starts is irrelevant; players do not have to "save" their specials for the end when expecting an Xtrawave as all of them will receive one repeat special.
sfg

- For the Salmon Run version of this manual in Splatoon 2, see Salmonid Field Guide (Splatoon 2).
The Salmonid Field Guide is the second part of the Employee Handbook manual for Salmon Run Next Wave that's available inside the Grizzco building. It contains descriptions, images, and tips for dealing with Salmonids and Known Occurrences in Salmon Run Next Wave. This manual is an updated version of Salmon Run's version of the manual featuring information on newly-discovered variants of Salmonids, as well as some grammar corrections.
Players interested in learning about the general mechanics of Salmon Run Next Wave can view the Employee Handbook (Splatoon 3), the other part of the eponymous manual.
The full text is reproduced below.
2 transcript
lesser 33 snatcher2 / boss steelhead2 eel2 scrapper2 sniper2 maws2 drizzler2 flyfish3 fishstick2 flipperflopper2 slamminlid2 bigshot2 / events tides2 rush3 fog2 griller2 cannon2 goldie3 mothership3 mudmouths2 tornado2 FISH
Lesser Salmonids
 Chum,
Chum,  Smallfry, and
  Cohock
- Main article: Chum
- Main article: Smallfry (species)
- Main article: Cohock


- Basic Information
- They tend to appear in groups rather than alone.
- Defeating them will earn you Power Eggs.
- Attack Behavior
- They use their sense of smell to locate and close in on targets who have entered their territory.
- Once they close in on a target, they perform close-range attacks using frying pans or other cookware.
- Elimination
- Can be neutralized relatively easily with a direct hit of ink.
- Supporting Information
- They inhabit a restricted ocean zone, and any unauthorized contact with them is expressly forbidden by law.
- The Smallfry might be weak, but they're very fast. They often ambush their targets from below.
- The larger Cohock moves slowly but packs a real punch with direct, strong attacks.
- On their own, they don't pose a significant threat—but ignore them and you may quickly find yourself surrounded.
Snatcher
- Main article: Snatcher


- Basic Information
- Tasked with procuring Golden Eggs, Snatchers will emerge from the sea when Golden Eggs are present, and try to seize them and return to the depths.
- Any snatched Golden Eggs can be retrieved by defeating this Salmonid before it returns to the water.
- Attack Behavior
- Not known to attack directly.
- Elimination
- Can be neutralized relatively easy with a direct hit of ink.
- Supporting Information
- New recruits usually start as Snatchers to give them a taste of the battlefield.
- Provided they demonstrate sufficient aptitude at collecting Golden Eggs, they will be allowed to join the front lines.
- In recent years, aircraft have also been brought in to improve their egg-collection rates.
Boss Salmonids (the ones that drop Golden Eggs)
 Steelhead


- Main article: Steelhead
- Basic Information
- An extraordinarily large specimen, it moves very slowly.
- Its body is covered in hard, protective skin. Shooting it with ink has no effect.
- Attack Behavior
- It generates bombs from its head, which it throws at enemies.
- It can't throw these bombs very far, but the resulting explosion covers a large area.
- Elimination
- The only way to defeat the Steelhead is to shoot ink at the bomb on its head as it inflates.
- Supporting Information
- It's the company commander of a Salmonid troop.
- Its powerful physique capable of supporting heavy armor, and its ink-resistant skin is the result of arduous conditioning.
- It forms the bomb on its head by collecting its own explosive saliva. Ew.
 Steel Eel


- Main article: Steel Eel
- Basic Information
- It's a weapon made of connected ink-spraying devices for the suppression of large areas.
- It locks on to and relentlessly pursues a single target.
- Attack Behavior
- Its extensive length is used to block routes as it rains down ink.
- Elimination
- It can be neutralized by shooting the driver in the very rear of the Steel Eel.
- Supporting Information
- The driver of the Steel Eel wears a mask to protect itself from the spray generated by the machine.
- The great length of the Steel Eel is attributable to the large number of interconnected ink sprayers used to create it.
 Scrapper


- Main article: Scrapper
- Basic Information
- They're protected against almost all ink damage by their shields.
- Their ability to turn rapidly allows them to keep their shields facing their target.
- Attack Behavior
- The protection afforded by their shields allows them to charge forward.
- Elimination
- Sustained ink attacks will damage their shields and bring them to a standstill.
- Once the Scrapper is immobilized, move round around behind it to fire through the gap in its shields and take it out.
- Supporting Information
- The Scrapper's vehicle is a much-desired item for many Salmonids.
- The shields are made from odds and ends of scrap metal and old cookware.
- If the shields are broken, the Scrapper will have to stop in order to make repairs.
 Stinger


- Main article: Stinger
- Basic Information
- It's a Salmonid sniper atop a stack of pots and pans.
- It's not known to move from the beach.
- The Salmonid on top can't be harmed with ink-based attacks.
- Attack Behavior
- It attacks from a distance with powerful jets of ink that can pass through walls and other obstacles.
- Elimination
- Use your ink to knock pots away one at a time until the Salmonid lands on the flame below.
- Supporting Information
- It boils ink in its pots to generate the pressure required for its long-range attacks.
- The pots are stacked high on top of a gas burner to allow the Stinger to effectively sight and attack enemies from a distance.
- The Salmonid on top wears protective equipment to absorb the shock from the jet of ink.
 Maws
Maws


- Main article: Maws
- Basic Information
- It lurks under the surface of the ink.
- It can swim in ink to scale walls.
- Attack Behavior
- It appears from directly beneath its prey and can swallow it in an instant.
- Elimination
- You can deal damage by shooting ink at it when it surfaces to attack, but defeating it this way will take some time, as it is rather robust.
- To bring it down in one fell swoop, trick it into swallowing a bomb by placing one at its point of attack.
- Supporting Information
- In order to sustain its large size, it must perpetually roam around, searching for prey to consume.
- It uses sonar to detect the location of suitable prey whilst submerged.
 Drizzler


- Main article: Drizzler
- Basic Information
- It's a floaty fighter specializing in surprise attacks.
- Its armored umbrella renders it essentially impervious to ink.
- Attack Behavior
- It fires midrange attacks using special projectiles.
- Its projectiles explode into clouds that rain down ink.
- Elimination
- It's susceptible to attack immediately after it fires.
- With good timing, it's possible to reflect the shot and hit the Drizzler with its own projectile, taking it down in one go.
- Supporting Information
- The ranks of the Drizzlers are made up by renegade Salmonid who prefer to go it alone and fight on their own terms.
- It's well-protected against ink by unusual umbrella-like armor.
- The immense recoil from discharging its weapon temporarily exposes the Salmonid within its armor.
 Flyfish


- Main article: Flyfish
- Basic Information
- Each of its flank is equipped with missile launchers capable of firing up to four missiles each.
- It uses jet-propulsion technology to hover about.
- It's covered in ink-repelling armor.
- Attack Behavior
- Capable of locking on to two targets and firing up to four missiles from each missile launcher.
- Elimination
- Throw a bomb into one of the missile launchers to destroy it.
- Take out both of its missile launchers to bring down the Flyfish.
- Supporting Information
- The latest model of weapon from leading Salmonid engineers.
- Only the most elite Smallfry are selected to undergo the special training to become Flyfish pilots.
- It's equipped with a space-grade reaction control system on each flank to enable a smooth, stable hover.
 Fish Stick


- Main article: Fish Stick
- Basic Information
- It's a squad of flying Smallfry carrying a massive pillar.
- They plant the pillar in the ground, then fly around above the pillar, spraying ink and generally being a nuisance.
- After you splat them, the pillar will stick around.
- Attack Behavior
- Several Smallfry fly in circles above the pillar, spraying ink.
- Elimination
- Splat all orbiting Smallfry with ink shots.
- Climb the pillar, and aim from the top to splat in relative safety.
- Supporting Information
- They train to increase their lung capacity, and some are even recruited to become Stingers.
- As they fly in circles, they sing a cheerful tune to encourage their fellow Salmonids in battle.
 Flipper-Flopper


- Main article: Flipper-Flopper
- Basic Information
- It swims deep below the ink, then launches high into the air before diving back down.
- It'll place a ring of ink as it jumps, showing where it will dive.
- Attack Behavior
- It will ink the ground within the thrown ring, then attack anyone inside the ring as it dives in.
- Elimination
- It's exposed while it's in the air getting ready to attack. That's your chance!
- If you ink the ground within its ring, it won't be able to dive back under, letting you make quick work of it.
- Supporting Information
- It seems to idolize an animal said to have flourished in ancient times, which may explain why it wears a mask to make itself look more like this creature.
- It clearly attaches more importance to the beauty of its dives than its combat effectiveness.
 Slammin' Lid


- Main article: Slammin' Lid
- Basic Information
- It's a pilot riding on a hovering, saucer-shaped craft.
- These provide support for other Salmonids by creating a circular force field that ink cannot pass through.
- Attack Behavior
- Lesser Salmonids will be deployed from the hole on the bottom of the saucer.
- It will try to squash targets who walk into the force field.
- Elimination
- There is a pilot stationed on top of the craft. Defeating the pilot will destroy the craft.
- Walk into the barrier under the Slammin' Lid, then quickly dodge when the craft drops down to splat you. Once it's down, that's your chance to get on top and attack the pilot.
- Supporting Information
- The cutting-edge technology incorporated into the craft was obtained by trading with Octarians.
- Because of the high cost to build these, only highly experienced veterans are allowed to pilot them.
- To save on weight, the craft has no weapons. This is why it attacks by trying to smash enemies beneath it.
 Big Shot


- Main article: Big Shot
- Basic Information
- These set up a Big Shot launcher near the shore. The Big Shot launcher is loaded with cannonballs carried in from the sea, which it then fires.
- The attending Salmonid itself is not aggressive—it just passively goes back and forth between the sea and the Big Shot launcher.
- The Big Shot launcher can be used to load and fire Golden Eggs.
- After the Big Shot is defeated, the Big Shot launcher will stick around until the next wave.
- Attack Behavior
- It will fire its cannonballs in the direction of the egg basket.
- When a cannonball lands, it creates two shock-wave attacks.
- Elimination
- Take out the Salmonid operating the Big Shot launcher.
- Supporting Information
- Among muscle-bound Salmonids, those with belligerent personalities tend to be assigned as Steelheads, while those with calmer dispositions are assigned to Big Shots.
- On Salmonid holidays, Big Shot workers like to launch special fireworks in place of cannonballs to make things more festive.
Known Occurences
Water Levels (high and low tides)


- Main article: Water Levels (high and low tides)
- Low Tide
- When the tide goes out, a large amount of land that is usually underwater will be exposed.
- Salmonid warriors use this land as a staging ground from which to launch coordinated attacks.
- During low tide, the egg basket will be stationed near this newly exposed land.
- High Tide
- When the tide is in, there'll be much less land available.
- During high tide, the egg basket will be in its normal place.
- Advice from Mr. Grizz
- During low tide, you gotta get together and move, move, move down to that exposed land, kid!
- During high tide—I don't care how hard it is—you gotta survive against those Salmonids!
- Supplementary Information
- The sudden and irregular changes in the water levels are a rare phenomenon unique to areas where Salmonids like to gather.
- The cause is as yet unknown and is the subject of much research throughout the academic world.
Rush


- Main article: Rush
- What Happens
- Large groups of ferocious Salmonids appear and carry out rush attacks at furious speed.
- These crazed Salmonids gather whenever Glowflies appear.
- How to Get Golden Eggs
- Take out the Goldie hidden in the school of Salmonids.
- Advice from Mr. Grizz
- Stand your ground with your allies, and concentrate your fire on the incoming Salmonids!
- Watch out for the Glowflies—if they buzz around you, a concentrated attack won't be far behind.
- Supplementary Information
- It is claimed that the Salmonids' increased aggression is tied somehow to gravitational shifts due to the planet's celestial course, but there is still much that is unclear.
- It is said that in premedieval times, before effective defense measures such as long-range ink attacks were available, many cities fell before the rage of the Salmonid rush.
Fog


- Main article: Fog
- What Happens
- The area is covered in a dense fog, drastically reducing visibility.
- Enemies will take advantage of the fog and attack from all directions.
- How to Get Golden Eggs
- Defeat Boss Salmonids.
- The extremely rare Goldies may appear in foggy conditions.
- Advice from Mr. Grizz
- Try to maintain contact with your teammates at all times while in the fog.
- Being alone in the fog is extremely dangerous.
- Supplementary Information
- Goldies are extremely rare Salmonids—only one of every 10,000 hatchlings is a Goldie.
- They live longer than and possess far superior intelligence to normal Salmonid specimens.
 The Griller


- Main article: Griller
- What Happens
- Armored vehicles called Grillers spawn one after the other. Grillers lock their sights on to a target and will pursue it relentlessly.
- Smallfry are known for hitching a ride on the Griller and interfering with its targeting.
- How to Get Golden Eggs
- Attack the weak spot on the back of the Griller to stun it.
- Stunning Grillers will reveal further weak points. Attacking these weak points is the key to taking down Grillers and getting Golden Eggs.
- Advice from Mr. Grizz
- If the Griller has you in its sights, you're better off running away and letting your friends handle it.
- Supplementary Information
- Operating costs for a single Griller would be enough to deploy a hundred regular Salmonid fighters.
Cohock Charge


- Main article: Cohock Charge
- What Happens
- Cohocks will attack in large numbers from exposed sandbanks.
- Mr. Grizz will deploy a cannon for you to use in dealing with these foes.
- How to Get Golden Eggs
- Defeat Boss Salmonids.
- Advice from Mr. Grizz
- Use the cannon well to clear the way for your coworkers!
- Supplementary Information
- Apparently there are special rooms in the Salmonid barracks set aside for large numbers of Cohocks to gather and practice.
 Goldie Seeking


- Main article: Goldie Seeking
- What Happens
- Large numbers of gushers will appear in the area.
- A Goldie will be hiding in one of the gushers.
- Other Salmonids will attack in their masses from the shores.
- Shooting open a gusher without a Goldie in it will cause it to erupt. Thankfully, there won't be anything hiding inside.
- How to Get Golden Eggs
- Reveal the Goldie by causing the gusher it's hiding in to erupt.
- The Goldie will drop Golden Eggs if hit with enough ink.
- Advice from Mr. Grizz
- Spread out, and find that Goldie FAST.
- When you find the Goldie, call your buddies over, and let loose with all your firepower!
- The gushers emit light when you hit them-—the brighter the light, the closer you are to that glorious Goldie.
- Supplementary Information
- Salmonids obtained the technology to create gushers through trade with Octarians.
- The more you hit the Goldie, the faster it will move!
The Mothership
- Main article: The Mothership
- What Happens
- New troops are brought to the battleground from the Mothership.
- A large number of Chinooks will bring containers of lesser Salmonids from the Mothership to join the fray.
- Periodically, the Mothership will draw close to the egg basket and try to suck up and reclaim any Golden Eggs inside.
- How to Get Golden Eggs
- Shoot the containers carried by Chinooks, and they'll explode.
- If you manage to blow up the Chinooks as well, they will drop Golden Eggs.
- Advice from Mr. Grizz
- Split up to take out the Chinooks.
- If the Mothership comes to take back the Golden Eggs, everyone should focus on pushing it back!
- Supplementary Information
- The Mothership is a vital link in the Salmonid distribution chain.
- Deploying the Mothership is said to be the last resort of the Salmonid army. When it is dispatched, the troops stationed nearby gather together to see it off.
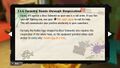
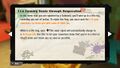
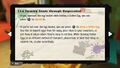
 Mudmouth Eruptions


- Main article: Mudmouth Eruptions
- What Happens
- A Mudmouth will erupt out of the hole left by a gusher and open its huge mouth.
- Lesser Salmonids will start jumping out of the Mudmouth's mouth, one after another after another...
- How to Get Golden Eggs
- Throw a bomb into the Mudmouth's mouth. When the bomb explodes, it'll cough up a Golden Egg.
- If you throw in enough bombs, the Mudmouth will explode and drop even more Golden Eggs!
- Sometimes you'll see one covered in golden goop. Defeat it, and it'll leave behind LOTS of Golden Eggs.
- Advice from Mr. Grizz
- Search for the Mudmouth by tracking where the Lesser Salmonids are coming from.
- Mudmouths multiply as time passes, so splat 'em fast!
- Supplementary Information
- Long ago, the Mudmouth was thought to be a spirit who haunted the depths of the Splatlands seas.
- Now, thanks to the courage and quick thinking of Splatsville youths who thought to start throwing bombs into their mouths, we know they're just Salmonids who got stuck in a pipe and coated in mud.
Giant Tornado


- Main article: Giant Tornado
- What Happens
- The ground will dry up, and a gigantic tornado will whirl to life by the shore.
- Anything in the sea, including Salmonids, will be sucked up by the tornado and flung toward land.
- How to Get Golden Eggs
- Boxes packed full of Golden Eggs will fall somewhere on dry land.
- Break open the boxes to release a large number of Golden Eggs.
- Advice from Mr. Grizz
- Since the eggs may land far away from the basket, coordinate with your coworkers and use the Egg Throw.
- Dodge any Salmonids that come flying toward you, or splat them as you transport the eggs.
- Supplementary Information
- There's no way to predict when a giant tornado might appear. It will fling all kinds of things out from the ocean, which usually results in a great number of Salmonid casualties.
- Flying debris will be present, and accidents are bound to happen. If you become unable to use the egg basket on dry land, a single egg delivered to the basket will be counted as two.
