Octoling Assault (Octo Valley): Difference between revisions
m (MAINT: broken file links) |
|||
| (7 intermediate revisions by 6 users not shown) | |||
| Line 1: | Line 1: | ||
{{OctoValleyPrevNext| prevnum=13| nextnum=15| prev=Shifting Splatforms| next=Undeniable Flying Object}} | {{OctoValleyPrevNext|prevnum=13|nextnum=15|prev=Shifting Splatforms|next=Undeniable Flying Object}} | ||
{{ | {{Infobox/Mission | ||
|title=Octoling Assault | |title=Octoling Assault | ||
|subtitle=Skirmish at the Skatepark | |subtitle=~ Skirmish at the Skatepark ~ | ||
|number=14 | |number=14 | ||
|area=[[Area 3|3]] | |area=[[Area 3|3]] | ||
| Line 23: | Line 23: | ||
==Walkthrough== | ==Walkthrough== | ||
===Mission briefing=== | ===Mission briefing=== | ||
{| class="wikitable sitecolor-s" style="margin: auto;" | {| class="wikitable sitecolor-s" style="margin: auto;" | ||
|+ Octoling Assault stats | |+ Octoling Assault stats | ||
| Line 31: | Line 29: | ||
! Enemies | ! Enemies | ||
! Armor | ! Armor | ||
!Special weapon | ! Special weapon | ||
!Sunken Scroll | ! Sunken Scroll | ||
|- | |- | ||
!Beginning area | !Beginning area | ||
| Line 54: | Line 52: | ||
===Mechanics=== | ===Mechanics=== | ||
Leaving the start area, [[Cap'n Cuttlefish]] sees some [[Octoling (enemy)|Octolings]], which will attack. These can easily be splatted by [[Seeker]]s. From the start to the second checkpoint there is a line of [[Power Egg]]s. [[Ink]] the ramp and climb up it to reach the second checkpoint. On the ledge of the central tower, there is a box that contains an Octoling. Now there is a line of Power Eggs up the ramp to the top of the central tower. In the orange box on the top of the tower, there is a piece of [[armor]]. There is also another Octoling on the ground. On another ledge in the wall, there are some Power Eggs. Drop down the side of the tower and climb the ramp to the third checkpoint. | Leaving the start area, [[Cuttlefish|Cap'n Cuttlefish]] sees some [[Octoling (enemy)|Octolings]], which will attack. These can easily be splatted by [[Seeker]]s. From the start to the second checkpoint there is a line of [[Power Egg]]s. [[Ink]] the ramp and climb up it to reach the second checkpoint. On the ledge of the central tower, there is a box that contains an Octoling. Now there is a line of Power Eggs up the ramp to the top of the central tower. In the orange box on the top of the tower, there is a piece of [[armor]]. There is also another Octoling on the ground. On another ledge in the wall, there are some Power Eggs. Drop down the side of the tower and climb the ramp to the third checkpoint. | ||
After you pass that, on the ramp to the left, there is a [[canned special]], which contains an [[Inkzooka]]. Octolings are shooting at you during this. On the grates to the right, there is a box that contains some Power Eggs. There is also a line of Power Eggs running to the next part. On one of the smaller ramps, there is a box that contains another piece of armor. There is also an Octoling trying to splat you when you approach. There is a path of Power Eggs to the [[Gusher]]. However, before you activate the Gusher, go on the path to the right. At the end is a box which contains this mission's [[Sunken Scroll]]. Then, run back, activate the Gusher, and burst the [[Zapfish]] out of its shield. | After you pass that, on the ramp to the left, there is a [[canned special]], which contains an [[Inkzooka]]. Octolings are shooting at you during this. On the grates to the right, there is a box that contains some Power Eggs. There is also a line of Power Eggs running to the next part. On one of the smaller ramps, there is a box that contains another piece of armor. There is also an Octoling trying to splat you when you approach. There is a path of Power Eggs to the [[Gusher]]. However, before you activate the Gusher, go on the path to the right. At the end is a box which contains this mission's [[Sunken Scroll]]. Then, run back, activate the Gusher, and burst the [[Zapfish]] out of its shield. | ||
| Line 60: | Line 58: | ||
==Collectibles== | ==Collectibles== | ||
===Sunken Scroll=== | ===Sunken Scroll=== | ||
[[File: | [[File:S Sunken Scroll 14.png|center|frameless|300px]] | ||
{{Quote|Lady Luck shone down on the Inklings, and historians today agree that the Inklings' victory over the Octarians was mostly due to their superior number of limbs.|[[Sunken Scroll]] 14}} | {{Quote|Lady Luck shone down on the Inklings, and historians today agree that the Inklings' victory over the Octarians was mostly due to their superior number of limbs.|[[Sunken Scroll]] 14}} | ||
| Line 73: | Line 71: | ||
==Enemies and Mechanics== | ==Enemies and Mechanics== | ||
===Previously Introduced=== | ===Previously Introduced=== | ||
<gallery> | <gallery> | ||
| Line 83: | Line 80: | ||
==Quotes== | ==Quotes== | ||
{{Collapse| | {{Collapse| | ||
===[[File:S Icon Cap'n Cuttlefish.png| | ===[[File:S Icon Cap'n Cuttlefish.png|45px]] [[Cuttlefish|Cap'n Cuttlefish]]{{color|'s Quotes|green}}=== | ||
{{clr}} | {{clr}} | ||
| | | | ||
{{ | {{MissionQuote|S|Cap'n Cuttlefish|Here they come! {{color|Octoling|orange}} ahoy!}} | ||
{{ | {{MissionQuote|S|Cap'n Cuttlefish|Get sneaky and blow 'em down!}} | ||
{{ | {{MissionQuote|S|Cap'n Cuttlefish|Remember, bucko: they can do anything you can!}} | ||
{{ | {{MissionQuote|S|Cap'n Cuttlefish|I think there's one behind the wall here. I can smell it...}} | ||
{{ | {{MissionQuote|S|Cap'n Cuttlefish|Take the high ground, Inkling!}} | ||
{{ | {{MissionQuote|S|Cap'n Cuttlefish|The {{color|Inkzooka|orange}}! Press {{button|RS}}, and blow 'em down with {{Button|ZR1}}!}} | ||
{{ | {{MissionQuote|S|Cap'n Cuttlefish|Beware that Octo ink! Who knows what's in there...}} | ||
{{ | {{MissionQuote|S|Cap'n Cuttlefish|Bravo!}} | ||
}} | }} | ||
==Gallery== | ==Gallery== | ||
<gallery> | <gallery> | ||
OV Octoling Assault mission icon.png|Level icon | |||
Octo Valley mission 14 Octoling Assault map.png|In-game map | Octo Valley mission 14 Octoling Assault map.png|In-game map | ||
</gallery> | </gallery> | ||
| Line 106: | Line 103: | ||
==Names in other languages== | ==Names in other languages== | ||
{{Localized name | {{Localized name | ||
|color=Splatoon | |color=Splatoon | ||
Revision as of 20:53, 26 February 2024
|
|
|
~ Skirmish at the Skatepark ~
| Number | 14 |
| Area | 3 |
| Items | 1 scroll, 2 pieces of armor, 1 Inkzooka |
| Music | Octoling Rendezvous |
| amiibo challenges |
| StrategyWiki has an article about: Octoling Assault |
- This article is about the mission in Splatoon. For the mission by the same name in Splatoon 2, see Octoling Assault (Octo Canyon).
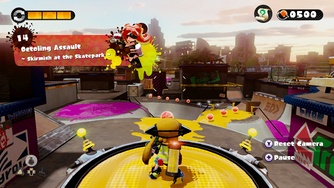
Octoling Assault is the fourteenth mission available in Splatoon's single-player mode, Octo Valley. It takes place in a modified version of the multiplayer stage, Blackbelly Skatepark.
Octo Valley
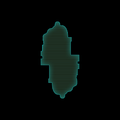
Mission 14 is located on the second level of the tower in Area 3. When on the second level, find platforms resembling a staircase, then the grate path will take you to the mission.
Gameplay
Walkthrough
Mission briefing
| Area | Enemies | Armor | Special weapon | Sunken Scroll |
|---|---|---|---|---|
| Beginning area | 1× Octoling | N/A | N/A | N/A |
| Checkpoint 1 | 2× Octolings | 1× Piece of armor | N/A | N/A |
| Final Checkpoint | 5× Octolings | 1× Piece of armor | 1× Inkzooka | Yes |
Mechanics
Leaving the start area, Cap'n Cuttlefish sees some Octolings, which will attack. These can easily be splatted by Seekers. From the start to the second checkpoint there is a line of Power Eggs. Ink the ramp and climb up it to reach the second checkpoint. On the ledge of the central tower, there is a box that contains an Octoling. Now there is a line of Power Eggs up the ramp to the top of the central tower. In the orange box on the top of the tower, there is a piece of armor. There is also another Octoling on the ground. On another ledge in the wall, there are some Power Eggs. Drop down the side of the tower and climb the ramp to the third checkpoint.
After you pass that, on the ramp to the left, there is a canned special, which contains an Inkzooka. Octolings are shooting at you during this. On the grates to the right, there is a box that contains some Power Eggs. There is also a line of Power Eggs running to the next part. On one of the smaller ramps, there is a box that contains another piece of armor. There is also an Octoling trying to splat you when you approach. There is a path of Power Eggs to the Gusher. However, before you activate the Gusher, go on the path to the right. At the end is a box which contains this mission's Sunken Scroll. Then, run back, activate the Gusher, and burst the Zapfish out of its shield.
Collectibles
Sunken Scroll

| “ | Lady Luck shone down on the Inklings, and historians today agree that the Inklings' victory over the Octarians was mostly due to their superior number of limbs. | ” |
— Sunken Scroll 14
| ||
Location: At the far north of the stage, along the wall in the north-eastern corner. Go through the mission as you normally would. Once you have reached the Gusher leading up to the Zapfish, turn around to face south, towards the spawn point. Go along the elevated path to the left until you reach the small crate containing the scroll.
Armor
Location 1: At the top of the stage's central pillar.
Location 2: On the smallest hill in front of the enemy's half-pipe area.
Special Weapon
Location: On the left ledge of the enemy's half-pipe.
Enemies and Mechanics
Previously Introduced
Quotes
 Cap'n Cuttlefish's Quotes
Gallery
-
Level icon
-
In-game map
Trivia
- The Italian name for this stage contains a pun on imboscata (ambush) and skate.
Names in other languages
| Language | Name | Meaning |
|---|---|---|
| げきとつ!タコゾネス ~くんず ほぐれつ Bバスパーク~ Gekitotsu! Takozonesu Kunzu-Hoguretsu B Basu Pāku |
Clash! Octolings: Wildly Wrestling, Blackbelly Skatepark | |
| - Embuscade octaling - Plancho Mako |
- octoling ambush - Blackbelly Skatepark | |
| - Skatepark Mako - Embuscade Octaling |
- Blackbelly Skatepark - Octoling ambush | |
| Oktoling-Hinterholt im Punkasius-Skatepark |
Octoling ambush in the Blackbelly Skatepark | |
| Acrobazie pericolose: imboskate delle Octoling! |
Dangerous stunts: Octoling's ambush! | |
| Octolings al ataque ~ Riña en el Parque Lubina ~ |
Octolings on the attack ~ Fight in the Blackbelly Skatepark ~ | |
| Encerrona octoamazona sobre la plataforma |
Octoling ambush on the platform |


