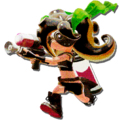
'''Octoling Onslaught''' is the twenty-sixth mission available in the single player mode, [[Octo Valley (mode)|Octo Valley]]. It takes place in a modified version of [[Saltspray Rig]], a multiplayer [[stage]].
'''Octoling Onslaught''' is the twenty-sixth mission available in the single player mode, [[Octo Valley (mode)|Octo Valley]]. It takes place in a modified version of [[Saltspray Rig]], a multiplayer [[stage]].
== [[Octo Valley]]==
==Octo Valley==
Take the small ramp on the left and furthest from the entrance of Area #5. There is another ramp, but don't use it. Preform a Swimming Squid Jump to reach the other side, there is an Inkrail, but don't take it either. Go on the Grate path and use the Geyser. There's the Kettle for Mission 26.
Take the small ramp on the left and furthest from the entrance of [[Area 5]]. There is another ramp, but don't use it. Perform a Swimming Squid Jump to reach the other side, there is an [[Inkrail]], but don't take it either. Go on the grate path and use the [[Gusher]]. There's the Kettle for Mission 26.
The player will spawn on a [[Checkpoint]] on the right side of the map. Nearby is a big wooden crate with nothing in it. Once the player walks out of the spawn point and after Agent 2's dialogue, a [[Octoling|Kelp Octoling]] will jump onto the crate and start trying to splat the player. Like always, you can defeat this Octoling or make a run to the checkpoint, which is to the left path of the box.
The player will be near the bottom part of the rig with the rectangular-shaped area. Once the player jumps off the edge of the path, a normal Octoling will jump to a high part in the middle of this area. The player is able to grab an Inkzooka Special in one of the small crates on the left. Once you are done here, the next checkpoint is on the Bottom Area, where the lifts are actually absent.
===Beginning===
The player will spawn on a [[spawn point|checkpoint]] on the right side of the map. Nearby is a big wooden [[crate]] with nothing in it. Once the player walks out of the spawn point and after Agent 2's dialogue, an [[Octoling (enemy)|Octoling|Kelp Octoling]] will jump onto the crate and start trying to splat the player. Like always, you can defeat this Octoling or make a run to the checkpoint, which is to the left path of the box.
== Checkpoint 2 ==
===Checkpoint 1===
The player will be near the bottom part of the rig with a rectangular-shaped area. Once the player jumps off the edge of the path, a normal [[Octoling (enemy)|Octoling]] will jump to a high part in the middle of this area. The player is able to grab an [[Inkzooka]] Special in one of the small crates on the left. Once you are done here, the next checkpoint is on the Bottom Area, where the lifts are actually absent.
Once the player reaches this area and moves forward, another Octoling will spawn. On top of one of the oil tins here is a crate which contains a suit of Armor. Obtain this, and move on to the section near the top part. Here, the player can defeat the Octoling and take a nearby [[Inkrail]] to the unreachable side.
===Checkpoint 2===
Once the player reaches this area and moves forward, another Octoling will spawn. On top of one of the oil tins here is a crate which contains a suit of [[Armor]]. Obtain this, and move on to the section near the top part. Here, the player can defeat the Octoling and take a nearby [[Inkrail]] to the unreachable side.
== Checkpoint 3 ==
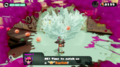
[[File:Octoling Onslaught - Scroll Location.png|thumb|right|250px|Location of the level's [[Sunken Scroll]].]]
[[File:Octoling Onslaught - Scroll Location.png|thumb|right|250px|Location of the level's [[Sunken Scroll]].]]
Here is where the Sunken Scroll can be obtained. However, once the player reaches here, another Kelp Octoling will appear as well as a normal Octoling once the player reaches the crate with the Sunken Scroll. Grab the Sunken Scroll, defeat the Octolings and go back to the middle part to the next checkpoint.
Here is where the Sunken Scroll can be obtained. However, once the player reaches here, another Kelp Octoling will appear as well as a normal Octoling once the player reaches the crate with the Sunken Scroll. Grab the Sunken Scroll, defeat the Octolings and go back to the middle part to the next checkpoint.
{{Clr}}
== Checkpoint 4 ==
Another Octoling will spawn and on one of the small platforms, another crate containing Armor is located. Grab this armor and the final checkpoint is after walking up the ramp to the final area.
Another Octoling will spawn and on one of the small platforms, another crate containing Armor is located. Grab this armour and the final checkpoint is after walking up the ramp to the final area.
===Final Checkpoint===
One more final Octoling will spawn, and this is where the Inkzooka can be used if the player hasn't defeated some of the other Octolings yet, as they will Super Jump here. Once the player defeats one, one last Kelp Octoling will appear. Either defeat these Octolings or splat the metal containers, swim up them, splat the [[Gusher]] then jump off onto a platform with the [[Zapfish]]. An Octoling will be waiting for you there. Splat it then burst the Zapfish's shield and take the Zapfish.
One more final Octoling will spawn, and this is where the Inkzooka can be used if the player hasn't defeated some of the other Octolings yet, as they will Super Jump here. Once the player defeats one, one last Kelp Octoling will appear. Either defeat these Octolings or splat the metal containers, swim up them, splat the Gusher then jump of onto a platform with the [[Zapfish]]. A Octoling will be waiting for you there. Splat it then burst the zapfish's shield and take the Zapfish.
{{Quote|A 12,000-year-old fossil of a creature with an odd internal skeleton. Its small skull indicates the creature was likely primitive with little intelligence. This specimen appears to have been fossilized in the middle of some kind of ritual.| [[Sunken Scroll]] {{color|26|green}}}}
== Collectables ==
'''Location:''' At the Southwestern corner of the map. As soon as the mission starts, if you look to the left to the level platform across the map, you should be able to see the [[crate]] containing the scroll. If you are familiar with the [[Saltspray Rig]] map in multiplayer, the scroll is located where the enemy spawn point would be. Work through the level as normal until you get to the slopes leading to the central area of the map. Rather than following that path, go to the left of it and you should see an inkrail. Ride up the [[inkrail]] and follow the path to the scroll. An enemy [[Octoling (enemy)|Octoling]] will super jump in, so watch out.
{{Quote|A 12,000-year-old fossil of a creature with an odd internal skeleton. Its small skull indicates the creature was likely primitive with little intelligence. This specimen appears to have been fossilized in the middle of some kind of ritual.| [[Sunken Scroll]] {{color|26|green}}}}
===Armor===
'''Armor 1 location:''' The zigzag paths down in the lower area have two containers with one having a small orange crate containing the armor.
'''Location:''' At the Southwestern corner of the map. As soon as the mission starts, if you look to the left to the level platform across the map, you should be able to see the [[crate]] containing the scroll. If you are familiar with the [[Saltspray Rig]] map in multiplayer, the scroll is located where the enemy spawn point would be. Work through the level as normal until you get to the slopes leading to the central area of the map. Rather than following that path, go to the left of it and you should see an inkrail. Ride up the [[inkrail]] and follow the path to the scroll. An enemy [[Octoling]] will super jump in, so watch out.
'''Armor 2 location:''' By the second checkpoint in the middle of the map there is a crate containing the armor sitting on top of a slightly raised platform with a "T" shape.
=== Armor ===
===Special Weapons===
===Special Weapons ===
'''Inkzooka location:''' On the lowest area on the map located to the left from the starting point there are two small crates, with the orange one carrying the Inkzooka.
{{MissionQuote|S|Agent 2|{{color|Octolings|orange}}! Over to you, Agent 3!}}
{{MissionQuote|S|Agent 2|Lookin' good, Agent 3!}}
{{MissionQuote|S|Agent 2|Don't let them corner you!}}
{{MissionQuote|S|Agent 2|This just in! Agent 3 is standing around doing absolutely nothing!}}
{{MissionQuote|S|Agent 2|Booyah!}}
}}
== Gallery ==
==Gallery==
<gallery mode=packed>
<gallery>
File:Octoling26.png
OV Octoling Onslaught mission icon.png|Level icon
Octo Valley mission 26 Octoling Onslaught map.png|In-game map
Octoling26.png
</gallery>
</gallery>
Line 91:
Line 132:
*If the player goes to the area where the Sunken Scroll is found and submerge into [[ink]], [[Marie|Agent 2]] will say a piece of dialogue not heard elsewhere.
*If the player goes to the area where the Sunken Scroll is found and submerge into [[ink]], [[Marie|Agent 2]] will say a piece of dialogue not heard elsewhere.
Octoling Onslaught is the twenty-sixth mission available in the single player mode, Octo Valley. It takes place in a modified version of Saltspray Rig, a multiplayer stage.
Take the small ramp on the left and furthest from the entrance of Area 5. There is another ramp, but don't use it. Perform a Swimming Squid Jump to reach the other side, there is an Inkrail, but don't take it either. Go on the grate path and use the Gusher. There's the Kettle for Mission 26.
The player will spawn on a checkpoint on the right side of the map. Nearby is a big wooden crate with nothing in it. Once the player walks out of the spawn point and after Agent 2's dialogue, an Octoling|Kelp Octoling will jump onto the crate and start trying to splat the player. Like always, you can defeat this Octoling or make a run to the checkpoint, which is to the left path of the box.
Checkpoint 1
The player will be near the bottom part of the rig with a rectangular-shaped area. Once the player jumps off the edge of the path, a normal Octoling will jump to a high part in the middle of this area. The player is able to grab an Inkzooka Special in one of the small crates on the left. Once you are done here, the next checkpoint is on the Bottom Area, where the lifts are actually absent.
Checkpoint 2
Once the player reaches this area and moves forward, another Octoling will spawn. On top of one of the oil tins here is a crate which contains a suit of Armor. Obtain this, and move on to the section near the top part. Here, the player can defeat the Octoling and take a nearby Inkrail to the unreachable side.
Here is where the Sunken Scroll can be obtained. However, once the player reaches here, another Kelp Octoling will appear as well as a normal Octoling once the player reaches the crate with the Sunken Scroll. Grab the Sunken Scroll, defeat the Octolings and go back to the middle part to the next checkpoint.
Another Octoling will spawn and on one of the small platforms, another crate containing Armor is located. Grab this armor and the final checkpoint is after walking up the ramp to the final area.
Final Checkpoint
One more final Octoling will spawn, and this is where the Inkzooka can be used if the player hasn't defeated some of the other Octolings yet, as they will Super Jump here. Once the player defeats one, one last Kelp Octoling will appear. Either defeat these Octolings or splat the metal containers, swim up them, splat the Gusher then jump off onto a platform with the Zapfish. An Octoling will be waiting for you there. Splat it then burst the Zapfish's shield and take the Zapfish.
Collectables
Sunken Scroll
“
A 12,000-year-old fossil of a creature with an odd internal skeleton. Its small skull indicates the creature was likely primitive with little intelligence. This specimen appears to have been fossilized in the middle of some kind of ritual.
Location: At the Southwestern corner of the map. As soon as the mission starts, if you look to the left to the level platform across the map, you should be able to see the crate containing the scroll. If you are familiar with the Saltspray Rig map in multiplayer, the scroll is located where the enemy spawn point would be. Work through the level as normal until you get to the slopes leading to the central area of the map. Rather than following that path, go to the left of it and you should see an inkrail. Ride up the inkrail and follow the path to the scroll. An enemy Octoling will super jump in, so watch out.
Armor
Armor 1 location: The zigzag paths down in the lower area have two containers with one having a small orange crate containing the armor.
Armor 2 location: By the second checkpoint in the middle of the map there is a crate containing the armor sitting on top of a slightly raised platform with a "T" shape.
Special Weapons
Inkzooka location: On the lowest area on the map located to the left from the starting point there are two small crates, with the orange one carrying the Inkzooka.