{{Quote|Salmonids are known to keep their weapons in tip-top shape. The frying pans they wield have often been passed down from generation to generation. You can see the unwavering pride of these fierce warriors in their (somewhat crazed) eyes.|[[Sunken Scroll]] {{color|19|green}}}}
{{Quote|Salmonids are known to keep their weapons in tip-top shape. The frying pans they wield have often been passed down from generation to generation. You can see the unwavering pride of these fierce warriors in their (somewhat crazed) eyes.|[[Sunken Scroll]] {{color|19|green}}}}
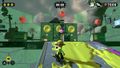
'''Location:''' After defeating the shielded [[Octotrooper]] enter the center [[launchpad]]. On the second area with Grapplinks hit the splat-switch on the third Grapplink. As you fall, you will land on a platform with a [[launchpad]]. The launchpad will take you to the first Grapplink and you can continue. At the end of the area you will find the Sunken Scroll on a [[grate]].
'''Location:''' After defeating the shielded [[Octotrooper]] enter the center [[launchpad]]. On the second area with Grapplinks hit the splat-switch on the third Grapplink. As you fall, you will land on a platform with a [[launchpad]]. The launchpad will take you to the first Grapplink and you can continue. At the end of the area you will find the Sunken Scroll on a [[grate]].
[[File:Octo Canyon Level 19 Scroll location 1.jpg|320px|thumb|left|Scroll location before activating the Splat-Switch]]
[[File:Octo Canyon Level 19 Scroll location 2.jpg|320px|thumb|left|Scroll location after activating the Splat-Switch]]
{{clr}}
===Sardinium===
===Sardinium===
'''Location:''' At the first checkpoint in the area accessed from the left-most launchpad, there is a spinning block with two inkable switches. Inking one will cause a platform to rotate upright, allowing the player to progress. Inking both will cause the block to stop spinning and lower, allowing the player to jump onto the block to reach a crate containing the Sardinium.
'''Location:''' At the first checkpoint in the area accessed from the left-most launchpad, there is a spinning block with two inkable switches. Inking one will cause a platform to rotate upright, allowing the player to progress. Inking both will cause the block to stop spinning and lower, allowing the player to jump onto the block to reach a crate containing the Sardinium.
'''Location:''' After reaching the final checkpoint with the 3 [[Industrial Squee-G]], head over to the platform in the middle of the area with the [[Shielded Octotrooper]] on top. Splat that fool into oblivion, and a launchpad will appear where they were standing. Use it, and it'll take you to an area filled with [[Flooder]]s. Hop across the platforms until you reach the far end of the area, and after reaching higher ground, jump on a [[Flooder]] and ride it to the platform on the left of where you should be facing. Climb up onto it, and you'll see a crate which you can bust open to find your ticket.
'''Location:''' After reaching the final checkpoint with the 3 [[Industrial Squee-G]], head over to the platform in the middle of the area with the [[Shielded Octotrooper]] on top. Splat that fool into oblivion, and a launchpad will appear where they were standing. Use it, and it'll take you to an area filled with [[Flooder]]s. Hop across the platforms until you reach the far end of the area, and after reaching higher ground, jump on a [[Flooder]] and ride it to the platform on the left of where you should be facing. Climb up onto it, and you'll see a crate which you can bust open to find your ticket.
Climb up the block to the right near the center of the map, and unfurl the Inkfurler on the left. Then take the path with the bouncepads. Jump over the uninkable wall with the last one. The kettle is at the end of the platform.
Walkthrough
Collectibles
Sunken Scroll
“
Salmonids are known to keep their weapons in tip-top shape. The frying pans they wield have often been passed down from generation to generation. You can see the unwavering pride of these fierce warriors in their (somewhat crazed) eyes.
Location: After defeating the shielded Octotrooper enter the center launchpad. On the second area with Grapplinks hit the splat-switch on the third Grapplink. As you fall, you will land on a platform with a launchpad. The launchpad will take you to the first Grapplink and you can continue. At the end of the area you will find the Sunken Scroll on a grate.
Scroll location before activating the Splat-SwitchScroll location after activating the Splat-Switch
Sardinium
Location: At the first checkpoint in the area accessed from the left-most launchpad, there is a spinning block with two inkable switches. Inking one will cause a platform to rotate upright, allowing the player to progress. Inking both will cause the block to stop spinning and lower, allowing the player to jump onto the block to reach a crate containing the Sardinium.
Sardinium location
Armor
The Experimentorium has 3 pieces of armor to collect.
Armor 1 Location: Located on the left side of an O shaped platform accessible after inking the 2nd inkswitch required to progress on the left launchpad's route.
Armor 2 Location: After landing from the right launchpad, there will be two small pillars on the left and right sides of a square just ahead. The armor is located at the top of the left one.
Armor 3 Location: After activating all three switches and using the launchpad that rises from the center, the closest Squee-G to the landing spot will have Armor in a crate on it.
Crust Bucket Ticket
Location: After reaching the final checkpoint with the 3 Industrial Squee-G, head over to the platform in the middle of the area with the Shielded Octotrooper on top. Splat that fool into oblivion, and a launchpad will appear where they were standing. Use it, and it'll take you to an area filled with Flooders. Hop across the platforms until you reach the far end of the area, and after reaching higher ground, jump on a Flooder and ride it to the platform on the left of where you should be facing. Climb up onto it, and you'll see a crate which you can bust open to find your ticket.


