Octotrooper Hideout: Difference between revisions
(→Octo Valley: Updated 1 Url) |
|||
| (96 intermediate revisions by 29 users not shown) | |||
| Line 1: | Line 1: | ||
{{ | {{OctoValleyPrevNext| prevnum=| nextnum=2| prev=| next=Lair of the Octoballs}} | ||
|subtitle = Catch That Zapfish! | {{Infobox/Mission | ||
|number | |subtitle=~ Catch That Zapfish! ~ (NA)<br>- Get That Zapfish - (EU/OC) | ||
|area | |number=1 | ||
|items | |area=[[Area 1|1]] | ||
|boss | |items=1 [[Sunken Scroll|scroll]], 1 [[armor]] | ||
|music | |boss=No | ||
|amiibo | |music=''[[Eight-Legged Advance]]'' | ||
|amiibo={{Challenge|Figure=Boy|RewardType=Cash|Reward=600}}<br/>{{Challenge|Figure=Girl|RewardType=Cash|Reward=600}}<br/>{{Challenge|Figure = Squid|SquidChallenge=Kraken|RewardType=Cash|Reward=600}} | |||
|image=OV Octotrooper Hideout beginning.jpg | |||
|image | |||
}} | }} | ||
{{StrategyWiki|Splatoon|Octotrooper Hideout}} | |||
'''Octotrooper Hideout''' is the first mission in {{S}}{{'s}} single-player [[mode]], [[Octo Valley (mode)|Octo Valley]]. | |||
==Octo Valley== | |||
[[File:OV Octotrooper Hideout Kettle.png|thumb|left|300px|Octotrooper Hideout's kettle.]] | |||
The player must follow [[Cuttlefish|Cap'n Cuttlefish]] down a grate to access [[Octo Valley (location)|Octo Valley]]. | |||
The player must | |||
The [[kettle]] for this mission is to the left of | The [[kettle]] for this mission is to the left of Cap'n Cuttlefish along the path on the first corner in [[Area 1]]. | ||
{{ | {{clr}} | ||
== | ==Gameplay== | ||
{{ | <embedvideo service="youtube">https://youtu.be/oujWrVa47Bo</embedvideo> | ||
{{Clr}} | |||
=== | ==Walkthrough== | ||
Octotrooper Hideout | {| class="wikitable sitecolor-s" style="margin: auto;" | ||
|+ Octotrooper Hideout Stats | |||
! Area | |||
! Enemies | |||
! Armor | |||
!Special Weapon | |||
!Sunken Scroll | |||
|- | |||
! Beginning Area | |||
| 1x Octotrooper | |||
| {{N/A}} | |||
| {{N/A}} | |||
| {{N/A}} | |||
|- | |||
! Checkpoint 1 | |||
| 1x Shielded Octotrooper | |||
| {{N/A}} | |||
| {{N/A}} | |||
| {{N/A}} | |||
|- | |||
! Checkpoint 2 | |||
| 3x Octotroopers | |||
| {{N/A}} | |||
| {{N/A}} | |||
| {{N/A}} | |||
|- | |||
! Checkpoint 3 | |||
| 1x Shielded Octotrooper | |||
| {{N/A}} | |||
| {{N/A}} | |||
| {{N/A}} | |||
|- | |||
! Checkpoint 4 | |||
|1x Shielded Octotrooper | |||
1x Octotrooper | |||
| {{N/A}} | |||
| {{N/A}} | |||
| {{N/A}} | |||
|- | |||
! Checkpoint 5 | |||
| 6x Octotroopers | |||
| {{N/A}} | |||
| {{N/A}} | |||
| Yes | |||
|- | |||
! Checkpoint 6 | |||
| 6x Octotroopers | |||
| 1x Piece of Armor | |||
| {{N/A}} | |||
| {{N/A}} | |||
|- | |||
! Final Checkpoint | |||
| 1x Shielded Octotrooper | |||
3x Octotroopers | |||
1x Twintacle Octotrooper | |||
| {{N/A}} | |||
| {{N/A}} | |||
| {{N/A}} | |||
|} | |||
===Beginning=== | |||
First, hit the [[launchpad]] immediately in front of you with {{Button|ZL}}. | |||
You will face three [[Octotrooper]]s: one on top of a box and two guarding behind. The light brown boxes do not contain anything, but the darker-colored ones with a white label contain [[Power Egg]]s. | |||
There is a hidden | After defeating the Octotroopers by shooting with {{Button|ZR}}, grab all the Power Eggs around. These can be obtained by walking close to them or shooting them. There is also a hidden Power Egg box behind the ramp. | ||
Swim up the ramp by covering it with [[ink]] and transforming into squid form. | Swim up the ramp by covering it with [[ink]] and transforming into squid form. | ||
===Checkpoint 1 | ===Checkpoint 1 === | ||
The Octotrooper in front of you has front-facing armor. To defeat it, you must shoot it in the back. This can be done by swimming around and shooting it from behind, or by distracting it with a [[Splat Bomb]] or other [[sub weapon]] so it faces the bomb and exposes its rear to you, then shooting it. After defeating it, grab the Power Eggs and smash the boxes. Launch to the next checkpoint. | |||
{{clr}} | |||
After defeating, grab the | |||
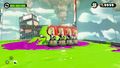
===Checkpoint 2=== | ===Checkpoint 2=== | ||
[[File:Octotrooper Hideout Checkpoint 2.jpg| | [[File:Octotrooper Hideout Checkpoint 2.jpg|thumb|left|300px]] | ||
You are faced with an arena and three Octotroopers on top of boxes. From your starting point, make a trail of ink by shooting out from the shelter. You can use a [[Splat Bomb]] to distract the Octotroopers, but they will not see you as you swim through the ink. Get behind or to the side of the enemies for an easy win. Note that when one is splatted, the others will be alerted, so act fast. | |||
Clean up the field by grabbing all Eggs surrounding the arena and destroying the red boxes, then launch. | |||
{{clr}} | |||
===Checkpoint 3=== | ===Checkpoint 3=== | ||
Fill in the ink trail already left for you, then swim down to a barricade to collect one Power Egg. Remember you can shoot to the other side to get the other Power Egg. | |||
Like with Checkpoint 1, you need to distract the Octotrooper with a bomb so that it turns around, then shoot its back. Splatting the enemy reveals the launchpad. | |||
{{clr}} | |||
===Checkpoint 4=== | ===Checkpoint 4=== | ||
Make a trail down to the first barricade, then shoot out to get the other two Power Eggs from the barricade. As with the previous checkpoint, use a bomb to distract the two Octotroopers, then shoot them in the back. Defeating both reveals the launchpad. There are no other collectibles so launch to the next checkpoint. | |||
{{clr}} | |||
As with the previous | |||
Defeating both reveals the launchpad. | |||
There are no other collectibles | |||
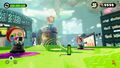
===Checkpoint 5=== | |||
[[File:Octotrooper Hideout Checkpoint 5.jpg|thumb|left|300px]] | |||
Six Octotroopers are circling three pillars, two per pillar. Swim around the pillars and splat all of the enemies, making sure to hide behind the first pillar if you get hurt. Then burst the remaining boxes. After all the Octotroopers are splatted, a launchpad will appear. | |||
On top of the third, tallest pillar is the [[Sunken Scroll]] for the mission. After getting the Scroll, [[Super Jump]] with the launchpad. | |||
{{clr}} | |||
===Checkpoint 6=== | ===Checkpoint 6=== | ||
Make an ink trail down to the end of the walkway, grabbing the three Eggs and smashing the box containing the [[armor]]. When collected, smash the box to the left and splat the Octotrooper circling the [[vault]] behind. Cover as much of the ramp to your right as you can, then swim up and splat the Octotrooper standing guard on the right. Collect the egg on the way up. | |||
When collected, smash the box to the left and | |||
Cover as much of the ramp to your right as you can, then swim up and | |||
After splatting them, grab the key by covering the ramp with ink and swimming up. | At the top of the ramp is four Octotroopers guarding a key. Remember that they lose your position when you dive into ink. Use bombs to distract them or simply shoot them all after destroying the boxes. There are two Power Egg boxes on the far right. After splatting them, grab the [[key]] by covering the ramp with ink and swimming up. | ||
Go back to the vault with the key and approach it to unlock it. It reveals a | Go back to the vault with the key and approach it to unlock it. It reveals a Launchpad. | ||
===Final checkpoint=== | |||
[[File:Octotrooper Hideout Checkpoint 7.jpg|thumb|left|300px]] | |||
Two Octotroopers are circling the [[Zapfish]]. One has front armor, the other does not. Fire down the ramp towards them, collecting the three Power Eggs on the way. As before, distract the one with armor with bombs. After splatting both, destroy all boxes around. The stack of three (two red on top of brown) has the key. | |||
When you approach the [[vault]], three more Octotroopers spawn in. Use a bomb or simply shoot them. Unlock the vault and launch using the unlocked launchpad. | |||
You are thrown to the top of the tower. Destroy the shield by firing at the Zapfish and then touch it to complete the mission. | |||
<br clear=all> | |||
==Collectibles== | |||
== | |||
===Sunken Scroll=== | ===Sunken Scroll=== | ||
[[File: | [[File:S Sunken Scroll 1.png|frameless|center|300px]] | ||
{{Quote|Since time immemorial, a rare type of electric catfish known as the Zapfish has been prized by Inkling society as a source of energy. In fact, the entire city of Inkopolis is powered by a single 100-year-old Great Zapfish!|[[Sunken Scroll]] {{color|1|green}}}} | |||
[[File:Octotrooper Hideout Checkpoint 4-Sunken Scroll Location.jpg|thumb|left|300px]] | |||
'''Location:''' Octotrooper Hideout's [[Sunken Scroll]] can be found on top of a pillar after Checkpoint 5. It is located inside a [[crate]], and discusses [[Inkopolis]]' power source, [[Zapfish]]. It also depicts an image of the [[Great Zapfish]], which has been captured by the [[Octarian]]s. | |||
{{clr}} | |||
===Armor=== | ===Armor=== | ||
[[File:Octotrooper Hideout Checkpoint 5-Armor.jpg| | [[File:Octotrooper Hideout Checkpoint 5-Armor.jpg|thumb|left|300px]] | ||
'''Location:''' The armor is located in front of Checkpoint 6. | |||
{{clr}} | |||
==Enemies and Mechanics== | |||
===First Introduced=== | |||
<gallery> | |||
Octotroopers1.jpg|[[Octotrooper]] | |||
Shielded Octotrooper Splatoon 2.jpg|[[Shielded Octotrooper]] | |||
Twintacle Octotroopers.jpg|[[Twintacle Octotrooper]] | |||
Launchpad Render.jpg|[[Launchpad]] | |||
== | Vault Render.jpg|[[Vault]] and [[Key]] | ||
=== | |||
<gallery | |||
Octotrooper | |||
Octotrooper | |||
</gallery> | </gallery> | ||
==Quotes== | |||
{{MissionQuote|S|Cap'n Cuttlefish|Give 'em heck, [[Agent 3 (Splatoon)|Agent 3]]!}} | |||
{{MissionQuote|S|Cap'n Cuttlefish|{{color-link|Octotrooper|orange}}{{color|s|orange}} dead ahead! Press {{Button|ZR1}} to attack!}} | |||
{{MissionQuote|S|Cap'n Cuttlefish|Aye! Well done!}} | |||
{{MissionQuote|S|Cap'n Cuttlefish|{{color|Hide yourself|orange}} with {{Button|ZL1}}! You can move without being seen.}} | |||
{{MissionQuote|S|Cap'n Cuttlefish|{{color-link|Launchpad|orange}} ahoy!}} | |||
{{MissionQuote|S|Cap'n Cuttlefish|Don't overdo it, bucko! Hide behind a wall if you're hurtin'.}} | |||
{{MissionQuote|S|Cap'n Cuttlefish|{{color-link|Launchpad|orange}} ahoy!}} | |||
{{MissionQuote|S|Cap'n Cuttlefish|Ya can't hit those sheilded Octojerks from the front!}} | |||
{{MissionQuote|S|Cap'n Cuttlefish|Use {{Button|R}} to distract 'em with a {{color|bomb|orange}}-then attack {{color|from behind|orange}}!}} | |||
{{MissionQuote|S|Cap'n Cuttlefish|{{color-link|Launchpad|orange}} ahoy!}} | |||
{{MissionQuote|S|Cap'n Cuttlefish|Hit {{Button|R}} to distract 'em with a {{color|bomb|orange}}, and then press {{Button|ZL1}} to {{color|hide|orange}}.}} | |||
{{MissionQuote|S|Cap'n Cuttlefish|{{color-link|Launchpad|orange}} ahoy!}} | |||
{{MissionQuote|S|Cap'n Cuttlefish|It's time to feed the fish, bucko! Chaaaaarge!}} | |||
{{MissionQuote|S|Cap'n Cuttlefish|{{color-link|Launchpad|orange}} ahoy!}} | |||
{{MissionQuote|S|Cap'n Cuttlefish|You're gonna want that {{color-link|armor|orange}}!}} | |||
{{MissionQuote|S|Cap'n Cuttlefish|Gotta have a {{color-link|key|orange}} to open that {{color-link|vault|orange}}!}} | |||
{{MissionQuote|S|Cap'n Cuttlefish|Way to be, [[Agent 3 (Splatoon)|Agent 3]]! Make for the {{color-link|vault|orange}}.}} | |||
{{MissionQuote|S|Cap'n Cuttlefish|That's it! Heave ho!}} | |||
{{MissionQuote|S|Cap'n Cuttlefish|Hmm. A {{color-link|key|orange}}. Look for the {{color-link|key|orange}}!}} | |||
{{MissionQuote|S|Cap'n Cuttlefish|Oho! Ya found the {{color-link|key|orange}}!}} | |||
{{MissionQuote|S|Cap'n Cuttlefish|Way to be, Agent 3! Make for the {{color-link|vault|orange}}.}} | |||
{{MissionQuote|S|Cap'n Cuttlefish|{{Button|Z}} {{color-link|Zapfish|orange}} off the port bow! Bust in and grab it!}} | |||
{{MissionQuote|S|Cap'n Cuttlefish|Nice work on your first mission! I knew ya could do it, bucko!}} | |||
==Gallery== | |||
== Gallery == | <gallery> | ||
<gallery | OV Octotrooper Hideout mission icon.png|Level icon | ||
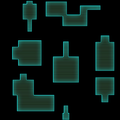
Octotrooper Hideout | Octo Valley mission 01 Octotrooper Hideout map.png|In-game map | ||
Octotrooper Hideout | Octotrooper Hideout Checkpoint 5-Octotrooper Conga Line.jpg|Checkpoint 5 - Octotrooper conga line | ||
Octotrooper Hideout Final Checkpoint-Enemy Octarians.jpg|Final Checkpoint - Enemy Octarians | |||
Octotrooper Hideout Final Checkpoint-Twintacle Octotrooper and Octotroopers.jpg|Final Checkpoint - [[Twintacle Octotrooper]] and Octotroopers | |||
OV Octotrooper Hideout first clear.jpg|First time beating the mission | |||
Octotrooper Hideout Checkpoint 5-Octotrooper Conga Line.jpg| | Octotrooper Hideout End Mission.jpg|Beating the mission again | ||
Octotrooper Hideout Final Checkpoint-Enemy Octarians.jpg| | |||
Octotrooper Hideout Final Checkpoint-Twintacle Octotrooper and Octotroopers.jpg| | |||
Octotrooper Hideout | |||
Octotrooper Hideout End Mission.jpg| | |||
</gallery> | </gallery> | ||
== | ==Names in other languages== | ||
{{Localized name | |||
{{ | |color=Splatoon | ||
|Jap= | |Jap=タコトルーパー<small>の</small>秘密基地<br>~デンチナマズ<small>を</small>取りもどせ!~ | ||
|JapR=Takotorūpā no Himitsu | |JapR=Takotorūpā no Himitsu Kichi<br>Denchi Namazu o Torimodose! | ||
|JapM=Octotroopers' Secret Base: Take the Zapfish Back! | |JapM=Octotroopers' Secret Base:<br>Take the Zapfish Back! | ||
| | |FreA=- Base des tentassins -<br>Objectif poisson-charge! | ||
| | |FreAM=- The Octotroopers' base -<br>Zapfish objective! | ||
| | |FreE=- Base des tentassins -<br>Objectif poisson-charge ! | ||
| | |FreEM=- The Octotroopers' base -<br>Zapfish objective! | ||
|Ita=Nascondiglio dei polpastri: caccia al pescescossa! | |Ger=Das Versteck der Oktorekruten | ||
|ItaM=Octotrooper hideout: hunting the zapfish! | |GerM=The Octotroopers' hiding place | ||
|Ita=Nascondiglio dei polpastri:<br>caccia al pescescossa! | |||
|ItaM=Octotrooper hideout:<br>hunting the zapfish! | |||
|SpaA=Guarida de octorreclutas<br>~ ¡Atrapa al volbragre! ~ | |||
|SpaAM=Lair of Octorecruits<br>~ Catch the Zapfish! ~ | |||
|SpaE=¡A la caza del siluro<br>en el octocuartel! | |||
|SpaEM=On the hunt of the zapfish<br>in the Octoquarters! | |||
}} | }} | ||
{{ | {{Navbox/Octo Valley}} | ||
[[Category:Octo Valley]] | |||
[[Category:Octo Valley missions]] | |||
Latest revision as of 08:56, 4 May 2024
|
|
|
|
~ Catch That Zapfish! ~ (NA)
- Get That Zapfish - (EU/OC)

| Number | 1 |
| Area | 1 |
| Items | 1 scroll, 1 armor |
| Music | Eight-Legged Advance |
| amiibo challenges |
|
| StrategyWiki has an article about: Octotrooper Hideout |
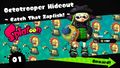
Octotrooper Hideout is the first mission in Splatoon's single-player mode, Octo Valley.
Octo Valley

The player must follow Cap'n Cuttlefish down a grate to access Octo Valley.
The kettle for this mission is to the left of Cap'n Cuttlefish along the path on the first corner in Area 1.
Gameplay
Walkthrough
| Area | Enemies | Armor | Special Weapon | Sunken Scroll |
|---|---|---|---|---|
| Beginning Area | 1x Octotrooper | N/A | N/A | N/A |
| Checkpoint 1 | 1x Shielded Octotrooper | N/A | N/A | N/A |
| Checkpoint 2 | 3x Octotroopers | N/A | N/A | N/A |
| Checkpoint 3 | 1x Shielded Octotrooper | N/A | N/A | N/A |
| Checkpoint 4 | 1x Shielded Octotrooper
1x Octotrooper |
N/A | N/A | N/A |
| Checkpoint 5 | 6x Octotroopers | N/A | N/A | Yes |
| Checkpoint 6 | 6x Octotroopers | 1x Piece of Armor | N/A | N/A |
| Final Checkpoint | 1x Shielded Octotrooper
3x Octotroopers 1x Twintacle Octotrooper |
N/A | N/A | N/A |
Beginning
First, hit the launchpad immediately in front of you with ![]() .
.
You will face three Octotroopers: one on top of a box and two guarding behind. The light brown boxes do not contain anything, but the darker-colored ones with a white label contain Power Eggs.
After defeating the Octotroopers by shooting with ![]() , grab all the Power Eggs around. These can be obtained by walking close to them or shooting them. There is also a hidden Power Egg box behind the ramp.
, grab all the Power Eggs around. These can be obtained by walking close to them or shooting them. There is also a hidden Power Egg box behind the ramp.
Swim up the ramp by covering it with ink and transforming into squid form.
Checkpoint 1
The Octotrooper in front of you has front-facing armor. To defeat it, you must shoot it in the back. This can be done by swimming around and shooting it from behind, or by distracting it with a Splat Bomb or other sub weapon so it faces the bomb and exposes its rear to you, then shooting it. After defeating it, grab the Power Eggs and smash the boxes. Launch to the next checkpoint.
Checkpoint 2

You are faced with an arena and three Octotroopers on top of boxes. From your starting point, make a trail of ink by shooting out from the shelter. You can use a Splat Bomb to distract the Octotroopers, but they will not see you as you swim through the ink. Get behind or to the side of the enemies for an easy win. Note that when one is splatted, the others will be alerted, so act fast.
Clean up the field by grabbing all Eggs surrounding the arena and destroying the red boxes, then launch.
Checkpoint 3
Fill in the ink trail already left for you, then swim down to a barricade to collect one Power Egg. Remember you can shoot to the other side to get the other Power Egg.
Like with Checkpoint 1, you need to distract the Octotrooper with a bomb so that it turns around, then shoot its back. Splatting the enemy reveals the launchpad.
Checkpoint 4
Make a trail down to the first barricade, then shoot out to get the other two Power Eggs from the barricade. As with the previous checkpoint, use a bomb to distract the two Octotroopers, then shoot them in the back. Defeating both reveals the launchpad. There are no other collectibles so launch to the next checkpoint.
Checkpoint 5

Six Octotroopers are circling three pillars, two per pillar. Swim around the pillars and splat all of the enemies, making sure to hide behind the first pillar if you get hurt. Then burst the remaining boxes. After all the Octotroopers are splatted, a launchpad will appear.
On top of the third, tallest pillar is the Sunken Scroll for the mission. After getting the Scroll, Super Jump with the launchpad.
Checkpoint 6
Make an ink trail down to the end of the walkway, grabbing the three Eggs and smashing the box containing the armor. When collected, smash the box to the left and splat the Octotrooper circling the vault behind. Cover as much of the ramp to your right as you can, then swim up and splat the Octotrooper standing guard on the right. Collect the egg on the way up.
At the top of the ramp is four Octotroopers guarding a key. Remember that they lose your position when you dive into ink. Use bombs to distract them or simply shoot them all after destroying the boxes. There are two Power Egg boxes on the far right. After splatting them, grab the key by covering the ramp with ink and swimming up.
Go back to the vault with the key and approach it to unlock it. It reveals a Launchpad.
Final checkpoint

Two Octotroopers are circling the Zapfish. One has front armor, the other does not. Fire down the ramp towards them, collecting the three Power Eggs on the way. As before, distract the one with armor with bombs. After splatting both, destroy all boxes around. The stack of three (two red on top of brown) has the key.
When you approach the vault, three more Octotroopers spawn in. Use a bomb or simply shoot them. Unlock the vault and launch using the unlocked launchpad.
You are thrown to the top of the tower. Destroy the shield by firing at the Zapfish and then touch it to complete the mission.
Collectibles
Sunken Scroll

| “ | Since time immemorial, a rare type of electric catfish known as the Zapfish has been prized by Inkling society as a source of energy. In fact, the entire city of Inkopolis is powered by a single 100-year-old Great Zapfish! | ” |
— Sunken Scroll 1
| ||

Location: Octotrooper Hideout's Sunken Scroll can be found on top of a pillar after Checkpoint 5. It is located inside a crate, and discusses Inkopolis' power source, Zapfish. It also depicts an image of the Great Zapfish, which has been captured by the Octarians.
Armor

Location: The armor is located in front of Checkpoint 6.
Enemies and Mechanics
First Introduced


Quotes
Gallery
-

Level icon
-
In-game map
-
Checkpoint 5 - Octotrooper conga line
-

Final Checkpoint - Enemy Octarians
-
Final Checkpoint - Twintacle Octotrooper and Octotroopers
-
First time beating the mission
-
Beating the mission again


Names in other languages
| Language | Name | Meaning |
|---|---|---|
| タコトルーパーの秘密基地 ~デンチナマズを取りもどせ!~ Takotorūpā no Himitsu Kichi Denchi Namazu o Torimodose! |
Octotroopers' Secret Base: Take the Zapfish Back! | |
| - Base des tentassins - Objectif poisson-charge! |
- The Octotroopers' base - Zapfish objective! | |
| - Base des tentassins - Objectif poisson-charge ! |
- The Octotroopers' base - Zapfish objective! | |
| Das Versteck der Oktorekruten | The Octotroopers' hiding place | |
| Nascondiglio dei polpastri: caccia al pescescossa! |
Octotrooper hideout: hunting the zapfish! | |
| Guarida de octorreclutas ~ ¡Atrapa al volbragre! ~ |
Lair of Octorecruits ~ Catch the Zapfish! ~ | |
| ¡A la caza del siluro en el octocuartel! |
On the hunt of the zapfish in the Octoquarters! |
