Octoseeker Shakedown: Difference between revisions
(fixing issue with page content after quotes not appearing) |
(→Quotes: Adjusted.) |
||
Line 158: | Line 158: | ||
====[[File:Sheldon Icon.png|45px|frameless|left]][[Sheldon]]{{Color|'s|green}} {{color|Quotes|green}} ==== | ====[[File:Sheldon Icon.png|45px|frameless|left]][[Sheldon]]{{Color|'s|green}} {{color|Quotes|green}} ==== | ||
| | | | ||
; '''Requesting the Hero Slosher:''' | |||
{{Quote|OK, take this with you. It'll help me gather some practical battle data.}} | {{Quote|OK, take this with you. It'll help me gather some practical battle data.}} | ||
{{Quote|Say hello to a simple weapon with a fantastic profit margin-the {{color|Hero Slosher|orange}}!}} | {{Quote|Say hello to a simple weapon with a fantastic profit margin-the {{color|Hero Slosher|orange}}!}} | ||
{{Quote|It's just a bucket! Fling ink with {{button|ZR}}. You can even slosh over walls!}} | {{Quote|It's just a bucket! Fling ink with {{button|ZR}}. You can even slosh over walls!}} | ||
{{Quote|Once you get the aim down, you'll be sloshing your enemies in no time!}} | {{Quote|Once you get the aim down, you'll be sloshing your enemies in no time!}} | ||
; '''During the Level:''' | |||
{{Quote|Man these {{color|Octoseekers|orange}} just don't quit!}} | {{Quote|Man these {{color|Octoseekers|orange}} just don't quit!}} | ||
}} | }} |
Revision as of 13:48, 28 April 2021
|
|
|
Template:InfoboxMission Octoseeker Shakedown is the tenth mission of Splatoon 2's single player mode Octo Canyon, and the only mission to have Octoseekers.
Octo Canyon
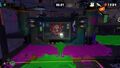
The Kettle for this mission can be found on an octagon-shaped platform to the left of Beaker's Depot. To get to it, ride the ride rail down to the lower level of the area. Near the ride rail that leads to the higher area, ride 2 moving blocks to a blocked off area filled with 3 sprinklers. A ramp on the area leads to a platform. Take a right onto the platform with the kettle
Walkthrough
Area | Enemies | Armor | Special Weapon | Sunken Scroll | Sardinium |
---|---|---|---|---|---|
Beginning Area | 2x Octotrooper 1x Octoseeker |
1x Armor | N/A | N/A | N/A |
Checkpoint 1 | 2x Octotrooper 1x Shielded Octotrooper 1x Octoseeker |
1x Armor | N/A | Yes | N/A |
Checkpoint 2 | 3x Octotrooper 1x Shielded Octotrooper |
1x Armor | N/A | N/A | N/A |
Checkpoint 3 | 3x Octotrooper 2x Octoseeker |
N/A | N/A | N/A | N/A |
Checkpoint 4 | 1x Octotrooper 1x Shielded Octotrooper 1x Octoseeker |
N/A | N/A | N/A | N/A |
Final Checkpoint | 1x Octoseeker | N/A | N/A | N/A | Yes |
Beginning Area
To the front immediately is a launchpad. Use it and ink the Sponge Block ahead. Climb up it and defeat the Octotrooper on top. Break through the crates to use the ride rail to a platform with a patrolling Octoseeker. It is easy to get through with quick movements. Ink the wall ahead and take the launchpad to the next checkpoint.
Checkpoint 1
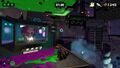
Ink the sponges ahead and climb up on them. At this point an Octoseeker starts patrolling the area. Quickly take a left turn, ink and hop across the sponges, splat the Shielded Octotrooper and break the crates to get to cover. A key is hidden inside a crate in there. The game intends the players to splat the other Shielded Octotrooper, take another right turn and go around the structure, but they can just go back to the direction they came from and get to the vault with the launchpad and head to the next checkpoint.
Checkpoint 2
Ink and cross the sponges ahead, take a right turn and splat the Octotrooper ahead. Pop the balloon fish behind the Octotrooper to ink the sponges, go over them, take a right turn and splat the Octotrooper there. Get onto the platform ahead, pop the balloon fish, and go over the sponges. Splat the Shielded Octotrooper, get to the launchpad and head to the next checkpoint.
Checkpoint 3
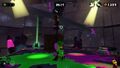
Ink the sponge ahead and climb up it to reach a circular platform with a giant pole in the middle and an Octoseeker patrolling above. Take on either the left or right Octotrooper and get to the sponges on the other side. Drop off to the next platform with another Octoseeker patrolling. Splat the Octotrooper to the left, and ink the sponge in the middle. Climb up the structure in the middle with the sponge, get on the Octoseeker and get to the next checkpoint.
Checekpoint 4
Climb up the wall and splat the Octotrooper and Shielded Octotrooper ahead. Ink the sponges to climb up to a circular uninkable platform with a giant pole in the middle, and an Octoseeker patrolling above. The game intends you to move anticlockwise along with the Octoseeker, but it is faster to go clockwise and break the crates to get to the launchpad to the final checkpoint.
Final Checkpoint
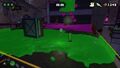
Pop the balloon fishes on the sides to ink the sponges. An Octoseeker will pursuit and destroy the player's footing. Move quickly to the other side and hop into the launchpad to get to the Zapfish.
Collectibles
Sunken Scroll
“ | There's a new fish in the sea! Come check out The Shoal! The most entertaining destination in Inkopolis is now OPEN! | ” |
— Sunken Scroll 10
|
Location: In the second Octoseeker location, go to the sponge blocks on the far side. Below the set of four sponges are more, non-expanded sponges underneath. These lead to a crate containing the scroll.
Armor
Octoseeker Shakedown has 3 pieces of Armor to collect.
Armor 1 Location: On top of the a pillar. Swimming up the Octoseeker grants the player access to said pillar.
Armor 2 Location: After getting the first and only key, one needs to go to the right. To the left of and slightly behind an Octotrooper, the second Armor piece can be found, laying on a sponge.
Armor 3 Location: After reaching the second checkpoint, there is a sponge section. Upon reaching the platform, one can find the third Armor piece on a separate sponge, in line with the other sponges mentioned.
Sardinium
Location: Near the last Octoseeker over several sponges, the Sardinium is located in the far back of the trail.
Crust Bucket Ticket
Location: After checkpoint four. Swimming up the Octoseeker grants access to a platform with a crate. The ticket is located next to this crate.
Enemies and Mechanics
First Introduced
Previously Introduced
Quotes
English
Marie's Quotes
“ | Talk about mood lighting. This place is creeptastic. | ” |
“ | Octoseekers spotted. Don't let them find you, Agent 4! | ” |
“ | It shouldn't be able to spot you up here. | ” |
“ | Oh, man... Another Octoseeker. | ” |
“ | A locked vault... | ” |
“ | Watch your step. | ” |
“ | ♪ Balloon Fish floating in the skyyyyy!♪ | ” |
“ | Think you can roast this shielded slob without breaking a sweat? | ” |
“ | Ugh… Looks like there's an Octoseeker guarding the Zapfish. | ” |
Sheldon's Quotes
- Requesting the Hero Slosher:
“ | OK, take this with you. It'll help me gather some practical battle data. | ” |
“ | Say hello to a simple weapon with a fantastic profit margin-the Hero Slosher! | ” |
“ | It's just a bucket! Fling ink with . You can even slosh over walls! | ” |
“ | Once you get the aim down, you'll be sloshing your enemies in no time! | ” |
- During the Level:
“ | Man these Octoseekers just don't quit! | ” |
Dutch
Marie's Quotes
“ | Hm... Wat hangt een onheilspellende sfeer... | ” |
“ | Octozoekers gespot! Zorg ervoor dat ze je niet vinden, agent! | ” |
“ | Ik denk dat je hierboven wel uit het zicht staat. | ” |
“ | O nee, meer Octozoekers! | ” |
“ | De kluis zit op slot... | ” |
“ | Pas een beetje op, oké? | ” |
“ | Wat zie ik daar? Balloon Fish! | ” |
“ | Dat figuur met het schild maak je wel even een koje kleiner, toch? | ” |
“ | En ja hoor... De voltvis wordt natuurlijk weer bewaakt door een Octozoeker. | ” |
Krabbert's Quotes
Order van Krabbert Quotes
“ | Oké, hier, neem, mee! Je kunt er gegevens mee verzamelen die mij goed van pas komen! | ” |
“ | Een eenvoudig maar effectief wapen: de Heldenmorser! | ” |
“ | Met gooi je inkt. Zelfs over muren heen! | ” |
“ | Als je het onder de knie hebt, zijn je tegenstanders nergens meer! | ” |
Krabbert's Level Quotes
“ | Zo, van die Octozoekers kom je niet makkelijk af... | ” |
Japanese
ホタル's Quotes
“ | Hm... Wat hangt een onheilspellende sfeer... | ” |
“ | Octozoekers gespot! Zorg ervoor dat ze je niet vinden, agent! | ” |
“ | Ik denk dat je hierboven wel uit het zicht staat. | ” |
“ | O nee, meer Octozoekers! | ” |
“ | De kluis zit op slot... | ” |
“ | Pas een beetje op, oké? | ” |
“ | Wat zie ik daar? Balloon Fish! | ” |
“ | Dat figuur met het schild maak je wel even een koje kleiner, toch? | ” |
“ | En ja hoor... De voltvis wordt natuurlijk weer bewaakt door een Octozoeker. | ” |
ブキチ's Quotes
ブキチリクエスト Quotes
“ | Oké, hier, neem, mee! Je kunt er gegevens mee verzamelen die mij goed van pas komen! | ” |
“ | Een eenvoudig maar effectief wapen: de Heldenmorser! | ” |
“ | Met gooi je inkt. Zelfs over muren heen! | ” |
“ | Als je het onder de knie hebt, zijn je tegenstanders nergens meer! | ” |
ブキチ's Level Quotes
“ | Zo, van die Octozoekers kom je niet makkelijk af... | ” |
Gallery
-
Level icon
-
Beginning Area - Enemy Octotrooper
-
Beginning Area - Alerted Octotrooper
-
Beginning Area - Enemy Octotrooper
-
Beginning Area - Enemy Octoseeker
-
Beginning Area - Alerted Octoseeker and broken Hero Suit
-
Checkpoint 1 - Enemy Octotrooper
-
Checkpoint 1 - Enemy Octoseeker
-
Checkpoint 1 - Enemy Octotrooper and Armor
-
Checkpoint 1 - Camera clips through Octoseeker
-
Checkpoint 1 - Key
-
Checkpoint 2 - Enemy Octotrooper, Armor, and Balloon Fish
-
Checkpoint 2 - Enemy Octotrooper
-
Checkpoint 2 - Enemy Shielded Octotrooper
-
Checkpoint 3 - Enemy Octarians
-
Checkpoint 3 - Enemy Octoseeker
-
Checkpoint 3 - Enemy Octoseeker
-
Checkpoint 4 - Enemy Octotroopers
-
Checkpoint 4 - Enemy Octoseeker
-
Final Checkpoint - Enemy Octoseeker
-
Mission complete
Trivia
- This is one of the few missions without any Canned Specials.