User:DaRootBeer1231/Sandbox: Difference between revisions
m (correcting plaza speakers links) |
m (→Splatoon 3: Replacing audio files) |
||
| (33 intermediate revisions by 13 users not shown) | |||
| Line 5: | Line 5: | ||
My only thought is that it might look a bit cluttered | My only thought is that it might look a bit cluttered | ||
==''Splatoon 3''== | |||
{{MediaLoadAll|group=Splatoon 3|name=Splatoon 3 music}} | |||
===General=== | ===General=== | ||
{| class="mw-collapsible mw-collapsed | {| class="wikitable mw-collapsible mw-collapsed" | ||
!Area | !Area | ||
!Fictional Band | !Fictional Band | ||
| Line 13: | Line 16: | ||
!Audio | !Audio | ||
|- | |- | ||
| style="text-align:center;" |[[File: | | rowspan="5" |[[Tutorial]] | ||
| rowspan="1" style="text-align:center;" |[[File:S3 Mahi-Mahi Resort Jelly Band Closeup.png|200x200px]] | |||
| | [[Mahi-Mahi Resort]] jellyfish band | ||
|{{MediaLoader|file=File: | | Character Creation | ||
|{{MediaLoader|file=File:S3 What's Your Style.mp3|name=Character Creation|group=Splatoon 3}} | |||
|- | |- | ||
| style="text-align:center;" |[[File: | | rowspan="3" style="text-align:center;" |[[File:S3 Band C-Side.jpg|center|200px]][[C-Side]] | ||
| | |Tutorial (Part 1) | ||
|{{MediaLoader|file=File:S3 Tutorial Phase 1.mp3|name=Tutorial (Part 1)|group=Splatoon 3}} | |||
|{{MediaLoader|file=File: | |||
|- | |- | ||
| | |Tutorial (Part 2) | ||
|{{MediaLoader|file=File:S3 Tutorial (Phase 2).mp3|name=Tutorial (Part 2)|group=Splatoon 3}} | |||
|{{MediaLoader|file=File:Tutorial. | |||
|- | |- | ||
| | |Tutorial (Part 3) | ||
|{{MediaLoader|file=File:S3 Tutorial (Phase 3).mp3|name=Tutorial (Part 3)|group=Splatoon 3}} | |||
|{{MediaLoader|file=File: | |||
|- | |- | ||
| rowspan=" | | rowspan="1" |N/A | ||
| | |Splatsville Tutorial | ||
|{{MediaLoader|file=File:S3 Splatsville Tour.mp3|name=Splatsville Tutorial|group=Splatoon 3}} | |||
|{{MediaLoader|file=File: | |||
|- | |- | ||
| | | rowspan="2" |[[Anarchy Splatcast]] | ||
|{{MediaLoader|file=File: | | style="text-align:center;" |[[File:S3 Band Deep Cut.png|frameless|center|213x213px]][[Deep Cut]] | ||
|Anarchy Splatcast | |||
|{{MediaLoader|file=File:S3 Anarchy Splatcast.mp3|name=Anarchy Splatcast|group=Splatoon 3}} | |||
|- | |- | ||
| | | style="text-align:center;" |[[File:S2 Band Grizzco Industries.jpg|center|200px]][[Grizzco Industries]] | ||
| {{MediaLoader|file=File: | |Anarchy Splatcast ([[Big Run]]) | ||
|{{MediaLoader|file=File:Anarchy Splatcast Deep Cut (Big Run).mp3|name=Anarchy Splatcast (Big Run)|group=Splatoon 3}} | |||
|- | |- | ||
| | | rowspan="17" |[[Splatsville]] | ||
|{{MediaLoader|file=File: | | rowspan="17" |N/A | ||
|{{Shop|game=S3|name=Ammo Knights}} | |||
|{{MediaLoader|file=File:S3 Ammo Knights.mp3|name=Ammo Knights|group=Splatoon 3}} | |||
|- | |- | ||
| | |{{Shop|game=S3|name=Naut Couture}} | ||
|{{MediaLoader|file=File:S3 Naut Couture.mp3|name=Naut Couture|group=Splatoon 3}} | |||
|{{MediaLoader|file=File: | |||
|- | |- | ||
| | |{{Shop|game=S3|name=Man-o'-Wardrobe}} | ||
|{{MediaLoader|file=File: | |{{MediaLoader|file=File:S3 Man-o'-Wardrobe.mp3|name=Man-o' Wardrobe|group=Splatoon 3}} | ||
|- | |- | ||
| | |{{Shop|game=S3|name=Crush Station}} | ||
|{{MediaLoader|file=File: | |{{MediaLoader|file=File:S3 Crush Station.mp3|name=Crush Station|group=Splatoon 3}} | ||
|- | |- | ||
| | |{{Shop|game=S3|name=Hotlantis}} | ||
|{{MediaLoader|file=File: | |{{MediaLoader|file=File:S3 Hotlantis.mp3|name=Hotlantis|group=Splatoon 3}} | ||
|- | |- | ||
| | |Lobby (Weekdays) | ||
|{{MediaLoader|file=File: | |{{MediaLoader|file=File:S3 Sinkopated.mp3|name=Lobby (Weekdays)|group=Splatoon 3}} | ||
|- | |- | ||
| | |Lobby (Weekends) | ||
|{{MediaLoader|file=File: | |{{MediaLoader|file=File:S3 Drip Feed.mp3|name=Lobby (Weekends)|group=Splatoon 3}} | ||
|- | |- | ||
| | |Lobby (Sub 1) | ||
|{{MediaLoader|file=File: | |{{MediaLoader|file=File:S3 Heliocentri City.mp3|name=Lobby (Sub 1)|group=Splatoon 3}} | ||
|- | |- | ||
| | |Lobby (Sub 2) | ||
|{{MediaLoader|file=File: | |{{MediaLoader|file=File:S3 Fuzzy Dazzler.mp3|name=Lobby (Sub 2)|group=Splatoon 3}} | ||
|- | |- | ||
| | |Lobby (Sub 3) | ||
|{{MediaLoader|file=File: | |{{MediaLoader|file=File:S3 Blop Bop.mp3|name=Lobby (Sub 3)|group=Splatoon 3}} | ||
|- | |- | ||
| | |Lobby (Sub 4) | ||
|{{MediaLoader|file=File: | |{{MediaLoader|file=File:S3 Gilded Cage.mp3|name=Lobby (Sub 4)|group=Splatoon 3}} | ||
|- | |- | ||
| | |Lobby (Sub 5) | ||
|{{MediaLoader|file=File: | |{{MediaLoader|file=File:S3 Dressed to Krill.mp3|name=Lobby (Sub 5)|group=Splatoon 3}} | ||
|- | |- | ||
| | |Lobby (Sub 6) | ||
|{{MediaLoader|file=File: | |{{MediaLoader|file=File:S3 Slick Moves.mp3|name=Lobby (Sub 6)|group=Splatoon 3}} | ||
|- | |- | ||
| | |Lobby (Sub 7) | ||
|{{MediaLoader|file=File: | |{{MediaLoader|file=File:S3 Belly Flop.mp3|name=Lobby (Sub 7)|group=Splatoon 3}} | ||
|- | |- | ||
| | |Lobby (Sub 8) | ||
|{{MediaLoader|file=File: | |{{MediaLoader|file=File:S3 Gillty.mp3|name=Lobby (Sub 8)|group=Splatoon 3}} | ||
|- | |- | ||
|Lobby (Sub 9) | |||
|{{MediaLoader|file=File:S3 Pour It On.mp3|name=Lobby (Sub 9)|group=Splatoon 3}} | |||
|} | |} | ||
Multiplayer battle songs from previous games occasionally play in the lobby as well. | |||
{| class=" | ===Multiplayer=== | ||
! | {| class="mw-collapsible mw-collapsed wikitable" | ||
!Fictional Band | |||
! | !Song Name | ||
!Audio | |||
|- | |- | ||
| rowspan="9" style="text-align:center;" |[[File:S3 Band C-Side.jpg|center|200px]][[C-Side]] | |||
|[[Opening#Opening (C-Side)|Opening]] | |||
|{{MediaLoader|file=File:Opening.mp3|name=Opening|group=Splatoon 3}} | |||
|- | |- | ||
| {{ | |''[[Clickbait]]'' | ||
| | |{{MediaLoader|file=File:Clickbait - C-Side World Premiere.mp3|group=Splatoon 3|name=Clickbait}}<br>{{MediaLoader|file=File:Clickbait_Anarchy.mp3|group=Splatoon 3|name=Clickbait (Anarchy Battle variant)}} | ||
|- | |- | ||
| {{ | |[[Splattack!#Splattack! (C-Side)|''Splattack!'']] | ||
|{{MediaLoader|file=File:S3 Splattack C-Side.mp3|group=Splatoon 3|name=Splattack!}} | |||
|- | |- | ||
| {{ | |''[[Headhammer]]'' | ||
|{{MediaLoader|file=File:S3 Headhammer.mp3|name=Headhammer|group=Splatoon 3}} | |||
|- | |- | ||
| {{ | |''[[Paintscraper]]'' | ||
|{{MediaLoader|file=File:Paintscraper - C-Side World Premiere.mp3|name=Paintscraper|group=Splatoon 3}} | |||
|- | |- | ||
| {{ | |''[[Triple Dip]]'' | ||
|{{MediaLoader|file=File:S3 Triple Dip.mp3|name=Triple Dip|group=Splatoon 3}} | |||
|- | |- | ||
| {{ | |''[[Now or Never!]]'' | ||
|{{MediaLoader|file=File:Splatoon 3 - Now or Never! (Full version).mp3|name=Now or Never!|group=Splatoon 3}} | |||
|- | |- | ||
| {{ | |[[Battle Victory]] | ||
|{{MediaLoader|file=File:S3 C-Side Battle Victory Theme.mp3|name=Battle Victory|group=Splatoon 3}} | |||
|- | |- | ||
| {{ | |[[Battle Defeat]] | ||
|{{MediaLoader|file=File:S3 Battle Defeat.mp3|name=Battle Defeat|group=Splatoon 3}} | |||
|- | |- | ||
| | | rowspan="2" style="text-align:center;" |[[File:FrontRoeBandArt.jpg|center|200px]][[Front Roe]] | ||
| | |''[[Sea Me Now]]'' | ||
|{{MediaLoader|file=File:Sea Me Now - Front Roe World Premiere.mp3|group=Splatoon 3|name=Sea Me Now}} | |||
|- | |- | ||
| {{ | |''[[Sandy Side Up]]'' | ||
|{{MediaLoader|file=File:S3 Sandy Side Up.mp3|name=Sandy Side Up|group=Splatoon 3}} | |||
|- | |- | ||
| | | rowspan="2" style="text-align:center;" |[[File:S3 Off the Hook 2D Art.jpg|center|201x201px]][[Damp Socks feat. Off the Hook]] | ||
| | |''[[Candy-Coated Rocks]]'' | ||
|{{MediaLoader|file=File:Candy-Coated Rocks - Damp Socks feat. Off The Hook DATAMINED.mp3|group=Splatoon 3|name=Candy-Coated Rocks}} | |||
|- | |- | ||
| {{ | |''[[Tentacle to the Metal]]'' | ||
| | |{{MediaLoader|file=File:Tentacle to the Metal.mp3|group=Splatoon 3|name=Tentacle to the Metal}} | ||
|} | |||
After the [[Version 2.0.0 (Splatoon 3)|Version 2.0.0]] update, multiplayer song names are now listed at the beginning of the match. | |||
===Splatfest=== | |||
{| class="wikitable mw-collapsible mw-collapsed" | |||
!Fictional Band | |||
!Song Name | |||
!Audio | |||
|- | |- | ||
| | | rowspan="10" style="text-align:center;" |[[File:S3 Band Deep Cut.png|frameless|center|213x213px]][[Deep Cut]] | ||
| | |Splatfest News | ||
|{{MediaLoader|file=File:Splatfest_News_(Deep_Cut).mp3|name=Splatfest News|group=Splatoon 3}} | |||
|- | |- | ||
| {{ | |[[Anarchy Rainbow|''Anarchy Rainbow'']] | ||
|{{MediaLoader|file=File:Anarchy Rainbow.mp3|name=Anarchy Rainbow|group=Splatoon 3}} | |||
|- | |- | ||
| {{ | |Splatfest Plaza Solo (Shiver) | ||
|{{MediaLoader|file=File:Splatfest_Plaza_Solo_(Shiver).mp3|name=Splatfest Plaza Solo (Shiver)|group=Splatoon 3}} | |||
|- | |- | ||
| {{ | |Splatfest Plaza Solo (Frye) | ||
|{{MediaLoader|file=File:Splatfest_Plaza_Solo_(Frye).mp3|name=Splatfest Plaza Solo (Frye)|group=Splatoon 3}} | |||
|- | |- | ||
| {{ | | Splatfest Plaza Solo (Big Man) | ||
|{{MediaLoader|file=File:Splatfest_Plaza_Solo_(Big Man).mp3|name=Splatfest Plaza Solo (Big Man)|group=Splatoon 3}} | |||
|- | |- | ||
| {{ | |''[[Fins in the Air]]'' | ||
|{{MediaLoader|file=File:Splatfest Fins in the Air.mp3|name=Fins in the Air|group=Splatoon 3}} | |||
|- | |- | ||
| {{ | |''[[Till Depth Do Us Part]]'' | ||
|{{MediaLoader|file=File:S3 Till Depth Do Us Part.mp3|name=Till Depth Do Us Part|group=Splatoon 3}} | |||
|- | |- | ||
| {{ | |''[[Now_or_Never!#Now or Never! (Deep Cut)|Now or Never!]]'' | ||
|{{MediaLoader|file=File:Splatfest Now or Never! (Deep Cut).mp3|name=Now or Never!|group=Splatoon 3}} | |||
|- | |- | ||
| {{ | | Splatfest Victory! | ||
|{{MediaLoader|file=File:Splatfest_Victory!.mp3|name=Splatfest Victory!|group=Splatoon 3}} | |||
|- | |- | ||
| {{ | |Splatfest Defeat | ||
|{{MediaLoader|file=File:Splatfest_Defeat.mp3|name=Splatfest Defeat|group=Splatoon 3}} | |||
|- | |- | ||
| | | rowspan="4" |N/A | ||
| | |Splatfest Lobby (Day 1) | ||
|{{MediaLoader|file=File:Splatfest_Lobby_(Day_1).mp3|name=Splatfest Lobby (Day 1)|group=Splatoon 3}} | |||
|- | |- | ||
| {{ | |Splatfest Lobby (Day 2) | ||
|{{MediaLoader|file=File:Splatfest_Lobby_(Day_2).mp3|name=Splatfest Lobby (Day 2)|group=Splatoon 3}} | |||
|- | |- | ||
| {{ | |Match Start (Splatfest) | ||
|{{MediaLoader|file=File:Match_Start_(Splatfest).mp3|name=Match Start (Splatfest)|group=Splatoon 3}} | |||
|- | |- | ||
| {{ | | Match Start (Tricolor Turf War) | ||
| | |{{MediaLoader|file=File:Match_Start_(Tricolor_Turf_War).mp3|name=Match Start (Tricolor Turf War)|group=Splatoon 3}} | ||
|} | |||
===Salmon Run Next Wave=== | |||
{| class="mw-collapsible mw-collapsed wikitable" | |||
!Fictional Band | |||
!Song Name | |||
!Audio | |||
|- | |- | ||
| | | rowspan="7" style="text-align:center;" |[[File:S2 Band Grizzco Industries.jpg|center|200px]][[Grizzco Industries]] | ||
| | |[[Grizzco]] Lobby | ||
|{{MediaLoader|file=File:Grizzco_Industries.mp3|name=Grizzco Lobby|group=Splatoon 3}} | |||
|- | |- | ||
| {{ | |Match Results | ||
|{{MediaLoader|file=File:Ever_Further_(Next_Wave).mp3|name=Match Results|group=Splatoon 3}} | |||
|- | |- | ||
| {{ | |Match Start | ||
|{{MediaLoader|file=File:Match_Start_(Salmon_Run_Next_Wave).mp3|name=Match Start|group=Splatoon 3}} | |||
|- | |- | ||
| {{ | |Match Start (Hazard Level MAX!!) | ||
|{{MediaLoader|file=File:Match_Start_(Hazard_Level_MAX!!).mp3|name=Match Start (Hazard Level MAX!!)|group=Splatoon 3}} | |||
|- | |- | ||
| {{ | |''Final Wave Clear'' | ||
|{{MediaLoader|file=File:Final Wave Clear.mp3|group=Splatoon2|name=Final Wave Clear}} | |||
|- | |- | ||
| {{ | |''That's a Wrap'' | ||
|{{MediaLoader|file=File:That's a Wrap.mp3|group=Splatoon2|name=That's a Wrap}} | |||
|- | |- | ||
| {{ | |[[Xtrawave]] Victory | ||
|{{MediaLoader|file=File:Xtra_Wave_Victory.mp3|name=Xtrawave Victory|group=Splatoon 3}} | |||
|- | |- | ||
| | | rowspan="4" style="text-align:center;" |[[File:S2 Band Omega-3 Artwork.jpg|center|200px]][[ω-3]] | ||
| | |''[[Frothy Waters]]'' | ||
|{{MediaLoader|file=File:Frothy_Waters.mp3|group=Splatoon2|name=Frothy Waters}} | |||
|- | |- | ||
| {{ | |[[Xtrawave]] | ||
|{{MediaLoader|file=File:Salmon Run Next Wave Xtrawave Toxic Anoxic.mp3|group=Splatoon2|name=Xtrawave}} | |||
|- | |- | ||
| {{ | |Grizzco Lobby ([[Big Run]]) | ||
|{{MediaLoader|file=File:Big Run Lobby.mp3|name=Grizzco Lobby (Big Run)|group=Splatoon 3}} | |||
|- | |- | ||
| {{ | |Clickbait (Big Run) | ||
|{{MediaLoader|file=File:SRNW Bait & Click.mp3|group=Splatoon2|name=Clickbait (Big Run)}} | |||
|- | |- | ||
| | | rowspan="2" style="text-align:center;" |[[File:S3 Icon Fish Stick.png|100px]]<br>[[Fish Stick]] | ||
| | |Fish Stick Chant | ||
|{{MediaLoader|file=File:Fish_Stick_Chant.mp3|group=Splatoon3|name=Fish Stick Chant}} | |||
|} | |||
All of the other songs performed by ω-3 from ''Splatoon 2'' are also in Salmon Run Next Wave. | |||
===Return of the Mammalians=== | |||
{| class="mw-collapsible mw-collapsed wikitable" | |||
!Area | |||
!Fictional Band | |||
!Song Name | |||
!Audio | |||
|- | |||
| rowspan="4" style="text-align:center;" |[[The Crater]] | |||
| rowspan="55" |N/A | |||
|[[The Crater]] | |||
|{{MediaLoader|file=File:RotM The Crater.mp3|name=The Crater|group=Splatoon 3}} | |||
|- | |||
|[[Crater Mission]] | |||
|{{MediaLoader|file=File:Crater Eighters Routine.mp3|name=Crater Mission|group=Splatoon 3}} | |||
|- | |- | ||
| {{ | |[[Onward!]] | ||
|{{MediaLoader|file=File:Crater Mission Clear.mp3|name=Onward!|group=Splatoon 3}} | |||
|- | |- | ||
| {{ | |[[Octobot King L3.Gs|I am Octavio (Splatoon 3)]] | ||
|{{MediaLoader|file=File:S3 DJ Octavio Battle.mp3|name=I am Octavio (Splatoon 3)|group=Splatoon 3}} | |||
|- | |- | ||
| | | rowspan="4" style="text-align:center;" |[[File:Future Utopia Island (Square).png|frameless|center|200px]][[Future Utopia Island]] | ||
| | |[[Future Utopia Island]] (Phase 1) | ||
|{{MediaLoader|file=File:RotM Sandcastles Phase 1.mp3|name=Future Utopia Island (Phase 1)|group=Splatoon 3}} | |||
|- | |- | ||
| {{ | |[[Future Utopia Island]] (Phase 2) | ||
|{{MediaLoader|file=File:RotM Sandcastles Phase 2.mp3|name=Future Utopia Island (Phase 2)|group=Splatoon 3}} | |||
|- | |- | ||
| {{ | |[[Future Utopia Island]] (Phase 3) | ||
|{{MediaLoader|file=File:RotM Sandcastles Phase 3.mp3|name=Future Utopia Island (Phase 3)|group=Splatoon 3}} | |||
|- | |- | ||
| {{ | |[[Future Utopia Island]] (Phase 4) | ||
|{{MediaLoader|file=File:RotM Sandcastles Phase 4.mp3|name=Future Utopia Island (Phase 4)|group=Splatoon 3}} | |||
|- | |- | ||
| | | rowspan="4" style="text-align:center;" | [[File:Cozy & Safe Factory (Square).png|frameless|center|200px]][[Cozy & Safe Factory]] | ||
| | |[[Cozy & Safe Factory]] (Phase 1) | ||
|{{MediaLoader|file=File:RotM Sudden Depth Phase 1.mp3|name=Cozy & Safe Factory (Phase 1)|group=Splatoon 3}} | |||
|- | |- | ||
| {{ | | [[Cozy & Safe Factory]] (Phase 2) | ||
|{{MediaLoader|file=File:RotM Sudden Depth Phase 2.mp3|name=Cozy & Safe Factory (Phase 2)|group=Splatoon 3}} | |||
|- | |- | ||
| {{ | |[[Cozy & Safe Factory]] (Phase 3) | ||
|{{MediaLoader|file=File:RotM Sudden Depth Phase 3.mp3|name=Cozy & Safe Factory (Phase 3)|group=Splatoon 3}} | |||
|- | |- | ||
| {{ | |[[Cozy & Safe Factory]] (Phase 4) | ||
|{{MediaLoader|file=File:RotM Sudden Depth Phase 4.mp3|name=Cozy & Safe Factory (Phase 4)|group=Splatoon 3}} | |||
|- | |- | ||
| | | rowspan="4" style="text-align:center;" |[[File:Cryogenic Hopetown (Square).png|frameless|center|200px]][[Cryogenic Hopetown]] | ||
| | |[[Cryogenic Hopetown]] (Phase 1) | ||
|{{MediaLoader|file=File:RotM Two Shadows in the Sun Phase 1.mp3|name=Cryogenic Hopetown (Phase 1)|group=Splatoon 3}} | |||
|- | |- | ||
| {{ | |[[Cryogenic Hopetown]] (Phase 2) | ||
|{{MediaLoader|file=File:RotM Two Shadows in the Sun Phase 2.mp3|name=Cryogenic Hopetown (Phase 2)|group=Splatoon 3}} | |||
|- | |- | ||
| {{ | |[[Cryogenic Hopetown]] (Phase 3) | ||
|{{MediaLoader|file=File:RotM Two Shadows in the Sun Phase 3.mp3|name=Cryogenic Hopetown (Phase 3)|group=Splatoon 3}} | |||
|- | |- | ||
| {{ | |[[Cryogenic Hopetown]] (Phase 4) | ||
|{{MediaLoader|file=File:RotM Two Shadows in the Sun Phase 4.mp3|name=Cryogenic Hopetown (Phase 4)|group=Splatoon 3}} | |||
|- | |- | ||
| | | rowspan="4" style="text-align:center;" |[[File:Landfill Dreamland (Square).png|frameless|center|200px]][[Landfill Dreamland]] | ||
| | |[[Landfill Dreamland]] (Phase 1) | ||
|{{MediaLoader|file=File:RotM Dead Sea Phase 1.mp3|name=Landfill Dreamland (Phase 1)|group=Splatoon 3}} | |||
|- | |- | ||
| {{ | |[[Landfill Dreamland]] (Phase 2) | ||
|{{MediaLoader|file=File:RotM Dead Sea Phase 2.mp3|name=Landfill Dreamland (Phase 2)|group=Splatoon 3}} | |||
|- | |- | ||
| {{ | |[[Landfill Dreamland]] (Phase 3) | ||
|{{MediaLoader|file=File:RotM Dead Sea Phase 3.mp3|name=Landfill Dreamland (Phase 3)|group=Splatoon 3}} | |||
|- | |- | ||
| {{ | |[[Landfill Dreamland]] (Phase 4) | ||
|{{MediaLoader|file=File:RotM Dead Sea Phase 4.mp3|name=Landfill Dreamland (Phase 4)|group=Splatoon 3}} | |||
|- | |- | ||
| | | rowspan="4" style="text-align:center;" |[[File:Eco-Forest Treehills (Square).png|frameless|center|200px]][[Eco-Forest Treehills]] | ||
| | |[[Eco-Forest Treehills]] (Phase 1) | ||
|{{MediaLoader|file=File:RotM Whirlpool Tune Phase 1.mp3|name=Eco-Forest Treehills (Phase 1)|group=Splatoon 3}} | |||
|- | |- | ||
| {{ | |[[Eco-Forest Treehills]] (Phase 2) | ||
|{{MediaLoader|file=File:RotM Whirlpool Tune Phase 2.mp3|name=Eco-Forest Treehills (Phase 2)|group=Splatoon 3}} | |||
|- | |- | ||
| {{ | |[[Eco-Forest Treehills]] (Phase 3) | ||
|{{MediaLoader|file=File:RotM Whirlpool Tune Phase 3.mp3|name=Eco-Forest Treehills (Phase 3)|group=Splatoon 3}} | |||
|- | |- | ||
| {{ | |[[Eco-Forest Treehills]] (Phase 4) | ||
|{{MediaLoader|file=File:RotM Whirlpool Tune Phase 4.mp3|name=Eco-Forest Treehills (Phase 4)|group=Splatoon 3}} | |||
|- | |- | ||
| | | rowspan="4" style="text-align:center;" |[[File:Happiness Research Lab (Square).png|frameless|center|200px]][[Happiness Research Lab]] | ||
| | |[[Happiness Research Lab]] (Phase 1) | ||
|{{MediaLoader|file=File:RotM Hyper Diver Phase 1.mp3|name=Happiness Research Lab (Phase 1)|group=Splatoon 3}} | |||
|- | |- | ||
| {{ | |[[Happiness Research Lab]] (Phase 2) | ||
|{{MediaLoader|file=File:RotM Hyper Diver Phase 2.mp3|name=Happiness Research Lab (Phase 2)|group=Splatoon 3}} | |||
|- | |- | ||
| {{ | |[[Happiness Research Lab]] (Phase 3) | ||
|{{MediaLoader|file=File:RotM Hyper Diver Phase 3.mp3|name=Happiness Research Lab (Phase 3)|group=Splatoon 3}} | |||
|- | |- | ||
| {{ | |[[Happiness Research Lab]] (Phase 4) | ||
|{{MediaLoader|file=File:RotM Hyper Diver Phase 4.mp3|name=Happiness Research Lab (Phase 4)|group=Splatoon 3}} | |||
|- | |- | ||
| {{ | | style="text-align:center;" |Squid Sisters' Camp | ||
|Squid Sisters Introduction | |||
|{{MediaLoader|file=File:Squid Sisters Introduction.mp3|name=Squid Sisters Introduction|group=Splatoon 3}} | |||
|- | |- | ||
| {{ | | rowspan="3" style="text-align:center;" |Level Entrance<br>(Kettles) | ||
|Silver Kettle | |||
|{{MediaLoader|file=File:Level Entrance (Silver Kettle).mp3|name=Silver Kettle|group=Splatoon 3}} | |||
|- | |- | ||
| {{ | |Gold Kettle | ||
|{{MediaLoader|file=File:Level Entrance (Gold Kettle).mp3 |name=Gold Kettle|group=Splatoon 3}} | |||
|- | |- | ||
| {{ | |[[After Alterna]] Kettle | ||
|{{MediaLoader|file=File:Level Entrance (After Alterna).mp3|name=After Alterna Kettle|group=Splatoon 3}} | |||
|- | |- | ||
| | | rowspan="11" style="text-align:center;" |Alterna Levels | ||
| | |Alterna Mission 1 (Action) | ||
|{{MediaLoader|file=File:RotM Nine Out of Tension.mp3|name=Alterna Mission 1 (Action)|group=Splatoon 3}} | |||
|- | |- | ||
| {{ | |Alterna Mission 2 (Funky) | ||
|{{MediaLoader|file=File:RotM Underwater Neon.mp3|name=Alterna Mission 2 (Funky)|group=Splatoon 3}} | |||
|- | |- | ||
| {{ | |Alterna Mission 3 (Synth) | ||
|{{MediaLoader|file=File:RotM Flop to It.mp3 |name=Alterna Mission 3 (Synth)|group=Splatoon 3}} | |||
|- | |- | ||
| {{ | |Alterna Mission 4 (Chill) | ||
|{{MediaLoader|file=File:RotM Smoke and Mirrors.mp3|name=Alterna Mission 4 (Chill)|group=Splatoon 3}} | |||
|- | |- | ||
| {{ | |Alterna Mission 5 (Daft Punk-ish) | ||
|{{MediaLoader|file=File:RotM Ride or Fry.mp3|name=Alterna Mission 5 (Daft Punk-ish)|group=Splatoon 3}} | |||
|- | |- | ||
| {{ | |Alterna Mission 6 (Superhero) | ||
|{{MediaLoader|file=File:RotM With Flying Colors.mp3|name=Alterna Mission 6 (Superhero)|group=Splatoon 3}} | |||
|- | |- | ||
| {{ | |Alterna Mission 7 (Bang Bing) | ||
|{{MediaLoader|file=File:RotM Seep & Destroy.mp3|name=Alterna Mission 7 (Bang Bing)|group=Splatoon 3}} | |||
|- | |- | ||
| {{ | |Alterna Mission 8 (Puzzle) | ||
|{{MediaLoader|file=File:RotM Marine Machines.mp3|name=Alterna Mission 8 (Puzzle)|group=Splatoon 3}} | |||
|- | |- | ||
| {{ | |Alterna Mission 9 (Spy) | ||
|{{MediaLoader|file=File:RotM 35 caught.mp3|name=Alterna Mission 9 (Spy)|group=Splatoon 3}} | |||
|- | |- | ||
| {{ | |Alterna Mission 10 (Gauntlet) | ||
|{{MediaLoader|file=File:RotM Don't Flinch.mp3|name=Alterna Mission 10 (Gauntlet)|group=Splatoon 3}} | |||
|- | |- | ||
| {{ | |Alterna Mission Clear | ||
|{{MediaLoader|file=File:Alterna Mission Clear.mp3|name=Alterna Mission Clear|group=Splatoon 3}} | |||
|- | |- | ||
| {{ | | style="text-align:center;" |[[Future Utopia Island]],<br>Boss Levels,<br>[[Alterna Space Center]] | ||
|Deep Cut Introduction | |||
|{{MediaLoader|file=File:RotM Deep Cut's Theme.mp3|name=Deep Cut Introduction|group=Splatoon 3}} | |||
|- | |- | ||
| {{ | | rowspan="4" style="text-align:center;" |Boss Levels | ||
|Deep Cut Boss (Phase 1) | |||
|{{MediaLoader|file=File:RotM Surprise and Shine Phase 1.mp3|name=Deep Cut Boss (Phase 1)|group=Splatoon 3}} | |||
|- | |- | ||
| {{ | |Deep Cut Boss (Phase 2) | ||
|{{MediaLoader|file=File:RotM Surprise and Shine Phase 2.mp3|name=Deep Cut Boss (Phase 2)|group=Splatoon 3}} | |||
|- | |- | ||
| {{ | |Deep Cut Boss (Phase 3) | ||
|{{MediaLoader|file=File:RotM Surprise and Shine Phase 3.mp3|name=Deep Cut Boss (Phase 3)|group=Splatoon 3}} | |||
|- | |- | ||
| {{ | |Alterna Boss Clear | ||
|{{MediaLoader|file=File:RotM Treasure Obtained.mp3|name=Alterna Boss Clear|group=Splatoon 3}} | |||
|- | |- | ||
| {{ | | style="text-align:center;" |[[Future Utopia Island]] | ||
|Cutscene: Building the [[Treasure]] | |||
|{{MediaLoader|file=File:Building the Tool Cutscene.mp3|name=Building the Treasure Cutscene|group=Splatoon 3}} | |||
|- | |- | ||
| {{ | | rowspan="11" style="text-align:center;" |[[Alterna Space Center]] | ||
|Rocket Intermission 1 | |||
|{{MediaLoader|file=File:RotM Rocket_Intermission_1.mp3|name=Rocket Intermission 1|group=Splatoon 3}} | |||
|- | |- | ||
| {{ | |Rocket Intermission 2 | ||
|{{MediaLoader|file=File:RotM Rocket_Intermission_2.mp3|name=Rocket Intermission 2|group=Splatoon 3}} | |||
|- | |- | ||
| {{ | |Rocket Intermission 3 | ||
|{{MediaLoader|file=File:RotM Rocket_Intermission_3.mp3|name=Rocket Intermission 3|group=Splatoon 3}} | |||
|- | |- | ||
| {{ | |Rocket Intermission 4 | ||
|{{MediaLoader|file=File:RotM Rocket_Intermission_4.mp3|name=Rocket Intermission 4|group=Splatoon 3}} | |||
|- | |- | ||
| {{ | |Rocket Intermission 5 | ||
|{{MediaLoader|file=File:RotM Rocket_Intermission_5.mp3|name=Rocket Intermission 5|group=Splatoon 3}} | |||
|- | |- | ||
| {{ | |Alterna Space Center Entrance | ||
| | |{{MediaLoader|file=File:RotM In Filtration.mp3|name=Alterna Space Center Entrance|group=Splatoon 3}} | ||
|- | |||
| rowspan="2" style="text-align:center;" |[[File:S3 Band Deep Cut.png|frameless|center|213x213px]][[Deep Cut]] | |||
|''[[Hide and Sleek]]'' | |||
|{{MediaLoader|file=File:Alterna_Space_Center_Hangar_&_Lift.mp3|name=Hide and Sleek|group=Splatoon 3}} | |||
|- | |||
|[[The Spirit Lifter: Steerage & First Class]] | |||
|{{MediaLoader|file=File:RotM Smeared Canvas (First Class).mp3|name=The Spirit Lifter: Steerage & First Class|group=Splatoon 3}} | |||
|- | |||
| rowspan="6" |N/A | |||
|Mr. Grizz Appears Cutscene | |||
|{{MediaLoader|file=File:Final_Boss_Appears_Cutscene.mp3|name=Mr. Grizz Appears Cutscene|group=Splatoon 3}} | |||
|- | |||
|[[Cap'n Cuttlefish's Theme|Cap'n Cuttlefish Theme (Squid Form)]] | |||
|{{MediaLoader|file=File:Cap'n_Cuttlefish_Squid_Form.mp3|name=Cap'n Cuttlefish Theme (Squid Form)|group=Splatoon 3}} | |||
|- | |||
|Deep Cut's Assistance Cutscene | |||
|{{MediaLoader|file=File:Deep_Cut's_Assistance_Cutscene.mp3|name=Deep Cut's Assistance Cutscene|group=Splatoon 3}} | |||
|- | |||
| rowspan="5" style="text-align:center;" |[[The Ursine Anomaly - #03|Rocket Battle]] (Space) | |||
|[[Rocket Battle (song)|Rocket Battle]] (Phase 1) | |||
|{{MediaLoader|file=File:RotM Bear with Me (Phase_1).mp3|name=Rocket Battle (Phase 1)|group=Splatoon 3}} | |||
|- | |||
|[[Rocket Battle (song)|Rocket Battle]] (Phase 2) | |||
|{{MediaLoader|file=File:RotM Bear with Me (Phase_2).mp3|name=Rocket Battle (Phase 2)|group=Splatoon 3}} | |||
|- | |||
|[[Rocket Battle (song)|Rocket Battle]] (Phase 3) | |||
|{{MediaLoader|file=File:RotM Bear with Me (Phase_3).mp3|name=Rocket Battle (Phase 3)|group=Splatoon 3}} | |||
|- | |||
| rowspan="1" |[[DJ Octavio]]/[[Squid Sisters]]/[[Deep Cut]] | |||
|[[Calamari Inkantation|''Calamari Inkantation 3MIX'']] | |||
|{{MediaLoader|file=File:RotM Calamari Inkantation 3MIX.mp3|name=Calamari Inkantation 3MIX|group=Splatoon 3}} | |||
|- | |||
| rowspan="1" |N/A | |||
|[[Hairmaggedon]] | |||
|{{MediaLoader|file=File:Hairmaggedon.mp3|name=Hairmaggedon|group=Splatoon 3}} | |||
|- | |||
| style="text-align:center;" |End [[Credits]] | |||
| rowspan="1" style="text-align:center;" |[[File:S3 Band Squid Sisters.png|frameless|center|200px]][[Squid Sisters]] | |||
|''[[Wave Goodbye]]'' | |||
|{{MediaLoader|file=File:RotM Wave Goodbye.mp3|name=Wave Goodbye|group=Splatoon 3}} | |||
|} | |||
Octoling Rendezvous by Turquoise October returns from the previous games and can be heard in the [[Bet You Mist Us!]] mission and the final Checkpoint of [[After Alterna]]. | |||
===Tableturf Battle=== | |||
{| class="mw-collapsible mw-collapsed wikitable" | |||
! Area | |||
!Fictional Band | |||
!Song Name | |||
!Audio | |||
|- | |- | ||
| | | rowspan="6" style="text-align:center;" |[[File:S3 Tableturf Battle logo.png|frameless|center|288x146px]][[Tableturf Battle]] | ||
| | | rowspan="7" |N/A | ||
|Main Theme | |||
|{{MediaLoader|file=File:S3 Tableturf Main Theme.mp3|name=Main Theme|group=Splatoon 3}} | |||
|- | |- | ||
| {{ | |Now or Never! | ||
|{{MediaLoader|file=File:S3 Tableturf Three Turns Remaining.mp3|name=Now or Never!|group=Splatoon 3}} | |||
|- | |- | ||
| {{ | |Victory | ||
|{{MediaLoader|file=File:S3 Tableturf Win Theme.mp3|name=Victory|group=Splatoon 3}} | |||
|- | |- | ||
| {{ | |Defeat | ||
|{{MediaLoader|file=File:S3 Tableturf Loss or Draw Theme.mp3|name=Defeat|group=Splatoon 3}} | |||
|- | |- | ||
| {{ | |Level Select | ||
|{{MediaLoader|file=File:S3 Tableturf Level Selection.mp3|name=Level Select|group=Splatoon 3}} | |||
|- | |- | ||
| | |Deck Select | ||
| | |{{MediaLoader|file=File:S3 Tableturf Deck Selection.mp3|name=Deck Select|group=Splatoon 3}} | ||
|- | |- | ||
|Anywhere the menu is accessible. | |||
|Deck Edit | |||
|{{MediaLoader|file=File:S3 Tableturf Card List.mp3|name=Deck Edit|group=Splatoon 3}} | |||
|} | |} | ||
Latest revision as of 14:47, 8 May 2024
I'm not really sure what these sandbox things are for but I'm guessing it's for trying stuff out before making actual edits on the page. If that's not what it's for, let me know.
I'm currently working on the music page, specifically the Splatoon 1 general section because I noticed some issues
My only thought is that it might look a bit cluttered
Splatoon 3
General
| Area | Fictional Band | Song Name | Audio |
|---|---|---|---|
| Tutorial | 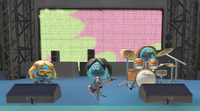
Mahi-Mahi Resort jellyfish band |
Character Creation | |
 |
Tutorial (Part 1) | ||
| Tutorial (Part 2) | |||
| Tutorial (Part 3) | |||
| N/A | Splatsville Tutorial | ||
| Anarchy Splatcast | 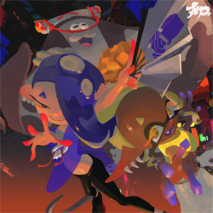 |
Anarchy Splatcast | |
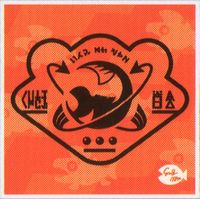 |
Anarchy Splatcast (Big Run) | ||
| Splatsville | N/A | ||
| Lobby (Weekdays) | |||
| Lobby (Weekends) | |||
| Lobby (Sub 1) | |||
| Lobby (Sub 2) | |||
| Lobby (Sub 3) | |||
| Lobby (Sub 4) | |||
| Lobby (Sub 5) | |||
| Lobby (Sub 6) | |||
| Lobby (Sub 7) | |||
| Lobby (Sub 8) | |||
| Lobby (Sub 9) |
Multiplayer battle songs from previous games occasionally play in the lobby as well.
Multiplayer
After the Version 2.0.0 update, multiplayer song names are now listed at the beginning of the match.
Splatfest
| Fictional Band | Song Name | Audio |
|---|---|---|
 |
Splatfest News | |
| Anarchy Rainbow | ||
| Splatfest Plaza Solo (Shiver) | ||
| Splatfest Plaza Solo (Frye) | ||
| Splatfest Plaza Solo (Big Man) | ||
| Fins in the Air | ||
| Till Depth Do Us Part | ||
| Now or Never! | ||
| Splatfest Victory! | ||
| Splatfest Defeat | ||
| N/A | Splatfest Lobby (Day 1) | |
| Splatfest Lobby (Day 2) | ||
| Match Start (Splatfest) | ||
| Match Start (Tricolor Turf War) |
Salmon Run Next Wave
| Fictional Band | Song Name | Audio |
|---|---|---|
 |
Grizzco Lobby | |
| Match Results | ||
| Match Start | ||
| Match Start (Hazard Level MAX!!) | ||
| Final Wave Clear | ||
| That's a Wrap | ||
| Xtrawave Victory | ||
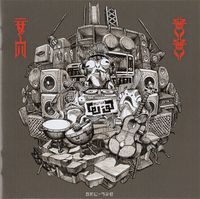 |
Frothy Waters | |
| Xtrawave | ||
| Grizzco Lobby (Big Run) | ||
| Clickbait (Big Run) | ||
Fish Stick |
Fish Stick Chant |
All of the other songs performed by ω-3 from Splatoon 2 are also in Salmon Run Next Wave.
Return of the Mammalians
| Area | Fictional Band | Song Name | Audio |
|---|---|---|---|
| The Crater | N/A | The Crater | |
| Crater Mission | |||
| Onward! | |||
| I am Octavio (Splatoon 3) | |||
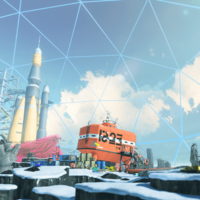 |
Future Utopia Island (Phase 1) | ||
| Future Utopia Island (Phase 2) | |||
| Future Utopia Island (Phase 3) | |||
| Future Utopia Island (Phase 4) | |||
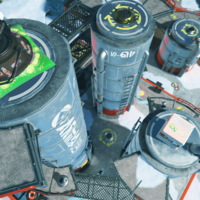 |
Cozy & Safe Factory (Phase 1) | ||
| Cozy & Safe Factory (Phase 2) | |||
| Cozy & Safe Factory (Phase 3) | |||
| Cozy & Safe Factory (Phase 4) | |||
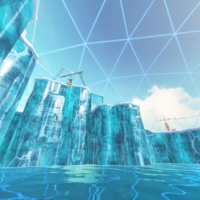 |
Cryogenic Hopetown (Phase 1) | ||
| Cryogenic Hopetown (Phase 2) | |||
| Cryogenic Hopetown (Phase 3) | |||
| Cryogenic Hopetown (Phase 4) | |||
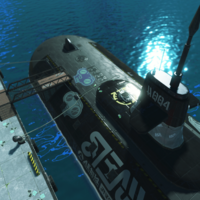 |
Landfill Dreamland (Phase 1) | ||
| Landfill Dreamland (Phase 2) | |||
| Landfill Dreamland (Phase 3) | |||
| Landfill Dreamland (Phase 4) | |||
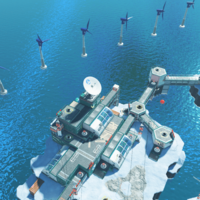 |
Eco-Forest Treehills (Phase 1) | ||
| Eco-Forest Treehills (Phase 2) | |||
| Eco-Forest Treehills (Phase 3) | |||
| Eco-Forest Treehills (Phase 4) | |||
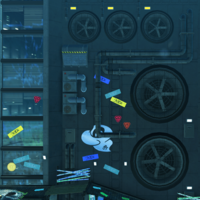 |
Happiness Research Lab (Phase 1) | ||
| Happiness Research Lab (Phase 2) | |||
| Happiness Research Lab (Phase 3) | |||
| Happiness Research Lab (Phase 4) | |||
| Squid Sisters' Camp | Squid Sisters Introduction | ||
| Level Entrance (Kettles) |
Silver Kettle | ||
| Gold Kettle | |||
| After Alterna Kettle | |||
| Alterna Levels | Alterna Mission 1 (Action) | ||
| Alterna Mission 2 (Funky) | |||
| Alterna Mission 3 (Synth) | |||
| Alterna Mission 4 (Chill) | |||
| Alterna Mission 5 (Daft Punk-ish) | |||
| Alterna Mission 6 (Superhero) | |||
| Alterna Mission 7 (Bang Bing) | |||
| Alterna Mission 8 (Puzzle) | |||
| Alterna Mission 9 (Spy) | |||
| Alterna Mission 10 (Gauntlet) | |||
| Alterna Mission Clear | |||
| Future Utopia Island, Boss Levels, Alterna Space Center |
Deep Cut Introduction | ||
| Boss Levels | Deep Cut Boss (Phase 1) | ||
| Deep Cut Boss (Phase 2) | |||
| Deep Cut Boss (Phase 3) | |||
| Alterna Boss Clear | |||
| Future Utopia Island | Cutscene: Building the Treasure | ||
| Alterna Space Center | Rocket Intermission 1 | ||
| Rocket Intermission 2 | |||
| Rocket Intermission 3 | |||
| Rocket Intermission 4 | |||
| Rocket Intermission 5 | |||
| Alterna Space Center Entrance | |||
 |
Hide and Sleek | ||
| The Spirit Lifter: Steerage & First Class | |||
| N/A | Mr. Grizz Appears Cutscene | ||
| Cap'n Cuttlefish Theme (Squid Form) | |||
| Deep Cut's Assistance Cutscene | |||
| Rocket Battle (Space) | Rocket Battle (Phase 1) | ||
| Rocket Battle (Phase 2) | |||
| Rocket Battle (Phase 3) | |||
| DJ Octavio/Squid Sisters/Deep Cut | Calamari Inkantation 3MIX | ||
| N/A | Hairmaggedon | ||
| End Credits | 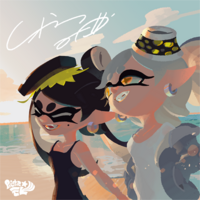 |
Wave Goodbye |
Octoling Rendezvous by Turquoise October returns from the previous games and can be heard in the Bet You Mist Us! mission and the final Checkpoint of After Alterna.
Tableturf Battle
| Area | Fictional Band | Song Name | Audio |
|---|---|---|---|
 |
N/A | Main Theme | |
| Now or Never! | |||
| Victory | |||
| Defeat | |||
| Level Select | |||
| Deck Select | |||
| Anywhere the menu is accessible. | Deck Edit |
