Doors, Doors, Doors! And More! (Doors): Difference between revisions
MegaValenX (talk | contribs) (→Names in other languages: Spanish) |
KPOfficial26 (talk | contribs) (Added walkthrough, quotes, access, and O.R.C.A.'s notes.) Tags: Visual edit: Switched Disambiguation links |
||
| Line 16: | Line 16: | ||
== Description == | == Description == | ||
The level consists of a box-like structure full of various switches the player must find in order to reach the goal. | The level consists of a box-like structure full of various switches the player must find in order to reach the goal. | ||
== Access == | |||
This level is a simple walk away from [[Splat You on the Flip Side|the previous level]]. The player has to clear [[Fuzzy Ooze]], too. | |||
== O.R.C.A.'s Notes == | |||
In this mission, you will hone your hide-and-seek skills by hunting for hidden keys. | |||
== Walkthrough == | |||
''Note: Due to the level having no fee, you may retry from checkpoints as many times as you want, even if you lose all your lives.'' | |||
=== Checkpoint 1 === | |||
The player first encounters a small room with an [[Octotrooper]] and a [[Splat-Switch]]. The player should exit when he or she splats the switch. If the player continues, he or she sees another room, this time bigger and with a [[Vault|vault]]. There is no [[Key|key]] in the room, so the player has to backtrack a bit. He or she would find an ink-able wall which leads to the key. When the player opens the vault, another Octotrooper will try to attack. After the player destroys it, he or she will be able to progress. | |||
=== Checkpoint 2 === | |||
The player will enter a big room. On the right is a vault. He or she can try to break the [[Crate|crate]], but there will be no key. The player then has to drop down with {{Button|ZL|Switch}} and find another crate, this time with a key. The player afterwards can open the vault and progress. He or she will find an [[Octocopter]] and some more, with another Splat-Switch. On the left is another vault with [[Power Egg|Power Eggs]] inside. After that, the player would find a [[Can|canned]] [[Reefslider]] special. The player could use the special to destroy the [[Octocommander]]. There would be no key, but when the player backtracks, he or she would find a few ink-able wall that leads to the top of the room. | |||
=== Checkpoint 3 === | |||
The player can go to the left to find a very narrow platform and a crate containing a key. If the player goes behind the checkpoint, he or she drops down to find a secret floor with Octocopters and some Splat-Switches. The player would find some [[Armor|armor]] hidden in a crate and an [[Octosniper]] behind it. The player find yet another key and backtracks to find some more Splat-Switches and a vault containing Power Eggs. If the player goes early, he or she would end up in the final checkpoint. Same goes for the other vault. | |||
=== Checkpoint 4 === | |||
These checkpoints are on either sides and count as seperate checkpoints, but we combined them for the sake of this guide. On the left or right, depending on what checkpoint you chosen, there would be a Splat-Switch. If the player inks it up, it would reveal part of the bridge. The player could go to the other checkpoint to do the same thing. With the bridge complete, [[Agent 3]] could go to the goal. | |||
== Quotes == | |||
{{collapse| | |||
===[[File:S3 Icon Callie.png|45px]] [[Agent 1]]{{color|’s Quotes|green}}=== | |||
{{Clr}} | |||
| | |||
{{Quote|There's gotta be a {{color|key|orange}} around here somewhere, right?}} | |||
{{Quote|Oh, now we've got a nice view of the {{color|goal|orange}}!}} | |||
{{Quote|Yes! Another {{color|key|orange}}!}} | |||
{{Quote|Ooo, you found a {{color|Reefslider|orange}}. Aim in the direction of your enemies, and press {{button|Right Stick Click|Switch}} to peel out!}} | |||
{{Quote|{{color|Keys|orange}}, {{color|keys|orange}}, and more {{color|keys|orange}}!}} | |||
{{Quote|Woah! A secret floor! As inconvenient as it is cool.}} | |||
{{Quote|Yes! That's the key to reaching the {{color|goal|orange}}! ...Sorry-I'm just a little keyed up.}} | |||
}} | |||
{{collapse| | |||
===[[File:S3 Icon Marie.png|45px]] [[Agent 2]]{{color|’s Quotes|green}}=== | |||
{{Clr}} | |||
| | |||
{{Quote|You're not alone. Keep your eyes OPEN. And your mouth CLOSED. Y'know, in case ink is flying everywhere.}} | |||
{{Quote|Aha! A {{color|key|orange}}!}} | |||
{{Quote|Awww. No {{color|key|orange}}.}} | |||
{{Quote|WHAT. NO. Another {{color|key|orange}}? I'm shocked.}} | |||
}} | |||
==Gallery== | ==Gallery== | ||
Revision as of 02:21, 14 January 2023
|
|
|
Doors, Doors, Doors! And More! (Doors) is the 9th level in Splatoon 3's story mode: Return of the Mammalians.
Description
The level consists of a box-like structure full of various switches the player must find in order to reach the goal.
Access
This level is a simple walk away from the previous level. The player has to clear Fuzzy Ooze, too.
O.R.C.A.'s Notes
In this mission, you will hone your hide-and-seek skills by hunting for hidden keys.
Walkthrough
Note: Due to the level having no fee, you may retry from checkpoints as many times as you want, even if you lose all your lives.
Checkpoint 1
The player first encounters a small room with an Octotrooper and a Splat-Switch. The player should exit when he or she splats the switch. If the player continues, he or she sees another room, this time bigger and with a vault. There is no key in the room, so the player has to backtrack a bit. He or she would find an ink-able wall which leads to the key. When the player opens the vault, another Octotrooper will try to attack. After the player destroys it, he or she will be able to progress.
Checkpoint 2
The player will enter a big room. On the right is a vault. He or she can try to break the crate, but there will be no key. The player then has to drop down with and find another crate, this time with a key. The player afterwards can open the vault and progress. He or she will find an Octocopter and some more, with another Splat-Switch. On the left is another vault with Power Eggs inside. After that, the player would find a canned Reefslider special. The player could use the special to destroy the Octocommander. There would be no key, but when the player backtracks, he or she would find a few ink-able wall that leads to the top of the room.
Checkpoint 3
The player can go to the left to find a very narrow platform and a crate containing a key. If the player goes behind the checkpoint, he or she drops down to find a secret floor with Octocopters and some Splat-Switches. The player would find some armor hidden in a crate and an Octosniper behind it. The player find yet another key and backtracks to find some more Splat-Switches and a vault containing Power Eggs. If the player goes early, he or she would end up in the final checkpoint. Same goes for the other vault.
Checkpoint 4
These checkpoints are on either sides and count as seperate checkpoints, but we combined them for the sake of this guide. On the left or right, depending on what checkpoint you chosen, there would be a Splat-Switch. If the player inks it up, it would reveal part of the bridge. The player could go to the other checkpoint to do the same thing. With the bridge complete, Agent 3 could go to the goal.
Quotes
File:S3 Icon Callie.png Agent 1’s Quotes
| “ | There's gotta be a key around here somewhere, right? | ” |
| “ | Oh, now we've got a nice view of the goal! | ” |
| “ | Yes! Another key! | ” |
| “ | Ooo, you found a Reefslider. Aim in the direction of your enemies, and press to peel out! | ” |
| “ | Keys, keys, and more keys! | ” |
| “ | Woah! A secret floor! As inconvenient as it is cool. | ” |
| “ | Yes! That's the key to reaching the goal! ...Sorry-I'm just a little keyed up. | ” |
File:S3 Icon Marie.png Agent 2’s Quotes
| “ | You're not alone. Keep your eyes OPEN. And your mouth CLOSED. Y'know, in case ink is flying everywhere. | ” |
| “ | Aha! A key! | ” |
| “ | Awww. No key. | ” |
| “ | WHAT. NO. Another key? I'm shocked. | ” |
Gallery
-
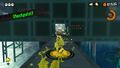
Checkpoint 1.
-
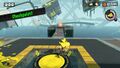
Checkpoint 2.
-
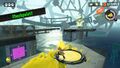
Checkpoint 3.
-
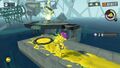
Final Checkpoint.
_Checkpoint_1.jpg)
_Checkpoint_2.jpg)
_Checkpoint_3.jpg)
_Final_Checkpoint.jpg)
Names in other languages
Translation notes
