The Spirit Lifter: First Class: Difference between revisions
EeveeBest11 (talk | contribs) (Added Quotes) |
(clean up) |
||
| Line 12: | Line 12: | ||
|music=''[[Smeared Canvas]]'' | |music=''[[Smeared Canvas]]'' | ||
}} | }} | ||
[[File:RotM Rocket Map 5.jpg|thumb]] | [[File:RotM Rocket Map 5.jpg|thumb]] | ||
| Line 21: | Line 20: | ||
== Walkthrough == | == Walkthrough == | ||
=== Checkpoint 1 === | === Checkpoint 1 === | ||
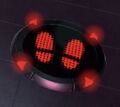
This section requires the player to travel vertically using the Zipcaster to collect the energy cores scattered throughout. The cores are largely arranged to form a path for the player to collect them in one fell swoop by grappling between clear patches of the walls. Stepping on the pad on the topmost platform with all the energy cores will open the next area. | This section requires the player to travel vertically using the Zipcaster to collect the energy cores scattered throughout. The cores are largely arranged to form a path for the player to collect them in one fell swoop by grappling between clear patches of the walls. Stepping on the pad on the topmost platform with all the energy cores will open the next area. | ||
=== Checkpoint 2 === | === Checkpoint 2 === | ||
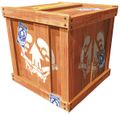
The objective remains the same here, but now with some energy cores requiring the player to grapple breakable [[Power Egg]] crates. Stepping on the pad on the topmost platform with all the energy cores again will open the next area. | The objective remains the same here, but now with some energy cores requiring the player to grapple breakable [[Power Egg]] crates. Stepping on the pad on the topmost platform with all the energy cores again will open the next area. | ||
=== Final Checkpoint === | === Final Checkpoint === | ||
Lastly, the player needs to grapple small square platforms, each with an energy core near them, all while avoiding an [[Octosniper]]'s shots. The platforms spiral up, with the topmost one above the Octosniper. Dropping down, taking it out, and grabbing the last few energy cores will allow the player to progress to the end of the phase. | Lastly, the player needs to grapple small square platforms, each with an energy core near them, all while avoiding an [[Octosniper]]'s shots. The platforms spiral up, with the topmost one above the Octosniper. Dropping down, taking it out, and grabbing the last few energy cores will allow the player to progress to the end of the phase. | ||
| Line 37: | Line 32: | ||
===First Introduced=== | ===First Introduced=== | ||
*[[Energy core]] | *[[Energy core]] | ||
===Previously Introduced=== | ===Previously Introduced=== | ||
<gallery> | <gallery> | ||
| Line 42: | Line 38: | ||
Checkpoint splatoon 2 prima guide.png|[[Checkpoint]] | Checkpoint splatoon 2 prima guide.png|[[Checkpoint]] | ||
S3 Tableturf Card Twintacle Octotrooper.png|[[Twintacle Octotrooper]] | S3 Tableturf Card Twintacle Octotrooper.png|[[Twintacle Octotrooper]] | ||
Splat3cannedspecial.jpg|[[Canned special]] | |||
OE Pressure Switch Screenshot.jpg|[[Switch]] | |||
S3 render Octotrooper.png|[[Octotrooper]] | S3 render Octotrooper.png|[[Octotrooper]] | ||
S3 Tableturf Card Octosniper.png|[[Octosniper]] | S3 Tableturf Card Octosniper.png|[[Octosniper]] | ||
S3 promo screenshot story Fuzzy Ink 00.jpg|[[Fuzzy Ooze]] | |||
</gallery> | </gallery> | ||
== Quotes == | ==Quotes== | ||
{{ | ==={{flag|us}} English (North America)== | ||
{{Clr}}| | {{collapse| | ||
====[[File:S3 Icon Callie.png|45px]] [[Callie|Agent 1]]{{color|'s Quotes|green}}==== | |||
{{Clr}} | |||
| | |||
{{Quote|OK, hear me out. We get the {{color|energy cores|orange}}, we flip the {{color|switch|orange}}, and then...SOMETHING! Right?}} | |||
{{Quote|Nice, a {{color|Zipcaster|orange}}! That'll make collecting {{color|energy cores|orange}} easier for sure.}} | {{Quote|Nice, a {{color|Zipcaster|orange}}! That'll make collecting {{color|energy cores|orange}} easier for sure.}} | ||
{{Quote|There's still another bulkhead and more energy cores. Get after 'em, Agent 3!}} | {{Quote|There's still another bulkhead and more energy cores. Get after 'em, Agent 3!}} | ||
{{Quote|Hold on-I'm getting a signal. There are five remaining!}}}}{{ | {{Quote|Hold on-I'm getting a signal. There are five remaining!}} | ||
{{Clr}}| | }} | ||
{{collapse| | |||
====[[File:S3 Icon Marie.png|45px]] [[Marie|Agent 2]]{{color|'s Quotes|green}}==== | |||
{{Clr}} | |||
| | |||
{{Quote|Hm?}} | |||
{{Quote|Hold on...look at those floating {{color|energy cores|orange}}!}} | {{Quote|Hold on...look at those floating {{color|energy cores|orange}}!}} | ||
{{Quote|You gotta streeetch your arm with {{button|R|Switch}} and really STICK with it!}} | {{Quote|You gotta streeetch your arm with {{button|R|Switch}} and really STICK with it!}} | ||
| Line 61: | Line 67: | ||
{{Quote|Just one left. Go get it!}} | {{Quote|Just one left. Go get it!}} | ||
{{Quote|I think that's the way out. I bet it opens the same way as the bulkheads.}} | {{Quote|I think that's the way out. I bet it opens the same way as the bulkheads.}} | ||
{{Quote|That's definitely all of them. Let's head to the exit.}}}}{{ | {{Quote|That's definitely all of them. Let's head to the exit.}} | ||
{{Clr}}| | }} | ||
{{Quote|Keep cool. You're almost there.}}}}{{ | |||
{{Clr}}| | {{collapse| | ||
{{Quote|That was fire!}}}}{{ | ====[[File:S3 Icon Shiver.png|45px]] [[Shiver]]{{color|'s Quotes|green}}==== | ||
{{Clr}}| | {{Clr}} | ||
{{Quote|Aaay! (Now we're getting somewhere!)}}}} | | | ||
{{Quote|Rude! It shut us out! Guess that way's a no-go...}} | |||
{{Quote|Keep cool. You're almost there.}} | |||
}} | |||
{{collapse| | |||
====[[File:S3 Icon Frye.png|45px]] [[Frye]]{{color|'s Quotes|green}}==== | |||
{{Clr}} | |||
| | |||
{{Quote|Won't know unless we try! Let's steal 'em!}} | |||
{{Quote|That was fire!}} | |||
}} | |||
{{collapse| | |||
====[[File:S3 Icon Big Man.png|45px]] [[Big Man]]{{color|'s Quotes|green}}==== | |||
{{Clr}} | |||
| | |||
{{Quote|Ay! Ay! (And that's a {{color|switch|orange}}. Look at me-I'm helping!)}} | |||
{{Quote|Aaay! (Now we're getting somewhere!)}} | |||
}} | |||
==Names in other languages== | ==Names in other languages== | ||
Revision as of 12:34, 27 April 2023
|
|
|

The Spirit Lifter: First Class is the 5th section in the Alterna Space Center sequence in Splatoon 3: Return of the Mammalians.
Description
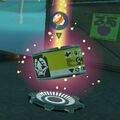
In this section, the player is faced with a series of locked doors and bulkheads. The player must use a canned Zipcaster with infinite duration found in a crate near the beginning to collect a series of floating energy cores. The main threat of this section is the large quantities of Fuzzy Ooze coating the majority of the Spirit Lifter's interior. A scattering of Octotroopers and Octosnipers also appears in this section.
Walkthrough
Checkpoint 1
This section requires the player to travel vertically using the Zipcaster to collect the energy cores scattered throughout. The cores are largely arranged to form a path for the player to collect them in one fell swoop by grappling between clear patches of the walls. Stepping on the pad on the topmost platform with all the energy cores will open the next area.
Checkpoint 2
The objective remains the same here, but now with some energy cores requiring the player to grapple breakable Power Egg crates. Stepping on the pad on the topmost platform with all the energy cores again will open the next area.
Final Checkpoint
Lastly, the player needs to grapple small square platforms, each with an energy core near them, all while avoiding an Octosniper's shots. The platforms spiral up, with the topmost one above the Octosniper. Dropping down, taking it out, and grabbing the last few energy cores will allow the player to progress to the end of the phase.
Enemies and Mechanics
First Introduced
Previously Introduced
Quotes
= English (North America)
File:S3 Icon Callie.png Agent 1's Quotes
| “ | OK, hear me out. We get the energy cores, we flip the switch, and then...SOMETHING! Right? | ” |
| “ | Nice, a Zipcaster! That'll make collecting energy cores easier for sure. | ” |
| “ | There's still another bulkhead and more energy cores. Get after 'em, Agent 3! | ” |
| “ | Hold on-I'm getting a signal. There are five remaining! | ” |
File:S3 Icon Marie.png Agent 2's Quotes
| “ | Hm? | ” |
| “ | Hold on...look at those floating energy cores! | ” |
| “ | You gotta streeetch your arm with and really STICK with it! | ” |
| “ | Got 'em! Nice work. | ” |
| “ | Just one left. Go get it! | ” |
| “ | I think that's the way out. I bet it opens the same way as the bulkheads. | ” |
| “ | That's definitely all of them. Let's head to the exit. | ” |
File:S3 Icon Shiver.png Shiver's Quotes
| “ | Rude! It shut us out! Guess that way's a no-go... | ” |
| “ | Keep cool. You're almost there. | ” |
File:S3 Icon Frye.png Frye's Quotes
| “ | Won't know unless we try! Let's steal 'em! | ” |
| “ | That was fire! | ” |
File:S3 Icon Big Man.png Big Man's Quotes
| “ | Ay! Ay! (And that's a switch. Look at me-I'm helping!) | ” |
| “ | Aaay! (Now we're getting somewhere!) | ” |


