Salmon Run Next Wave: Difference between revisions
SaltySquib (talk | contribs) (→Salmon Run Next Wave rank names: took a shot at the asian languages) |
SaltySquib (talk | contribs) (→Salmon Run Next Wave rank names: forgot a few) |
||
| Line 630: | Line 630: | ||
|- | |- | ||
|'''Profreshional +2''' | |'''Profreshional +2''' | ||
|'''たつじん+2 アルバイター''' | |'''たつじん+2 アルバイター'''<br>(Master +2 Part-Timer) | ||
|'''Parttime baas +2'''<br>(part-time boss +2) | |'''Parttime baas +2'''<br>(part-time boss +2) | ||
|'''Prodige +2'''<br>(Prodigy +2) | |'''Prodige +2'''<br>(Prodigy +2) | ||
| Line 643: | Line 643: | ||
|- | |- | ||
|'''Profreshional +3''' | |'''Profreshional +3''' | ||
|'''たつじん+3 アルバイター''' | |'''たつじん+3 アルバイター'''<br>(Master +3 Part-Timer) | ||
|'''Parttime baas +3'''<br>(part-time boss +3) | |'''Parttime baas +3'''<br>(part-time boss +3) | ||
|'''Prodige +3'''<br>(Prodigy +3) | |'''Prodige +3'''<br>(Prodigy +3) | ||
Revision as of 16:17, 30 October 2022
- For this mode's first iteration in Splatoon 2, see Salmon Run.
Salmon Run Next Wave is a co-op multiplayer mode in Splatoon 3 for up to four players. It is the sequel to Salmon Run in Splatoon 2 and was revealed on 9 February 2022 during a Nintendo Direct.
Description
Like in Splatoon 2, each Salmon Run shift consists of three waves; to complete waves, players must collect Golden Eggs by defeating Boss Salmonids and depositing them at the egg basket to reach a quota. Unless otherwise noted, each Boss Salmonid splatted yields three Golden Eggs. If they are not picked up, a Snatcher flies over after a few seconds to retrieve them.
Each player can carry only one Golden Egg at a time. While carrying a Golden Egg, players can press to perform an Egg Throw, launching the Golden Egg in an arc similar to thrown bombs. This requires the same amount of ink as a Splat Bomb to perform, but not as much ink is actually used and there is no ink-recovery lag. Performing the Egg Throw also causes a small explosion of ink around the player that deals 100 damage to Salmonids and inks a small area around the player.
If the egg is thrown directly into the egg basket, it is collected: otherwise, it remains on the ground where it lands and does not roll. Throwing a Golden Egg into the water results in it bouncing back to where it was thrown from; if it hits a wall or a Salmonid, it is deflected and changes its trajectory. Any player may pick up a Golden Egg as normal after it has been thrown.
The quota for each of the three waves depends on the number of players present and their ranks. If the quota is not filled before the wave timer ends or the team is wiped out, their shift is terminated. After a shift ends, players are rewarded Grizzco Points based on the amount of Power Eggs and Golden Eggs collected, which can be exchanged for bonuses. All players' ranks increase by 20 points after clearing a shift, unless they are playing with a friend with a higher job title than themselves. Similarly, failing a shift reduces all participants' ranks by between 0 and 20 points based on the number of waves cleared (-20 points on the first wave, -10 on the second, and 0 on the third). Thus, failing a shift on wave three does not change participants’ ranks.
The hazard level of a shift determines both the difficulty of the shift, such as how many bosses spawn in a time period, and determines the odds of getting silver or gold scales from an Xtrawave encounter. The hazard level is determined by a formula using the combined rank of all players in the shift. The hazard level for a completed shift can be checked by opening the Recent Jobs list from the menu in Grizzco or via SplatNet 3, which can be used to estimate what the hazard level of the next shift will be. The maximum hazard level possible is 333%, which can only occur for a team whose ranks are all Eggsecutive VP.
Equipment for collecting eggs is provided by Grizzco, including a Grizzco uniform and a lifesaver, as well as a different supplied main weapon for each wave and two uses of a single special weapon for each shift. When players are splatted, their lifesaver appears at their last position and a teammate can revive them by inking them. Ink level and special weapon uses are displayed visually, with the lifesaver serving as an ink tank with markings, and the player's two specials appearing as packets on their headgear. Additionally, a notification saying "One player left!" now appears when three coworkers have been splatted.
Known Occurrences return from Splatoon 2, with new ones being added, such as Mudmouth Eruptions and Giant Tornado.[1] Additionally, an event called Big Run, where Salmonids invade inhabited cities, will happen once every few months and take place on multiplayer stages such as Wahoo World.[2]
Xtrawave
- Main article: Xtrawave
Occasionally after a successful third wave, an Xtrawave occurs, with a large King Salmonid and multiple other Boss Salmonids appearing. The primary objective is not to deposit eggs but to defeat the King Salmonid. During this wave, players are supplied with egg cannons; these convert Golden Eggs into powerful projectiles that deal lots of damage (estimated at 700 damage[3]), do not consume ink, but break on contact (even if they hit the ground). The egg cannon can be used to one-shot all Lesser Salmonids and most regular Boss Salmonids by aiming at their weak spot, and they are largely used to damage the King Salmonid. If the player is holding an egg, a special weapon-esque notification encourages them to attack the King Salmonid with it. The players have 100 seconds, like any wave, to defeat the King Salmonid, and as usual, the wave ends prematurely if the whole squad is wiped out. If the players fail to complete the Xtrawave, the overall shift is still considered cleared.
If an Xtrawave is due to occur, the victory jingle after wave 3 will be slightly distorted, and the final triumphant horn will be immediately followed by a siren and a large, orange notification saying "EMERGENCY!". This is then followed by a short cut-scene of the King Salmonid emerging from the water and roaring. The crew members then Super Jump back to the start point, or a unique lowered start point if the third wave was low tide, and the text "XTRAWAVE" will appear as they land. The Xtrawave also takes place with a unique red sky, rather than the normal orange sky or the night environment used for most Known Occurrences, and will use the same tide level as the previous wave (i.e. if wave 3 took place at high tide, the Xtrawave will too).
An Xtrawave is guaranteed to occur when the Salmometer, a King Salmonid-shaped meter appearing below the player's rank bar while they're in the Grizzco Lobby, is full for every player in the group. Otherwise, the chance of an Xtrawave occurring scales based on the total value.[4] The meter fills after every shift, whether successful or not, and empties for everyone in the party when the special wave occurs. The Salmometer also resets between different rotations. Until wave 3 is complete, there is no way of knowing whether or not a shift will result in an Xtrawave, unless one is aware of the Salmometer levels of their teammates.
Fish scales
Damaging the King Salmonid during an Xtrawave rewards the player with fish scales, a precious resource that has three types, the rarer varieties of which are associated with higher hazard levels.[5] Fish scales can be exchanged for Splashtag banners, locker room items, and a Grizzco-approved alternate work outfit.[5]
The Xtrawave grants the player 2-13 scales: two for entering the Xtrawave, one for every 12.5% damage the team dealt to the King Salmonid (a maximum of eight for a victory), and one for every ten seconds remaining on the clock when the King Salmonid is defeated (a maximum three for more than thirty seconds left).[6]
Getting silver and gold scales is random, with the chance getting better the higher the player's hazard level is. At max hazard level (333%), 20% of the scales are converted to silver and 3% are converted to gold.[6][Citation needed]
| Hazard level | Silver fish scale | Gold fish scale | Approximate rank for the hazard level |
|---|---|---|---|
| 20% | 5.9009% | 0.1802% | Apprentice |
| 130% | 10.8559% | 1.1712% | Profreshional +2 |
| 200% | 14.009% | 1.8018% | Eggsecutive VP 200 |
| 333% (max.) | 20% | 3% | Team of only Eggsecutive VP |
Rotations
Unlike in Splatoon 2, Grizzco Industries is always open for business - this includes during Splatfests. The only exception is during server maintenance, during which all multiplayer services are disabled.[2]
Salmon Run rotations appear to change every day-and-two-thirds (1 day 16 hours, or 40 hours), at 00:00, 16:00, and 08:00 UTC, in order and repeating. Whether this will be consistent across long periods is unknown.
Loaned weapons
All main weapons are are usable in Salmon Run Next Wave, and some loaned weapons do more damage in Salmon Run than in regular multiplayer battles.
Unlike in Splatoon 2, there are more than four special weapons available in Salmon Run Next Wave. The special weapons are the Crab Tank, Killer Wail 5.1, Reefslider, Wave Breaker, Booyah Bomb, Triple Inkstrike and Inkjet.
Stages
| Image | Name | Description | Release Date |
|---|---|---|---|
 |
Sockeye Station | Sockeye Station is set in a setting similar to that of Spawning Grounds, but appears to be in the Splatlands. It was first shown off in the first Salmon Run Next Wave trailer.[7] | Initial release; 2022 |
| File:Gone Fission Hydroplant.png | Gone Fission Hydroplant | Gone Fission Hydroplant is set next to a massive hydroplant in the ocean. | Initial release; 2022 |
 |
Spawning Grounds | Returning from Splatoon 2, Spawning Grounds is set in the Inkadia region, with minimal changes. | Initial release; 2022 |
Wildcard rotation
Wildcard rotations return in Salmon Run Next Wave, the first started on 1 October 2022 at 16:00 (UTC)[8]. So far, only all-wildcard rotations have been confirmed; one-wildcard rotations and rare-only rotations have yet to be seen.
During an all-wildcard rotation, the only weapon available in the testing range is the Splattershot. After a shift ends, players are still equipped with the weapon they ended the shift with in the testing range, but it is replaced with the Splattershot if they open the Match Menu.
Grizzco-brand weapons return for wildcard rotations and a new weapon, the Grizzco Stringer, has been added.
Events
- Main article: Known Occurrence
There are nine different events in Salmon Run Next Wave, with some having variants. Seven of the events return from Salmon Run in Splatoon 2.
- Water Levels (high and low tides)
- Rush
- Fog
- The Griller
- Cohock Charge
- Goldie Seeking
- The Mothership
- Mudmouth Eruption[1][9]
- Giant Tornado[9]
Additionally, a special event known as Big Run will happen once every few months.
Job Title
| “ | The Profreshional title has been usurped by Eggsecutive VP, providing a shining new rung on the corporate ladder. Your earning power will increase with a higher title, but the job sites will get more intense too.
We've even recorded a 333% increase in hazard level at the sites where Eggsecutive VPs work. |
” |
All job titles from Splatoon 2 return. A new title, Eggsecutive VP[5], has been added following the Profreshional title.
| Title / Rank | Paygrade (Rank Points 0 - 49) | Paygrade (Rank Points 50-99) |
|---|---|---|
| Intern (2 tutorials) | 100% | 100% |
| Apprentice (0 - 99) | 150% | 155% |
| Part-Timer (0 - 99) | 160% | 165% |
| Go-Getter (0 - 99) | 170% | 175% |
| Overachiever (0 - 99) | 180% | 185% |
| Profreshional Part-Timer (0 - 99) | 190% | 195% |
| Profreshional +1 (0 - 99) | 200% | 205% |
| Profreshional +2 (0 - 99) | 210% | 215% |
| Profreshional +3 (0 - 99) | 220% | 225% |
| Eggsecutive VP (0 - 999) | 230% | 235% |
At Eggsecutive VP, the pay grade is calculated as 2.3 + floor([Rank Points] / 50) × 0.05. The highest possible pay grade is ×3.25 at Eggsecutive VP 950 - 999. Following Splatoon 2, titles are retained across Salmon Run rotations, but the point ranges are reset to the 40-point mark within the player's current title, including the new Eggsecutive VP title.
Rewards
Completion of a round of Salmon Run Next Wave grants players Grizzco Points, which they can redeem at the exchange desk inside Grizzco Industries for bonuses. The points earned after any run are calculated with the formula (G/100)(E+P/200)+50*C, where G is the pay grade number after any raises or penalties, E is the number of Golden Eggs collected, P is the number of Power Eggs collected, and C is 1 upon completing all 3 rounds successfully, 2 upon successfully defeating the King Salmonid, otherwise 0. All counts are rounded down to the nearest integer. Players also earn Catalog Points which increase their catalog level (300 points per wave cleared, including if the Xtrawave is cleared). If the player participates in an Xtrawave and damages the King Salmonid, they receive fish scales.[5]
Every 100 Grizzco Points (200/400 after reaching 1200/4000 points in a rotation) earns the player one bonus "capsule", which come in different colors representing the type of the contents, or a piece of gear. The main ability of this item is randomly determined when the bonus is redeemed. It usually has up to three randomly filled secondary gear ability slots. If the player receives gear they already have, they can either replace the old gear with the new version or receive ability chunks (equal to the filled slots) instead.
| Reward[10] | Type | 50% | 40% | 10% |
|---|---|---|---|---|
| Drink ticket | One drink ticket | Four drink tickets | ||
| Ability chunks | Two ability chunks | Four ability chunks | ||
| Food ticket | One 1.5× cash ticket | One 2× cash ticket | ||
| Gear | One filled ability slot | Two filled ability slots | Three filled ability slots | |
| Cash |
Normal, non-superbonus capsules have a 50% chance of providing a poor reward, a 40% chance of providing a good reward, and a 10% chance of providing an excellent reward. At 600 and 1200 points, the player earns a superbonus, which always contains the 10% chance reward. The type of superbonus capsule is fixed for the length of a rotation. After 1200 points, the player only earns the current gear or pink capsules until the rotation ends. The capsules of the rewards until the second superbonus are different for every player.
Pink capsules contain gear aside from the one currently in rotation. During the first gear rotation, when the Bream-Brim Cap was the only gear piece available, pink capsules did not appear as a reward.
The exchange desk stores only a maximum of 99 capsules. Each additional capsule that the player receives without collecting the previous rewards will be lost.
Gear
Gear by Grizzco Industries is obtained from Salmon Run bonus rewards. The main ability for each gear reward is randomly selected from 0 to 2 stars and all abilities that can also appear as secondary abilities. Each gear comes with one to three secondary abilities that are also randomly selected. If the player receives gear they already have, they can either replace the old gear with the new version or swap for ability chunks (equal to the secondary ability slots, but not the main ability slot) instead. A new piece of gear is added each month, similar to Splatoon 2.
| Gear | Type | Release date |
|---|---|---|
| Headgear | September 2022 | |
| Headgear | October 2022 |
Shop
By defeating or damaging a King Salmonid, players are rewarded with Fish scales that they can use to purchase work suits, decorations, stickers, or banners. Most items are locked by default, however, the rest are unlocked by spending more scales. The first set of unlockable items requires spending at least ![]() 100 and
100 and ![]() 10 to unlock, while the rest of the items requires spending at least
10 to unlock, while the rest of the items requires spending at least ![]() 350,
350, ![]() 40, and
40, and ![]() 4.
4.
Work Suits
| Name | Cost | Purchasable? |
|---|---|---|
| File:Orange Slopsuit.webp Orange Slopsuit | Unlocked by default | Initially |
| File:Green Slopsuit.webp Green Slopsuit | Initially | |
| File:Yellow Slopsuit.webp Yellow Slopsuit | Initially | |
| File:Pink Slopsuit.webp Pink Slopsuit | After 1st milestone | |
| File:Blue Slopsuit.webp Blue Slopsuit | After 1st milestone | |
| File:Black Slopsuit.webp Black Slopsuit | After 2nd milestone | |
| File:White Slopsuit.webp White Slopsuit | After 2nd milestone |
Decorations
| Name | Cost | Purchasable? |
|---|---|---|
 Scrapper Scrapper
|
Initially | |
 Steelhead Steelhead
|
Initially | |
 Smallfry Smallfry
|
Initially | |
 Maws Maws
|
After 1st milestone | |
 Stinger Stinger
|
After 1st milestone | |
 Chum Chum
|
After 1st milestone | |
 Drizzler Drizzler
|
After 2nd milestone | |
 Flyfish Flyfish
|
After 2nd milestone | |
 Cohock Cohock
|
After 2nd milestone | |
 Steel Eel Steel Eel
|
After 2nd milestone | |
 Goldie Goldie
|
After 2nd milestone |
Stickers
| Name | Cost | Purchasable? |
|---|---|---|
| File:Grf Sti Graffiti 20.pngTS-SAL graffiti | Initially | |
| File:Grf Sti Graffiti 22.pngTS-SWD graffiti | Initially | |
| File:Pap Sti Poster 18.pngGCI-DNG poster | Initially | |
| File:Emi Sti Decoration 19.pngGCI-FRI neon | Initially | |
| File:Grf Sti Graffiti 27.pngTS-ORBRS graffiti | Initially | |
| File:Stc Sti Signboard 14.pngGrizzco Industries logo | Initially | |
| File:Grf Sti Graffiti 21.pngTS-C0HK graffiti | After 1st milestone | |
| File:Grf Sti Graffiti 29.pngTS-RLPL graffiti | After 1st milestone | |
| File:Stc Sti Sticker 32.pngGCI-FSH sticker | After 1st milestone | |
| File:Emi Sti Decoration 18.pngGCI-NMLSMN neon | After 1st milestone | |
| File:Stc Sti Signboard 18.pngSR-UDTRG sign | After 1st milestone | |
| File:Pap Sti Poster 15.pngGCI-WTD poster | After 1st milestone | |
| File:Grf Sti Graffiti 25.pngTS-WHPL graffiti | After 2nd milestone | |
| File:Grf Sti Graffiti 34.pngTS-SMFR graffiti | After 2nd milestone | |
| File:Grf Sti Graffiti 35.pngTS-LGF8Z graffiti | After 2nd milestone | |
| File:Pap Sti Poster 19.pngGCI-N0SLMN poster | After 2nd milestone | |
| File:Emi Sti Decoration 20.pngGCI-XLSMN neon | After 2nd milestone | |
| File:Grf Sti Graffiti 32.pngTS-FLT graffiti | After 2nd milestone | |
| File:Grf Sti Graffiti 41.pngSD0-STR graffiti | After 2nd milestone | |
| File:Grf Sti Graffiti 37.pngTS-C0HZ graffiti | After 2nd milestone |
Banners
| Banner | Cost | Purchasable? |
|---|---|---|

|
Initially | |

|
Initially | |

|
Initially | |

|
After 1st milestone | |

|
After 1st milestone | |

|
After 1st milestone | |

|
After 2nd milestone | |

|
After 2nd milestone | |

|
After 2nd milestone | |

|
After 2nd milestone |
Quotes
| “ | SRL HR dept. here. No, it's not another mandatory seminar about conserving printer toner. Rather, we're confirming that Salmon Run is available 24/7 in the Splatoon 3 game! That means you can work nonstop to climb the corporate salmon ladder - maybe all the way to Eggsecutive VP!
Now, at the end of the day, it's all about that paycheck. And we think Salmon Run workers are handsomely rewarded! Diligent employees who have collected fish scales can trade them in for bonus items like designer work suits. As always, we support a healthy work-splat balance. |
” |
| “ | Salmon Run is open for business 24/7 in #Splatoon3, and you can team up with friends in private lobbies too! If you defeat the big 'ol King Salmonid, you may earn some rare fish scales that can be exchanged for snazzier uniforms. | ” |
— @NintendoEurope on Twitter[13]
| ||
Gallery
Artwork and renders
-

Logo
-
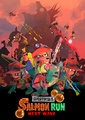
Key art (vertical)
-

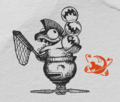
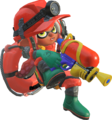
Inkling in uniform
-

Another Inkling in uniform
-
An Octoling in uniform
-

-

-
-
-

-

-

-

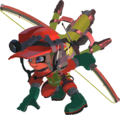
Render of an Inkling in uniform
-
Another render
-
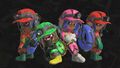
Designer work suits
-

Chums and a Cohock
-

-

Egg cannon used to throw Golden Eggs


Icons
-

-

Icon
-
SplatNet 3 icon
Promotional screenshots


Trivia
- The Salmometer is internally referred to as "smell". This, as well as wording in the Employee Handbook, may imply that the Salmometer is a metaphor for the King Salmonid gradually learning the scent of the crew members as they keep returning to the same location.
Names in other languages
Salmon Run Next Wave rank names
| English | Japanese | Dutch | French | German | Italian | Russian | Spanish (Latin America) |
Spanish (Spain) |
Chinese (Simplified) |
Chinese (Traditional) |
Korean |
|---|---|---|---|---|---|---|---|---|---|---|---|
| Apprentice | かけだし アルバイター (Novice Part-Timer) |
Uitzendkracht (temporary worker) |
Néophyte (Novice) |
Azubi (Apprentice) |
Apprendista | Рабочий Rabochiy (Worker) |
Aprendiz (Apprentice) |
Aprendiz eventual (Eventual Apprentice) |
新手 打工仔 (Novice Employee) |
新手 打工仔 (Novice Employee) |
초보 아르바이트생 (Novice Part-Timer) |
| Part-Timer | はんにんまえ アルバイター (Half-Rate Part-Timer) |
Parttimer (part-timer) |
Stagiaire (Intern) |
Teilzeitkraft (Part-time employee) |
Tirocinante | Бригадир Brigadir (Brigadier) |
Subordinado (Subordinate) |
Subordinado eventual (Eventual Subordinate) |
半吊子 打工仔 (Half-Rate Employee) |
半吊子 打工仔 (Half-Rate Employee) |
견습 아르바이트생 (Apprentice Part-Timer) |
| Go-Getter | いちにんまえ アルバイター (Full-Fledged Part-Timer) |
Vaste kracht (permanent worker) |
Semi-pro | Fachpersonal (Specialized staff) |
Carrierista | Старший бригадир Starshiy brigadir (Senior brigadier) |
Supervisor | Capataz eventual (Eventual Overseer) |
独当一面 打工仔 (Self-Supporting Employee) |
獨當一面 打工仔 (Self-Supporting Employee) |
일반 아르바이트생 (General Part-Timer) |
| Overachiever | じゅくれん アルバイター (Skilled Part-Timer) |
Leidinggevende (supervisor) |
Pro | Führungskraft (Executive) |
Promessa | Зам. начальника Zam. nachal'nika (Deputy chief) |
Gerente (Manager) |
Gerente eventual (Eventual Manager) |
熟练 打工仔 (Skilled Employee) |
熟練 打工仔 (Skilled Employee) |
전문 아르바이트생 (Professional Part-Timer) |
| Profreshional Part-Timer | たつじん アルバイター (Master Part-Timer) |
Parttime baas (part-time boss) |
Prodige stagiaire (Intern prodigy) |
Nebenjob-Boss (Side Job Boss) |
Professionista tirocinante | Начальник на полставки Nachal'nik na polstavki (Part-time chief) |
Jefe (Boss) |
Jefe eventual (Eventual Boss) |
达人 打工仔 (Master Employee) |
達人 打工仔 (Master Employee) |
달인 아르바이트생 (Master Part-Timer) |
| Profreshional +1 | たつじん+1 アルバイター (Master +1 Part-Timer) |
Parttime baas +1 (part-time boss +1) |
Prodige +1 (Prodigy +1) |
Nebenjob-Boss +1 (Side Job Boss +1) |
Professionista tirocinante +1 | Начальник +1 Nachal'nik +1 (Chief +1) |
Jefe +1 (Boss +1) |
Jefe +1 eventual (Eventual Boss +1) |
达人+1 打工仔 (Master +1 Employee) |
達人+1 打工仔 (Master +1 Employee) |
달인 아르바이트생 +1 (Master Part-Timer +1) |
| Profreshional +2 | たつじん+2 アルバイター (Master +2 Part-Timer) |
Parttime baas +2 (part-time boss +2) |
Prodige +2 (Prodigy +2) |
Nebenjob-Boss +2 (Side Job Boss +2) |
Professionista tirocinante +2 | Начальник +2 Nachal'nik +2 (Chief +2) |
Jefe +2 (Boss +2) |
Jefe +2 eventual (Eventual Boss +2) |
达人+2 打工仔 (Master +2 Employee) |
達人+2 打工仔 (Master +2 Employee) |
달인 아르바이트생 +2 (Master Part-Timer +2) |
| Profreshional +3 | たつじん+3 アルバイター (Master +3 Part-Timer) |
Parttime baas +3 (part-time boss +3) |
Prodige +3 (Prodigy +3) |
Nebenjob-Boss +3 (Side Job Boss +3) |
Professionista tirocinante +3 | Начальник +3 Nachal'nik +3 (Chief +3) |
Jefe +3 (Boss +3) |
Jefe +3 eventual (Eventual Boss +3) |
达人+3 打工仔 (Master +3 Employee) |
達人+3 打工仔 (Master +3 Employee) |
달인 아르바이트생 +3 (Master Part-Timer +3) |
| Eggsecutive VP | でんせつ アルバイター (Legendary Part-Timer) |
Parttime legende (part-time legend) |
Légende (Legend) |
Nebenjob-Legende (Side Job Legend) |
Dirigente | Генеральный директор General'nyy direktor (General director) |
Director | Director eventual (Eventual Director) |
传说 打工仔 (Legendary Employee) |
傳說 打工仔 (Legendary Employee) |
전설의 아르바이트생 (Legendary Part-Timer) |
Salmon Run Next Wave rank names (SplatNet 3)
| English | Japanese | Dutch | French | German | Italian | Russian | Spanish (Latin America) |
Spanish (Spain) |
Chinese (Simplified) |
Chinese (Traditional) |
Korean |
|---|---|---|---|---|---|---|---|---|---|---|---|
| Apprentice | かけだし | Uitzendkracht (temporary worker) |
Néophyte (Novice) |
Azubi (Apprentice) |
Apprendista | Рабочий | Aprendiz
(Apprentice) |
新手 | 新手 | 초보 | |
| Part-Timer | はんにんまえ | Parttimer (part-timer) |
Stagiaire (Intern) |
Teilzeitkraft (Part-time employee) |
Tirocinante | Бригадир Brigadir (Brigadier) |
Subordinado
(Subordinate) |
半吊子 | 半吊子 | 견습 | |
| Go-Getter | いちにんまえ | Vaste kracht (permanent worker) |
Semi-pro | Fachpersonal (Specialized staff) |
Carrierista | Старший бригадир Starshiy brigadir (Senior brigadier) |
Supervisor | Capataz (Overseer) |
独当一面 | 獨當一面 | 일반 |
| Overachiever | じゅくれん | Leidinggevende (supervisor) |
Pro | Führungskraft (Executive) |
Promessa | Зам. начальника Zam. nachal'nika (Deputy chief) |
Gerente
(Manager) |
熟练 | 熟練 | 전문 | |
| Profreshional | たつじん | Baas (boss) |
Prodige (Prodigy) |
Boss | Professionista | Начальник Nachal'nik (Chief) |
Jefe
(Boss) |
达人 | 達人 | 달인 | |
| Profreshional +1 | たつじん+1 | Baas +1 (boss +1) |
Prodige +1 (Prodigy +1) |
Boss +1 | Professionista +1 | Начальник +1 Nachal'nik +1 (Chief +1) |
Jefe +1
(Boss +1) |
达人+1 | 達人+1 | 달인 +1 | |
| Profreshional +2 | たつじん+2 | Baas +2 (boss +2) |
Prodige +2 (Prodigy +2) |
Boss +2 | Professionista +2 | Начальник +2 Nachal'nik +2 (Chief +2) |
Jefe +2
(Boss +2) |
达人+2 | 達人+2 | 달인 +2 | |
| Profreshional +3 | たつじん+3 | Baas +3 (boss +3) |
Prodige +3 (Prodigy +3) |
Boss +3 | Professionista +3 | Начальник +3 Nachal'nik +3 (Chief +3) |
Jefe +3
(Boss +3) |
达人+3 | 達人+3 | 달인 +3 | |
| Eggsecutive VP | でんせつ | Legende (legend) |
Légende (Legend) |
Legende (Legend) |
Dirigente | Гендиректор Gendirektor (General director) |
Director
|
传说 | 傳說 | 전설 | |
References
- ↑ 1.0 1.1 GameXplain: New Mudmouth Boss in Salmon Run - Splatoon 3 Gameplay
- ↑ 2.0 2.1 https://splatoon.nintendo.com/en/news/catch-up-on-all-the-latest-from-the-splatoon-3-direct/
- ↑ 3.0 3.1
 Ultimate Cohozuna Xtra Wave Guide - Splatoon 3 Salmon Run
- ↑
 @OatmealDome
- ↑ 5.0 5.1 5.2 5.3
 CONFIDENTIAL REPORT: SQUID RESEARCH LAB DIVES DEEP INTO THE SPLATLANDS
- ↑ 6.0 6.1 Salmon Run Scales and Rewards Explained! - Splatoon 3 Salmon Run - HDHaZmY
- ↑ Splatoon 3 - Salmon Run Next Wave Trailer - Nintendo Switch
- ↑ https://youtu.be/oVXEP4I9xHU
- ↑ 9.0 9.1 https://leanny.github.io/splat3/manuals.html
- ↑ Salmon Run Database
- ↑ @SplatoonNA on Twitter
- ↑ @SplatoonNA on Twitter
- ↑ @NintendoEurope on Twitter
|
