Stage/Gallery: Difference between revisions
m (→Map: added image) |
TakoShogun (talk | contribs) m (→Overhead: Splatfest correction) |
||
| (35 intermediate revisions by 11 users not shown) | |||
| Line 1: | Line 1: | ||
{{More images|Needs all map layouts & descriptions}}{{Clr}} | |||
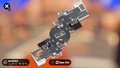
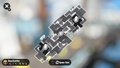
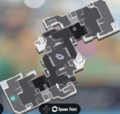
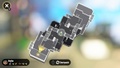
This is the gallery of [[Stage|stages]] | This is the gallery of [[Stage|stages]]. | ||
== Splatoon == | == Splatoon == | ||
=== Other === | === Other === | ||
<gallery> | <gallery> | ||
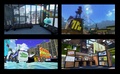
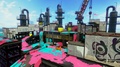
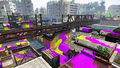
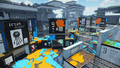
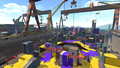
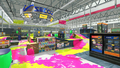
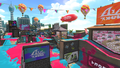
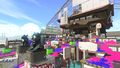
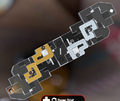
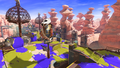
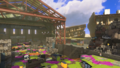
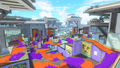
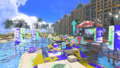
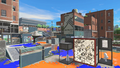
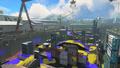
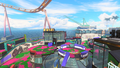
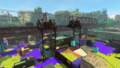
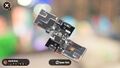
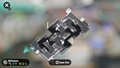
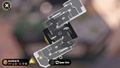
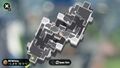
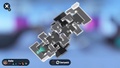
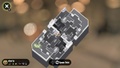
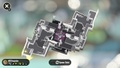
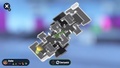
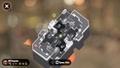
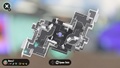
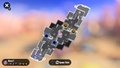
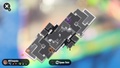
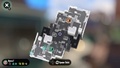
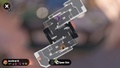
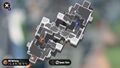
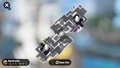
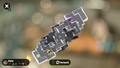
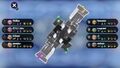
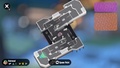
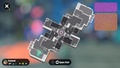
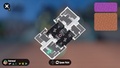
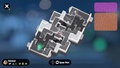
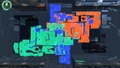
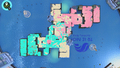
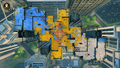
Stages1.jpg|This image shows [[Urchin Underpass]], [[Walleye Warehouse]], [[Saltspray Rig]] & [[Blackbelly Skatepark]]. | |||
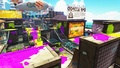
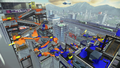
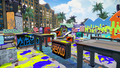
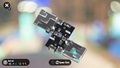
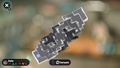
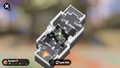
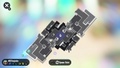
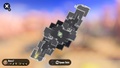
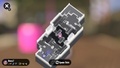
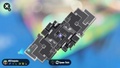
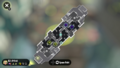
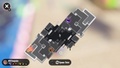
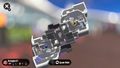
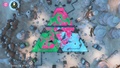
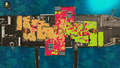
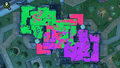
Stages2.jpg|This image shows [[Camp Triggerfish]], [[Moray Towers]], [[Flounder Heights]] & [[Hammerhead Bridge]]. | |||
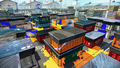
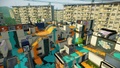
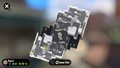
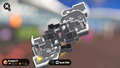
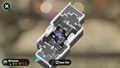
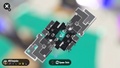
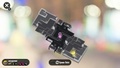
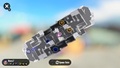
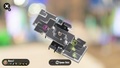
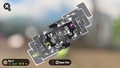
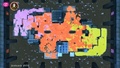
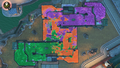
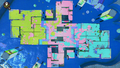
Stages3.jpg|This image shows [[Museum d'Alfonsino]], [[Piranha Pit]], [[Mahi-Mahi Resort]] & [[Ancho-V Games]]. | |||
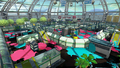
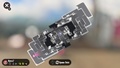
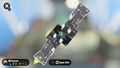
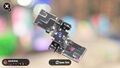
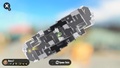
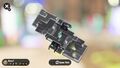
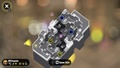
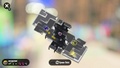
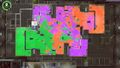
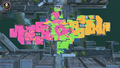
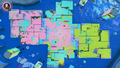
Stages4.jpg|This image shows [[Arowana Mall]], [[Port Mackerel]], [[Kelp Dome]] & [[Bluefin Depot]]. | |||
</gallery> | </gallery> | ||
=== Cover === | === Cover === | ||
<gallery> | <gallery> | ||
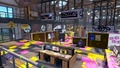
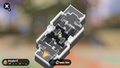
S Stage Urchin Underpass.jpg|Urchin Underpass | |||
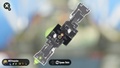
S Stage Walleye Warehouse.jpg|Walleye Warehouse | |||
S Stage Saltspray Rig.jpg|Saltspray Rig | |||
S Stage Arowana Mall.jpg|Arowana Mall | |||
S Stage Blackbelly Skatepark.jpg|Blackbelly Skatepark | |||
S Stage Port Mackerel.png|Port Mackerel | |||
S Stage Kelp Dome.png|Kelp Dome | |||
S Stage Bluefin Depot.png|Bluefin Depot | |||
S Stage Moray Towers.png|Moray Towers | |||
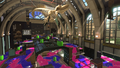
S Stage Camp Triggerfish.jpg|Camp Triggerfish | |||
S Stage Flounder Heights.jpg|Flounder Heights | |||
S Stage Hammerhead Bridge.jpg|Hammerhead Bridge | |||
S Stage Museum d'Alfonsino.png|Museum d'Alfonsino | |||
S Stage Mahi-Mahi Resort.png|Mahi-Mahi Resort | |||
S Stage Piranha Pit.png|Piranha Pit | |||
S Stage Ancho-V Games.jpg|Ancho-V Games | |||
</gallery> | </gallery> | ||
| Line 39: | Line 36: | ||
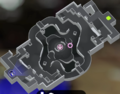
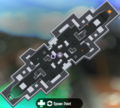
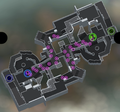
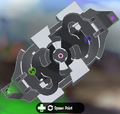
<gallery> | <gallery> | ||
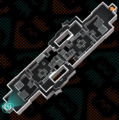
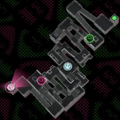
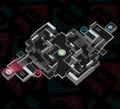
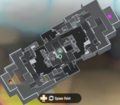
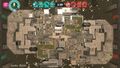
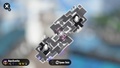
Map Urchin Underpass Turf War Overhead.jpg|[[Urchin Underpass]] | Map Urchin Underpass Turf War Overhead.jpg|[[Urchin Underpass]] | ||
Old Urchin Underpass map 1.3.0.jpg|Urchin Underpass prior to version {{Ver|S|2.0.0}} | |||
Map Walleye Warehouse Turf War Overhead.jpg|[[Walleye Warehouse]] | Map Walleye Warehouse Turf War Overhead.jpg|[[Walleye Warehouse]] | ||
Map Saltspray Rig Turf War Overhead.png|[[Saltspray Rig]] | Map Saltspray Rig Turf War Overhead.png|[[Saltspray Rig]] | ||
| Line 63: | Line 61: | ||
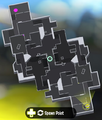
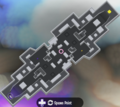
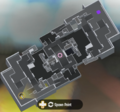
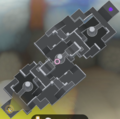
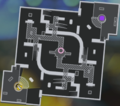
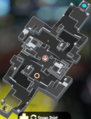
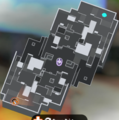
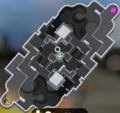
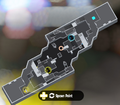
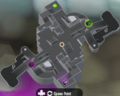
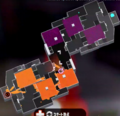
==== Map ==== | ==== Map ==== | ||
<gallery> | <gallery> | ||
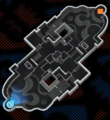
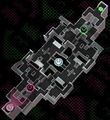
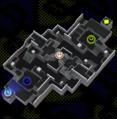
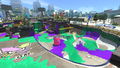
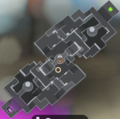
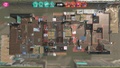
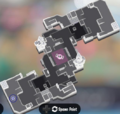
Map Urchin Underpass 2.0 Splat Zones Overhead.jpg|Urchin Underpass | |||
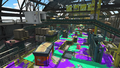
Map Walleye Warehouse Splat Zones Overhead.jpg|Walleye Warehouse | Map Walleye Warehouse Splat Zones Overhead.jpg|Walleye Warehouse | ||
Map Saltspray Rig Splat Zones Overhead.jpg|Saltspray Rig | Map Saltspray Rig Splat Zones Overhead.jpg|Saltspray Rig | ||
| Line 168: | Line 166: | ||
<gallery> | <gallery> | ||
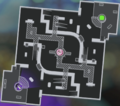
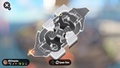
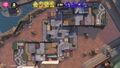
S2 Map The Reef Turf War.png|[[The Reef]] | S2 Map The Reef Turf War.png|[[The Reef]] | ||
S2 Map The Reef Turf War Old.png|The Reef prior to version {{Ver|S2|4.2.0}} | |||
S2 Map Musselforge Fitness Turf War.png|[[Musselforge Fitness]] | S2 Map Musselforge Fitness Turf War.png|[[Musselforge Fitness]] | ||
S2 Map Starfish Mainstage Turf War 4.0.0.png|[[Starfish Mainstage]] | S2 Map Starfish Mainstage Turf War 4.0.0.png|[[Starfish Mainstage]] | ||
S2 Map Starfish Mainstage Turf War.png|Starfish Mainstage prior to version {{Ver|S2|4.0.0}} | |||
S2 Map Humpback Pump Track Turf War.png|[[Humpback Pump Track]] | S2 Map Humpback Pump Track Turf War.png|[[Humpback Pump Track]] | ||
S2 Map Inkblot Art Academy Turf War.png|[[Inkblot Art Academy]] | S2 Map Inkblot Art Academy Turf War.png|[[Inkblot Art Academy]] | ||
| Line 179: | Line 179: | ||
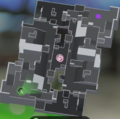
S2 Map Snapper Canal Turf War.png|[[Snapper Canal]] | S2 Map Snapper Canal Turf War.png|[[Snapper Canal]] | ||
S2 Map Blackbelly Skatepark Turf War.png|[[Blackbelly Skatepark]] | S2 Map Blackbelly Skatepark Turf War.png|[[Blackbelly Skatepark]] | ||
S2 Map Blackbelly Skatepark Turf War Old.png|Blackbelly Skatepark prior to version {{Ver|S2|4.3.0}} | |||
S2 Map MakoMart Turf War.png|[[MakoMart]] | S2 Map MakoMart Turf War.png|[[MakoMart]] | ||
S2 Map Walleye Warehouse Turf War.png|[[Walleye Warehouse]] | S2 Map Walleye Warehouse Turf War.png|[[Walleye Warehouse]] | ||
S2 Map Shellendorf Institute Turf War.png|[[Shellendorf Institute]] | S2 Map Shellendorf Institute Turf War 5.0.0.png|[[Shellendorf Institute]] | ||
S2 Map Shellendorf Institute Turf War.png|Shellendorf Institute prior to version {{Ver|S2|5.0.0}} | |||
S2 Map Arowana Mall Turf War.png|[[Arowana Mall]] | S2 Map Arowana Mall Turf War.png|[[Arowana Mall]] | ||
S2 Map Goby Arena Turf War.png|[[Goby Arena]] | S2 Map Goby Arena Turf War.png|[[Goby Arena]] | ||
| Line 198: | Line 200: | ||
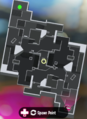
==== Map ==== | ==== Map ==== | ||
<gallery> | <gallery> | ||
S2 Map The Reef Splat Zones.png|The Reef | S2 Map The Reef Splat Zones 4.2.0.png|The Reef | ||
S2 Map The Reef Splat Zones.png|The Reef prior to version 4.2.0 | |||
S2 Map Musselforge Fitness Splat Zones.png|Musselforge Fitness | S2 Map Musselforge Fitness Splat Zones.png|Musselforge Fitness | ||
S2 Map Starfish Mainstage Splat Zones.png|Starfish Mainstage | S2 Map Starfish Mainstage Splat Zones 4.0.0.png|Starfish Mainstage | ||
S2 Map Starfish Mainstage Splat Zones.png|Starfish Mainstage prior to version 4.0.0 | |||
S2 Map Humpback Pump Track Splat Zones.png|Humpback Pump Track | S2 Map Humpback Pump Track Splat Zones.png|Humpback Pump Track | ||
S2 Map Inkblot Art Academy Splat Zones.png|Inkblot Art Academy | S2 Map Inkblot Art Academy Splat Zones.png|Inkblot Art Academy | ||
| Line 209: | Line 213: | ||
S2 Map Kelp Dome Splat Zones.png|Kelp Dome | S2 Map Kelp Dome Splat Zones.png|Kelp Dome | ||
S2 Map Snapper Canal Splat Zones.png|Snapper Canal | S2 Map Snapper Canal Splat Zones.png|Snapper Canal | ||
S2 Map Blackbelly Skatepark Splat Zones.png|Blackbelly Skatepark | S2 Map Blackbelly Skatepark Splat Zones 4.3.0.png|Blackbelly Skatepark | ||
S2 Map Blackbelly Skatepark Splat Zones.png|Blackbelly Skatepark prior to version 4.3.0 | |||
S2 Map MakoMart Splat Zones.png|MakoMart | S2 Map MakoMart Splat Zones.png|MakoMart | ||
S2 Map Walleye Warehouse Splat Zones.png|Walleye Warehouse | S2 Map Walleye Warehouse Splat Zones.png|Walleye Warehouse | ||
S2 Map Shellendorf Institute Splat Zones.png|Shellendorf Institute | S2 Map Shellendorf Institute Splat Zones 5.0.0.png|Shellendorf Institute | ||
S2 Map Shellendorf Institute Splat Zones.png|Shellendorf Institute prior to version 5.0.0 | |||
S2 Map Arowana Mall Splat Zones.png|Arowana Mall | S2 Map Arowana Mall Splat Zones.png|Arowana Mall | ||
S2 Map Goby Arena Splat Zones.png|Goby Arena | S2 Map Goby Arena Splat Zones.png|Goby Arena | ||
| Line 230: | Line 236: | ||
<gallery> | <gallery> | ||
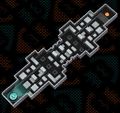
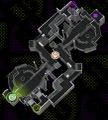
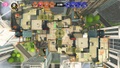
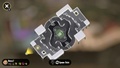
S2 Map The Reef Tower Control.png|The Reef | S2 Map The Reef Tower Control.png|The Reef | ||
S2 Map The Reef Tower Control Old.png|The Reef prior to version 4.2.0 | |||
S2 Map Musselforge Fitness Tower Control.png|Musselforge Fitness | S2 Map Musselforge Fitness Tower Control.png|Musselforge Fitness | ||
S2 Map Starfish Mainstage Tower Control.png|Starfish Mainstage | S2 Map Starfish Mainstage Tower Control 4.0.0.png|Starfish Mainstage | ||
S2 Map Starfish Mainstage Tower Control.png|Starfish Mainstage prior to version 4.0.0 | |||
S2 Map Humpback Pump Track Tower Control.png|Humpback Pump Track | S2 Map Humpback Pump Track Tower Control.png|Humpback Pump Track | ||
S2 Map Inkblot Art Academy Tower Control.png|Inkblot Art Academy | S2 Map Inkblot Art Academy Tower Control.png|Inkblot Art Academy | ||
| Line 240: | Line 248: | ||
S2 Map Kelp Dome Tower Control.png|Kelp Dome | S2 Map Kelp Dome Tower Control.png|Kelp Dome | ||
S2 Map Snapper Canal Tower Control.png|Snapper Canal | S2 Map Snapper Canal Tower Control.png|Snapper Canal | ||
S2 Map Blackbelly Skatepark Tower Control.png|Blackbelly Skatepark | S2 Map Blackbelly Skatepark Tower Control Version 4.3.0.jpg|Blackbelly Skatepark | ||
S2 Map Blackbelly Skatepark Tower Control.png|Blackbelly Skatepark prior to version 4.3.0 | |||
S2 Map MakoMart Tower Control.png|MakoMart | S2 Map MakoMart Tower Control.png|MakoMart | ||
S2 Map Walleye Warehouse Tower Control.png|Walleye Warehouse | S2 Map Walleye Warehouse Tower Control.png|Walleye Warehouse | ||
S2 Map Shellendorf Institute Tower Control.png|Shellendorf Institute | S2 Map Shellendorf Institute Tower Control 5.0.0.png|Shellendorf Institute | ||
S2 Map Shellendorf Institute Tower Control.png|Shellendorf Institute prior to version 5.0.0 | |||
S2 Map Arowana Mall Tower Control.png|Arowana Mall | S2 Map Arowana Mall Tower Control.png|Arowana Mall | ||
S2 Map Goby Arena Tower Control.png|Goby Arena | S2 Map Goby Arena Tower Control.png|Goby Arena | ||
| Line 260: | Line 270: | ||
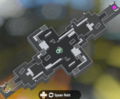
==== Map ==== | ==== Map ==== | ||
<gallery> | <gallery> | ||
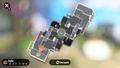
S2 Map The Reef Rainmaker.png|The Reef | S2 Map The Reef Rainmaker 4.2.0.png|The Reef | ||
S2 Map The Reef Rainmaker.png|The Reef prior to version 4.2.0 | |||
S2 Map Musselforge Fitness Rainmaker.png|Musselforge Fitness | S2 Map Musselforge Fitness Rainmaker.png|Musselforge Fitness | ||
S2 Map Starfish Mainstage Rainmaker.png|Starfish Mainstage | S2 Map Starfish Mainstage Rainmaker 4.0.0.png|Starfish Mainstage | ||
S2 Map Starfish Mainstage Rainmaker.png|Starfish Mainstage prior to version 4.0.0 | |||
S2 Map Humpback Pump Track Rainmaker.png|Humpback Pump Track | S2 Map Humpback Pump Track Rainmaker.png|Humpback Pump Track | ||
S2 Map Inkblot Art Academy Rainmaker.png|Inkblot Art Academy | S2 Map Inkblot Art Academy Rainmaker.png|Inkblot Art Academy | ||
| Line 272: | Line 284: | ||
S2 Map Snapper Canal Rainmaker.png|Snapper Canal | S2 Map Snapper Canal Rainmaker.png|Snapper Canal | ||
S2 Map Blackbelly Skatepark Rainmaker.png|Blackbelly Skatepark | S2 Map Blackbelly Skatepark Rainmaker.png|Blackbelly Skatepark | ||
S2 Map Blackbelly Skatepark Rainmaker Old.png|Blackbelly Skatepark prior to version 4.3.0 | |||
S2 Map MakoMart Rainmaker.png|MakoMart | S2 Map MakoMart Rainmaker.png|MakoMart | ||
S2 Map Walleye Warehouse Rainmaker.png|Walleye Warehouse | S2 Map Walleye Warehouse Rainmaker.png|Walleye Warehouse | ||
S2 Map Shellendorf Institute Rainmaker.png|Shellendorf Institute | S2 Map Shellendorf Institute Rainmaker 5.0.0.png|Shellendorf Institute | ||
S2 Map Shellendorf Institute Rainmaker.png|Shellendorf Institute prior to version 5.0.0 | |||
S2 Map Arowana Mall Rainmaker.png|Arowana Mall | S2 Map Arowana Mall Rainmaker.png|Arowana Mall | ||
S2 Map Goby Arena Rainmaker.png|Goby Arena | S2 Map Goby Arena Rainmaker.png|Goby Arena | ||
| Line 291: | Line 305: | ||
==== Map ==== | ==== Map ==== | ||
<gallery> | <gallery> | ||
S2 Map The Reef Clam Blitz.png|The Reef | S2 Map The Reef Clam Blitz 4.2.0.png|The Reef | ||
S2 Map The Reef Clam Blitz.png|The Reef prior to version 4.2.0 | |||
S2 Map Musselforge Fitness Clam Blitz.png|Musselforge Fitness | S2 Map Musselforge Fitness Clam Blitz.png|Musselforge Fitness | ||
S2 Map Starfish Mainstage Clam Blitz.png|Starfish Mainstage | S2 Map Starfish Mainstage Clam Blitz 4.0.0.png|Starfish Mainstage | ||
S2 Map Starfish Mainstage Clam Blitz.png|Starfish Mainstage prior to version 4.0.0 | |||
S2 Map Humpback Pump Track Clam Blitz.png|Humpback Pump Track | S2 Map Humpback Pump Track Clam Blitz.png|Humpback Pump Track | ||
S2 Map Inkblot Art Academy Clam Blitz.png|Inkblot Art Academy | S2 Map Inkblot Art Academy Clam Blitz.png|Inkblot Art Academy | ||
| Line 302: | Line 318: | ||
S2 Map Kelp Dome Clam Blitz.png|Kelp Dome | S2 Map Kelp Dome Clam Blitz.png|Kelp Dome | ||
S2 Map Snapper Canal Clam Blitz.png|Snapper Canal | S2 Map Snapper Canal Clam Blitz.png|Snapper Canal | ||
S2 Map Blackbelly Skatepark Clam Blitz.png|Blackbelly Skatepark | S2 Map Blackbelly Skatepark Clam Blitz 4.3.0.png|Blackbelly Skatepark | ||
S2 Map Blackbelly Skatepark Clam Blitz.png|Blackbelly Skatepark prior to version 4.3.0 | |||
S2 Map MakoMart Clam Blitz.png|MakoMart | S2 Map MakoMart Clam Blitz.png|MakoMart | ||
S2 Map Walleye Warehouse Clam Blitz.png|Walleye Warehouse | S2 Map Walleye Warehouse Clam Blitz.png|Walleye Warehouse | ||
S2 Map Shellendorf Institute Clam Blitz.png|Shellendorf Institute | S2 Map Shellendorf Institute Clam Blitz 5.0.0.png|Shellendorf Institute | ||
S2 Map Shellendorf Institute Clam Blitz.png|Shellendorf Institute prior to version 5.0.0 | |||
S2 Map Arowana Mall Clam Blitz.png|Arowana Mall | S2 Map Arowana Mall Clam Blitz.png|Arowana Mall | ||
S2 Map Goby Arena Clam Blitz.png|Goby Arena | S2 Map Goby Arena Clam Blitz.png|Goby Arena | ||
| Line 323: | Line 341: | ||
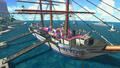
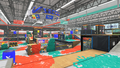
<gallery> | <gallery> | ||
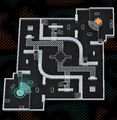
S2 Stage Wayslide Cool.png|[[Wayslide Cool]] | S2 Stage Wayslide Cool.png|[[Wayslide Cool]] | ||
S2 Stage The Secret of | S2 Stage The Secret of SPLAT.jpg|[[The Secret of S.P.L.A.T.]] | ||
S2 Stage Goosponge.png|[[Goosponge]] | S2 Stage Goosponge.png|[[Goosponge]] | ||
S2 Stage Windmill House on the Pearlie.png|[[Windmill House on the Pearlie]] | S2 Stage Windmill House on the Pearlie.png|[[Windmill House on the Pearlie]] | ||
| Line 329: | Line 347: | ||
S2 Stage Zone of Glass.png|[[Zone of Glass]] | S2 Stage Zone of Glass.png|[[Zone of Glass]] | ||
S2 Stage Cannon Fire Pearl.jpg|[[Cannon Fire Pearl]] | S2 Stage Cannon Fire Pearl.jpg|[[Cannon Fire Pearl]] | ||
S2 Stage The Bunker Games. | S2 Stage The Bunker Games.jpg|[[The Bunker Games]] | ||
S2 Stage Grapplink Girl.png|[[Grapplink Girl]] | S2 Stage Grapplink Girl.png|[[Grapplink Girl]] | ||
S2 Stage Zappy Longshocking.png|[[Zappy Longshocking]] | S2 Stage Zappy Longshocking.png|[[Zappy Longshocking]] | ||
| Line 343: | Line 361: | ||
S2 Stage The Ink is Spreading.png|[[The Ink is Spreading]] | S2 Stage The Ink is Spreading.png|[[The Ink is Spreading]] | ||
S2 Stage Bridge to Tentaswitchia.jpg|[[Bridge to Tentaswitchia]] | S2 Stage Bridge to Tentaswitchia.jpg|[[Bridge to Tentaswitchia]] | ||
S2 Stage The Chronicles of Rolonium. | S2 Stage The Chronicles of Rolonium.jpg|[[The Chronicles of Rolonium]] | ||
S2 Stage Furler in the Ashes. | S2 Stage Furler in the Ashes.jpg|[[Furler in the Ashes]] | ||
S2 Stage MC.Princess Diaries.png|[[MC.Princess Diaries]] | S2 Stage MC.Princess Diaries.png|[[MC.Princess Diaries]] | ||
</gallery> | </gallery> | ||
| Line 386: | Line 404: | ||
=== Other === | === Other === | ||
<gallery> | <gallery> | ||
S3 Unknown Stage.png|Mystery stage before season begins as shown in [[Splatoon 3]]. | |||
S3 Stage Not Found.png|Mystery stage before season begins as shown in [[SplatNet 3|Splatnet 3]]. | |||
</gallery> | </gallery> | ||
=== Cover === | === Cover === | ||
<gallery> | <gallery> | ||
S3 Stage Scorch Gorge.png|Stage Scorch Gorge | |||
S3 Stage Eeltail Alley.png|Eeltail Alley | |||
S3 Stage Hagglefish Market.png|Hagglefish Market | |||
S3 Stage Undertow Spillway.png|Undertow Spillway | |||
S3 Stage Mincemeat Metalworks.png|Mincemeat Metalworks | |||
S3 Stage Hammerhead Bridge.png|Hammerhead Bridge | |||
S3 Stage Museum d'Alfonsino.png|Museum d'Alfonso | |||
S3 Stage Mahi-Mahi Resort.png|Mahi-Mahi Resort | |||
S3 Stage Inkblot Art Academy.png|Inkblot Art Academy | |||
S3 Stage Sturgeon Shipyard.png|Sturgeon Shipyard | |||
S3 Stage MakoMart.png|Makomart | |||
S3 Stage Wahoo World.png|Wahoo World | |||
S3 Stage Brinewater Springs.png|Brunewater Springs | |||
S3 Stage Flounder Heights.png|Flounder Heights | |||
S3 Stage Um'ami Ruins.png|Um'ami Ruins | |||
S3 Stage Manta Maria.png|Manta Maria | |||
S3 Stage Barnacle & Dime.png|Barnacle & Dime | |||
S3 Stage Humpback Pump Track.png|Humpback Pump | |||
S3 Stage Crableg Capital.png|Crableg Capital | |||
S3 Stage Shipshape Cargo Co..png|Shipshape Cargo Co.. | |||
S3 Stage Robo ROM-en.png|Robo ROM-en | |||
S3 Stage Bluefin Depot.png|Bluefin Depot | |||
S3 Stage Marlin Airport.png|Marlin Airport | |||
</gallery> | </gallery> | ||
| Line 418: | Line 439: | ||
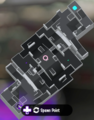
==== Map ==== | ==== Map ==== | ||
<gallery> | <gallery> | ||
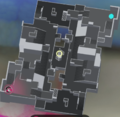
S3 Map Scorch Gorge Turf War.jpg|[[Scorch Gorge]] | |||
Splatoon 3 3.0 Eeltail Alley Turf War Layout.png|[[Eeltail Alley]] | |||
S3 Map Hagglefish Market Turf War 3.0.jpg|[[Hagglefish Market]] | |||
S3 Map Undertow Spillway Turf War 7.2.0.jpg|[[Undertow Spillway]] | |||
S3 Map Undertow Spillway Turf War 2.0.0.jpg|Undertow Spillway prior to version {{Ver|S3|7.2.0}} | |||
S3 6.1 Mincemeat Metalworks Turf War Layout.jpg|[[Mincemeat Metalworks]] | |||
S3 Map Mincemeat Metalworks Turf War 3.0.jpg|Mincemeat Metalworks prior to version {{Ver|S3|6.1.0}} | |||
S3 Map Hammerhead Bridge Turf War 3.0.jpg|[[Hammerhead Bridge]] | |||
S3 Map Museum d'Alfonsino Turf War 3.0.jpg|[[Museum d'Alfonsino]] | |||
S3 5.1 Mahi Mahi Turf War Layout.jpg|[[Mahi-Mahi Resort]] before the water level drops | |||
S3 5.1 Mahi Mahi Turf War Layout Dropped.jpg|Mahi-Mahi Resort after the water level drops | |||
Splatoon 3 3.0 Mahi Mahi Turf War Layout.jpg|Mahi-Mahi Resort before the water level drops prior to version {{Ver|S3|5.1.0}} | |||
S3 3.0 Mahi Mahi Turf War Layout Dropped.jpg|Mahi-Mahi Resort after the water level drops prior to version 5.1.0 | |||
S3 Map Inkblot Art Academy Turf War.jpg|[[Inkblot Art Academy]] | |||
S3 Map Sturgeon Shipyard Turf War.jpg|[[Sturgeon Shipyard]] | |||
S3 Map MakoMart Turf War 3.0.jpg|[[MakoMart]] | |||
S3 Map Wahoo World Turf War 3.0.jpg|[[Wahoo World]] | |||
S3 Map Brinewater Springs Turf War.jpg|[[Brinewater Springs]] | |||
S3 Stage Flounder Heights Turf War.jpg|[[Flounder Heights]] | |||
S3 Map Um'ami Ruins Turf War.jpg|[[Um'ami Ruins]] | |||
S3 Map Manta Maria Turf War.jpg|[[Manta Maria]] | |||
S3 Map Barnacle & Dime Turf War.png|[[Barnacle & Dime]] | |||
S3 Map Humpback Pumptrack Turf War.jpg|[[Humpback Pump Track]] | |||
S3 Map Crableg Capital Turf War.jpg|[[Crableg Capital]] | |||
S3 Map Shipshape Cargo Co Turf War.jpg|[[Shipshape Cargo Co.]] | |||
S3 Map Robo ROM-en Turf War.jpg|[[Robo ROM-en]] | |||
S3 Map Bluefin Depot Turf War.png|[[Bluefin Depot]] | |||
S3 Map Marlin Airport Turf War.png|[[Marlin Airport]] | |||
</gallery> | </gallery> | ||
==== Overhead ==== | ==== Overhead ==== | ||
<gallery> | <gallery> | ||
Hagglefish Market Overhead View.jpg|Hagglefish Market | |||
Undertow Spillway Overhead view.jpg|Undertow Spillway | |||
Hammerhead Bridge Overhead View.jpg|Hammerhead Bridge | |||
Sturgeon Shipyard Overhead Look.jpg|Sturgeon Shipyard | |||
Brinewater Springs Overview.jpg|Brinewater Springs | |||
Crableg Capital Overhead View Turf War.jpg|[[Crableg Capital]] | |||
</gallery> | </gallery> | ||
| Line 453: | Line 483: | ||
==== Map ==== | ==== Map ==== | ||
<gallery> | <gallery> | ||
S3 Map Scorch Gorge Splat Zones.jpg|Scorch Gorge | |||
Splatoon 3 3.0 Eeltail Alley Splat Zones Layout.png|Eeltail Alley | |||
S3 Map Hagglefish Market Splat Zones 3.0.jpg|Hagglefish Market | |||
S3 Map Undertow Spillway Splat Zones 7.2.0.jpg|Undertow Spillway | |||
S3 Map Undertow Spillway Splat Zones 2.0.0.jpg|Undertow Spillway prior to version 7.2.0 | |||
S3 6.1 Mincemeat Metalworks Splat Zones Layout.jpg|Mincemeat Metalworks | |||
S3 Map Mincemeat Metalworks Splat Zones 3.0.jpg|Mincemeat Metalworks prior to version 6.1.0 | |||
S3 Map Hammerhead Bridge Splat Zones 3.0.jpg|Hammerhead Bridge | |||
S3 Map Museum d'Alfonsino Splat Zones 3.0.jpg|Museum d'Alfonsino | |||
S3 5.1 Mahi Mahi Splat Zones Layout.jpg|Mahi-Mahi Resort before the water level drops | |||
S3 5.1 Mahi Mahi Splat Zones Layout Dropped.jpg|Mahi-Mahi Resort after the water level drops | |||
Splatoon 3 3.0 Mahi Mahi Splat Zones Layout.jpg|Mahi-Mahi Resort before the water level drops prior to version 5.1.0 | |||
S3 3.0 Mahi Mahi Splat Zones Layout Dropped.jpg|Mahi-Mahi Resort after the water level drops prior to version 5.1.0 | |||
S3 Map Inkblot Art Academy Splat Zones.jpg|Inkblot Art Academy | |||
S3 Map Sturgeon Shipyard Splat Zones.jpg|Sturgeon Shipyard | |||
S3 Map MakoMart Splat Zones 3.0.jpg|MakoMart | |||
S3 Map Wahoo World Splat Zones 3.0.jpg|Wahoo World | |||
S3 Map Brinewater Springs Splat Zones.jpg|Brinewater Springs | |||
S3 Stage Flounder Heights Splat Zones.jpg|Flounder Heights | |||
S3 Map Um'ami Ruins Splat Zones.jpg|Um'ami Ruins | |||
S3 Map Manta Maria Splat Zones.jpg|Manta Maria | |||
S3 Map Barnacle & Dime Splat Zones.png|Barnacle & Dime | |||
S3 Map Humpback Pumptrack Splat Zones.jpg|Humpback Pump Track | |||
S3 Map Crableg Capital Splat Zones.jpg|Crableg Capital | |||
S3 Map Shipshape Cargo Co Splat Zones.jpg|Shipshape Cargo Co. | |||
S3 Map Robo ROM-en Splat Zones.jpg|Robo ROM-en | |||
S3 Map Bluefin Depot Splat Zones.png|Bluefin Depot | |||
S3 Map Marlin Airport Splat Zones.png|Marlin Airport | |||
</gallery> | </gallery> | ||
| Line 482: | Line 519: | ||
==== Map ==== | ==== Map ==== | ||
<gallery> | <gallery> | ||
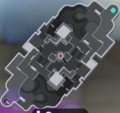
S3 Map Scorch Gorge Tower Control.jpg|Scorch Gorge | |||
Splatoon 3 3.0 Eeltail Alley Tower Control Layout.png|Eeltail Alley | |||
S3 Map Hagglefish Market Tower Control.jpg|Hagglefish Market | S3 Map Hagglefish Market Tower Control.jpg|Hagglefish Market | ||
S3 Map Undertow Spillway Tower Control 7.2.0.jpg|Undertow Spillway | |||
S3 Map Undertow Spillway Tower Control 2.0.0.jpg|Undertow Spillway prior to version 7.2.0 | |||
S3 6.1 Mincemeat Metalworks Tower Control Layout.jpg|Mincemeat Metalworks | |||
S3 Map Mincemeat Metalworks Tower Control.jpg|Mincemeat Metalworks prior to version 6.1.0 | |||
S3 Map Hammerhead Bridge Tower Control 3.0.jpg|Hammerhead Bridge | |||
S3 Map Museum d'Alfonsino Tower Control.jpg|Museum d'Alfonsino | |||
S3 5.1 Mahi Mahi Tower Control Layout.jpg|Mahi-Mahi Resort before the water level drops | |||
S3 5.1 Mahi Mahi Tower Control Layout Dropped.jpg|Mahi-Mahi Resort after the water level drops | |||
Mahi-Mahi Resort Tower Control.jpg|Mahi-Mahi Resort before the water level drops prior to version 5.1.0 | |||
S3 Map Map Tower Control Water Drop Mahi Mahi Resort.jpg|Mahi-Mahi Resort after the water level drops prior to version 5.1.0 | |||
S3 Map Inkblot Art Academy Tower Control.jpg|Inkblot Art Academy | |||
S3 Map Sturgeon Shipyard Tower Control.jpg|Sturgeon Shipyard | |||
S3 Map MakoMart Tower Control 3.0.jpg|MakoMart | |||
S3 Map Wahoo World Tower Control.jpg|Wahoo World | |||
S3 Map Brinewater Springs Tower Control.jpg|Brinewater Springs | |||
S3 Stage Flounder Heights Tower Control.jpg|Flounder Heights | |||
S3 Map Um'ami Ruins Tower Control.jpg|Um'ami Ruins | |||
S3 Map Manta Maria Tower Control.jpg|Manta Maria | |||
S3 Map Barnacle & Dime Tower Control.png|Barnacle & Dime | |||
S3 Map Humpback Pumptrack Tower Control.jpg|Humpback Pump Track | |||
S3 Map Crableg Capital Tower Control.jpg|Crableg Capital | |||
S3 Map Shipshape Cargo Co Tower Control.jpg|Shipshape Cargo Co. | |||
S3 Map Robo ROM-en Tower Control.jpg|Robo ROM-en | |||
S3 Map Bluefin Depot Tower Control.png|Bluefin Depot | |||
S3 Map Marlin Airport Tower Control.png|Marlin Airport | |||
</gallery> | </gallery> | ||
| Line 510: | Line 554: | ||
==== Map ==== | ==== Map ==== | ||
<gallery> | |||
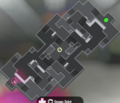
S3 Map Scorch Gorge Rainmaker.jpg|Scorch Gorge | |||
Splatoon 3 3.0 Eeltail Alley Rainmaker Layout.png|Eeltail Alley | |||
S3 Map Hagglefish Market Rainmaker.jpg|Hagglefish Market | |||
S3 Map Undertow Spillway Rainmaker 7.2.0.jpg|Undertow Spillway | |||
S3 Map Undertow Spillway Rainmaker 2.0.0.jpg|Undertow Spillway prior to version 7.2.0 | |||
S3 6.1 Mincemeat Metalworks Rainmaker Layout.jpg|Mincemeat Metalworks | |||
S3 Map Mincemeat Metalworks Rainmaker 3.0.jpg|Mincemeat Metalworks prior to version 6.1.0 | |||
S3 Map Hammerhead Bridge Rainmaker 3.0.jpg|Hammerhead Bridge | |||
S3 Map Museum d'Alfonsino Rainmaker 3.0.jpg|Museum d'Alfonsino | |||
S3 5.1 Mahi Mahi Rainmaker Layout.jpg|Mahi-Mahi Resort before the water level drops | |||
S3 5.1 Mahi Mahi Rainmaker Layout Dropped.jpg|Mahi-Mahi Resort after the water level drops | |||
S3 Map Mahi-Mahi Resort Rainmaker.jpg|Mahi-Mahi Resort before the water level drops prior to version 5.1.0 | |||
S3 Map Map Rainmaker Water Drop Mahi Mahi Resort.jpg|Mahi-Mahi Resort after the water level drops prior to version 5.1.0 | |||
S3 Map Inkblot Art Academy Rainmaker.jpg|Inkblot Art Academy | |||
S3 Map Sturgeon Shipyard Rainmaker.jpg|Sturgeon Shipyard | |||
S3 Map Mako Mart Rainmaker.jpg|MakoMart | |||
S3 Map Wahoo World Rainmaker.jpg|Wahoo World | |||
S3 Map Brinewater Springs Rainmaker.jpg|Brinewater Springs | |||
S3 Stage Flounder Heights Rainmaker.jpg|Flounder Heights | |||
S3 Map Um'ami Ruins Rainmaker.jpg|Um'ami Ruins | |||
S3 Map Manta Maria Rainmaker.jpg|Manta Maria | |||
S3 Map Barnacle & Dime Rainmaker.png|Barnacle & Dime | |||
S3 Map Humpback Pumptrack Rainmaker.jpg|Humpback Pump Track | |||
S3 Map Crableg Capital Rainmaker.jpg|Crableg Capital | |||
S3 Map Shipshape Cargo Co Rainmaker.jpg|Shipshape Cargo Co. | |||
S3 Map Robo ROM-en Rainmaker.jpg|Robo ROM-en | |||
S3 Map Bluefin Depot Rainmaker.png|Bluefin Depot | |||
S3 Map Marlin Airport Rainmaker.png|Marlin Airport | |||
</gallery> | |||
==== Overhead ==== | ==== Overhead ==== | ||
| Line 516: | Line 590: | ||
==== Map ==== | ==== Map ==== | ||
<gallery> | |||
S3 Map Scorch Gorge Clam Blitz.jpg|Scorch Gorge | |||
Splatoon 3 3.0 Eeltail Alley Clam Blitz Layout.png|Eeltail Alley | |||
S3 Map Hagglefish Market Clam Blitz 3.0.jpg|Hagglefish Market | |||
S3 Map Undertow Spillway Clam Blitz 7.2.0.jpg|Undertow Spillway | |||
S3 Map Undertow Spillway Clam Blitz 2.0.0.jpg|Undertow Spillway prior to version 7.2.0 | |||
S3 6.1 Mincemeat Metalworks Clam Blitz Layout.jpg|Mincemeat Metalworks | |||
S3 Map Mincemeat Metalworks Clam Blitz 3.0.jpg|Mincemeat Metalworks prior to version 6.1.0 | |||
S3 Map Hammerhead Bridge Clam Blitz 3.0.jpg|Hammerhead Bridge | |||
S3 Map Museum d'Alfonsino Clam Blitz 3.0.jpg|Museum d'Alfonsino | |||
S3 5.1 Mahi Mahi Clam Blitz Layout.jpg|Mahi-Mahi Resort before the water level drops | |||
S3 5.1 Mahi Mahi Clam Blitz Layout Dropped.jpg|Mahi-Mahi Resort after the water level drops | |||
S3 Map Mahi-Mahi Resort Clam Blitz.jpg|Mahi-Mahi Resort before the water level drops prior to version 5.1.0 | |||
S3 Map Map Clam Blitz Water Drop Mahi Mahi Resort.jpg|Mahi-Mahi Resort after the water level drops prior to version 5.1.0 | |||
S3 Map Inkblot Art Academy Clam Blitz.jpg|Inkblot Art Academy | |||
S3 Map Sturgeon Shipyard Clam Blitz.jpg|Sturgeon Shipyard | |||
S3 Map MakoMart Clam Blitz 3.0.jpg|MakoMart | |||
S3 Map Wahoo World Clam Blitz 3.0.jpg|Wahoo World | |||
S3 Map Brinewater Springs Clam Blitz.jpg|Brinewater Springs | |||
S3 Stage Flounder Heights Clam Blitz.jpg|Flounder Heights | |||
S3 Map Um'ami Ruins Clam Blitz.jpg|Um'ami Ruins | |||
S3 Map Manta Maria Clam Blitz.jpg|Manta Maria | |||
S3 Map Barnacle & Dime Clam Blitz.png|Barnacle & Dime | |||
S3 Map Humpback Pumptrack Clam Blitz.jpg|Humpback Pump Track | |||
S3 Map Crableg Capital Clam Blitz.jpg|Crableg Capital | |||
S3 Map Shipshape Cargo Co Clam Blitz.jpg|Shipshape Cargo Co. | |||
S3 Map Robo ROM-en Clam Blitz.jpg|Robo ROM-en | |||
S3 Map Bluefin Depot Clam Blitz.png|Bluefin Depot | |||
S3 Map Marlin Airport Clam Blitz.png|Marlin Airport | |||
</gallery> | |||
==== Overhead ==== | ==== Overhead ==== | ||
=== Tricolor Turf War === | === Tricolor Turf War === | ||
==== Map ==== | ==== Map ==== | ||
<gallery> | |||
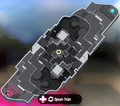
S3 Sturgeon Tricolor Old.jpg|Sturgeon Shipyard ([[Rock vs. Paper vs. Scissors]]) | |||
S3 Map Tri Color Turf War Hammerhead Bridge.jpg|Hammerhead Bridge ([[Gear vs. Grub vs. Fun]]) | |||
S3 Sturgeon Tricolor New.jpg|Sturgeon Shipyard ([[Grass vs. Fire vs. Water]]) | |||
S3 Map Undertow Spillway Tricolor Turf War.jpg|Undertow Spillway ([[Spicy vs. Sweet vs. Sour]]) | |||
S3 Map Mincemeat Metalworks Tricolor Turf War.jpg|Mincemeat Metalworks ([[Dark Chocolate vs. Milk Chocolate vs. White Chocolate]]) | |||
S3 Map MakoMart Tricolor Turf War.jpg|MakoMart ([[Nessie vs. Aliens vs. Bigfoot]]) | |||
S3 Map Scorch Gorge Tricolor Turf War.jpg|Scorch Gorge ([[Power vs. Wisdom vs. Courage]]) | |||
S3 Map Barnacle & Dime Tricolor Turf War.jpg|Barnacle & Dime ([[Vanilla vs. Strawberry vs. Mint Chip]]) | |||
S3 Map Eeltail Alley Tricolor Turf War.jpg|Eeltail Alley ([[Money vs. Fame vs. Love]]) | |||
S3 Map Brinewater Springs Tricolor.jpg|Brinewater Springs ([[Zombie vs. Skeleton vs. Ghost]]) | |||
S3 Map Manta Maria Tricolor.jpg|Manta Maria ([[Handshake vs. Fist Bump vs. Hug]] / [[Kaiten-yaki vs. Ōban-yaki vs. Imagawa-yaki]]) | |||
S3 Map Crableg Capital Tricolor Turf War.jpg|Crableg Capital ([[Friends vs. Family vs. Solo]]) | |||
S3 Map Bluefin Depot Tricolor.jpg|Bluefin Depot ([[Friday vs. Saturday vs. Sunday]] / [[Red Bean Paste vs. Custard vs. Whipped Cream]]) | |||
S3 Map Flounder Heights Tricolor Turf War.jpg|Flounder Heights ([[Drums vs. Guitar vs. Keyboard]] / [[Lightly Salted vs. Consommé vs. Salted Seaweed]]) | |||
S3 Map Mahi-Mahi Resort Tricolor Turf War.jpg|Mahi-Mahi Resort before the water level drops ([[Baby Chicks vs. Li'l Bunnies vs. Bear Cubs]]) | |||
S3 Map Mahi-Mahi Resort Water Dropped Tricolor Turf War.jpg|Mahi-Mahi Resort after the water level drops (Baby Chicks vs. Li'l Bunnies vs. Bear Cubs) | |||
</gallery> | |||
==== Overhead ==== | ==== Overhead ==== | ||
<gallery> | <gallery> | ||
S3 Sturgeon Shipyard Tricolor.jpg|Sturgeon Shipyard ( | S3 Sturgeon Shipyard Tricolor.jpg|Sturgeon Shipyard (Rock vs. Paper vs. Scissors) | ||
S3 Hammerhead Bridge Tricolor.jpg|Hammerhead Bridge | S3 Hammerhead Bridge Tricolor.jpg|Hammerhead Bridge (Gear vs. Grub vs. Fun) | ||
S3 Sturgeon Shipyard 2 Tricolor.jpg|Sturgeon Shipyard ( | S3 Sturgeon Shipyard 2 Tricolor.jpg|Sturgeon Shipyard (Grass vs. Fire vs. Water) | ||
S3 Undertow Tricolor.jpg|Undertow Spillway | S3 Undertow Tricolor.jpg|Undertow Spillway (Spicy vs. Sweet vs. Sour) | ||
S3 Mincemeat Tricolor.jpg|Mincemeat Metalworks | S3 Mincemeat Tricolor.jpg|Mincemeat Metalworks (Dark Chocolate vs. Milk Chocolate vs. White Chocolate) | ||
S3 MakoMart Tricolor.jpg|MakoMart | S3 MakoMart Tricolor.jpg|MakoMart (Nessie vs. Aliens vs. Bigfoot) | ||
S3 Gorge Tricolor.jpg|Scorch Gorge | S3 Gorge Tricolor.jpg|Scorch Gorge (Power vs. Wisdom vs. Courage) | ||
S3 Barnacle & Dime Tricolor.png|Barnacle & Dime | S3 Barnacle & Dime Tricolor.png|Barnacle & Dime (Vanilla vs. Strawberry vs. Mint Chip) | ||
S3 Eeltail Alley Tricolor.png|Eeltail Alley | S3 Eeltail Alley Tricolor.png|Eeltail Alley (Money vs. Fame vs. Love) | ||
S3 Brinewater Springs Tricolor.png|Brinewater Springs | S3 Brinewater Springs Tricolor.png|Brinewater Springs (Zombie vs. Skeleton vs. Ghost) | ||
S3 Manta Maria Tricolor.png|Manta Maria | S3 Manta Maria Tricolor.png|Manta Maria (Kaiten-yaki vs. Ōban-yaki vs. Imagawa-yaki) | ||
S3 Crableg Capital Tricolor.png|Crableg Capital (Friends vs. Family vs. Solo) | |||
S3 Bluefin Depot Tricolor.png|Bluefin Depot (Friday vs. Saturday vs. Sunday) | |||
S3 Flounder Heights Tricolor.png|Flounder Heights (Drums vs. Guitar vs. Keyboard) | |||
S3 Mahi-Mahi Resort Tricolor.png|Mahi-Mahi Resort before the water level drops (Baby Chicks vs. Li'l Bunnies vs. Bear Cubs) | |||
S3 Mahi-Mahi Resort Tricolor Dropped.png|Mahi-Mahi Resort after the water level drops (Baby Chicks vs. Li'l Bunnies vs. Bear Cubs) | |||
</gallery> | </gallery> | ||
[[Category:Galleries]] | [[Category:Galleries]] | ||
Revision as of 01:10, 28 April 2024

Reason: Needs all map layouts & descriptions
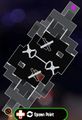
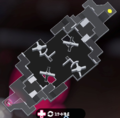
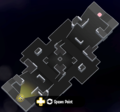
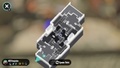
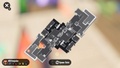
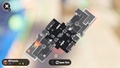
This is the gallery of stages.
Splatoon
Other
-

This image shows Urchin Underpass, Walleye Warehouse, Saltspray Rig & Blackbelly Skatepark.
-

This image shows Camp Triggerfish, Moray Towers, Flounder Heights & Hammerhead Bridge.
-
This image shows Museum d'Alfonsino, Piranha Pit, Mahi-Mahi Resort & Ancho-V Games.
-
This image shows Arowana Mall, Port Mackerel, Kelp Dome & Bluefin Depot.


Cover
-
Urchin Underpass
-
Walleye Warehouse
-
Saltspray Rig
-
Arowana Mall
-

Blackbelly Skatepark
-
Port Mackerel
-
Kelp Dome
-
Bluefin Depot
-
Moray Towers
-

Camp Triggerfish
-
Flounder Heights
-
Hammerhead Bridge
-
Museum d'Alfonsino
-
Mahi-Mahi Resort
-
Piranha Pit
-
Ancho-V Games


Turf War
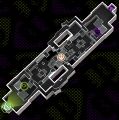
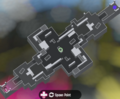
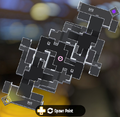
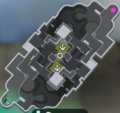
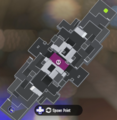
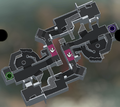
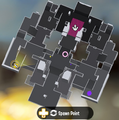
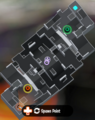
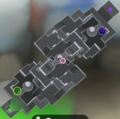
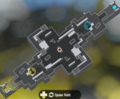
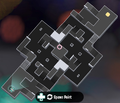
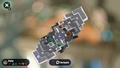
Map
-
-
Urchin Underpass prior to version 2.0.0
-
-
-
-
-
-
-
-
-
-
-
-
-

Mahi-Mahi Resort before the water level drops
-
Mahi-Mahi Resort after the water level drops
-
-


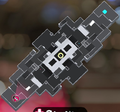
Overhead
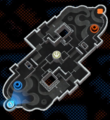
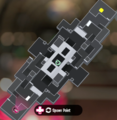
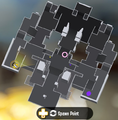
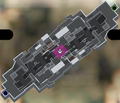
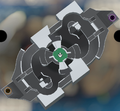
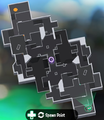
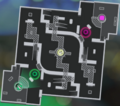
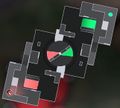
Splat Zones
Map
-
Urchin Underpass
-
Walleye Warehouse
-
Saltspray Rig
-
Arowana Mall
-
Blackbelly Skatepark
-
Port Mackerel
-
Kelp Dome
-
Bluefin Depot
-

Moray Tower
-
Camp Triggerfish
-
Flounder Heights
-
Hammerhead Bridge
-
Museum d'Alfonsino
-
Mahi-Mahi Resort before the water level drops
-
Mahi-Mahi Resort after the water level drops
-
Piranha Pit
-
Ancho-V Games


Overhead
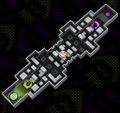
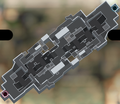
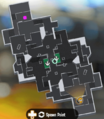
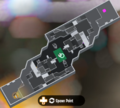
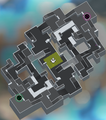
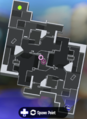
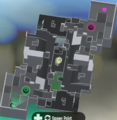
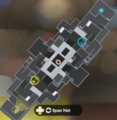
Tower Control
Map
-
Urchin Underpass
-
Walleye Warehouse
-
Saltspray Rig
-
Arowana Mall
-
Blackbelly Skatepark
-
Port Mackerel
-
Kelp Dome
-
Bluefin Depot
-
Moray Tower
-
Camp Triggerfish
-

Flounder Heights
-
Hammerhead Bridge
-
Museum d'Alfonsino
-
Mahi-Mahi Resort before the water level drops
-
Mahi-Mahi Resort after the water level drops
-
Piranha Pit
-
Ancho-V Games


Overhead
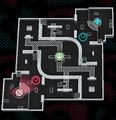
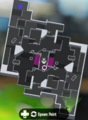
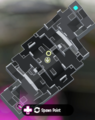
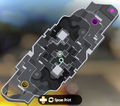
Rainmaker
Map
-
Urchin Underpass
-
Walleye Warehouse
-
Saltspray Rig
-
Arowana Mall
-
Blackbelly Skatepark
-
Port Mackerel
-
Kelp Dome
-
Bluefin Depot
-
Moray Tower
-
Camp Triggerfish
-
Flounder Heights
-
Hammerhead Bridge
-
Museum d'Alfonsino
-

Mahi-Mahi Resort before the water level drops
-
Mahi-Mahi Resort after the water level drops
-
Piranha Pit
-
Ancho-V Games


Overhead
Splatoon 2
Cover
-
The Reef
-
Musselforge Fitness
-
Starfish Mainstage
-
Humpback Pump Track
-
Inkblot Art Academy
-
Moray Towers
-
Port Mackerel
-
Sturgeon Shipyard
-
Manta Maria
-
Kelp Dome
-
Snapper Canal
-
Blackbelly Skatepark
-
MakoMart
-
Walleye Warehouse
-
Shellendorf Institute
-
Arowana Mall
-

Goby Arena
-

Piranha Pit
-
Camp Triggerfish
-

Wahoo World
-
New Albacore Hotel
-
Ancho-V Games
-
Skipper Pavilion


Turf War
Map
-
-
The Reef prior to version 4.2.0
-
-
-
Starfish Mainstage prior to version 4.0.0
-
-
-

-
-
-
-
-
-
-
Blackbelly Skatepark prior to version 4.3.0
-
-
-
-
Shellendorf Institute prior to version 5.0.0
-
-
-
-
-

-
-
-


Overhead
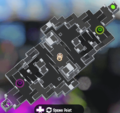
Splat Zones
Map
-
The Reef
-
The Reef prior to version 4.2.0
-
Musselforge Fitness
-
Starfish Mainstage
-
Starfish Mainstage prior to version 4.0.0
-
Humpback Pump Track
-
Inkblot Art Academy
-
Moray Towers
-
Port Mackerel
-
Sturgeon Shipyard
-
Manta Maria
-
Kelp Dome
-
Snapper Canal
-
Blackbelly Skatepark
-
Blackbelly Skatepark prior to version 4.3.0
-
MakoMart
-
Walleye Warehouse
-
Shellendorf Institute
-
Shellendorf Institute prior to version 5.0.0
-
Arowana Mall
-
Goby Arena
-
Piranha Pit
-
Camp Triggerfish
-
Wahoo World
-
New Albacore Hotel
-
Ancho-V Games
-
Skipper Pavilion


Overhead
Tower Control
Map
-
The Reef
-
The Reef prior to version 4.2.0
-
Musselforge Fitness
-

Starfish Mainstage
-
Starfish Mainstage prior to version 4.0.0
-
Humpback Pump Track
-
Inkblot Art Academy
-

Moray Towers
-
Port Mackerel
-
Sturgeon Shipyard
-
Manta Maria
-
Kelp Dome
-
Snapper Canal
-
Blackbelly Skatepark
-
Blackbelly Skatepark prior to version 4.3.0
-
MakoMart
-
Walleye Warehouse
-
Shellendorf Institute
-
Shellendorf Institute prior to version 5.0.0
-
Arowana Mall
-
Goby Arena
-
Piranha Pit
-
Camp Triggerfish
-
Wahoo World
-
New Albacore Hotel
-
Ancho-V Games
-
Skipper Pavilion


Overhead
Rainmaker
Map
-
The Reef
-
The Reef prior to version 4.2.0
-
Musselforge Fitness
-
Starfish Mainstage
-
Starfish Mainstage prior to version 4.0.0
-
Humpback Pump Track
-
Inkblot Art Academy
-
Moray Towers
-
Port Mackerel
-
Sturgeon Shipyard
-
Manta Maria
-
Kelp Dome
-
Snapper Canal
-
Blackbelly Skatepark
-

Blackbelly Skatepark prior to version 4.3.0
-
MakoMart
-
Walleye Warehouse
-
Shellendorf Institute
-
Shellendorf Institute prior to version 5.0.0
-
Arowana Mall
-
Goby Arena
-
Piranha Pit
-

Camp Triggerfish
-
Wahoo World
-
New Albacore Hotel
-
Ancho-V Games
-
Skipper Pavilion


Overhead
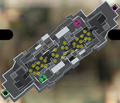
Clam Blitz
Map
-
The Reef
-
The Reef prior to version 4.2.0
-
Musselforge Fitness
-

Starfish Mainstage
-
Starfish Mainstage prior to version 4.0.0
-
Humpback Pump Track
-
Inkblot Art Academy
-
Moray Towers
-
Port Mackerel
-
Sturgeon Shipyard
-
Manta Maria
-
Kelp Dome
-
Snapper Canal
-

Blackbelly Skatepark
-

Blackbelly Skatepark prior to version 4.3.0
-
MakoMart
-
Walleye Warehouse
-
Shellendorf Institute
-
Shellendorf Institute prior to version 5.0.0
-
Arowana Mall
-
Goby Arena
-
Piranha Pit
-
Camp Triggerfish
-
Wahoo World
-
New Albacore Hotel
-
Ancho-V Games
-
Skipper Pavilion


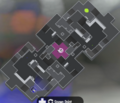
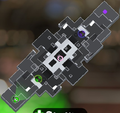
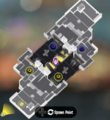
Overhead
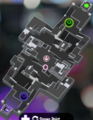
Shifty Stations
Cover


Map
-
Wayslide Cool
-
The Secret of S.P.L.A.T. in 2017
-
The Secret of S.P.L.A.T. starting 2018
-
Goosponge in 2017
-
Goosponge starting 2018
-
Windmill House on the Pearlie in 2017
-
Windmill House on the Pearlie starting 2018
-
Fancy Spew
-

Zone of Glass
-
Cannon Fire Pearl
-

The Bunker Games
-
Grapplink Girl
-
Zappy Longshocking
-
A Swiftly Tilting Balance
-
Sweet Valley Tentacles
-

The Switches
-
The Bouncey Twins
-
Railway Chillin'
-
Gusher Towns
-
The Maze Dasher
-
Flooders in the Attic
-
The Splat in our Zones
-
The Ink is Spreading
-
Bridge to Tentaswitchia
-
The Chronicles of Rolonium
-
Furler in the Ashes before the water level drops
-
Furler in the Ashes after the water level drops
-
MC.Princess Diaries


Overhead
Splatoon 3
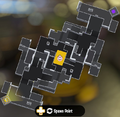
Other
-

Mystery stage before season begins as shown in Splatoon 3.
-

Mystery stage before season begins as shown in Splatnet 3.


Cover
-
Stage Scorch Gorge
-
Eeltail Alley
-
Hagglefish Market
-
Undertow Spillway
-
Mincemeat Metalworks
-

Hammerhead Bridge
-
Museum d'Alfonso
-
Mahi-Mahi Resort
-
Inkblot Art Academy
-
Sturgeon Shipyard
-
Makomart
-
Wahoo World
-
Brunewater Springs
-
Flounder Heights
-
Um'ami Ruins
-
Manta Maria
-
Barnacle & Dime
-
Humpback Pump
-
Crableg Capital
-
Shipshape Cargo Co..
-
Robo ROM-en
-
Bluefin Depot
-
Marlin Airport


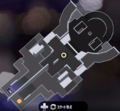
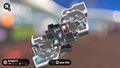
Turf War
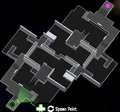
Map
-
-
-
-
-
Undertow Spillway prior to version 7.2.0
-
-
Mincemeat Metalworks prior to version 6.1.0
-
-

-
Mahi-Mahi Resort before the water level drops
-
Mahi-Mahi Resort after the water level drops
-
Mahi-Mahi Resort before the water level drops prior to version 5.1.0
-
Mahi-Mahi Resort after the water level drops prior to version 5.1.0
-
-
-
-
-
-
-
-
-
-

-
-
-
-

-


Overhead
-
Hagglefish Market
-
Undertow Spillway
-

Hammerhead Bridge
-
Sturgeon Shipyard
-
Brinewater Springs
-


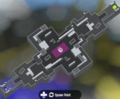
Splat Zones
Map
-
Scorch Gorge
-
Eeltail Alley
-
Hagglefish Market
-
Undertow Spillway
-
Undertow Spillway prior to version 7.2.0
-
Mincemeat Metalworks
-
Mincemeat Metalworks prior to version 6.1.0
-
Hammerhead Bridge
-
Museum d'Alfonsino
-
Mahi-Mahi Resort before the water level drops
-
Mahi-Mahi Resort after the water level drops
-
Mahi-Mahi Resort before the water level drops prior to version 5.1.0
-
Mahi-Mahi Resort after the water level drops prior to version 5.1.0
-
Inkblot Art Academy
-
Sturgeon Shipyard
-
MakoMart
-
Wahoo World
-
Brinewater Springs
-
Flounder Heights
-
Um'ami Ruins
-
Manta Maria
-
Barnacle & Dime
-
Humpback Pump Track
-
Crableg Capital
-
Shipshape Cargo Co.
-

Robo ROM-en
-

Bluefin Depot
-

Marlin Airport


Overhead
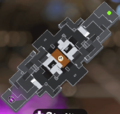
Tower Control
Map
-
Scorch Gorge
-
Eeltail Alley
-
Hagglefish Market
-
Undertow Spillway
-

Undertow Spillway prior to version 7.2.0
-
Mincemeat Metalworks
-
Mincemeat Metalworks prior to version 6.1.0
-
Hammerhead Bridge
-
Museum d'Alfonsino
-
Mahi-Mahi Resort before the water level drops
-

Mahi-Mahi Resort after the water level drops
-
Mahi-Mahi Resort before the water level drops prior to version 5.1.0
-
Mahi-Mahi Resort after the water level drops prior to version 5.1.0
-

Inkblot Art Academy
-

Sturgeon Shipyard
-
MakoMart
-
Wahoo World
-
Brinewater Springs
-
Flounder Heights
-

Um'ami Ruins
-
Manta Maria
-
Barnacle & Dime
-
Humpback Pump Track
-
Crableg Capital
-
Shipshape Cargo Co.
-
Robo ROM-en
-
Bluefin Depot
-
Marlin Airport


Overhead
Rainmaker
Map
-
Scorch Gorge
-
Eeltail Alley
-
Hagglefish Market
-
Undertow Spillway
-
Undertow Spillway prior to version 7.2.0
-
Mincemeat Metalworks
-
Mincemeat Metalworks prior to version 6.1.0
-
Hammerhead Bridge
-
Museum d'Alfonsino
-
Mahi-Mahi Resort before the water level drops
-
Mahi-Mahi Resort after the water level drops
-
Mahi-Mahi Resort before the water level drops prior to version 5.1.0
-
Mahi-Mahi Resort after the water level drops prior to version 5.1.0
-
Inkblot Art Academy
-
Sturgeon Shipyard
-

MakoMart
-
Wahoo World
-
Brinewater Springs
-
Flounder Heights
-
Um'ami Ruins
-
Manta Maria
-
Barnacle & Dime
-
Humpback Pump Track
-
Crableg Capital
-
Shipshape Cargo Co.
-
Robo ROM-en
-
Bluefin Depot
-
Marlin Airport


Overhead
Clam Blitz
Map
-
Scorch Gorge
-
Eeltail Alley
-
Hagglefish Market
-
Undertow Spillway
-
Undertow Spillway prior to version 7.2.0
-
Mincemeat Metalworks
-
Mincemeat Metalworks prior to version 6.1.0
-
Hammerhead Bridge
-
Museum d'Alfonsino
-
Mahi-Mahi Resort before the water level drops
-
Mahi-Mahi Resort after the water level drops
-
Mahi-Mahi Resort before the water level drops prior to version 5.1.0
-
Mahi-Mahi Resort after the water level drops prior to version 5.1.0
-
Inkblot Art Academy
-
Sturgeon Shipyard
-
MakoMart
-
Wahoo World
-
Brinewater Springs
-
Flounder Heights
-
Um'ami Ruins
-
Manta Maria
-
Barnacle & Dime
-
Humpback Pump Track
-
Crableg Capital
-
Shipshape Cargo Co.
-
Robo ROM-en
-
Bluefin Depot
-
Marlin Airport


Overhead
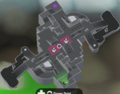
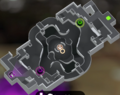
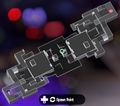
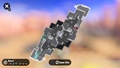
Tricolor Turf War
Map
-
Sturgeon Shipyard (Rock vs. Paper vs. Scissors)
-
Hammerhead Bridge (Gear vs. Grub vs. Fun)
-
Sturgeon Shipyard (Grass vs. Fire vs. Water)
-
Undertow Spillway (Spicy vs. Sweet vs. Sour)
-
Mincemeat Metalworks (Dark Chocolate vs. Milk Chocolate vs. White Chocolate)
-
MakoMart (Nessie vs. Aliens vs. Bigfoot)
-
Scorch Gorge (Power vs. Wisdom vs. Courage)
-
Barnacle & Dime (Vanilla vs. Strawberry vs. Mint Chip)
-
Eeltail Alley (Money vs. Fame vs. Love)
-
Brinewater Springs (Zombie vs. Skeleton vs. Ghost)
-

-
Crableg Capital (Friends vs. Family vs. Solo)
-
Bluefin Depot (Friday vs. Saturday vs. Sunday / Red Bean Paste vs. Custard vs. Whipped Cream)
-
Flounder Heights (Drums vs. Guitar vs. Keyboard / Lightly Salted vs. Consommé vs. Salted Seaweed)
-
Mahi-Mahi Resort before the water level drops (Baby Chicks vs. Li'l Bunnies vs. Bear Cubs)
-
Mahi-Mahi Resort after the water level drops (Baby Chicks vs. Li'l Bunnies vs. Bear Cubs)


Overhead
-
Sturgeon Shipyard (Rock vs. Paper vs. Scissors)
-
Hammerhead Bridge (Gear vs. Grub vs. Fun)
-
Sturgeon Shipyard (Grass vs. Fire vs. Water)
-
Undertow Spillway (Spicy vs. Sweet vs. Sour)
-

Mincemeat Metalworks (Dark Chocolate vs. Milk Chocolate vs. White Chocolate)
-
MakoMart (Nessie vs. Aliens vs. Bigfoot)
-
Scorch Gorge (Power vs. Wisdom vs. Courage)
-
Barnacle & Dime (Vanilla vs. Strawberry vs. Mint Chip)
-
Eeltail Alley (Money vs. Fame vs. Love)
-
Brinewater Springs (Zombie vs. Skeleton vs. Ghost)
-
Manta Maria (Kaiten-yaki vs. Ōban-yaki vs. Imagawa-yaki)
-
Crableg Capital (Friends vs. Family vs. Solo)
-

Bluefin Depot (Friday vs. Saturday vs. Sunday)
-
Flounder Heights (Drums vs. Guitar vs. Keyboard)
-
Mahi-Mahi Resort before the water level drops (Baby Chicks vs. Li'l Bunnies vs. Bear Cubs)
-
Mahi-Mahi Resort after the water level drops (Baby Chicks vs. Li'l Bunnies vs. Bear Cubs)


