***The tent will be very useful to push down moving Octotroopers from the stage and it will wipe out in a second the Octopods.
***The tent will be very useful to push down moving Octotroopers from the stage and it will wipe out in a second the Octopods.
*This [[Brella]]-class weapon isn't very fast, so always pay attention to ink patches and incoming projectiles while fighting enemies.
*This [[Brella]]-class weapon isn't very fast, so always pay attention to ink patches and incoming projectiles while fighting enemies.
**Although it doesn't happen always, with good timing, pressing R (throwing a [[Burst Bomb]]) and instantly pressing ZR right after will slightly reduce shooting timing.
**Although it doesn't happen every time, with good timing, pressing R (throwing a [[Burst Bomb]]) and pressing ZR right after will slightly reduce shooting time.
***This can be also done as an attack combination do get rid of the enemies faster.
***This can be also done as an attack combination to get rid of the enemies faster.
***Keep in mind that this technique will cost more ink than a simple shot.
***Keep in mind that this technique will cost more ink than a simple shot.
****In general, always pay attention to the ink, as this weapon consumes it more than other weapons, and take advantage of the Ink Refillers that you can find during the mission.
****In general, always pay attention to the ink level, as this weapon consumes ink more than other weapons, and take advantage of the Ink Refillers that you can find through the stage.
In this mission, the player has to make their way through pathways guarded by multiple enemies and often stained with big patches of sanitized ink. Touching any enemy ink, either by stepping in it or getting damaged by an enemy will result in the failure of the test. To complicate this, there will be often both obstacles and narrow paths and walls to use as covers, and the weapons provided will have both strenght points and a weakness not to be underestimated. The level is mainly made up of find-the-key situations, and Agent 8 will have to take difficult routes, encountering many enemies ready to shot at them.
Tips: Classic Squiffer
Although being the less expensive choice, facing the mission with the Classic Squiffer still comes with its own risks, paired with some advantages, of course.
It has got a medium-long range: it will allow Agent 8 to splat enemies keeping the distance and to create paths through enemy ink; still, the player musn't overestimate its range: being reckless may lead to fatal mistakes.
Keep the distance from Sanitized Octotroopers and Octopods and take advantage of the fast charging of the Squiffer to quickly splat them.
Use the Curling Bombs, provided alongside the Charger-class weapon, with correct timing and detonation moment, to get rid of static enemies that block your way at the end of a pathway.
Pay attention to the weapon's range and don't underestimate its limits: when facing the Octocommander, for example, wait until it stopped shooting before approaching. Same goes for the Octosniper section too: wait until he has shot before creating a path to proceed.
Always take cover (and a quick rest) from the Octosniper exploiting the walls on the sides of the platform.
Do not approach too quickly and recklessly the Twintacle Octotrooper at the end of the final section, as its wide barrage of bullets can directly hit Agent 8 and cover of sanitized ink the floor under their feet.
The Classic Squiffer has got a relatively quick charging time and, combined with rapid moves and charge storing, is probably the best advantage that this set provides.
The Squiffer consents to walk around fast even when fully charged. Although it's still risky, you can face Octotroopers even while continuously charging and shooting thanks to this.
It is not the best strategy against Octotroopers Bonbon.
Exploit the chance to swim fast and to store the fully charged projectile to swim towards your enemies to improve the possibility of keeping the enemies within the Squiffer's range.
This may be useful especially against the Octosniper.
While charging and moving, always be careful to where you set foot: you risk to end even in a small patch that the Squiffer couldn't cover entirely.
Always ink a lot the pathways to have better freedom of movement and to avoid enemies' projectiles.
Tips: Tenta Brella
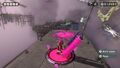
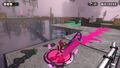
The Tenta Brella, thanks to its long lasting, wide-spreading canopy, provides safety and good ink coverage. With its power and decent range, it's probably the best set for this mission.
Its quite good range and great damage power will allow Agent 8 to splat enemies quickly while keeping the distance from them.
Aiming with precision will one-shot common Octotroopers and heavily damage both the Octocommander and the Octosniper.
Thanks to its large cluster projectile, it is more useful against Shielded Octotroopers, which can be easily splatted by aiming slightly above them to make the fired ink fall on their head.
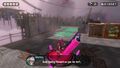
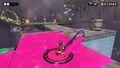
The tent will provide great protection from enemies.
Deploying it in pathways guarded by enemies at the end of them will allow Agent 8 to swim toward them without getting hit by enemy ink.
This will consent the player to get rid of the Octocommander and the Octosniper very easily.
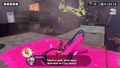
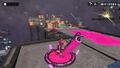
Be patient, as the canopy isn't very fast, and swimming too quickly may lead you to touch enemy ink that the tent hasn't covered yet.
The tent will be very useful to push down moving Octotroopers from the stage and it will wipe out in a second the Octopods.
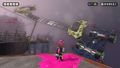
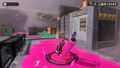
This Brella-class weapon isn't very fast, so always pay attention to ink patches and incoming projectiles while fighting enemies.
Although it doesn't happen every time, with good timing, pressing R (throwing a Burst Bomb) and pressing ZR right after will slightly reduce shooting time.
This can be also done as an attack combination to get rid of the enemies faster.
Keep in mind that this technique will cost more ink than a simple shot.
In general, always pay attention to the ink level, as this weapon consumes ink more than other weapons, and take advantage of the Ink Refillers that you can find through the stage.
Tips: Splat Roller
The Splat Roller, because of its lack of range and need of immediate response to enemy attacks, may be a risky choice. It provides good ink coverage and Curling Bombs will be really useful, but its downsides will make the challenge extremely difficult in case of distraction.
Horizontal swings will be very useful against Octotroopers and Octopods, especially when they're in packs, but they'll be less effective against farther enemies.
Swinging horizontally will be effective against Shielded Octarians as well, because by aiming slightly above them, the splash will fall on their head, splatting them.
Remember to take cover or to be careful of their attacks while doing this.
Vertical swings, with a range almost as long as the Tenta Brella's one, will be useful against further enemies, but only when there are not many of them, as this kind of attack will leave Agent 8 more exposed to attacks and to a possible landing on an enemy ink patch.
To prevent getting hit when facing many enemies that cannot be reached by horizontally swinging the roller, use the Curling Bomb to splat the farthest and most dangerous enemies, or use them to distract the Octarians and to take the time for splat them with your main weapon.
Pushing the roller along the ground will be useful to regain turf, but it's almost useless against enemies, because Octotroopers tend to keep the distance when Agent 8 approaches them and they'll continue to attack, so moving towards them will increase the change of getting hit.
When inking by pushing the roller, always pay attention to the ink tank, because if Agent 8 runs out of ink just right before an enemy ink patch, they'll get damaged and fail the test.
It's better to use this attack mode exclusively for inking purpose and when there aren't any enemies nearby.
Since the Splat Roller can't reach extremely long spots with its swings and can leave Agent 8 exposed to enemy attacks, it's better to use Curling Bombs to splat further enemies, especially when there's a couple of them, but they aren't close to each other.
When moving enemies are roaming near the edges of the platforms, use Curling Bombs to push them out of the stage. This may be really useful in the section after the Octosniper, where three Octotroopers and a Shielded Octotrooper will attack the player from more than one direction, but near the edges of the platforms.
Curling Bombs are also useful to crate a path in the Octosniper section to swim from a cover to the next one to get close to the enemy.


