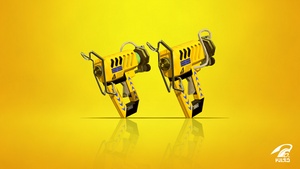
Competitive:Glooga Dualies Deco
From Inkipedia, the Splatoon wiki
Unofficial!
This article discusses content that is not part of the official Splatoon series but is part of the community or competitive gaming space.

This page or section is under construction.
Please excuse its informal appearance while it is being worked on. We hope to have it completed as soon as possible!
Can you help us get it done?
Can you help us get it done?
- For information about the Glooga Dualies Deco, see Glooga Dualies Deco.
Splatoon 2
Glooga Dualies Deco
| Abbreviations | Gloogas, Glooga Deco |
| Sub | |
| Special | |
| Base damage | 36 52.5 (Post-roll) |
| Ink consumption | 1.4% 8% (Roll) |
| Special points | 180p |
| Role | Slayer |
| Strengths | High range and high damage in turret mode, Splash Wall for protection[1] |
| Weaknesses | Poor turfing, long endlag after dodge-rolling, poor falloff damage, poor accuracy with normal fire[1] |
Like its Vanilla and Kensa variants, the Glooga Dualies Deco are dualies with the unique trait of increasing their range and damage after a dodge roll. The sub weapon of Splash Wall is extremely helpful to the weapon, letting it throw a Splash Wall and safely perform a roll to splat an opponent. Baller can be useful in some situations, like helping the Rainmaker push forward by making a path, or capping a zone, using it to get out of a sticky situation can be risky, since the Baller will usually get shredded very quickly.
When placed properly, a Splash Wall can provide great utility, even in stages and areas that are more open:
- Splash Wall has excellent synergy with the Glooga Dualies; tossing a Splash Wall and then rolling forward will put the user directly behind the Splash Wall and allow them to fire through in turret mode.
- Any bombs thrown by an opponent that hit a Splash Wall will instantly explode, potentially splatting the Splash Wall's user or their teammates.
- Refrain from either showering in or rushing through the wall until it is certain that the opponent has no bombs available in the area.
- Defensively, it can hinder the opponents' push, blocking both their movement and their fire.
- Offensively, a Splash Wall can restrain the opponents' movement and range, allowing its user and their teammates to push forward or gain map control.
- Throwing a Splash Wall behind an opponent can prevent them from fleeing.[2]
- A Splash Wall can nullify a Brella shield — even a Tenta Brella shield.
- If an opposing Brella user launches their shield, dropping a Splash Wall in front of it will cause both to negate one another, potentially denying a Rainmaker or Power Clam push.
- At maximum, it takes 36-41% of the ink tank to launch a Brella shield and 60% to drop a Splash Wall. However, the Splash Wall can be deployed far more quickly, allowing its owner more time to reload ink or reposition themselves to a more favorable location.
- In Splatoon 2, the Tower will destroy any Splash Wall it collides into. However, a Splash Wall may still be placed onto the Tower to protect its user or their teammate while riding it. (Once again, watch out for the opponents' bombs.)
References
- ↑ 1.0 1.1
 "My Thoughts on Glooga Dualies in Splatoon 2" by Chase247
- ↑
 "PAX East Finals Pt. 3 | Splatoon 2 NA Inkling Open 2019" Game 6, Arashi (Lowkey) prevents Kyo (FTWin) from fleeing
|

