Return of the Mammalians: Difference between revisions
m (→Trivia) |
Artemis1311 (talk | contribs) (added a Characters section similar to Side Order's) |
||
| (15 intermediate revisions by 8 users not shown) | |||
| Line 13: | Line 13: | ||
{{Quote|Join Agent 3 and the New Squidbeak Splatoon in a hairy fight against the unruly Octarians. Discover the secrets of Alterna and the Fuzzy Ooze.|{{S}}{{'s}} official website}} | {{Quote|Join Agent 3 and the New Squidbeak Splatoon in a hairy fight against the unruly Octarians. Discover the secrets of Alterna and the Fuzzy Ooze.|{{S}}{{'s}} official website}} | ||
'''Return of the Mammalians''' is a single player [[Mode|game mode]] in | '''Return of the Mammalians''' is a single-player [[Mode|game mode]] in {{S3}}. It involves the player donning a [[Hero Suit]] and venturing into [[the Crater]] to defeat the [[Octarian]] army (which is now [[Fuzzy Octarian|covered in hair]]), soon ending up in [[Alterna]]. | ||
==Story== | ==Story== | ||
| Line 47: | Line 47: | ||
==Missions== | ==Missions== | ||
'''Prologue: [[The Crater]]''' | '''Prologue: [[The Crater]]''' | ||
<section begin=Level List Crater/> | <section begin=Level List Crater/> | ||
| Line 169: | Line 168: | ||
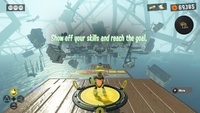
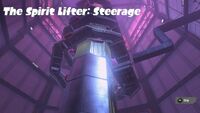
{{level list item|level id={{RotMMission|Rocket|04}}|level name=[[The Spirit Lifter: Steerage]]|image=The Spirit Lifter Steerage.jpg}} | {{level list item|level id={{RotMMission|Rocket|04}}|level name=[[The Spirit Lifter: Steerage]]|image=The Spirit Lifter Steerage.jpg}} | ||
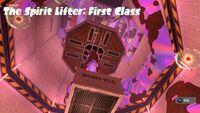
{{level list item|level id={{RotMMission|Rocket|05}}|level name=[[The Spirit Lifter: First Class]]|image=The Spirit Lifter First Class.jpg}} | {{level list item|level id={{RotMMission|Rocket|05}}|level name=[[The Spirit Lifter: First Class]]|image=The Spirit Lifter First Class.jpg}} | ||
{{level list item|level id={{RotMMission|Rocket|Boss 1}}|level name=[[ | {{level list item|level id={{RotMMission|Rocket|Boss 1}}|level name=[[The Ursine Anomaly - #03|The Ursine Anomaly - #03]]|image=RotM Rocket Battle.jpg}} | ||
{{level list item|level id={{RotMMission|Rocket|Boss 2}}|level name=[[Return of the Mammalians (mission)|Return of the Mammalians]]|image=S3 Inkantation R3MIX.png}} | {{level list item|level id={{RotMMission|Rocket|Boss 2}}|level name=[[Return of the Mammalians (mission)|Return of the Mammalians]]|image=S3 Inkantation R3MIX.png}} | ||
}}<section end=Level List Rocket/> | }}<section end=Level List Rocket/> | ||
==Characters== | |||
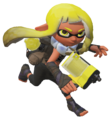
*[[Agent 3 (Splatoon 3)|Agent 3]] - [[Inkling]] or [[Octoling]] - The playable character. | |||
*[[Smallfry (character)|Smallfry]] - [[Salmonid]] - Agent 3's companion. | |||
*{{Character|RotM|Cuttlefish}} - Inkling - An old war hero and the retired captain of the [[New Squidbeak Splatoon]], who recruits Agent 3 and Smallfry. | |||
*{{Character|RotM|Agent 1}} / [[Callie]] - Inkling - A member of the [[Squid Sisters]] who supports Agent 3 in Alterna. | |||
*{{Character|RotM|Agent 2}} / [[Marie]] - Inkling - A member of the Squid Sisters who supports Agent 3 in Alterna. | |||
*[[Agent 3 (Splatoon)|Captain]] - Inkling - The original Agent 3 and current leader of the New Squidbeak Splatoon. | |||
*[[O.R.C.A.]] - AI - A computer system created by the scientists who built [[Alterna]], and overseer of the missions in Alterna. | |||
*{{Character|RotM|Shiver}} - Octoling - A member of [[Deep Cut]], a band and bandit trio, who serves as a minor antagonist. | |||
*{{Character|RotM|Frye}} - Inkling - A member of Deep Cut, a band and bandit trio, who serves as a minor antagonist. | |||
*{{Character|RotM|Big Man}} - Manta ray - A member of Deep Cut, a band and bandit trio, who serves as a minor antagonist. | |||
*{{Character|RotM|DJ Octavio}} - Octoling - The leader of the [[Octarian]] army and minor antagonist of the story. | |||
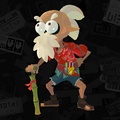
*{{Character|RotM|Mr. Grizz}} - Grizzly bear - CEO of [[Grizzco Industries]] and main antagonist of the story. | |||
==Enemies== | ==Enemies== | ||
| Line 275: | Line 288: | ||
| align="center" |[[File:S3 Tableturf Battle card Octoling.png|x70px]] | | align="center" |[[File:S3 Tableturf Battle card Octoling.png|x70px]] | ||
| Fuzzy [[Octoling (enemy)|Octoling]] | | Fuzzy [[Octoling (enemy)|Octoling]] | ||
| Octarian variants of [[Inkling]]s that act as elite forces en masse and can | | Octarian variants of [[Inkling]]s that act as elite forces en masse and can utilize a wide variety of main, sub, and special weapons. Dark-haired Elite Octolings are much harder to defeat and act similarly to human opponents in multiplayer modes. | ||
| {{RotMMission|04|11}} [[Stamp 'Em Out]] | | {{RotMMission|04|11}} [[Stamp 'Em Out]] | ||
|- | |- | ||
| Line 310: | Line 323: | ||
| align="center" |[[File:S3 Tableturf Battle card Tentakook.png|x70px]] | | align="center" |[[File:S3 Tableturf Battle card Tentakook.png|x70px]] | ||
| Fuzzy [[Tentakook]] | | Fuzzy [[Tentakook]] | ||
| Extremely rare little Octarians that hide important items and give chase on sight. They use their ink-powered | | Extremely rare little Octarians that hide important items and give chase on sight. They use their ink-powered roller skates to cover their tracks and can drop Splat Bombs behind them. They are very fast and can only be caught by swimming in ink. | ||
| {{RotMMission|06|11}} [[Don't Tease with the Keys]] | | {{RotMMission|06|11}} [[Don't Tease with the Keys]] | ||
|- | |- | ||
| Line 316: | Line 329: | ||
| [[Octorpedo]] | | [[Octorpedo]] | ||
| Missiles filled with Octarian ink fired by [[Mr. Grizz]]. Acting like flying Octopods, they home in on Agent 3 and explode, but can be easily shot down. However, amongst the rest of the boss battle, they can serve as major distractions. | | Missiles filled with Octarian ink fired by [[Mr. Grizz]]. Acting like flying Octopods, they home in on Agent 3 and explode, but can be easily shot down. However, amongst the rest of the boss battle, they can serve as major distractions. | ||
| {{RotMMission|Rocket|Boss 1}} [[ | | {{RotMMission|Rocket|Boss 1}} [[The Ursine Anomaly - #03|The Ursine Anomaly - #03]] | ||
|} | |} | ||
| Line 328: | Line 341: | ||
| align="center" |[[File:Splatoon 3 Octobot L3.Gs.png|x70px]] | | align="center" |[[File:Splatoon 3 Octobot L3.Gs.png|x70px]] | ||
| [[DJ Octavio]] and the [[Octobot King]] L3.Gs | | [[DJ Octavio]] and the [[Octobot King]] L3.Gs | ||
| The leader of the [[Octarian]]s in his signature machine, now with added legs and new attacks to make up for no longer being powered by the [[Great Zapfish]]. Like in previous appearances, Octavio attacks with a variety of fist attacks which must be avoided or shot back to damage him. In later phases, he | | The leader of the [[Octarian]]s in his signature machine, now with added legs and new attacks to make up for no longer being powered by the [[Great Zapfish]]. Like in previous appearances, Octavio attacks with a variety of fist attacks which must be avoided or shot back to damage him. In later phases, he utilizes [[Ink Vac]] and [[Wave Breaker]] attacks as well. | ||
| {{RotMMission|Crater|Boss}} [[Octobot King L3.Gs]] | | {{RotMMission|Crater|Boss}} [[Octobot King L3.Gs]] | ||
|- | |- | ||
| align="center" |[[File:RotM Frye boss intro.png|x70px]] | | align="center" |[[File:RotM Frye boss intro.png|x70px]] | ||
| [[Frye]] | | [[Frye]] and moray eels* | ||
| The first member of [[Deep Cut]]. She rides on the remains of the [[Octostomp]] out of range and attacks by shooting dozens of moray eels at [[Agent 3 (Splatoon 3)|Agent 3]], which must be avoided or shot back to damage her. When stunned, the player must scale the Octostomp to damage her directly, after which she adds a variety of extra eel attacks to her move set. | | The first member of [[Deep Cut]]. She rides on the remains of the [[Octostomp]] out of range and attacks by shooting dozens of moray eels at [[Agent 3 (Splatoon 3)|Agent 3]], which must be avoided or shot back to damage her. When stunned, the player must scale the Octostomp to damage her directly, after which she adds a variety of extra eel attacks to her move set. | ||
| {{RotMMission|02|Boss}} [[The Future Stares Back]] | | {{RotMMission|02|Boss}} [[The Future Stares Back]] | ||
| Line 348: | Line 361: | ||
| align="center" |[[File:Mr. Grizz.png|x70px]] | | align="center" |[[File:Mr. Grizz.png|x70px]] | ||
| [[Mr. Grizz]]* | | [[Mr. Grizz]]* | ||
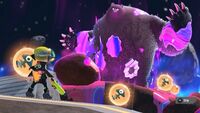
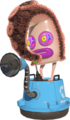
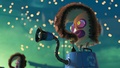
| He is Ursine Anomaly #3 and CEO of [[Grizzco Industries]] who has harvested [[Golden Egg]]s and stolen the Great Zapfish | | He is Ursine Anomaly #3 and CEO of [[Grizzco Industries]] who has harvested [[Golden Egg]]s and stolen the Great Zapfish to return mammals to the world through his [[Fuzzy Ooze]]. Agent 3 must dodge his many attacks and clear Fuzzy Ooze with [[Smallfry (character)|Smallfry]] to be able to attack Grizz directly, after which he intensifies his attacks. In the [[Return of the Mammalians (mission)|second half]] of the battle, Agent 3 must work with DJ Octavio to use the Octobot King L3.Gs' Ink Vac and absorb and shoot out the Fuzzballs on Grizz's body within 3 minutes and 33 seconds, all while avoiding space debris. | ||
| {{RotMMission|Rocket|Boss 1}} [[ | | {{RotMMission|Rocket|Boss 1}} [[The Ursine Anomaly - #03|The Ursine Anomaly - #03]] | ||
|} | |} | ||
<!-- | <!-- | ||
| Line 369: | Line 382: | ||
==Badges== | ==Badges== | ||
{{Main|Badge#Story Mode}} | {{Main|Badge#Story Mode}} | ||
Completing certain objectives in Return of the Mammalians rewards the player with [[badge]]s that they can use on their [[Splashtag]]. | |||
{| class="wikitable sitecolor-s3" | {| class="wikitable sitecolor-s3" | ||
! colspan="3" | Return of the Mammalians [[ | ! colspan="3" | Return of the Mammalians [[badge]]s | ||
|- | |- | ||
|[[File:S3 Badge DJ Octavio.png|32x32px]]||DJ Octavio Defeated!||Defeat the [[Octobot King L3.Gs]] in [[the Crater]] | |[[File:S3 Badge DJ Octavio.png|32x32px]]||DJ Octavio Defeated!||Defeat the [[Octobot King L3.Gs]] in [[the Crater]] | ||
|- | |- | ||
|[[File:S3 Badge Cuttlefish.png|32x32px]]||Story Mode Cleared!||Complete the [[Alterna Space Center]] sequence | |[[File:S3 Badge Cuttlefish.png|32x32px]]||Story Mode Cleared!||Complete the [[Alterna Space Center]] sequence and see the [[credits]] | ||
|- | |- | ||
|[[File:S3 Badge Callie.png|32x32px]]||Max Hero Level Achieved! | |[[File:S3 Badge Callie.png|32x32px]]||Max Hero Level Achieved! | ||
| Line 385: | Line 400: | ||
|} | |} | ||
== Music == | ==Music== | ||
{{Incomplete|Needs audio file for "Alterna Shimin Program M-00: Init (Test Noise)"}} | |||
{| class="mw-collapsible mw-collapsed wikitable sitecolor-s3" | {| class="mw-collapsible mw-collapsed wikitable sitecolor-s3" | ||
!Fictional Band | !Fictional Band | ||
!Song Name | !Song Name | ||
!Audio | !Audio | ||
|- | |- | ||
| rowspan=" | | rowspan="2" |[[File:S3 Tutorial & Crater cover art.png|center|200x200px]] | ||
|[[File:S3 Tutorial & Crater cover art.png|center|200x200px]] | |''[[Cap'n Cuttlefish's Theme]]'' | ||
|{{MediaLoader|file=File:OV Cap'n Cuttlefish's Theme.mp3|group=Splatoon|name=Cap'n Cuttlefish's Theme}} | |||
|- | |||
|''[[The Crater (song)|The Crater]]'' | |''[[The Crater (song)|The Crater]]'' | ||
|{{MediaLoader|file=File: | |{{MediaLoader|file=File:RotM The Crater.mp3|name=The Crater|group=Splatoon 3}} | ||
|- | |- | ||
| rowspan="2" style="text-align:center;" |[[File: | | rowspan="2" style="text-align:center;" |[[File:S2 Band Turquoise October.png|center|200x200px]][[Turquoise October]] | ||
|''[[Crater Eighters Routine]]'' | |''[[Crater Eighters Routine]]'' | ||
|{{MediaLoader|file=File:Crater Eighters Routine.mp3|name=Crater Eighters Routine|group=Splatoon 3}} | |{{MediaLoader|file=File:Crater Eighters Routine.mp3|name=Crater Eighters Routine|group=Splatoon 3}} | ||
|- | |- | ||
|''[[Hero Mode - Onward!#Mission Clear! (The Crater)|Mission Clear! (The Crater)]]'' | |''[[Hero Mode - Onward!#Mission Clear! (The Crater)|Mission Clear! (The Crater)]]'' | ||
|{{MediaLoader|file=File: | |{{MediaLoader|file=File:Crater Mission Clear.mp3|name=Mission Clear! (The Crater)|group=Splatoon 3}} | ||
|- | |- | ||
| style="text-align:center;" |[[File:S Band DJ Octavio.png|center|200px]][[DJ Octavio]] | | style="text-align:center;" |[[File:S Band DJ Octavio.png|center|200px]][[DJ Octavio]] | ||
|''[[I am Octavio#I'm Octavio (F34RME Remix)|I'm Octavio (F34RME Remix)]]'' | |''[[I am Octavio#I'm Octavio (F34RME Remix)|I'm Octavio (F34RME Remix)]]'' | ||
|{{MediaLoader|file=File: | |{{MediaLoader|file=File:S3 DJ Octavio Battle.mp3|name=I'm Octavio (F34RME Remix)|group=Splatoon 3}} | ||
|- | |- | ||
| rowspan=" | | rowspan="1" style="text-align:center;" |[[File:S3 Alterna cover art.png|frameless|center|200px]] | ||
| | |''[[City of Color#Meeting the New Squidbeak Splatoon|Meeting the New Squidbeak Splatoon]]'' | ||
|{{MediaLoader|file=File:Squid Sisters Introduction.mp3|name=Meeting the New Squidbeak Splatoon|group=Splatoon 3}} | |||
|{{MediaLoader|file=File: | |||
|- | |- | ||
| style="text-align:center;" |[[File:S3 Band Stars in the Deep.png|center|200px]][[Stars in the Deep]] | |||
|''[[Sandcastles]]'' | |''[[Sandcastles]]'' | ||
| | |Phase 1:<br>{{MediaLoader|file=File:RotM Sandcastles (Phase 1).oga|name=Sandcastles (Phase 1)|group=Splatoon 3}}<br>Phase 2:<br>{{MediaLoader|file=File:RotM Sandcastles (Phase 2).oga|name=Sandcastles (Phase 2)|group=Splatoon 3}}<br>Phase 3:<br>{{MediaLoader|file=File:RotM Sandcastles (Phase 3).oga|name=Sandcastles (Phase 3)|group=Splatoon 3}}<br>Phase 4:<br>{{MediaLoader|file=File:RotM Sandcastles (Phase 4).oga|name=Sandcastles (Phase 4)|group=Splatoon 3}} | ||
|- | |- | ||
|[[ | | style="text-align:center;" |[[File:S3 Band Mimicry.png|center|200px]][[Mimicry]] | ||
|{{MediaLoader|file=File: | |''[[Sudden Depth]]'' | ||
|Phase 1:<br>{{MediaLoader|file=File:Alterna Site 02 Phase 1.oga|name=Sudden Depth (Phase 1)|group=Splatoon 3}}<br>Phase 2:<br>{{MediaLoader|file=File:Alterna Site 02 Phase 2.oga|name=Sudden Depth (Phase 2)|group=Splatoon 3}}<br>Phase 3:<br>{{MediaLoader|file=File:Alterna Site 02 Phase 3.oga|name=Sudden Depth (Phase 3)|group=Splatoon 3}}<br>Phase 4:<br>{{MediaLoader|file=File:Alterna Site 02 Phase 4.oga|name=Sudden Depth (Phase 4)|group=Splatoon 3}} | |||
|- | |- | ||
| | | style="text-align:center;" |[[File:S3 Band Wash Out.png|center|200px]][[Wash Out]] | ||
| | |''[[Two Shadows in the Sun]]'' | ||
| | |Phase 1:<br>{{MediaLoader|file=File:Alterna Site 03 Phase 1.oga|name=Two Shadows in the Sun (Phase 1)|group=Splatoon 3}}<br>Phase 2:<br>{{MediaLoader|file=File:Alterna Site 03 Phase 2.oga|name=Two Shadows in the Sun (Phase 2)|group=Splatoon 3}}<br>Phase 3:<br>{{MediaLoader|file=File:Alterna Site 03 Phase 3.oga|name=Two Shadows in the Sun (Phase 3)|group=Splatoon 3}}<br>Phase 4:<br>{{MediaLoader|file=File:Alterna Site 03 Phase 4.oga|name=Two Shadows in the Sun (Phase 4)|group=Splatoon 3}} | ||
|{{MediaLoader|file=File: | |||
|- | |- | ||
|[[ | | style="text-align:center;" |[[File:S3 Band Firefly.png|center|200px]][[Firefly]] | ||
|{{MediaLoader|file=File: | |''[[Dead Sea]]'' | ||
|Phase 1:<br>{{MediaLoader|file=File:Alterna Site 04 Phase 1.oga|name=Dead Sea (Phase 1)|group=Splatoon 3}}<br>Phase 2:<br>{{MediaLoader|file=File:Alterna Site 04 Phase 2.oga|name=Dead Sea (Phase 2)|group=Splatoon 3}}<br>Phase 3:<br>{{MediaLoader|file=File:Alterna Site 04 Phase 3.oga|name=Dead Sea (Phase 3)|group=Splatoon 3}}<br>Phase 4:<br>{{MediaLoader|file=File:Alterna Site 04 Phase 4.oga|name=Dead Sea (Phase 4)|group=Splatoon 3}} | |||
|- | |- | ||
|[[ | | style="text-align:center;" |[[File:S3 Band On the Clock.png|center|200px]][[On the Clock]] | ||
|{{MediaLoader|file=File: | |''[[Whirlpool Tune]]'' | ||
|Phase 1:<br>{{MediaLoader|file=File:Alterna Site 05 Phase 1.oga|name=Whirlpool Tune (Phase 1)|group=Splatoon 3}}<br>Phase 2:<br>{{MediaLoader|file=File:Alterna Site 05 Phase 2.oga|name=Whirlpool Tune (Phase 2)|group=Splatoon 3}}<br>Phase 3:<br>{{MediaLoader|file=File:Alterna Site 05 Phase 3.oga|name=Whirlpool Tune (Phase 3)|group=Splatoon 3}}<br>Phase 4:<br>{{MediaLoader|file=File:Alterna Site 05 Phase 4.oga|name=Whirlpool Tune (Phase 4)|group=Splatoon 3}} | |||
|- | |- | ||
|[[ | | style="text-align:center;" |[[File:S3 Band Anxiety Society.png|center|200px]][[Anxiety Society]] | ||
|{{MediaLoader|file=File:RotM Hyper Diver (Phase 4).oga|name=Hyper Diver|group=Splatoon 3}} | |''[[Hyper Diver]]'' | ||
|Phase 1:<br>{{MediaLoader|file=File:RotM Hyper Diver (Phase 1).oga|name=Hyper Diver (Phase 1)|group=Splatoon 3}}<br>Phase 2:<br>{{MediaLoader|file=File:RotM Hyper Diver (Phase 2).oga|name=Hyper Diver (Phase 2)|group=Splatoon 3}}<br>Phase 3:<br>{{MediaLoader|file=File:RotM Hyper Diver (Phase 3).oga|name=Hyper Diver (Phase 3)|group=Splatoon 3}}<br>Phase 4:<br>{{MediaLoader|file=File:RotM Hyper Diver (Phase 4).oga|name=Hyper Diver (Phase 4)|group=Splatoon 3}} | |||
|- | |- | ||
| rowspan="4" |N/A | | rowspan="4" |N/A | ||
|''[[Alterna Shimin Program M-01: Standard Course (Asagiri no Kaigansen)]]'' | |''[[Alterna Shimin Program M-01: Standard Course (Asagiri no Kaigansen)]]'' | ||
|{{MediaLoader|file=File: | |{{MediaLoader|file=File:Level Entrance (Gold Kettle).mp3 |name=Alterna Shimin Program M-01: Standard Course (Asagiri no Kaigansen)|group=Splatoon 3}} | ||
|- | |- | ||
|''[[Alterna Shimin Program M-02: Challenge Course (Yūgure no Ofushoa)]]'' | |''[[Alterna Shimin Program M-02: Challenge Course (Yūgure no Ofushoa)]]'' | ||
|{{MediaLoader|file=File: | |{{MediaLoader|file=File:Level Entrance (Silver Kettle).mp3|name=Alterna Shimin Program M-02: Challenge Course (Yūgure no Ofushoa)|group=Splatoon 3}} | ||
|- | |- | ||
|''Alterna Shimin Program M-00: Init (Test Noise)'' | |''Alterna Shimin Program M-00: Init (Test Noise)'' | ||
|<!--{{MediaLoader|file=File: | |<!--{{MediaLoader|file=File:Level Entrance (Boss).mp3|name=Alterna Shimin Program M-00: Init (Test Noise)|group=Splatoon 3}}--> | ||
|- | |- | ||
|''[[Alterna Shimin Program M-??: mY dEAR]]'' | |''[[Alterna Shimin Program M-??: mY dEAR]]'' | ||
|{{MediaLoader|file=File: | |{{MediaLoader|file=File:Level Entrance (After Alterna).mp3|name=Alterna Shimin Program M-??: mY dEAR|group=Splatoon 3}} | ||
|- | |- | ||
| rowspan="10" style="text-align:center;" |[[File:Octoplush.png|center|200x200px]] | |||
| rowspan="10" style="text-align:center;" |[[File:Octoplush.png|center|200x200px]][[Octoplush]] | [[Octoplush]] | ||
|''[[Nine Out of Tension]]'' | |''[[Nine Out of Tension]]'' | ||
|{{MediaLoader|file=File: | |{{MediaLoader|file=File:RotM Nine Out of Tension.mp3|name=Nine Out of Tension|group=Splatoon 3}} | ||
|- | |- | ||
|''[[Underwater Neon]]'' | |''[[Underwater Neon]]'' | ||
|{{MediaLoader|file=File: | |{{MediaLoader|file=File:RotM Underwater Neon.mp3|name=Underwater Neon|group=Splatoon 3}} | ||
|- | |- | ||
|''[[Flop to It]]'' | |''[[Flop to It]]'' | ||
|{{MediaLoader|file=File: | |{{MediaLoader|file=File:RotM Flop to It.mp3 |name=Flop to It|group=Splatoon 3}} | ||
|- | |- | ||
|''[[Smoke and Mirrors]]'' | |''[[Smoke and Mirrors]]'' | ||
|{{MediaLoader|file=File: | |{{MediaLoader|file=File:RotM Smoke and Mirrors.mp3|name=Smoke and Mirrors|group=Splatoon 3}} | ||
|- | |- | ||
|''[[Ride or Fry]]'' | |''[[Ride or Fry]]'' | ||
|{{MediaLoader|file=File: | |{{MediaLoader|file=File:RotM Ride or Fry.mp3|name=Ride or Fry|group=Splatoon 3}} | ||
|- | |- | ||
|''[[With Flying Colors]]'' | |''[[With Flying Colors]]'' | ||
|{{MediaLoader|file=File: | |{{MediaLoader|file=File:RotM With Flying Colors.mp3|name=With Flying Colors|group=Splatoon 3}} | ||
|- | |- | ||
|''[[Seep & Destroy]]'' | |''[[Seep & Destroy]]'' | ||
|{{MediaLoader|file=RotM Seep & Destroy.mp3|name=Seep & Destroy|group=Splatoon 3}} | |{{MediaLoader|file=File:RotM Seep & Destroy.mp3|name=Seep & Destroy|group=Splatoon 3}} | ||
|- | |- | ||
|''[[Marine Machines]]'' | |''[[Marine Machines]]'' | ||
| Line 539: | Line 493: | ||
|- | |- | ||
|''[[#35 caught|#35 caught]]'' | |''[[#35 caught|#35 caught]]'' | ||
|{{MediaLoader|file=File: | |{{MediaLoader|file=File:RotM 35 caught.mp3|name=#35 caught|group=Splatoon 3}} | ||
|- | |- | ||
|''[[Don't Flinch]]'' | |''[[Don't Flinch]]'' | ||
|{{MediaLoader|file=File: | |{{MediaLoader|file=File:RotM Don't Flinch.mp3|name=Don't Flinch|group=Splatoon 3}} | ||
|- | |||
| style="text-align:center;" |[[File:S2 Band Turquoise October.png|center|200x200px]][[Turquoise October]] | |||
|''[[Octoling Rendezvous]]'' | |||
|{{MediaLoader|file=File:OV Octoling Rendezvous.mp3|group=Splatoon|name=Octoling Rendezvous}} | |||
|- | |- | ||
|N/A | |N/A | ||
|''[[Mission Complete! (Alterna)]]'' | |''[[Mission Complete! (Alterna)]]'' | ||
|{{MediaLoader|file=File: | |{{MediaLoader|file=File:Alterna Mission Clear.mp3|name=Mission Complete! (Alterna)|group=Splatoon 3}} | ||
|- | |- | ||
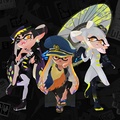
| rowspan="2" style="text-align:center;" |[[File:S3 Band Deep Cut.png|frameless|center|200px]][[Deep Cut]] | |||
| rowspan=" | |||
|''[[Deep Cut's Theme]]'' | |''[[Deep Cut's Theme]]'' | ||
|{{MediaLoader|file=File: | |{{MediaLoader|file=File:RotM Deep Cut's Theme.mp3|name=Deep Cut's Theme|group=Splatoon 3}} | ||
|- | |- | ||
|''[[Surprise and Shine]]'' | |''[[Surprise and Shine]]'' | ||
|{{MediaLoader|file=File: | |Phase 1:<br>{{MediaLoader|file=File:RotM Surprise and Shine (Phase 1).oga|name=Surprise and Shine (Phase 1)|group=Splatoon 3}}<br>Phase 2:<br>{{MediaLoader|file=File:RotM Surprise and Shine (Phase 2).oga|name=Surprise and Shine (Phase 2)|group=Splatoon 3}}<br>Phase 3:<br>{{MediaLoader|file=File:RotM Surprise and Shine (Phase 3).oga|name=Surprise and Shine (Phase 3)|group=Splatoon 3}} | ||
|- | |- | ||
| rowspan=" | | rowspan="3" |N/A | ||
|''[[Treasure Obtained]]'' | |''[[Treasure Obtained]]'' | ||
|{{MediaLoader|file=File: | |{{MediaLoader|file=File:RotM Treasure Obtained.mp3|name=Treasure Obtained|group=Splatoon 3}} | ||
|- | |- | ||
| | |''Combining the Treasures'' | ||
|{{MediaLoader|file=File:Building the Tool Cutscene.mp3|name=Combining the Treasures|group=Splatoon 3}} | |||
|{{MediaLoader|file=File: | |||
|- | |- | ||
| | |Rocket intermissions | ||
|Rocket Intermission | |Rocket intermission 1:<br>{{MediaLoader|file=File:RotM Rocket Intermission 1.mp3|name=Rocket intermission 1|group=Splatoon 3}}<br>Rocket intermission 2:<br>{{MediaLoader|file=File:RotM Rocket Intermission 2.mp3|name=Rocket intermission 2|group=Splatoon 3}}<br>Rocket intermission 3:<br>{{MediaLoader|file=File:RotM Rocket Intermission 3.mp3|name=Rocket intermission 3|group=Splatoon 3}}<br>Rocket intermission 4:<br>{{MediaLoader|file=File:RotM Rocket Intermission 4.mp3|name=Rocket intermission 4|group=Splatoon 3}}<br>Rocket intermission 5:<br>{{MediaLoader|file=File:RotM Rocket Intermission 5.mp3|name=Rocket intermission 5|group=Splatoon 3}} | ||
|{{MediaLoader|file=File: | |||
|- | |- | ||
| style="text-align:center;" |[[File:Octoplush.png|center|200x200px]] | |||
[[Octoplush]] | |||
| style="text-align:center;" |[[File:Octoplush.png|center|200x200px]][[Octoplush]] | |||
|''[[In Filtration]]'' | |''[[In Filtration]]'' | ||
|{{MediaLoader|file=File: | |{{MediaLoader|file=File:RotM In Filtration.mp3|name=In Filtration|group=Splatoon 3}} | ||
|- | |- | ||
| rowspan=" | | rowspan="2" style="text-align:center;" |[[File:S3 Band Deep Cut.png|frameless|center|200px]][[Deep Cut]] | ||
|''[[Hide and Sleek]]'' | |''[[Hide and Sleek]]'' | ||
|{{MediaLoader|file=File: | |{{MediaLoader|file=File:Alterna Space Center Hangar & Lift.mp3|name=Hide and Sleek|group=Splatoon 3}} | ||
|- | |- | ||
| | |''[[Smeared Canvas]]'' | ||
| | |{{MediaLoader|file=File:Smeared Canvas - Deep Cut.oga|name=Smeared Canvas|group=Splatoon 3}}<br>[[The Spirit Lifter: First Class|First Class]] version:<br>{{MediaLoader|file=File:RotM Smeared Canvas (First Class).mp3|name=Smeared Canvas (First Class)|group=Splatoon 3}} | ||
|{{MediaLoader|file=File: | |||
|- | |- | ||
|[[ | | rowspan="2" style="text-align:center;" |[[File:S3 Band Grizzco Industries.png|center|200px]][[Grizzco Industries|Grizzco]] | ||
|{{MediaLoader|file=File: | |''Mr. Grizz Appears'' | ||
|{{MediaLoader|file=File:Final Boss Appears Cutscene.mp3|name=Mr. Grizz Appears|group=Splatoon 3}} | |||
|- | |- | ||
| | |''Rocket Launch'' | ||
|{{MediaLoader|file=File: | |{{MediaLoader|file=File:S3 Rocket Takeoff.mp3|name=Rocket Launch|group=splatoon 3}} | ||
|- | |- | ||
| rowspan=" | | rowspan="2" |N/A | ||
|[[Cap'n Cuttlefish's Theme#Cap'n Cuttlefish's Theme (Dry)|Cap'n Cuttlefish's Theme (Dry)]] | |||
|{{MediaLoader|file=File:Cap'n Cuttlefish Squid Form.mp3|name=Cap'n Cuttlefish's Theme (Dry)|group=Splatoon 3}} | |||
|{{MediaLoader|file=File: | |||
|- | |- | ||
|''Go, Agent 3!'' | |||
|{{MediaLoader|file=File: | |{{MediaLoader|file=File:Deep Cut's Assistance Cutscene.mp3|name=Go, Agent 3!|group=Splatoon 3}} | ||
|- | |- | ||
|[[Bear with Me | | style="text-align:center;" |[[File:S3 Band Grizzco Industries.png|center|200px]][[Grizzco Industries|Grizzco]] | ||
|{{MediaLoader|file=File: | |''[[Bear with Me]]'' | ||
|Phase 1:<br>{{MediaLoader|file=File:RotM Bear with Me (Phase 1).mp3|name=Bear with Me (Phase 1)|group=Splatoon 3}}<br>Phase 2:<br>{{MediaLoader|file=File:RotM Bear with Me (Phase 2).mp3|name=Bear with Me (Phase 2)|group=Splatoon 3}}<br>Phase 3:<br>{{MediaLoader|file=File:RotM Bear with Me (Phase 3).mp3|name=Bear with Me (Phase 3)|group=Splatoon 3}}<br>Full:<br>{{MediaLoader|file=File:RotM Bear with Me.mp3|name=Bear with Me|group=Splatoon 3}} | |||
|- | |- | ||
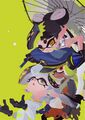
| rowspan="1" style="text-align:center;" |[[File:S3 Band Deep Cut x Squid Sisters.png|center|200px]][[Deep Cut]] x [[Squid Sisters]] | | rowspan="1" style="text-align:center;" |[[File:S3 Band Deep Cut x Squid Sisters.png|center|200px]][[Deep Cut]] x [[Squid Sisters]] | ||
|''[[Calamari Inkantation#Calamari Inkantation 3MIX|Calamari Inkantation 3MIX]]'' | |''[[Calamari Inkantation#Calamari Inkantation 3MIX|Calamari Inkantation 3MIX]]'' | ||
|{{MediaLoader|file=File: | |{{MediaLoader|file=File:Calamari Inkantation 3MIX.oga|name=Calamari Inkantation 3MIX|group=Splatoon 3}} | ||
|- | |- | ||
| rowspan="1" |N/A | | rowspan="1" |N/A | ||
| Line 632: | Line 561: | ||
|{{MediaLoader|file=File:Hairmaggedon.mp3|name=Kyodai na Kedama|group=Splatoon 3}} | |{{MediaLoader|file=File:Hairmaggedon.mp3|name=Kyodai na Kedama|group=Splatoon 3}} | ||
|- | |- | ||
| rowspan="1" style="text-align:center;" |[[File:S3 Band Squid Sisters.png|frameless|center|200px]][[Squid Sisters]] | | rowspan="1" style="text-align:center;" |[[File:S3 Band Squid Sisters.png|frameless|center|200px]][[Squid Sisters]] | ||
|''[[Wave Goodbye]]'' | |''[[Wave Goodbye]]'' | ||
|{{MediaLoader|file=File: | |{{MediaLoader|file=File:RotM Wave Goodbye.mp3|name=Wave Goodbye|group=Splatoon 3}} | ||
|} | |} | ||
| Line 647: | Line 575: | ||
File:RotM promo art 2D new Agent 3.jpg|[[Agent 3 (Splatoon 3)|Agent 3]] and [[Smallfry (character)|Smallfry]] | File:RotM promo art 2D new Agent 3.jpg|[[Agent 3 (Splatoon 3)|Agent 3]] and [[Smallfry (character)|Smallfry]] | ||
File:RotM render New Agent 3 Hero Suit 2.png|Agent 3 | File:RotM render New Agent 3 Hero Suit 2.png|Agent 3 | ||
File:RotM New Agent 3 Hero Suit 2 | File:RotM render New Agent 3 Hero Suit 2 02.png|Agent 3 | ||
File:RotM render New Agent 3 Hero Suit 2 03.png|Agent 3 | File:RotM render New Agent 3 Hero Suit 2 03.png|Agent 3 | ||
File:RotM art 3D Little buddy.png|Smallfry and [[Power Egg]]s | File:RotM art 3D Little buddy.png|Smallfry and [[Power Egg]]s | ||
File:RotM Render Smallfry.png|Smallfry | File:RotM Render Smallfry.png|Smallfry | ||
File:RotM render little buddy.png|Smallfry | File:RotM render little buddy.png|Smallfry | ||
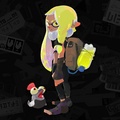
File:RotM promo art 2D New Squidbeak Splatoon.jpg|[[New Squidbeak Splatoon]] ([[Callie]], the [[Agent 3 | RotM Render Smallfry 02.png|Smallfry | ||
File:RotM promo art 2D New Squidbeak Splatoon.jpg|[[New Squidbeak Splatoon]] ([[Callie]], the [[Agent 3 (Splatoon)|Captain]], and [[Marie]]) | |||
Happy Holidays 2021.jpg|New Squidbeak Splatoon - Holidays 2021 | Happy Holidays 2021.jpg|New Squidbeak Splatoon - Holidays 2021 | ||
File:RotM render New Squidbeak Splatoon.png|New Squidbeak Splatoon | File:RotM render New Squidbeak Splatoon.png|New Squidbeak Splatoon | ||
| Line 670: | Line 599: | ||
File:RotM promo screenshot story Alterna stage 02.jpg | File:RotM promo screenshot story Alterna stage 02.jpg | ||
File:RotM promo screenshot story Fuzzy Ink 00.jpg|Agent 3 and [[Smallfry (character)|Smallfry]] near some of the [[Fuzzy Ooze]] | File:RotM promo screenshot story Fuzzy Ink 00.jpg|Agent 3 and [[Smallfry (character)|Smallfry]] near some of the [[Fuzzy Ooze]] | ||
File: | File:RotM promo screenshot story Fuzzy Ink damage 00.jpg|Agent 3, immediately after touching the Fuzzy Ooze | ||
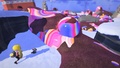
File:S3 promo screenshot story Fuzzy Ink damage 01.jpg|Agent 3, fully trapped in Fuzzy Ooze | File:S3 promo screenshot story Fuzzy Ink damage 01.jpg|Agent 3, fully trapped in Fuzzy Ooze | ||
File:S3LittleBudyEatsFuzzyInk.mov|Smallfry eating some Fuzzy Ooze via a Fuzzball | File:S3LittleBudyEatsFuzzyInk.mov|Smallfry eating some Fuzzy Ooze via a Fuzzball | ||
File:S3 promo screenshot story New Squidbeak Splatoon 00.jpg|[[Callie]], [[Marie]], and the [[Agent 3 (Splatoon)|Captain]] | File:S3 promo screenshot story New Squidbeak Splatoon 00.jpg|[[Callie]], [[Marie]], and the [[Agent 3 (Splatoon)|Captain]] | ||
File:S3 promo screenshot story Smallfry.jpg|An [[Octarian]] and [[Smallfry (character)|Smallfry]] | File:S3 promo screenshot story Smallfry.jpg|An [[Octarian]] and [[Smallfry (character)|Smallfry]] | ||
File:Capn Cuttlefish in Splatoon 3.jpg|[[Cuttlefish]], as seen in | File:Capn Cuttlefish in Splatoon 3.jpg|[[Cuttlefish]], as seen in {{S3}} | ||
File:S3 Octostamp Group.jpg|[[Octostamp]]s and an [[Amped Octostamp]] in Return of the Mammalians | File:S3 Octostamp Group.jpg|[[Octostamp]]s and an [[Amped Octostamp]] in Return of the Mammalians | ||
File:S3 Octohopper Group.jpg|A group of [[Octotrooper|Octohoppers]] | File:S3 Octohopper Group.jpg|A group of [[Octotrooper|Octohoppers]] | ||
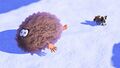
File:S3 Octopod Group.jpg|A group of [[Octopod]]s with an Oversized Octopod. | File:S3 Octopod Group.jpg|A group of [[Octopod]]s with an Oversized Octopod. | ||
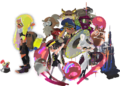
File:S3 promo art Octarian.jpg|A group of [[Octarian]]s | File:S3 promo art Octarian.jpg|A group of [[Octarian]]s | ||
File:S3 promo art Octoling Rival.jpg|Enemy [[Octoling (enemy)|Octolings]] | File:S3 promo art Octoling Rival.jpg|Enemy [[Octoling (enemy)|Octolings]] | ||
</gallery> | </gallery> | ||
| Line 690: | Line 619: | ||
===Screenshots=== | ===Screenshots=== | ||
<gallery> | <gallery> | ||
RotM Hero Mode Sloshing Machine.png| | RotM Hero Mode Sloshing Machine.png|An image of Agent 3 wielding a [[Sloshing Machine]], with Smallfry in the back. | ||
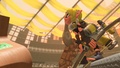
RotM Octarian Splatana Stamper.png|Agent 3 battling an Octarian with the [[Splatana Stamper]]. | RotM Octarian Splatana Stamper.png|Agent 3 battling an Octarian with the [[Splatana Stamper]]. | ||
</gallery> | </gallery> | ||
== Similarities with ''Octo Expansion'' == | == Similarities with ''Octo Expansion'' == | ||
Return of the Mammalians bears multiple similarities to ''[[Octo Expansion]]''. Both stages share their name with a playable game mode within their respective Splatoon | Return of the Mammalians bears multiple similarities to ''[[Octo Expansion]]''. Both stages share their name with a playable game mode within their respective ''Splatoon'' games. | ||
==== Story Mode Progression ==== | ==== Story Mode Progression ==== | ||
*The player can choose between different non-Hero weapons. | *The player can choose between different non-Hero weapons. | ||
*Both modes have a similar interface, a variety of mission conditions and heightened freedom as opposed to the previous two | *Both modes have a similar interface, a variety of mission conditions and heightened freedom as opposed to the previous two story modes' linear progression. | ||
* Both modes have a form of currency | *Both modes have a form of currency | ||
** | **Return of the Mammalians has [[Power Egg]]s. | ||
** Octo Expansion has [[CQ-80#CQ Points|CQ Points]]. | **''Octo Expansion'' has [[CQ-80#CQ Points|CQ Points]]. | ||
** Use of in-game currency is required to unlock or attempt missions, progressing the campaign. | **Use of in-game currency is required to unlock or attempt missions, progressing the campaign. | ||
* In | *In Return of the Mammalians, Power Eggs are also used to clear [[Fuzzy Ooze]] that blocks the way. | ||
*Both modes have a key NPC that guides the player throughout an area or splats them if they fail certain objectives (such as running out of ink or time). | *Both modes have a key NPC that guides the player throughout an area or splats them if they fail certain objectives (such as running out of ink or time). | ||
** | **Return of the Mammalians has [[O.R.C.A.]] | ||
**Octo Expansion has [[C.Q. Cumber]] | **''Octo Expansion'' has [[C.Q. Cumber]] | ||
*Both modes are underground, far below the sea level of Earth. | *Both modes are underground, far below the sea level of Earth. | ||
==== Final Stage ==== | ==== Final Stage ==== | ||
In both Octo Expansion and Return of the Mammalians, the player must face a continuous final stage before attempting to face the final boss of each campaign. The start of both stages | In both ''Octo Expansion'' and Return of the Mammalians, the player must face a continuous final stage before attempting to face the final boss of each campaign. The start of both stages removes the player's weapons and requires the player to re-equip their gear along the way. Both stages also feature an "unlimited use" section that allows special weapon use without losing special power. | ||
===== Return of the Mammalians ===== | ===== Return of the Mammalians ===== | ||
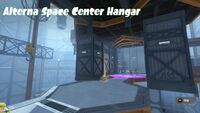
The final stage in | The final stage in Return of the Mammalians is the [[Alterna Space Center]] with the initial [[Alterna Space Center: Entrance]] starting the player with no gear. | ||
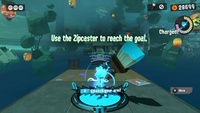
The section for unlimited special weapon use is [[The Spirit Lifter: First Class]] with [[Zipcaster]] as the weapon. | The section for unlimited special weapon use is [[The Spirit Lifter: First Class]] with [[Zipcaster]] as the weapon. | ||
===== Octo Expansion ===== | ===== ''Octo Expansion'' ===== | ||
The final stage in Octo Expansion is [[Deepsea Metro|Deepsea Metro Escape]] with the initial areas of [[Coccyx Phase]] and [[Villi Phase]] starting the player with no gear. | The final stage in ''Octo Expansion'' is [[Deepsea Metro|Deepsea Metro Escape]] with the initial areas of [[Coccyx Phase]] and [[Villi Phase]] starting the player with no gear. | ||
The section for unlimited special weapon use is [[Diaphragm Phase]] with [[Inkjet]] as the weapon. | The section for unlimited special weapon use is [[Diaphragm Phase]] with [[Inkjet]] as the weapon. | ||
| Line 726: | Line 655: | ||
Both of these sequences feature two songs written by the game's main idol group. | Both of these sequences feature two songs written by the game's main idol group. | ||
The penultimate mission uses different music for each section: the first | The penultimate mission uses different music for each section: the first plays a modified version of the enemy's theme, and the second plays the idol's theme. | ||
In both '''final''' missions, the successful final attack grows so powerful that the attack damages the game UI in some way. | In both '''final''' missions, the successful final attack grows so powerful that the attack damages the game UI in some way. | ||
| Line 733: | Line 662: | ||
===== Return of the Mammalians ===== | ===== Return of the Mammalians ===== | ||
The first mission is [[ | The first mission is [[The Ursine Anomaly - #03|The Ursine Anomaly - #03]], using ''[[Bear with Me]]'' as the theme. | ||
The '''final''' mission is [[Return of the Mammalians | The '''final''' mission is [[Return of the Mammalians (mission)]], using [[Calamari Inkantation#Calamari Inkantation 3MIX|Calamari Inkantation 3MIX]] as the theme. DJ Octavio's [[Ink Vac]] destroys the game UI as the attack power increases. | ||
===== Octo Expansion ===== | ===== ''Octo Expansion'' ===== | ||
The first mission is [[Agent 3 (Splatoon)|Sanitized Agent 3]] using [[Splattack!#Splattack! (Octo)|Splattack! (Octo)]] as the the theme. | The first mission is [[Agent 3 (Splatoon)|Sanitized Agent 3]] using [[Splattack!#Splattack! (Octo)|Splattack! (Octo)]] as the the theme. | ||
The '''final''' mission is [[Turf War (Octo Expansion)]] using [[Fly Octo Fly ~ Ebb & Flow (Octo)]] as the theme. Pearl's [[Princess Cannon]] destroys the game UI as the attack power increases. | The '''final''' mission is [[Turf War (Octo Expansion)]] using [[Fly Octo Fly ~ Ebb & Flow (Octo)]] as the theme. Pearl's [[Princess Cannon]] destroys the game UI as the attack power increases. | ||
| Line 765: | Line 694: | ||
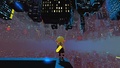
*Many mysterious sounds can be heard in Alterna, but are hard to hear and are distorted. This ambient noise includes announcement messages sent over a loudspeaker system to the Alterna Space Center, with various notification sounds and human speech in English reporting on the status of the rocket launch. | *Many mysterious sounds can be heard in Alterna, but are hard to hear and are distorted. This ambient noise includes announcement messages sent over a loudspeaker system to the Alterna Space Center, with various notification sounds and human speech in English reporting on the status of the rocket launch. | ||
*The [[Booyah Bomb]] and [[Tacticooler]] special weapons are the only ones in the game that were available at the game's launch to not appear in any way in Return of the Mammalians. [[Big Bubbler]], while not available for use by the player, is used by Octolings in the final section of [[After Alterna]]. | *The [[Booyah Bomb]] and [[Tacticooler]] special weapons are the only ones in the game that were available at the game's launch to not appear in any way in Return of the Mammalians. [[Big Bubbler]], while not available for use by the player, is used by Octolings in the final section of [[After Alterna]]. | ||
*Before Version 1.1.1, if the player closed the game or entered sleep mode during Deep Cut's news broadcast directly after beating the final boss, they would be forced to replay the entire final section due to a glitch. | *Before [[Version 1.1.1 (Splatoon 3)|Version 1.1.1]], if the player closed the game or entered sleep mode during Deep Cut's news broadcast directly after beating the final boss, they would be forced to replay the entire final section due to a glitch. | ||
*As level progression in Return of the Mammalians is linked to collecting [[Power Egg]]s rather than completing levels, the ending can be reached by completing a minimum of 15 levels (the five [[the Crater|Crater]] levels, the three [[Deep Cut]] bosses, and the seven stages in the final [[Alterna Space Center]] sequence). This is the fewest required levels of any single-player mode in the series, with one fewer than the ''[[Octo Expansion]]''. | *As level progression in Return of the Mammalians is linked to collecting [[Power Egg]]s rather than completing levels, the ending can be reached by completing a minimum of 15 levels (the five [[the Crater|Crater]] levels, the three [[Deep Cut]] bosses, and the seven stages in the final [[Alterna Space Center]] sequence). This is the fewest required levels of any single-player mode in the series, with one fewer than the ''[[Octo Expansion]]''. | ||
| Line 780: | Line 709: | ||
|Ger=Rückkehr der Mammalianer | |Ger=Rückkehr der Mammalianer | ||
|GerM=Return of the Mammalians | |GerM=Return of the Mammalians | ||
|Ita= | |Ita=Il ritorno dei mammiferiani | ||
|ItaM= | |ItaM=The return of the mammalians | ||
|Rus= Возвращение молокоедов | |Rus= Возвращение молокоедов | ||
|RusR=Vozvrashcheniye molokoyedov | |RusR=Vozvrashcheniye molokoyedov | ||
|RusM=The return of the milk eaters | |RusM=The return of the milk eaters | ||
|Spa= | |Spa=El regreso de los mamiferoides | ||
|SpaM= | |SpaM=The return of the mammalians | ||
|ChiT=哺乳類的回歸 | |ChiT=哺乳類的回歸 | ||
|ChiTR=Bǔrǔlèi de huíguī | |ChiTR=Bǔrǔlèi de huíguī | ||
| Line 796: | Line 725: | ||
|KorR=poyuryu-ui gwihwan | |KorR=poyuryu-ui gwihwan | ||
|KorM=Return of the Mammals | |KorM=Return of the Mammals | ||
}} | }} | ||
Revision as of 01:13, 25 April 2024

| Type | Single-player campaign |
| Players | 1 |
| Weapons | Various |
| Controllers | |
| Release Date | Launch |
- This article is about the single-player mode of Splatoon 3. For the mission, see Return of the Mammalians (mission).
| “ | Join Agent 3 and the New Squidbeak Splatoon in a hairy fight against the unruly Octarians. Discover the secrets of Alterna and the Fuzzy Ooze. | ” |
— Splatoon's official website
| ||
Return of the Mammalians is a single-player game mode in Splatoon 3. It involves the player donning a Hero Suit and venturing into the Crater to defeat the Octarian army (which is now covered in hair), soon ending up in Alterna.
Story
An Inkling or Octoling accompanied by their "little buddy" Smallfry are scrap hunters who search for junk gems and splat it up in Turf Wars on the side. When they go through a manhole, they meet Craig Cuttlefish on the other end at the Crater, who dubs them the new Agent 3 of the New Squidbeak Splatoon. He explains that the New Squidbeak Splatoon's continued mission is to stand in opposition of the unruly Octarians, who are suspected to be behind the recent disappearance of the Great Zapfish from Splatsville.
The areas throughout the campaign have a large amount of Fuzzy Ooze. To get through areas, Agent 3 has to take care of the Fuzzy Ooze, which Smallfry can eat as long as they have the adequate amount of Power Eggs. Cuttlefish also notices that the Octarians have fur grown over their body, as opposed to their previous appearances where they were smoother. When Cuttlefish tries to contact Agent 1 and Agent 2 to come pick them up, DJ Octavio intervenes but Cuttlefish dismisses it as his radio being broken.
After reaching the center of the Crater, DJ Octavio appears in his battle mech named the Octobot King L3.Gs, trying to confront the two for the recent disappearance of his Octarian army, but when asked about the stolen Great Zapfish, states that he does not even know about it this time, and engages Agent 3 in a fight. Upon being defeated, Octavio tells Cuttlefish and Agent 3 that he indeed did not steal the Great Zapfish. Cuttlefish thinks that someone else might have done it, but before they can continue, the ground beneath them collapses as Fuzzy Ooze flows out. A tentacle-shaped piece of Ooze takes Cuttlefish away from Agent 3, who loses their Hero Suit and Power Eggs in the fall. Agent 3 then wakes up in Alterna, where they are greeted by the New Squidbeak Splatoon, comprised of the old Agent 3 (now Captain) and the Squid Sisters.
The new Agent 3 is also aided by a robotic assistant known as O.R.C.A., who helps guide them through Alterna.
At the end of Site 1, Future Utopia Island, Deep Cut makes their entrance and makes it clear that all the loot in Alterna belongs to them. Later, each of them guards one of the three 'treasures' in the area and Agent 3 has to defeat them to continue.
After collecting all three parts of the Treasure, Callie and Marie assemble it into a lawn mower-like tool, which the Captain uses to cut off the fur near the rocket at Alterna Space Center so the team can go there and save Cuttlefish.
The Captain gets hurt while using the tool, and it also breaks down. Soon after this, Deep Cut appears again, trying to take back the treasure, but Marie tells them that the New Squidbeak Splatoon does not need the treasure and that they can have it back. Deep Cut then asks Marie to be their boss, who reluctantly accepts.
On their way to the rocket, the party overhears that Mr. Grizz plans to use Cuttlefish and the Golden Eggs (collected by the unwitting Inklings and Octolings in Inkopolis and Splatsville working in his company) to 'restore the balance of the world'. When asked about the reason for hunting treasures, Shiver and Frye explain that they want to sell the treasure to help those in need in Splatsville, while leaving little to themselves, which makes Callie and Marie respect them.
After completing all the sites, Agent 3 has to get on the Ooze-covered rocket. Once they get to the top, they and the New Squidbeak Splatoon find Cuttlefish dried up and lifeless, as a result of being dehydrated by Mr. Grizz. Grizz, now revealed to be a grizzly bear, then appears and escapes on the rocket, aimed to spread Fuzzy Ooze all over the Earth and bring forth a new era of mammalian dominance.
The Captain drops a tear on Cuttlefish's body, which makes him come to his senses. Deep Cut appears again and helps Agent 3 and Smallfry reach Mr. Grizz's rocket. There, Agent 3 and Mr. Grizz engage in a fight. After having some of his Fuzzballs splatted, Mr. Grizz knocks Agent 3 and Smallfry out from his rocket as he absorbs the Fuzzy Ooze and plans to send it on the Earth himself. Now, DJ Octavio, now knowing who the true culprit is, appears in his modified Octobot to save the two. DJ Octavio, the Squid Sisters and Deep Cut then play the Calamari Inkantation 3MIX together, causing Smallfry to become Hugefry. They then fight Mr. Grizz as DJ Octavio and Agent 3 vacuum the Fuzzballs on Mr. Grizz's body, before blasting him back with the ooze, defeating him. After emerging victorious, DJ Octavio, Agent 3 and Smallfry return to the Earth together.
Gameplay
Mechanics
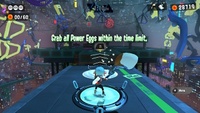
Comparing to the Hero Mode of the previous two games, Return of the Mammalians has a less linear progression similar to the Octo Expansion. Upon entering a mission, O.R.C.A. explains the rule of the level with dialogue and prompts the player to select one of the sets of weapons available. Different sets of weapons may have different Power Eggs rewards. Some missions also cost Power Eggs to play, and/or have special conditions that will cause the player to get splatted if they fail.
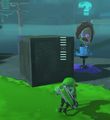
The areas in this mode are covered in Fuzzy Ooze, which serves as the obstacle blocking the path to other areas, rather than having the missions locked themselves. The player needs to use the Power Eggs they collect from the missions to clear them and progress.
The map screen in each of the sites tracks how many of each type of item the player has found on the overworld (loot anchors that contain decorations, golden records, Sardinium, and Sunken Scrolls). The map highlights areas with unobtained items to find in green, labeled as Areas of Interest, whereas it marks areas which the player hasn't been to yet with black striped squares labeled Parts Unknown. If the player fully collects all items in a site and goes to every possible part of the map so that there are no longer any black squares, the site becomes marked as "Surveyed". Marie will award the player with a piece of the map of Alterna as a sticker if they survey that site.
Fully surveying all sites causes a Shel-drone to appear. Each day the player can charge this drone by using 999 power eggs. The following day, the drone will send an item to the lobby terminal. These items include cash, ability chunks, and meal tickets, as well as decorations that can only be found in Alterna. This is currently the only way to get duplicates of these decorations. If the Shel-drone doesn't appear after the player surveys every area, they will need to go back to Splatsville, and then Alterna again.
Missions
Prologue: The Crater
Site 1: Future Utopia Island
Site 2: Cozy & Safe Factory
Site 3: Cryogenic Hopetown
Site 4: Landfill Dreamland

Site 5: Eco-Forest Treehills
Site 6: Happiness Research Lab
Finale: Alterna Space Center


Characters
- Agent 3 - Inkling or Octoling - The playable character.
- Smallfry - Salmonid - Agent 3's companion.
 Cuttlefish - Inkling - An old war hero and the retired captain of the New Squidbeak Splatoon, who recruits Agent 3 and Smallfry.
 Agent 1 / Callie - Inkling - A member of the Squid Sisters who supports Agent 3 in Alterna.
 Agent 2 / Marie - Inkling - A member of the Squid Sisters who supports Agent 3 in Alterna.
- Captain - Inkling - The original Agent 3 and current leader of the New Squidbeak Splatoon.
- O.R.C.A. - AI - A computer system created by the scientists who built Alterna, and overseer of the missions in Alterna.
 Shiver - Octoling - A member of Deep Cut, a band and bandit trio, who serves as a minor antagonist.
 Frye - Inkling - A member of Deep Cut, a band and bandit trio, who serves as a minor antagonist.
 Big Man - Manta ray - A member of Deep Cut, a band and bandit trio, who serves as a minor antagonist.
 DJ Octavio - Octoling - The leader of the Octarian army and minor antagonist of the story.
 Mr. Grizz - Grizzly bear - CEO of Grizzco Industries and main antagonist of the story.
Enemies
Regular enemies
This table is sorted by order of appearance. Enemies marked with * are newly introduced in Splatoon 3.
| Image | Name | Description | Debut |
|---|---|---|---|
| Fuzzy Blobby Octotrooper | Octotroopers that ride a different machine resembling a gumball machine. They act and look almost identically to their regular versions but shoot a duo of shots that bounce along the ground. These can deal a lot of damage in numbers but are also susceptible to gravity. | No. 1 Octarians in the Crater? YIKES! | |

|
Fuzzy Octocopter | Flying enemies propelled by their helmets. They hover above the ground and shoot at Agent 3 on sight, but their projectiles and general flying speed are slow, like Octotroopers. | No. 3 Boxes Locked! Keys, Please! |
| Fuzzy Octotrooper | The basic grunts of the Octarian army, Octotroopers stand on small machines that allow them to shoot single, very slow ink globules. They have very little health and mobility and so are easily defeated, but may pose a threat in numbers. | No. 4 What Are They? Can We Stop Them?! | |

|
Fuzzy Shielded Octotrooper | Octotroopers with shields in front of their machines. The shield can be destroyed after taking a lot of damage, but their exposed backsides are their weak spots, easily hit after being distracted, such as by Smallfry. Also appears in Octodiver and Twintacle Octotrooper forms. | 0101 Get to Know Alterna, Your Only Choice |

|
Squee-G | Although incapable of dealing damage, these very rare small robots serve as nuisances, attaching to walls and automatically sucking up Agent 3's ink. They can sometimes carry items and slow down upon being attacked. | 0101 Get to Know Alterna, Your Only Choice |

|
Octopod | Small metallic creatures that run around in sneakers. Octopods jump to attention upon seeing the player. Upon reaching them, they explode in Octarian ink, dealing some damage. They can be attacked to be defused. They appear to be Octorpedoes on legs. | 0102 Octopods at Rest Tend to FLIP OUT! |

|
Oversized Octopod* | Giant Octopods that move and attack in a similar way to their smaller counterparts. However, they are slower but require much more damage to detonate, having a much larger blast radius as well. | 0102 Octopods at Rest Tend to FLIP OUT! |

|
Fuzzy Octosniper | Elite enemies that shoot long, thin, and very powerful shots of ink, similar to chargers, while stationed on unmoving platforms. Like charger users, they have an extremely long line of sight but are mostly incapable of close-quarters fighting, while their shots require some time to charge and are marked with a laser line. | 0104 Doors, Doors, Doors! And More! (Doors) |

|
Fuzzy Octocommander | Large stationary enemies that are very similar to Octosnipers. They can only rotate in place and use giant splatlings to attack quickly over a large range. However, they take a while to recharge, leaving them wide open. | 0104 Doors, Doors, Doors! And More! (Doors) |

|
Fuzzy Rocket Octocopter | Darker versions of Octocopters that have thrusters attached to their helmets. Although they are no stronger than normal, they can quickly dodge left and right, making them a nuisance to defeat. | 0109 The String's the Thing |

|
Fuzzy Amped Octostamp* | Stronger Octostamps that are recognisable by their headphones. They have a cover over their weak point, requiring more damage to break, and send out a damaging shockwave on contact with the ground similar to the Wave Breaker. | 0110 Deadly Dance Hall—Jump, Jump! |

|
Fuzzy Twintacle Octotrooper | Stronger Octotroopers with two tentacles. These enemies have better mobility than the normal Octotrooper and greater ink-firing capability, similar to a splatling, but are still easy targets. | 0201 Twirling, Swirling, Whirling |

|
Fuzzy Octomissile | Little explosive missiles with a tentacle in the middle. They spawn infinitely and burst with ink on contact, but can be defeated simply by being attacked. | 0205 Tread Heavily |

|
Fuzzy Octozeppelin | Giant airships themed after Octarians with a single tentacle sticking out the top. They spawn infinitely, using their propellers to spray ink behind them, and are invulnerable apart from their tentacle. | 0302 They Said We'd Have Flying Cars, and We Do! Kinda! |

|
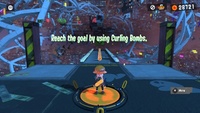
Octowasher | Indestructible spinning torrents of ink that appear as damaging barriers. They deal fatal damage on contact and block shots, meaning they can only be avoided. | 0304 Try Curling! Alterna's 11th Most Popular Athleisure Activity! |

|
Fuzzy Octohopper* | Bouncing Octotroopers that follow Agent 3 on sight. Although they are as weak as regular Octotroopers, they are persistent and attack with slosher-like ink flings which deal a lot of damage. | 0402 Octohoppers Don't Have a Sense of Humor (and They Hate Puns)! |

|
Fuzzy Octoballer | Inky bowling balls populated by Octotroopers that spawn infinitely and leave a trail of ink behind them. They can only be destroyed by attacking the Octotrooper as normal. | 0403 Let's Put a Pin in That |

|
Fuzzy Octodisco* | Flying spherical Octarians that look similar to disco balls. Instead of attacking Agent 3, they hover over other enemies and form a shield like the Big Bubbler. In this state, they can only be attacked from above, but the shield breaks if the enemy inside is defeated. | 0407 Charge Now, Splat Later |

|
Fuzzy Octoling | Octarian variants of Inklings that act as elite forces en masse and can utilize a wide variety of main, sub, and special weapons. Dark-haired Elite Octolings are much harder to defeat and act similarly to human opponents in multiplayer modes. | 0411 Stamp 'Em Out |

|
Fuzzy Octostamp | Cuboid, machine-like creatures with inky faces. Although they are not fast, they can leap into the air and face-plant the ground, dealing fatal damage. They can only be defeated from behind, which is exposed by their method of attack. | 0411 Stamp 'Em Out |

|
Fuzzy Rocket Twintacle Octotrooper | Noticeably darker Twintacle Octotroopers. They have the same capabilities as normal Twintacle Octotroopers but with jet thrusters on their machines, making them capable of fast dodges. | 0501 Trouble Round Every Corner |

|
Flooder | Huge machines on stilts that rain down Octarian ink from under them and move in set patterns. They charge at Agent 3 on sight and can defeat them instantly if not distracted by Smallfry, but their tops also act as platforms that can hold items and other mechanics. Big Flooders are even taller and harder to scale. | 0505 A Compulsive Collector's Paradise |

|
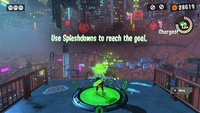
Fuzzy Octodiver | Octotroopers wearing snorkels, which allow them to breathe under their ink. They pop out without warning to attack and can dive to hide like Agent 3. Also appears in Shielded Octotrooper and Twintacle Octotrooper forms. | 0508 Making Waves with Splashdowns |

|
Fuzzy Octobomber | Large flying Octarians similar to improved Octocopters. They hover around and shoot Splat Bombs out of their helmets which detonate fatally one second after landing. However, they are large, slow, and unwieldy, making them obvious targets. | 0509 Low Viz, High Risk |

|
Fuzzy Rocket Octobomber | Darker variants of Octobombers that can use the rocket thrusters on their helmets to quickly dodge to the side when being attacked. Their attack pattern has not changed, however. | 0509 Low Viz, High Risk |

|
Fuzzy Tentakook | Extremely rare little Octarians that hide important items and give chase on sight. They use their ink-powered roller skates to cover their tracks and can drop Splat Bombs behind them. They are very fast and can only be caught by swimming in ink. | 0611 Don't Tease with the Keys |

|
Octorpedo | Missiles filled with Octarian ink fired by Mr. Grizz. Acting like flying Octopods, they home in on Agent 3 and explode, but can be easily shot down. However, amongst the rest of the boss battle, they can serve as major distractions. | Rocket |
Bosses
| Image | Name | Description | Debut |
|---|---|---|---|

|
DJ Octavio and the Octobot King L3.Gs | The leader of the Octarians in his signature machine, now with added legs and new attacks to make up for no longer being powered by the Great Zapfish. Like in previous appearances, Octavio attacks with a variety of fist attacks which must be avoided or shot back to damage him. In later phases, he utilizes Ink Vac and Wave Breaker attacks as well. | Crater |

|
Frye and moray eels* | The first member of Deep Cut. She rides on the remains of the Octostomp out of range and attacks by shooting dozens of moray eels at Agent 3, which must be avoided or shot back to damage her. When stunned, the player must scale the Octostomp to damage her directly, after which she adds a variety of extra eel attacks to her move set. | 02 |

|
Shiver and Master Mega* | The second member of Deep Cut and her shark, which she rides mostly out of range of attack. Although they can be damaged while circling the arena, it is easiest to attack Master Mega when it charges onto the arena like the Reefslider, at which point Shiver can be attacked directly. In later phases, they jump between ink tornadoes around the arena and attack much faster. | 04 |

|
Big Man* | The third and final member of Deep Cut. He transforms into a shadow and floats around the arena, leaving ink behind. When attacked, the shadow splits into smaller ones which attack with various bomb blasts. The real Big Man shadow is identified through the Squid Sensor, whereas fake ones explode. In later phases, the shadows attack faster and with more bomb types. | 06 |

|
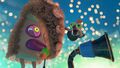
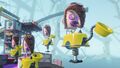
Mr. Grizz* | He is Ursine Anomaly #3 and CEO of Grizzco Industries who has harvested Golden Eggs and stolen the Great Zapfish to return mammals to the world through his Fuzzy Ooze. Agent 3 must dodge his many attacks and clear Fuzzy Ooze with Smallfry to be able to attack Grizz directly, after which he intensifies his attacks. In the second half of the battle, Agent 3 must work with DJ Octavio to use the Octobot King L3.Gs' Ink Vac and absorb and shoot out the Fuzzballs on Grizz's body within 3 minutes and 33 seconds, all while avoiding space debris. | Rocket |
Quotes
| “ | SRL historian here with a pro tip. Want to learn about the weird world of Alterna AND brush up your skills with all kinds of weapons and varied terrain? Check out Story Mode! Just follow the strange old man into the Splatsville sewer to get started. Wow, new sentence.
Another Story Mode tip: most stages allow you to choose from multiple weapon loadouts. So you can sharpen your skills AND take advantage of a weapon's particular strengths to survive. That said, sometimes you'll have nothing to rely on but your wits... and maybe a Zipcaster. |
” |
| “ | It's not all multiplayer mayhem in #Splatoon3, you know? Dozens of single-player stages filled with unique tricks, tests and... hairy Octarians await in Story Mode. | ” |
— @NintendoEurope on Twitter[3]
| ||
Badges
- Main article: Badge#Story Mode
Completing certain objectives in Return of the Mammalians rewards the player with badges that they can use on their Splashtag.
| Return of the Mammalians badges | ||
|---|---|---|
| DJ Octavio Defeated! | Defeat the Octobot King L3.Gs in the Crater | |
| Story Mode Cleared! | Complete the Alterna Space Center sequence and see the credits | |
| Max Hero Level Achieved! | Collect the maximum of 99 Upgrade Points | |
| Max Hero Level Achieved! | ||
| Secret Kettle Found and Cleared! | Unlock and clear After Alterna | |
Music

Reason: Needs audio file for "Alterna Shimin Program M-00: Init (Test Noise)"


Gallery
Artwork
-

Mode icon
-
Logo
-
Key art (vertical)
-
Key art (horizontal, no logo)
-
-
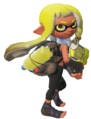
Agent 3
-
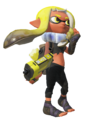
Agent 3
-
Agent 3
-
Smallfry and Power Eggs
-
Smallfry
-
Smallfry
-
Smallfry
-
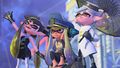
New Squidbeak Splatoon (Callie, the Captain, and Marie)
-
New Squidbeak Splatoon - Holidays 2021
-

New Squidbeak Splatoon
-
-

Craig Cuttlefish
-


Promotional images
-
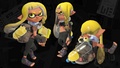
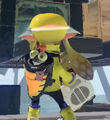
Agent 3 with the first style of the Hero Suit
-
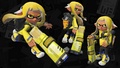
Agent 3 with the second style of the Hero Suit
-
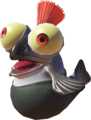
An Octotrooper
-

A view of Alterna, as seen in the opening
-

-
-
-
Agent 3 and Smallfry near some of the Fuzzy Ooze
-

Agent 3, immediately after touching the Fuzzy Ooze
-
Agent 3, fully trapped in Fuzzy Ooze
-
Smallfry eating some Fuzzy Ooze via a Fuzzball
-
-
-
Cuttlefish, as seen in Splatoon 3
-
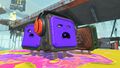
Octostamps and an Amped Octostamp in Return of the Mammalians
-
A group of Octohoppers
-
A group of Octopods with an Oversized Octopod.
-
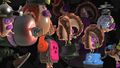
A group of Octarians
-
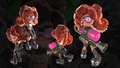
Enemy Octolings


Other
-

A world map taken from the Earth's model as seen in the final boss

Screenshots
-
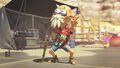
An image of Agent 3 wielding a Sloshing Machine, with Smallfry in the back.
-
Agent 3 battling an Octarian with the Splatana Stamper.


Similarities with Octo Expansion
Return of the Mammalians bears multiple similarities to Octo Expansion. Both stages share their name with a playable game mode within their respective Splatoon games.
Story Mode Progression
- The player can choose between different non-Hero weapons.
- Both modes have a similar interface, a variety of mission conditions and heightened freedom as opposed to the previous two story modes' linear progression.
- Both modes have a form of currency
- Return of the Mammalians has Power Eggs.
- Octo Expansion has CQ Points.
- Use of in-game currency is required to unlock or attempt missions, progressing the campaign.
- In Return of the Mammalians, Power Eggs are also used to clear Fuzzy Ooze that blocks the way.
- Both modes have a key NPC that guides the player throughout an area or splats them if they fail certain objectives (such as running out of ink or time).
- Return of the Mammalians has O.R.C.A.
- Octo Expansion has C.Q. Cumber
- Both modes are underground, far below the sea level of Earth.
Final Stage
In both Octo Expansion and Return of the Mammalians, the player must face a continuous final stage before attempting to face the final boss of each campaign. The start of both stages removes the player's weapons and requires the player to re-equip their gear along the way. Both stages also feature an "unlimited use" section that allows special weapon use without losing special power.
Return of the Mammalians
The final stage in Return of the Mammalians is the Alterna Space Center with the initial Alterna Space Center: Entrance starting the player with no gear.
The section for unlimited special weapon use is The Spirit Lifter: First Class with Zipcaster as the weapon.
Octo Expansion
The final stage in Octo Expansion is Deepsea Metro Escape with the initial areas of Coccyx Phase and Villi Phase starting the player with no gear.
The section for unlimited special weapon use is Diaphragm Phase with Inkjet as the weapon.
Penultimate Missions
Both of these sequences feature two songs written by the game's main idol group.
The penultimate mission uses different music for each section: the first plays a modified version of the enemy's theme, and the second plays the idol's theme.
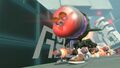
In both final missions, the successful final attack grows so powerful that the attack damages the game UI in some way.
In both final missions, being splatted or running out of time will show an additional cutscene of the world being destroyed before showing the 'Continue?' screen.
Return of the Mammalians
The first mission is The Ursine Anomaly - #03, using Bear with Me as the theme.
The final mission is Return of the Mammalians (mission), using Calamari Inkantation 3MIX as the theme. DJ Octavio's Ink Vac destroys the game UI as the attack power increases.
Octo Expansion
The first mission is Sanitized Agent 3 using Splattack! (Octo) as the the theme.
The final mission is Turf War (Octo Expansion) using Fly Octo Fly ~ Ebb & Flow (Octo) as the theme. Pearl's Princess Cannon destroys the game UI as the attack power increases.
Changes after completing the mode
After the player completes Return of the Mammalians, the following changes occur:
- The Great Zapfish can be seen in Splatsville.
- Li'l Judd starts to wear a headset.
- Deep Cut in Splatsville and the Squid Sisters in Inkopolis Plaza both have more enthusiastic animations when the player zooms in on them in their studios.
- The statue used by Mr. Grizz in Grizzco buildings changes from a bear eating a fish to a large fish eating a miniature bear, though his dialogue icon remains the same. The original Mr. Grizz statue appears in Alterna behind the Squid Sisters Camp, and can be interacted with to replay the final Alterna Space Center section or watch the credits again via memories.
- Cuttlefish, in his dried-up form, joins the Squid Sisters and the Captain at the Squid Sisters Camp, where he can be spoken to.
- The Spirit Lifter in Alterna is replaced by a near-identical rocket that is blue rather than orange.
- If the player has fully surveyed all of Alterna by visiting all of the space on the map, the Shel-drone appears on the platform near the Squid Sisters Camp.
- If the player has completed every level in Alterna, the secret kettle for After Alterna appears at the spot where the player first arrived in Alterna.
Trivia
- Return of the Mammalians is the first single-player mode in the Splatoon series:
- Return of the Mammalians is the only single-player mode in the Splatoon series in which the player can play as either an Inkling or an Octoling, without being restricted to one or the other.
- Cuttlefish's quotes about Octarians and squid references do not change when the player is an Octoling.
- Agent 3 has two styles of the Hero Suit. A post on Nintendo's official website hinted that they are "each suited to different situations".[4]
- In-game, the torn down version is a "standard" form while the other is part of the upgradable Hero set.
- Many mysterious sounds can be heard in Alterna, but are hard to hear and are distorted. This ambient noise includes announcement messages sent over a loudspeaker system to the Alterna Space Center, with various notification sounds and human speech in English reporting on the status of the rocket launch.
- The Booyah Bomb and Tacticooler special weapons are the only ones in the game that were available at the game's launch to not appear in any way in Return of the Mammalians. Big Bubbler, while not available for use by the player, is used by Octolings in the final section of After Alterna.
- Before Version 1.1.1, if the player closed the game or entered sleep mode during Deep Cut's news broadcast directly after beating the final boss, they would be forced to replay the entire final section due to a glitch.
- As level progression in Return of the Mammalians is linked to collecting Power Eggs rather than completing levels, the ending can be reached by completing a minimum of 15 levels (the five Crater levels, the three Deep Cut bosses, and the seven stages in the final Alterna Space Center sequence). This is the fewest required levels of any single-player mode in the series, with one fewer than the Octo Expansion.
Names in other languages
| Language | Name | Meaning |
|---|---|---|
| 哺乳類の帰還 honyūrui no kikan |
Return of the Mammals | |
| Terugkeer van de Mammalianen | Return of the Mammalians | |
| Le retour des mammifériens | The return of the Mammalians | |
| Rückkehr der Mammalianer | Return of the Mammalians | |
| Il ritorno dei mammiferiani | The return of the mammalians | |
| Возвращение молокоедов Vozvrashcheniye molokoyedov |
The return of the milk eaters | |
| El regreso de los mamiferoides | The return of the mammalians | |
| 哺乳类的回归 Bǔrǔlèi de huíguī |
Return of the Mammals | |
| 哺乳類的回歸 Bǔrǔlèi de huíguī |
Return of the Mammals | |
| 포유류의 귀환 poyuryu-ui gwihwan |
Return of the Mammals |
External links
References
|
