Test range

The test range, also referred to as the firing range,[1] is a location in the Splatoon series.
Description
The test range is meant for testing various weapons and abilities, by providing exact measurements that are not available in normal conditions. It contains squid-shaped target dummies, known as Squid Bumpers, that display exact damage amounts when hit, lines of the floor for distance measurements, etc.
In Splatoon and Splatoon 2, it can be accessed through Ammo Knights or through the equipment screen, by choosing the "Test" option, namely pressing ![]() . If the test range is accessed from Ammo Knights, all weapons unlocked by the player are available (via leveling, or in Splatoon, via Sunken Scrolls). When accessing from the equipment menu, only the weapons already bought by the player will be available. In Splatoon 3, it is a part of the lobby and is primarily accessed through it. It remains available even while searching for a match.
. If the test range is accessed from Ammo Knights, all weapons unlocked by the player are available (via leveling, or in Splatoon, via Sunken Scrolls). When accessing from the equipment menu, only the weapons already bought by the player will be available. In Splatoon 3, it is a part of the lobby and is primarily accessed through it. It remains available even while searching for a match.
Splatoon

Layout
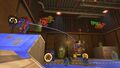
The stage is made up of two target ranges: one immediately in front of the player from the start, and one up the ramp to their left. To the player's right is a door back into Ammo Knights, though it cannot be interacted with and is just for show. Next to the door are some boxes stacked up, with an unknown weapon leaning against them. This weapon is also seen in the concept art of Sheldon.
The first area has three Squid Bumpers. Damaging them causes the amount of damage done to appear above them. They are destroyed after taking 100 points of damage, but if they take damage without being destroyed, they will heal in the same amount of time it takes players to heal in a multiplayer battle. The first area also features a series of dashed white lines on the ground to help players gauge the range of their weapons, as well as four grates on the walls that can be climbed to test chargers or other weapons. They also help the player determine their weapon's ability to ink vertical surfaces quickly, as some are better at it than others.
The second area features nine bumpers. Three of them are regular bumpers, and three have one, two, or three mains of Defense Up abilities respectively (though they still have 100 health points), as indicated by the number of Defense Up stickers on the front, and the back three are larger and much more durable, taking 500 points of damage to destroy. On the right wall is a basketball hoop.
All ground and walls are inkable.
Background
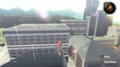
The area is in the middle of Inkopolis, surrounded by concrete city buildings and structures.
During a Splatfest, the Squid Sisters' song City of Color could be heard in the distance, with the music fading out the further left the player went. Also, the bumpers were lit, glowing and fading in time to the music.
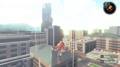
There is a non-climbable ledge surrounding the area preventing players from climbing out of it, though by placing a Squid Beakon and Super Jumping to it, the surrounding area can be briefly seen. This includes Inkopolis Tower in the distance, with the Great Zapfish curled around it.
Much of the stage is covered in graffiti and advertisements, as with most of the Splatoon world. However, unlike multiplayer matches or at Booyah Base, there are no Miiverse graffiti posts.
The entrance to Ammo Knights itself is also visible from the test range; there is a door with two flickering signs above and beside it, along with boxes and what appears to be an early version of a Splat Charger.

GamePad
On ![]() is a map of the test range and all the ink on it. Tapping on a Squid Beakon will Super Jump to it, like in online battles. There is a reset button, which removes all ink and sends the player back to where they started when pressed. There is also a control button, in which the player can change:
is a map of the test range and all the ink on it. Tapping on a Squid Beakon will Super Jump to it, like in online battles. There is a reset button, which removes all ink and sends the player back to where they started when pressed. There is also a control button, in which the player can change:
- Camera Sensitivity from -5 to +5. This changes how much the camera moves in response to the movement of the
 .
.  Y-axis/Y Axis (Normal or Inverted(NA)[a]/Reverse(EU/OC)[b]). This changes inversion controls on the Y-axis. This is disabled when motion controls are set to ON.
- X-axis/X Axis (Normal or Inverted(NA)[a]/Reverse(EU/OC)[b]). This changes inversion controls on the X-axis.
- Motion Controls (ON or OFF). This enables or disables the camera control by moving .
Gallery
-
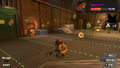
An Inkling in the test range
-
The test range during Splatfest
-
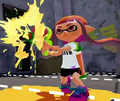
Firing a Splattershot
-
Firing a Heavy Splatling
-
Standing on one of the grates
-
Squid Bumpers with Defense Up stickers
-
Damaged Defense Up Squid Bumpers
-
The unclimbable ledge surrounding the test range
-
A camera above the test range, the purpose of which is unknown
-
A lone sparrow
-
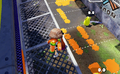
Some Splat Roller parts in the corner
-
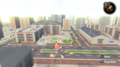
Super Jumping over the test range
-
Super Jump (alternate angle)
-
An unused toy assault rifle, presumably a beta version of the Splat Charger


Splatoon 2
Layout

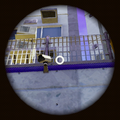
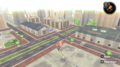
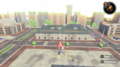
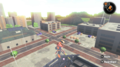
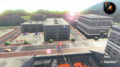
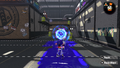
The test range is composed of two rooms connected by a short hallway. The entire range is marked with eleven dashed lines (dividing it into ten equal lengths) going left to right, the farthest being at the back wall and the closest at the front wall. It is indoors, though skylights allow sunlight in. Super Jumping inside reveals it is situated near a road in a suburban area.
The right room has a ramp leading up to a grate circling its back and side walls, and the left room has a small rise in its front-center with a grate attached to it as well. It contains five static target Squid Bumpers: three on the floor at various distances from the wall, another on the grate at the back-right corner, and the fifth on the front edge of the grate on the left wall. These target bumpers are colored to match the enemy ink color from the player's current color set.
The left room is slightly shorter and wider and has three bumpers moving laterally along paths marked on the floor. The front-most bumper moves at the slowest pace (taking eight seconds from one end of the path to the other), the middle one moves about twice as fast, and the farthest one moves about three times as fast. These bumpers are colored to match the neutral ink color from the player's current color set.
The player starts in the front of the right room and returns there whenever the test range is reset.
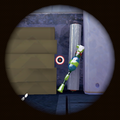
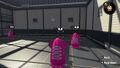
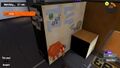
Inaccessible Room
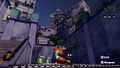
To the left of the spawn point, there is an inaccessible room with a dark gray nonfunctional door and a long window. Judging by the contents of the room, it is Sheldon's workshop. Inside the room are a pair of tables with green grids on them, an unknown light source, a staircase that presumably leads to Ammo Knights, and multiple smaller objects. These objects include five cardboard boxes, four purple suction bombs (two of which are stuck on walls), a tan pegboard with multiple tools on it, two Splat Rollers with their original design from Splatoon, two E-liter 3Ks (one partially disassembled), an empty Splat Bomb canister, a Slosher, a pair of wingtips similar to the Smoky Wingtips but purple, and small unlit light fixture. The door to the staircase leading to this room can be seen in the background of Ammo Knights.
Gallery
-
-
-
-
-
-
-
-
The Luna Blaster in the test range of Splatoon 2.
-
Moving Squid Bumpers in the test range.
-
Night version during a Splatfest.
-
-
-
-
-
-

The inaccessible side room.
-


Splatoon 3
Layout
Splatoon 3 features four unique test ranges accessible to the player:
Lobby

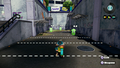
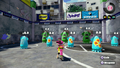
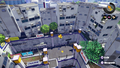
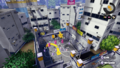
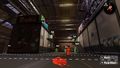
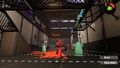
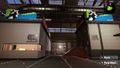
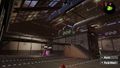
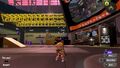
The first and largest test range is located inside the lobby and can be used to practice with the player's equipped weapon, including while waiting for online matchmaking.[2] Like the test range in Splatoon and Splatoon 2, there are a variety of immobile and mobile Squid Bumpers to shoot at. The back wall of the test range contains durable large Squid Bumpers that cannot be popped and instead will continue to take damage until it reaches the max of 999.9.
The test range also contains the Copy Machine[3], a stationary target that can be turned on to copy the player's actions, including throwing Splat Bombs when the player uses their sub weapon and shooting ink when the player attacks. The copy machine is useful for testing specials like the Big Bubbler, Ink Vac, and Tacticooler that interact with enemy ink, as well as testing the Squid Roll's damage reduction.[4]
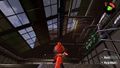
If the player is actively grouped with other players, such as in a room or when choosing to continue after a battle, they will appear as ghosts within the lobby, including the test range. The ghost players are created from screen projectors that can be seen on the ceiling of the lobby. Another player's ghost may be seen using their weapons, but this will not affect the player's test range's turf or Squid Bumpers.
Ammo Knights and The Shoal

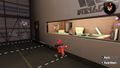
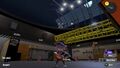
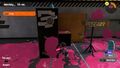
The Ammo Knights test range is now significantly scaled-down compared to previous games, being much smaller and fully enclosed with no windows. Like the previous games, it can also be accessed through the equip menu.

The Shoal's test range is near-identical to that of Ammo Knights in layout, featuring only minor differences in the placement of Squid Bumpers, though it has a different aesthetic and connects to the main room of The Shoal. Despite these similarities, it also functions similarly to the lobby test range, and ghosts can be seen when in a local room.
Grizzco

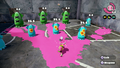
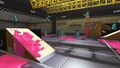
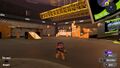
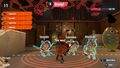
Officially referred to as a break room, Grizzco's test range features Salmonid-shaped Squid Bumpers, and allows the player to test out the weapon rotation and practice throwing eggs.[3] Weapons can be swapped at a blue crate next to the terminal, and only weapons available in the current rotation can be equipped. The break room also features differing sizes of bumpers with varying durability to account for different Salmonid types. For example, the smallest ones have the same health as Smallfry, while larger ones have the same health as Cohocks. Additionally, some of the larger bumpers have stickers of Boss Salmonids on them, indicating the health of that Boss Salmonid.
Quotes
| “ | Before hopping directly into battle, lobby patrons can get warmed up by trying out various weapons on the test range... or even practice new moves like the Squid Surge on a special test wall. It's all so new and clean! Ugh, laboratory goals... | ” |
— @SplatoonNA on Twitter[5]
| ||
| “ | We also have info on some new perks, like a break room where you can practice Egg Throws or try out new weapons. And you'll NEED practice, as a team of Eggsecutive VPs could face a hazard level of 333%! Last but not least, you'll be able to set up Private Jobs with your friends. | ” |
— @SplatoonNA on Twitter[6]
| ||
Gallery
-
-
-
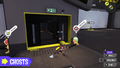
On the right, the copy machine can be seen.
-

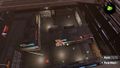
A drawing on the floor that appears to be a strategy guide for Eeltail Alley.
-
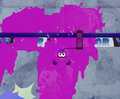
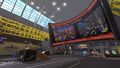
The test range during a Splatfest Sneak Peek.
-
The test range during a Splatfest.
-
The test range during a Big Run.
-
The same logo as on the Tri-Shred Tee and Tri-Squid Tee on a wall
-
The same logo as on the Tri-Octo Tee on one of the other sides of the same wall
-
A view of the Grizzco break room; a worker can be seen aiming an egg throw.
-
A team of workers celebrating in the break room.
-
Another view of the break room; the terminal and weapon crate can be seen to the left.
-
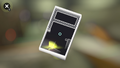
The turf map of the Ammo Knights test range.
-

The turf map of The Shoal's test range.


Trivia
- Splatoon
- The stage features an easter egg: if the player tosses a Splat Bomb through the basketball hoop in the second area, the hoop will produce a sparkly green effect and the player's Inkling will say one of the "Booyah!" sound clips. The Splat Bomb is the only sub weapon that can be used for this easter egg.
- An unused toy assault rifle with a scope similar to Splat weapons in Splatoon can be seen near the exit of the test range. It might have been a beta version of the Splat Charger.
- Following calculations from YouTube,[7] at 243p for 2%, and 239p for 1.9%, the total stage area is 12364.5p. This surpasses the largest stage, Piranha Pit, by about four times. However, this calculation would also include the inaccessible background, including Inkopolis Plaza.
- Splatoon 2
- If accessed immediately after playing Salmon Run, neither set of Squid Bumpers will have the Salmonid's signature green color. Instead, they have dark purple (right room) and dark brown (left room) colors.
- Similarly, if accessed immediately after visiting Octo Canyon, neither set of Squid Bumpers will have the Octarian's signature purple color. Instead, they have yellow (right room) and blue (left room) colors.
- It is possible to use the Inkjet to get on to the rafters along the back wall. Fly up to just below the rafter, press and at the same time, and switch to a non-Inkjet weapon. This is not possible with the Splashdown or Booyah Bomb, despite those specials also raising the player into the air.
- The arrow stripes logo of Ammo Knights on some hero weapons can also be seen on the wall.
- A few traffic cones lay around the test range and remain still until the player shoots ink at them or bumps into them. The player can interact with the cones and move them around.
- These traffic cones will make a glitched sound effect when ran into with bubbles from a Bubble Blower.
- Some gear items lay around the top area, such as a hat resembling the Hickory Work Cap, and two pairs of shoes resembling the Purple Sea Slugs and Punk Cherries, although with a different color.
- The player's character will cheer when they splat the three moving targets at the same time with the same attack.
- This is most easily done using the Baller or Splashdown special weapons, or with a single charger shot (using a fully charged shot's ability to pierce targets).
- Splatoon 3
- The giant screen in the lobby is actually a large, curved Nintendo Switch. There are no Joy-Cons attached, and the charging port can be seen on the bottom.
- The battle pot next to the terminal is a coffee dispenser. There is a handle and the hole that dispenses the coffee. Behind it, it is plugged into a wall.
Names in other languages
| Language | Name | Meaning |
|---|---|---|
| 試射場 Shishajō |
Test shooting range | |
| Schietbaan | Shooting range | |
| Aire de tir | Shooting area | |
| Übungsbereich | Practice area | |
| Poligono | ||
| Zona de pruebas | Testing area | |
| 試射場 shìshè chǎng |
Test Range | |
| 사격 연습장 sagyeog yeonseubjang |
Shooting Range | |
| ShootingRange |
References
- ↑ "Now, with all of these features, this weapon might take some getting used to, so I recommend taking it for a test run on the firing range before heading straight into battle." Sheldon's introduction to the Ballpoint Splatling, Splatoon 3
- ↑
 Splatoon 3 Direct - Nintendo Switch
- ↑ 3.0 3.1
 CONFIDENTIAL REPORT: SQUID RESEARCH LAB DIVES DEEP INTO THE SPLATLANDS
- ↑ Nintendo Treehouse: Live | August 2022 - Splatoon 3 Multiplayer Stages and Strategies
- ↑
 @SplatoonNA on Twitter
- ↑ @SplatoonNA on Twitter
- ↑ 1v1 at the Shooting Range
|
