Sting Ray: Difference between revisions
(→Use) |
GloverMist (talk | contribs) mNo edit summary |
||
| Line 17: | Line 17: | ||
* Before starting the Sting Ray, it is advised to keep a safe distance from battles, as firing a Sting Ray too close to an enemy can leave one vulnerable to attack. | * Before starting the Sting Ray, it is advised to keep a safe distance from battles, as firing a Sting Ray too close to an enemy can leave one vulnerable to attack. | ||
* The Sting Ray has poor ink coverage and is generally better for splatting enemies. | * The Sting Ray has poor ink coverage and is generally better for splatting enemies. | ||
* The player can change into squid or octopus form while using the Sting Ray, allowing for more mobility. This can help to escape from | * The player can change into squid or octopus form while using the Sting Ray, allowing for more mobility. This can help to escape from [[Tenta Missiles]] or other players. However, it is impossible to [[Super Jump]] while the Sting Ray is active. | ||
* It is impossible to activate the Sting Ray inside the [[spawn point]]. If activated, the player is automatically pushed out while continuing to fire. This may be because of how the Sting Ray, like all weapons, cannot penetrate the opponents' spawn point. | * It is impossible to activate the Sting Ray inside the [[spawn point]]. If activated, the player is automatically pushed out while continuing to fire. This may be because of how the Sting Ray, like all weapons, cannot penetrate the opponents' spawn point. | ||
* Despite the Sting Ray's ability to penetrate surfaces, it damages Ballers normally and thus will not affect the player that is inside. | * Despite the Sting Ray's ability to penetrate surfaces, it damages Ballers normally and thus will not affect the player that is inside. | ||
| Line 26: | Line 26: | ||
* When firing the Sting Ray, if you lose track of the opponent, bring up your map with {{button|X}}. If an opponent has taken any damage, they will be visible on the map until they completely heal. Redirect the Sting Ray until you hear the popping sound. | * When firing the Sting Ray, if you lose track of the opponent, bring up your map with {{button|X}}. If an opponent has taken any damage, they will be visible on the map until they completely heal. Redirect the Sting Ray until you hear the popping sound. | ||
* Using the Sting Ray can provide massive area control, as the Sting Ray's beam can go much further distances the farther away you are from your target. | * Using the Sting Ray can provide massive area control, as the Sting Ray's beam can go much further distances the farther away you are from your target. | ||
* Using the Sting Ray on an enemy player either riding the [[Tower]] or carrying the [[Rainmaker (weapon)|Rainmaker]], or on the [[Rainmaker shield]], allows for better objective control. If a team has a lead near the end of a [[Tower Control]] or [[Rainmaker]] match and one of its members has a Sting Ray, they can focus on building up their [[Special gauge]] to provide an instant win. Note that if the Rainmaker carrier is hiding in their ink, the user cannot see the | * Using the Sting Ray on an enemy player either riding the [[Tower]] or carrying the [[Rainmaker (weapon)|Rainmaker]], or on the [[Rainmaker shield]], allows for better objective control. If a team has a lead near the end of a [[Tower Control]] or [[Rainmaker]] match and one of its members has a Sting Ray, they can focus on building up their [[Special gauge]] to provide an instant win. Note that if the Rainmaker carrier is hiding in their ink, the user cannot see the Ranked Battle symbol on their screen. | ||
* The Sting Ray is less effective against an enemy carrying a Power Clam than against a Tower rider or Rainmaker carrier because of the greater mobility of the former. A single Sting Ray will also have trouble stopping multiple Power Clams. | * The Sting Ray is less effective against an enemy carrying a Power Clam than against a Tower rider or Rainmaker carrier because of the greater mobility of the former. A single Sting Ray will also have trouble stopping multiple Power Clams. | ||
* A Sting Ray can essentially invalidate an enemy’s tower push by just simply aiming at the tower and having a teammate board it. | * A Sting Ray can essentially invalidate an enemy’s tower push by just simply aiming at the tower and having a teammate board it. | ||
| Line 33: | Line 33: | ||
* The most effective way to counter Sting Ray is to prevent it from being fired. Recognize which players on the enemy team have a Sting Ray in their weapon sets and focus attacks on them when making a push. | * The most effective way to counter Sting Ray is to prevent it from being fired. Recognize which players on the enemy team have a Sting Ray in their weapon sets and focus attacks on them when making a push. | ||
* You can fight fire with fire by using your own Sting Ray against the opponent's one. On Tower Control and Rainmaker, in which each team typically has at least one Sting Ray user, Sting Ray battles are common, especially if the team on the offense is trying to splat the defending team's Sting Ray user. | * You can fight fire with fire by using your own Sting Ray against the opponent's one. On Tower Control and Rainmaker, in which each team typically has at least one Sting Ray user, Sting Ray battles are common, especially if the team on the offense is trying to splat the defending team's Sting Ray user. | ||
* The | * The [[Inkjet]] is an effective special against the Sting Ray. A properly launched and piloted Inkjet can splat an enemy Sting Ray user while being relatively safe from the beam. | ||
* | * [[Tenta Missiles]] are a quick way to either counter or dissuade a Sting Ray user if the attack is anticipated. The Sting Ray user will be forced to either delay or interrupt the Sting Ray to avoid getting splatted by the missiles. | ||
* Quickly swimming away from the Sting Ray's beam is generally the best way to avoid getting splatted without using Specials, as users turn relatively slowly while the Sting Ray is active. This is a useful tactic in Tower Control to maintain a Tower push. | * Quickly swimming away from the Sting Ray's beam is generally the best way to avoid getting splatted without using Specials, as users turn relatively slowly while the Sting Ray is active. This is a useful tactic in Tower Control to maintain a Tower push. | ||
| Line 46: | Line 46: | ||
| '''{{Ver|S2|1.3.0}}''' || | | '''{{Ver|S2|1.3.0}}''' || | ||
* {{buff|Firing the Sting Ray continuously for 1.5 seconds will cause a shock wave to appear around the [[ink]] blast, significantly increasing its damage radius.}} | * {{buff|Firing the Sting Ray continuously for 1.5 seconds will cause a shock wave to appear around the [[ink]] blast, significantly increasing its damage radius.}} | ||
* {{buff|Extended firing duration by .5 seconds (firing duration when using the maximum amount of | * {{buff|Extended firing duration by .5 seconds (firing duration when using the maximum amount of [[Special Power Up]] remains unchanged).}} | ||
* {{buff|Ink splats will no longer appear on players submerged in ink when hit by a Sting Ray fired by one of their allies.}} | * {{buff|Ink splats will no longer appear on players submerged in ink when hit by a Sting Ray fired by one of their allies.}} | ||
|- | |- | ||
| '''{{Ver|S2|1.4.0}}''' || | | '''{{Ver|S2|1.4.0}}''' || | ||
* {{buff|Opponents behind stage objects will be revealed when the Sting Ray's beam is roughly 23% further away from them than it was previously.}} | * {{buff|Opponents behind stage objects will be revealed when the Sting Ray's beam is roughly 23% further away from them than it was previously.}} | ||
* {{buff|Increased damage dealt to opposing | * {{buff|Increased damage dealt to opposing [[Baller]]s when shooting ink by roughly 100%.}} | ||
|- | |- | ||
| '''{{Ver|S2|2.0.0}}''' || | | '''{{Ver|S2|2.0.0}}''' || | ||
| Line 66: | Line 66: | ||
* {{nerf|Decreased duration by roughly 35/60 of a second.}} | * {{nerf|Decreased duration by roughly 35/60 of a second.}} | ||
* {{nerf|Decreased effect granted by the Special Power Up gear ability.}} | * {{nerf|Decreased effect granted by the Special Power Up gear ability.}} | ||
* {{nerf|Decreased damage dealt to opponents using | * {{nerf|Decreased damage dealt to opponents using [[Ink Armor]] by roughly 56%.}} | ||
* {{nerf|Decreased damage dealt to opponents using a Baller by roughly 25%.}} | * {{nerf|Decreased damage dealt to opponents using a Baller by roughly 25%.}} | ||
* {{nerf|Decreased ability to knock back opponents using a Baller.}} | * {{nerf|Decreased ability to knock back opponents using a Baller.}} | ||
|- | |- | ||
| '''{{Ver|S2|4.6.0}}''' || | | '''{{Ver|S2|4.6.0}}''' || | ||
* {{nerf|While shooting by pressing {{Button|ZR}}, silhouette displayed by effects such as | * {{nerf|While shooting by pressing {{Button|ZR}}, silhouette displayed by effects such as [[Thermal Ink]] will disappear altogether.}} | ||
|- | |- | ||
| '''{{Ver|S2|4.9.0}}''' || | | '''{{Ver|S2|4.9.0}}''' || | ||
* {{nerf|Decreased damage dealt to opponents when the Sting Ray's beam passes through at least one stage object before hitting them by roughly 17%.}} | * {{nerf|Decreased damage dealt to opponents when the Sting Ray's beam passes through at least one stage object before hitting them by roughly 17%.}} | ||
* {{nerf|Decreased the additional damage dealt to opponent Ink Armor when the | * {{nerf|Decreased the additional damage dealt to opponent Ink Armor when the [[Object Shredder]] gear ability is equipped from roughly 3.0 times normal to roughly 1.25 times normal damage.}} | ||
|} | |} | ||
| Line 110: | Line 110: | ||
* The Sting Ray appears to be based on a water jet cutter, particularly a gas powered one, hinted at by the ambient sounds the weapon makes when not firing. | * The Sting Ray appears to be based on a water jet cutter, particularly a gas powered one, hinted at by the ambient sounds the weapon makes when not firing. | ||
* The weapons with the smallest point requirements for Sting Ray are the [[Custom Jet Squelcher]], [[Squeezer]], [[Dynamo Roller]] and [[Clash Blaster]] at 180p each. The weapons with the largest point requirements for Sting Ray are the [[Splat Charger]], [[Hero Charger Replica]], and [[Splatterscope]] at 220p each. | * The weapons with the smallest point requirements for Sting Ray are the [[Custom Jet Squelcher]], [[Squeezer]], [[Dynamo Roller]] and [[Clash Blaster]] at 180p each. The weapons with the largest point requirements for Sting Ray are the [[Splat Charger]], [[Hero Charger Replica]], and [[Splatterscope]] at 220p each. | ||
* There are no [[ | * There are no [[Roller|brushes]], [[dualie]]s or [[brella]]s that have the Sting Ray as their [[special weapon]], nor is it paired with [[Suction Bomb]]s, [[Toxic Mist]], [[Point Sensor]]s, [[Squid Beakon]]s, [[Fizzy Bomb]]s or [[Torpedo]]es as their [[sub weapon]]. | ||
==Names in other languages== | ==Names in other languages== | ||
Revision as of 21:23, 13 January 2021
The Sting Ray is a special weapon in Splatoon 2.
Splatoon 2

| Category | Special |
| Base damage | 1.8 per frame (Direct hit) 1.5 per frame (Interference) |
| Base duration | 7.17 seconds |
When activated, it allows the player to fire a continuous laser that shoots through walls. To balance this, its turning is slow and delayed by 0.7 seconds. However, the user can stop firing the weapon to move the camera freely. When not firing, the player can see silhouettes of opponents on the map as if Thermal Ink was active, ostensibly for ease in targeting. The player can then continue firing.
The Sting Ray's laser deals 1.8 damage per frame while it makes contact with an opponent. While it has excellent range and can hurt players hiding behind cover, the beam is narrow and easy to evade. Players using the Sting Ray can move normally while firing it, but they turn very slowly when doing so. After about three seconds, the Sting Ray's range gets larger and it moves even slower. This is reset after the player stops firing or turns into a squid or octopus.
Use
- Before starting the Sting Ray, it is advised to keep a safe distance from battles, as firing a Sting Ray too close to an enemy can leave one vulnerable to attack.
- The Sting Ray has poor ink coverage and is generally better for splatting enemies.
- The player can change into squid or octopus form while using the Sting Ray, allowing for more mobility. This can help to escape from Tenta Missiles or other players. However, it is impossible to Super Jump while the Sting Ray is active.
- It is impossible to activate the Sting Ray inside the spawn point. If activated, the player is automatically pushed out while continuing to fire. This may be because of how the Sting Ray, like all weapons, cannot penetrate the opponents' spawn point.
- Despite the Sting Ray's ability to penetrate surfaces, it damages Ballers normally and thus will not affect the player that is inside.
Strategy
As a Sting Ray user
- The Sting Ray excels on stages that are long, narrow, closed, and relatively flat, especially Port Mackerel and Walleye Warehouse. A Sting Ray can also come in handy on large stages, depending on the mode. The wider and more open a stage is, the less effective the Sting Ray will usually be. However, note that some stages that are normally less suitable for the Sting Ray might have locations from which it can be effective, such as atop the booth in Humpback Pump Track and from the court in New Albacore Hotel.
- When firing the Sting Ray, if you lose track of the opponent, bring up your map with
 . If an opponent has taken any damage, they will be visible on the map until they completely heal. Redirect the Sting Ray until you hear the popping sound.
 - Using the Sting Ray can provide massive area control, as the Sting Ray's beam can go much further distances the farther away you are from your target.
- Using the Sting Ray on an enemy player either riding the Tower or carrying the Rainmaker, or on the Rainmaker shield, allows for better objective control. If a team has a lead near the end of a Tower Control or Rainmaker match and one of its members has a Sting Ray, they can focus on building up their Special gauge to provide an instant win. Note that if the Rainmaker carrier is hiding in their ink, the user cannot see the Ranked Battle symbol on their screen.
- The Sting Ray is less effective against an enemy carrying a Power Clam than against a Tower rider or Rainmaker carrier because of the greater mobility of the former. A single Sting Ray will also have trouble stopping multiple Power Clams.
- A Sting Ray can essentially invalidate an enemy’s tower push by just simply aiming at the tower and having a teammate board it.
Versus a Sting Ray user
- The most effective way to counter Sting Ray is to prevent it from being fired. Recognize which players on the enemy team have a Sting Ray in their weapon sets and focus attacks on them when making a push.
- You can fight fire with fire by using your own Sting Ray against the opponent's one. On Tower Control and Rainmaker, in which each team typically has at least one Sting Ray user, Sting Ray battles are common, especially if the team on the offense is trying to splat the defending team's Sting Ray user.
- The Inkjet is an effective special against the Sting Ray. A properly launched and piloted Inkjet can splat an enemy Sting Ray user while being relatively safe from the beam.
- Tenta Missiles are a quick way to either counter or dissuade a Sting Ray user if the attack is anticipated. The Sting Ray user will be forced to either delay or interrupt the Sting Ray to avoid getting splatted by the missiles.
- Quickly swimming away from the Sting Ray's beam is generally the best way to avoid getting splatted without using Specials, as users turn relatively slowly while the Sting Ray is active. This is a useful tactic in Tower Control to maintain a Tower push.
Version history
| Version | Adjustments |
|---|---|
| Base game |
|
| 1.3.0 |
|
| 1.4.0 |
|
| 2.0.0 |
|
| 3.0.0 |
|
| 4.0.0 |
|
| 4.3.0 |
|
| 4.6.0 |
|
| 4.9.0 |
|
Quotes
| “ | Hold down |
” |
| “ | Firing a high-pressure, wall-piercing jet of ink while |
” |
— Splatoon 2 Sub & Special Guide(EU)[b]
| ||
- Notes
Sets


Gallery
-
Sting Ray.
-
Promo image.
-
An Inkling using the Sting Ray.
-
Aiming the Sting Ray.
-
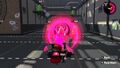
Firing the Sting Ray.
-
Holding the Sting Ray.
-
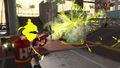
Shows a player firing the Sting Ray in the Training Room. The Sting Ray has developed a shockwave after firing for some time.
-
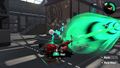
Shows a player firing the Sting Ray in the Training Room. The Sting Ray has developed a shockwave after firing for some time.


Demonstration
Trivia
- Sting Ray is made by the Custom brand.
- The Sting Ray's English name is a reference to the real-life marine animal of the same name. It could also be a reference to a ray gun, which would shoot a laser-like projectile.
- The Sting Ray appears to be based on a water jet cutter, particularly a gas powered one, hinted at by the ambient sounds the weapon makes when not firing.
- The weapons with the smallest point requirements for Sting Ray are the Custom Jet Squelcher, Squeezer, Dynamo Roller and Clash Blaster at 180p each. The weapons with the largest point requirements for Sting Ray are the Splat Charger, Hero Charger Replica, and Splatterscope at 220p each.
- There are no brushes, dualies or brellas that have the Sting Ray as their special weapon, nor is it paired with Suction Bombs, Toxic Mist, Point Sensors, Squid Beakons, Fizzy Bombs or Torpedoes as their sub weapon.
