Shooter: Difference between revisions
m (`) |
Thinker224 (talk | contribs) No edit summary |
||
| Line 16: | Line 16: | ||
! style="width: 3em;" | [[File:Splatoon 2 "2" icon.svg|x35px|link=Splatoon 2]] | ! style="width: 3em;" | [[File:Splatoon 2 "2" icon.svg|x35px|link=Splatoon 2]] | ||
|- | |- | ||
| style="text-align:center;" rowspan=" | | style="text-align:center;" rowspan="3" | {{Weapon|S2|Main|Sploosh-o-matic|64|icononly}}<br />'''Sploosh-o-matic''' | ||
| rowspan=" | | rowspan="3" | A mid-damage, close-range shooter with a high rate of fire. It features the highest damage output per second in its class, at the cost of having the shortest range. | ||
| {{Weapon|S2|Main| | | {{Weapon|S2|Main|Sploosh-o-matic|32}} | ||
| {{ya}} | | {{ya}} | ||
| {{ya}} | | {{ya}} | ||
|- | |- | ||
| {{Weapon|S2|Main| | | {{Weapon|S2|Main|Neo Sploosh-o-matic|32}} | ||
| {{ya}} | | {{ya}} | ||
| {{ya}} | | {{ya}} | ||
|- | |- | ||
| {{Weapon|S|Main|Sploosh-o-matic 7|32}} | |||
| {{ya}} | | {{ya}} | ||
| | | | ||
|- | |- | ||
| style="text-align:center;" rowspan="2" | {{Weapon| | | style="text-align:center;" rowspan="2" | {{Weapon|S2|Main|Splattershot Jr.|64|icononly}}<br />'''Splattershot Jr.''' | ||
| rowspan="2" | | | rowspan="2" | The first weapon given to the player upon starting the game. It is a low-damage, close-range shooter with a high rate of fire. Its fire rate and ink efficiency ensure that new players will be able to accomplish something. | ||
| {{Weapon| | | {{Weapon|S2|Main|Splattershot Jr.|32}} | ||
| {{ya}} | | {{ya}} | ||
| {{ya}} | | {{ya}} | ||
|- | |- | ||
| {{Weapon|S2|Main|Custom Splattershot Jr.|32}} | |||
| {{ya}} | | {{ya}} | ||
| {{ya}} | | {{ya}} | ||
|- | |- | ||
| {{Weapon|S2|Main| | | style="text-align:center;" rowspan="2" | {{Weapon|S2|Main|Splash-o-matic|64|icononly}}<br />'''Splash-o-matic''' | ||
| rowspan="2" | A low-damage, close-range shooter with a high rate of fire. It features near-perfect accuracy, the best among all automatic shooters. | |||
| {{Weapon|S2|Main|Splash-o-matic|32}} | |||
| {{ya}} | | {{ya}} | ||
| {{ya}} | | {{ya}} | ||
|- | |- | ||
| {{Weapon|S2|Main|Neo Splash-o-matic|32}} | |||
| {{ya}} | | {{ya}} | ||
| {{ya}} | | {{ya}} | ||
|- | |- | ||
| {{Weapon|S2|Main| | | style="text-align:center;" rowspan="3" | {{Weapon|S2|Main|Aerospray MG|64|icononly}}<br />'''Aerospray''' | ||
| rowspan="3" | A low-damage, close-range shooter with a high rate of fire. It has the widest shot spread and the fastest firing rate in its class, allowing it to excel at covering turf. | |||
| {{Weapon|S2|Main|Aerospray MG|32}} | |||
| {{ya}} | | {{ya}} | ||
| {{ya}} | | {{ya}} | ||
|- | |- | ||
| {{Weapon|S2|Main|Aerospray RG|32}} | |||
| {{Weapon|S2|Main| | |||
| {{ya}} | | {{ya}} | ||
| {{ya}} | | {{ya}} | ||
|- | |- | ||
| {{Weapon| | | {{Weapon|S|Main|Aerospray PG|32}} | ||
| {{ya}} | | {{ya}} | ||
| | |||
|- | |- | ||
| style="text-align:center;" rowspan="5" | {{Weapon|S2|Main|Splattershot|64|icononly}}<br />'''Splattershot''' | | style="text-align:center;" rowspan="5" | {{Weapon|S2|Main|Splattershot|64|icononly}}<br />'''Splattershot''' | ||
| Line 116: | Line 86: | ||
| | | | ||
|- | |- | ||
| style="text-align:center;" rowspan="2" | {{Weapon|S2|Main| | | style="text-align:center;" rowspan="2" | {{Weapon|S2|Main|.52 Gal|64|icononly}}<br />'''.52 Gal''' | ||
| rowspan="2" | | | rowspan="2" | A high-damage, mid-range shooter with a slow rate of fire. This weapon suffers from low accuracy. | ||
| {{Weapon|S2|Main| | | {{Weapon|S2|Main|.52 Gal|32}} | ||
| {{ya}} | |||
| {{ya}} | |||
|- | |||
| {{Weapon|S2|Main|.52 Gal Deco|32}} | |||
| {{ya}} | |||
| {{ya}} | |||
|- | |||
| style="text-align:center;" rowspan="3" | {{Weapon|S2|Main|N-ZAP '85|64|icononly}}<br />'''N-ZAP''' | |||
| rowspan="3" | A low-damage, mid-range shooter with a fast rate of fire. | |||
| {{Weapon|S2|Main|N-ZAP '85|32}} | |||
| {{ya}} | | {{ya}} | ||
| {{ya}} | | {{ya}} | ||
|- | |- | ||
| {{Weapon|S2|Main| | | {{Weapon|S2|Main|N-ZAP '89|32}} | ||
| {{ya}} | | {{ya}} | ||
| {{ya}} | | {{ya}} | ||
|- | |||
| {{Weapon|S|Main|N-ZAP '83|32}} | |||
| {{ya}} | |||
| | |||
|- | |- | ||
| style="text-align:center;" rowspan="3" | {{Weapon|S2|Main|Splattershot Pro|64|icononly}}<br />'''Splattershot Pro''' | | style="text-align:center;" rowspan="3" | {{Weapon|S2|Main|Splattershot Pro|64|icononly}}<br />'''Splattershot Pro''' | ||
| Line 140: | Line 124: | ||
| | | | ||
|- | |- | ||
| style="text-align:center;" rowspan=" | | style="text-align:center;" rowspan="2" | {{Weapon|S2|Main|.96 Gal|64|icononly}}<br />'''.96 Gal''' | ||
| rowspan=" | | rowspan="2" | A high-damage, long-range shooter with a slow rate of fire. As a trade-off for its power and range, this weapon suffers from low accuracy, and it consumes more ink per shot than any other weapon in its class. | ||
| {{Weapon|S2|Main| | | {{Weapon|S2|Main|.96 Gal|32}} | ||
| {{ya}} | | {{ya}} | ||
| {{ya}} | | {{ya}} | ||
|- | |- | ||
| {{Weapon|S2|Main| | | {{Weapon|S2|Main|.96 Gal Deco|32}} | ||
| {{ya}} | |||
| {{ya}} | | {{ya}} | ||
|- | |||
| style="text-align:center;" rowspan="2" | {{Weapon|S|Main|Dual Squelcher|64|icononly}}<br />'''Dual Squelcher''' | |||
| rowspan="2" | A low-damage, long-range shooter with a middling rate of fire. | |||
| {{Weapon|S|Main|Dual Squelcher|32}} | |||
| {{ya}} | | {{ya}} | ||
| | |||
|- | |- | ||
| {{Weapon|S|Main| | | {{Weapon|S|Main|Custom Dual Squelcher|32}} | ||
| {{ya}} | | {{ya}} | ||
| | | | ||
|- | |- | ||
| style="text-align:center;" rowspan="2" | {{Weapon|S2|Main|Jet Squelcher|64|icononly}}<br />'''Jet Squelcher''' | |||
| rowspan="2" | A low-damage, long-range shooter with a slow rate of fire. It has the longest range in its class. | |||
| {{Weapon|S2|Main|Jet Squelcher|32}} | |||
| {{ya}} | |||
| {{ya}} | |||
|- | |- | ||
| {{Weapon|S2|Main|Custom Jet Squelcher|32}} | |||
| {{Weapon|S2|Main| | |||
| {{ya}} | | {{ya}} | ||
| {{ya}} | | {{ya}} | ||
|- | |- | ||
| {{Weapon|S2|Main| | ! colspan="5" | Blaster | ||
|- | |||
| style="text-align:center;" rowspan="2" | {{Weapon|S2|Main|Luna Blaster|64|icononly}}<br />'''Luna Blaster''' | |||
| rowspan="2" | A high-damage, close-range blaster with a middling rate of fire. | |||
| {{Weapon|S2|Main|Luna Blaster|32}} | |||
| {{ya}} | | {{ya}} | ||
| {{ya}} | | {{ya}} | ||
|- | |- | ||
| {{Weapon|S2|Main| | | {{Weapon|S2|Main|Luna Blaster Neo|32}} | ||
| {{ya}} | | {{ya}} | ||
| {{ya}} | | {{ya}} | ||
|- | |- | ||
| {{Weapon|S2|Main| | | style="text-align:center;" rowspan="3" | {{Weapon|S2|Main|Blaster|64|icononly}}<br />'''Blaster''' | ||
| | | rowspan="3" | A high-damage, close-range blaster with a slow rate of fire. | ||
| {{Weapon|S2|Main|Blaster|32}} | |||
| {{ya}} | | {{ya}} | ||
| {{ya}} | | {{ya}} | ||
|- | |- | ||
| {{Weapon|S2|Main|Custom Blaster|32}} | |||
| {{Weapon|S2|Main| | |||
| {{ya}} | | {{ya}} | ||
| {{ya}} | | {{ya}} | ||
|- | |- | ||
| {{Weapon|S2|Main| | | {{Weapon|S2|Main|Hero Blaster Replica|32}} | ||
| | | | ||
| {{ya}} | | {{ya}} | ||
|- | |- | ||
| Line 209: | Line 193: | ||
| {{ya}} | | {{ya}} | ||
| | | | ||
|- | |||
| style="text-align:center;" rowspan="2" | {{Weapon|S2|Main|Clash Blaster|64|icononly}}<br />'''Clash Blaster''' | |||
| rowspan="2" | A low-damage, close-range blaster with a fast rate of fire. | |||
| {{Weapon|S2|Main|Clash Blaster|32}} | |||
| | |||
| {{ya}} | |||
|- | |||
| {{Weapon|S2|Main|Clash Blaster Neo|32}} | |||
| | |||
| {{ya}} | |||
|- | |- | ||
| style="text-align:center;" rowspan="2" | {{Weapon|S2|Main|Rapid Blaster|64|icononly}}<br />'''Rapid Blaster''' | | style="text-align:center;" rowspan="2" | {{Weapon|S2|Main|Rapid Blaster|64|icononly}}<br />'''Rapid Blaster''' | ||
| Line 228: | Line 222: | ||
| {{Weapon|S2|Main|Rapid Blaster Pro Deco|32}} | | {{Weapon|S2|Main|Rapid Blaster Pro Deco|32}} | ||
| {{ya}} | | {{ya}} | ||
| {{ya}} | |||
|- | |||
| style="text-align:center;" | {{Weapon|S2|Main|Grizzco Blaster|64|icononly}}<br />'''Grizzco Blaster''' | |||
| A low-damage, close-range blaster with a fast rate of fire. This weapon is only used at wildcard rotations in Salmon Run. | |||
| {{Weapon|S2|Main|Grizzco Blaster|32}} | |||
| | |||
| {{ya}} | | {{ya}} | ||
|- | |- | ||
! colspan="5" | Semi-automatic | ! colspan="5" | Semi-automatic | ||
|- | |||
| style="text-align:center;" rowspan="2" | {{Weapon|S2|Main|L-3 Nozzlenose|64|icononly}}<br />'''L-3 Nozzlenose''' | |||
| rowspan="2" | A low-damage, mid-range shooter. It is burst-fire, firing three bullets after a pull of the trigger. Well-timed button presses are required to maintain an optimal rate of fire. | |||
| {{Weapon|S2|Main|L-3 Nozzlenose|32}} | |||
| {{ya}} | |||
| {{ya}} | |||
|- | |||
| {{Weapon|S2|Main|L-3 Nozzlenose D|32}} | |||
| {{ya}} | |||
| {{ya}} | |||
|- | |- | ||
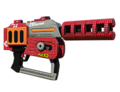
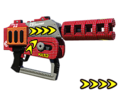
| style="text-align:center;" rowspan="3" | {{Weapon|S2|Main|H-3 Nozzlenose|64|icononly}}<br />'''H-3 Nozzlenose''' | | style="text-align:center;" rowspan="3" | {{Weapon|S2|Main|H-3 Nozzlenose|64|icononly}}<br />'''H-3 Nozzlenose''' | ||
| Line 245: | Line 255: | ||
| {{ya}} | | {{ya}} | ||
| | | | ||
|- | |- | ||
| style="text-align:center;" rowspan="2" | {{Weapon|S2|Main|Squeezer|64|icononly}}<br />'''Squeezer''' | | style="text-align:center;" rowspan="2" | {{Weapon|S2|Main|Squeezer|64|icononly}}<br />'''Squeezer''' | ||
Revision as of 04:11, 28 August 2018

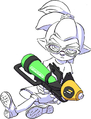
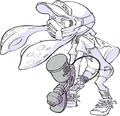
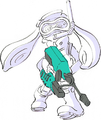
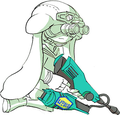
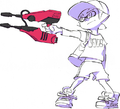
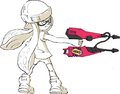
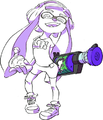
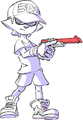
Shooters are main weapon classifications in Splatoon and Splatoon 2. Shooters are guns that fire small blobs of ink in quick succession. Most shooters will continuously fire when the player holds the trigger, but some have semi-automatic operation.
Blasters are shooters that are able to fire large globs of ink with a delayed explosion. The explosion allows users to attack opponents located behind obstacles or around corners.
Semi-automatic weapons are shooters that offer semi-automatic functionality, requiring the player to tap the trigger repeatedly instead of holding it for some or all aspects of operation.
List of shooters
| Series | Description | Variants | Games | |
|---|---|---|---|---|
 Sploosh-o-matic |
A mid-damage, close-range shooter with a high rate of fire. It features the highest damage output per second in its class, at the cost of having the shortest range. | Template:Ya | Template:Ya | |
| Template:Ya | Template:Ya | |||
| Template:Ya | ||||
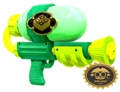
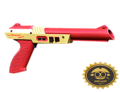
 Splattershot Jr. |
The first weapon given to the player upon starting the game. It is a low-damage, close-range shooter with a high rate of fire. Its fire rate and ink efficiency ensure that new players will be able to accomplish something. | Template:Ya | Template:Ya | |
| Template:Ya | Template:Ya | |||
 Splash-o-matic |
A low-damage, close-range shooter with a high rate of fire. It features near-perfect accuracy, the best among all automatic shooters. | Template:Ya | Template:Ya | |
| Template:Ya | Template:Ya | |||
 Aerospray |
A low-damage, close-range shooter with a high rate of fire. It has the widest shot spread and the fastest firing rate in its class, allowing it to excel at covering turf. | Template:Ya | Template:Ya | |
| Template:Ya | Template:Ya | |||
| Template:Ya | ||||
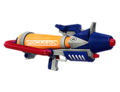
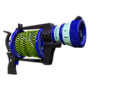
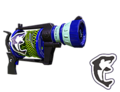
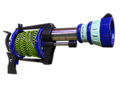
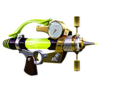
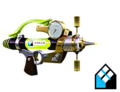
 Splattershot |
A mid-damage, mid-range shooter with a middling rate of fire. Has no real weaknesses and can adapt to any situation. | Template:Ya | Template:Ya | |
| Template:Ya | Template:Ya | |||
| Template:Ya | Template:Ya | |||
| Template:Ya | Template:Ya | |||
| Template:Ya | ||||
 .52 Gal |
A high-damage, mid-range shooter with a slow rate of fire. This weapon suffers from low accuracy. | Template:Ya | Template:Ya | |
| Template:Ya | Template:Ya | |||
 N-ZAP |
A low-damage, mid-range shooter with a fast rate of fire. | Template:Ya | Template:Ya | |
| Template:Ya | Template:Ya | |||
| Template:Ya | ||||
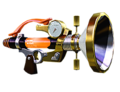
 Splattershot Pro |
A mid-damage, long-range shooter with a slow rate of fire. Notably, this weapon has very high ink consumption. | Template:Ya | Template:Ya | |
| Template:Ya | Template:Ya | |||
| Template:Ya | ||||
 .96 Gal |
A high-damage, long-range shooter with a slow rate of fire. As a trade-off for its power and range, this weapon suffers from low accuracy, and it consumes more ink per shot than any other weapon in its class. | Template:Ya | Template:Ya | |
| Template:Ya | Template:Ya | |||
 Dual Squelcher |
A low-damage, long-range shooter with a middling rate of fire. | Template:Ya | ||
| Template:Ya | ||||
 Jet Squelcher |
A low-damage, long-range shooter with a slow rate of fire. It has the longest range in its class. | Template:Ya | Template:Ya | |
| Template:Ya | Template:Ya | |||
| Blaster | ||||
 Luna Blaster |
A high-damage, close-range blaster with a middling rate of fire. | Template:Ya | Template:Ya | |
| Template:Ya | Template:Ya | |||
 Blaster |
A high-damage, close-range blaster with a slow rate of fire. | Template:Ya | Template:Ya | |
| Template:Ya | Template:Ya | |||
| Template:Ya | ||||
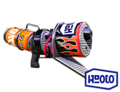
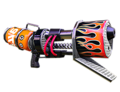
 Range Blaster |
A high-damage, mid-range blaster with a slow rate of fire. | Template:Ya | Template:Ya | |
| Template:Ya | Template:Ya | |||
| Template:Ya | ||||
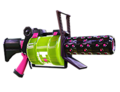
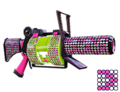
 Clash Blaster |
A low-damage, close-range blaster with a fast rate of fire. | Template:Ya | ||
| Template:Ya | ||||
 Rapid Blaster |
A mid-damage, long-range blaster with a fast rate of fire. | Template:Ya | Template:Ya | |
| Template:Ya | Template:Ya | |||
 Rapid Blaster Pro |
A mid-damage, long-range blaster with a middling rate of fire. | Template:Ya | Template:Ya | |
| Template:Ya | Template:Ya | |||
 Grizzco Blaster |
A low-damage, close-range blaster with a fast rate of fire. This weapon is only used at wildcard rotations in Salmon Run. | Template:Ya | ||
| Semi-automatic | ||||
 L-3 Nozzlenose |
A low-damage, mid-range shooter. It is burst-fire, firing three bullets after a pull of the trigger. Well-timed button presses are required to maintain an optimal rate of fire. | Template:Ya | Template:Ya | |
| Template:Ya | Template:Ya | |||
 H-3 Nozzlenose |
A mid-damage, long-range shooter. It is burst-fire, firing three bullets after a pull of the trigger. | Template:Ya | Template:Ya | |
| Template:Ya | Template:Ya | |||
| Template:Ya | ||||
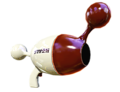
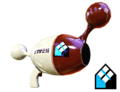
 Squeezer |
A shooter with two firing modes. Pulling the trigger once will squirt out a single long range, low spread, high-power ink shot. Holding the button leads to successive low range, high spread, lower-powered shots. The trigger can be tapped repeatedly to maintain the high-power mode. | Template:Ya | ||
| Template:Ya | ||||
Tips

Trivia
Splatoon
- Shooters are the only main weapon class to have each sub weapon represented at least once.
Gallery
SplatNet icons
-
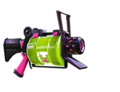
The Splattershot Jr.
-
-
The Splattershot.
-
-
The Wasabi Splattershot.
-
The Hero Shot Replica.
-
The Octoshot Replica.
-
The Splattershot Pro.
-
-
-
The Aerospray MG.
-
The Aerospray RG.
-
The Aerospray PG.
-
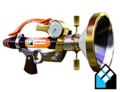
The Jet Squelcher.
-
The Custom Jet Squelcher.
-
The Dual Squelcher.
-
-
The L-3 Nozzlenose.
-
The L-3 Nozzlenose D.
-
The H-3 Nozzlenose.
-
The H-3 Nozzlenose D.
-
-
The N-ZAP '85.
-
The N-ZAP '89.
-
The N-ZAP '83.
-
The Splash-o-matic.
-
The Neo Splash-o-matic.
-
The Sploosh-o-matic.
-
The Neo Sploosh-o-matic.
-
The Sploosh-o-matic 7.
-
The .52 Gal.
-
The .52 Gal Deco.
-
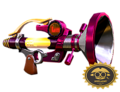
The .96 Gal.
-
The .96 Gal Deco.
-

The Blaster.
-
The Custom Blaster.
-
The Range Blaster.
-
The Custom Range Blaster.
-
The Grim Range Blaster.
-
The Rapid Blaster.
-
The Rapid Blaster Deco.
-
The Rapid Blaster Pro.
-
-
The Luna Blaster.
-
The Luna Blaster Neo.


In-game
-
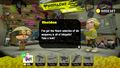
Ammo Knights, Sheldon selling Shooters with a Shooter on the shelf at the back.
-
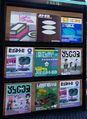
Magazines at Ancho-V Games, with several Shooters at the bottom.


Art
-

-

-

-
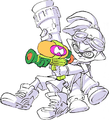
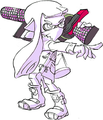
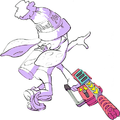
Tentatek Splattershot, two Suction Bombs, and Inkzooka
-
Hero Shot Replica and the Hero Replica set
-
-

-
-
-
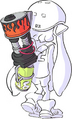
Aerospray RG and Ink Mine
-
-
-
-
-

-
-
-
-

-
-

-
-

-
-

-
-

-
-

-

-
-

-

-

-
-
-
-
-
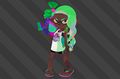
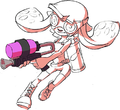
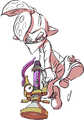
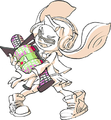
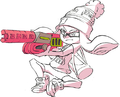
Inkling Girl with Shooter from Splatoon 2


