|
|
| Line 5: |
Line 5: |
| The '''special weapon''' is a powerful type of [[weapon]] in ''[[Splatoon]]'' and ''[[Splatoon 2]]''. There are several different kinds of special weapons, but they can all turn the tide of a battle when in the right hands. | | The '''special weapon''' is a powerful type of [[weapon]] in ''[[Splatoon]]'' and ''[[Splatoon 2]]''. There are several different kinds of special weapons, but they can all turn the tide of a battle when in the right hands. |
|
| |
|
| ==Description== | | == Description == |
| Along with the [[main weapon]] and [[sub weapon]], every set of weapons comes with a special weapon. These weapons are designed to be very powerful and table-turning, and may only be utilized for a short time once players have filled their [[special gauge]]. | | Along with the [[main weapon]] and [[sub weapon]], every set of weapons comes with a special weapon. These weapons are designed to be very powerful and table-turning, and may only be utilized for a short time once players have filled their [[special gauge]]. |
|
| |
|
| Line 12: |
Line 12: |
| Activating a special weapon makes the player's Inkling do a frontflip and completely refills the [[Ink Tank]]. | | Activating a special weapon makes the player's Inkling do a frontflip and completely refills the [[Ink Tank]]. |
|
| |
|
| ==Usage== | | == Usage == |
| In order to use a special weapon, the player must fill their [[special gauge]] by spreading [[ink]], or get a [[Canned Special]] in [[Octo Valley (mode)|Octo Valley]] and [[Battle Dojo]]. Once a special weapon is ready, clicking {{Button|RS}} will activate it. Different special weapons need different amounts of [[turf]] inked to fully charge, for balancing purposes; for instance, the Inkzooka requires 220 points to charge as of [[Version 2.0.0]], whereas the Killer Wail requires only 160.<ref>http://nintendonews.com/2015/08/splatoon-update-2-0-0-full-details/</ref> | | In order to use a special weapon, the player must fill their [[special gauge]] by spreading [[ink]], or get a [[Canned Special]] in [[Octo Valley (mode)|Octo Valley]] and [[Battle Dojo]]. Once a special weapon is ready, clicking {{Button|RS}} will activate it. Different special weapons need different amounts of [[turf]] inked to fully charge, for balancing purposes; for instance, the Inkzooka requires 220 points to charge as of [[Version 2.0.0]], whereas the Killer Wail requires only 160.<ref>http://nintendonews.com/2015/08/splatoon-update-2-0-0-full-details/</ref> |
|
| |
|
| The rate at which the special gauge depletes after being activated depends on which particular Special Weapon is in use. If the player is splatted before the gauge is completely depleted, they will respawn with a portion of the remaining gauge filled (how much depends upon the special depletion class of the main weapon; see special depletion below). This can be increased by equipping [[gear]] with [[Special Saver]]. | | The rate at which the special gauge depletes after being activated depends on which particular Special Weapon is in use. If the player is splatted before the gauge is completely depleted, they will respawn with a portion of the remaining gauge filled (how much depends upon the special depletion class of the main weapon; see special depletion below). This can be increased by equipping [[gear]] with [[Special Saver]]. |
|
| |
|
| ==Special Depletion== | | == Special Depletion == |
| | |
| Prior to the [[Version 2.7.0]] update, when a player was splatted before the special gauge was depleted, the player would respawn with half of the remaining gauge filled (barring the use of [[Special Saver]]-equipped gear). With the 2.7.0 update, all main weapons fall into one of three special depletion classes: light, medium and heavy. Weapons in the special depletion light class will lose only 40% of the special gauge when the player is splatted. Weapons in the special depletion medium class lose 60% of the special hauge, and special depletion heavy-class weapons lose 75% of the special gauge. | | Prior to the [[Version 2.7.0]] update, when a player was splatted before the special gauge was depleted, the player would respawn with half of the remaining gauge filled (barring the use of [[Special Saver]]-equipped gear). With the 2.7.0 update, all main weapons fall into one of three special depletion classes: light, medium and heavy. Weapons in the special depletion light class will lose only 40% of the special gauge when the player is splatted. Weapons in the special depletion medium class lose 60% of the special hauge, and special depletion heavy-class weapons lose 75% of the special gauge. |
|
| |
|
| Line 24: |
Line 23: |
|
| |
|
| == List of special weapons == | | == List of special weapons == |
| ===Splatoon=== | | {{:Special weapon/list of special weapons}} |
| <!-- Found any inaccuracies or missing info? The weapon it refers to may need updating too! -->
| | |
| {| class="sortable" align="left" width="100%" cellpadding="1px" style="background:#FFFFFF; text-align:center; border: 3px solid #a9de00; {{roundy}}" | | == Sets == |
| !Image | | Special weapons come in sets with main weapons. These lists show which special weapon comes with each main weapon. |
| !'''Special weapon''' | | * [[List of special weapon sets in Splatoon|List of special weapon sets in ''Splatoon'']] |
| !Ink to fill ([[battle points|p]]) | | * [[List of special weapon sets in Splatoon 2|List of special weapon sets in ''Splatoon 2'']] |
| !Duration (seconds) | | |
| ![[Damage]] | | == Stats == |
| | === ''Splatoon'' === |
| | {| class="wikitable" |
| | ! Weapon !! Ink to fill ([[battle points|p]]) !! Duration (s) !! Damage |
| |- | | |- |
| | [[File:Bomb Rush HQ.png|50px]] | | | {{Weapon|S|Special|Bomb Rush|50}} || 180 || 6 || (Depends on [[bomb]] type) |
| | [[Bomb Rush]] | |
| | 180 | |
| | 6 | |
| | (Depends on [[bomb]] type) | |
| |- | | |- |
| | [[File:Bubbler.png|50px]] | | | {{Weapon|S|Special|Bubbler|50}} || 180 || 4.5 || N/A |
| | [[Bubbler]] | |
| | 180 | |
| | 4.5 | |
| | N/A | |
| |- | | |- |
| | [[File:Echolocator.png|50px]] | | | {{Weapon|S|Special|Echolocator|50}} || 200 || 9 || N/A |
| | [[Echolocator]] | |
| | 200 | |
| | 9 | |
| | N/A | |
| |- | | |- |
| | [[File:Inkstrike HQ.png|80px]] | | | {{Weapon|S|Special|Inkstrike|50}} || 180 || 2 || 500 (at center) |
| | [[Inkstrike]] | |
| | 180 | |
| | 2 | |
| | 500 (at center) | |
| |- | | |- |
| | [[File:Inkzooka HQ.png|50px]] | | | {{Weapon|S|Special|Inkzooka|50}} || 220 || 6 || 150 |
| | [[Inkzooka]] | |
| | 220 | |
| | 6 | |
| | 150 | |
| |- | | |- |
| | [[File:Killer Wail.png|50px]] | | | {{Weapon|S|Special|Killer Wail|50}} || 160 || 4 || 500/s |
| | [[Killer Wail]] | |
| | 160 | |
| | 4 | |
| | 500/s | |
| |- | | |- |
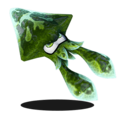
| | [[File:Kraken HQ.png|50px]] | | | {{Weapon|S|Special|Kraken|50}} || 200 || 5 || 160 |
| | [[Kraken]] | |
| | 200 | |
| | 5 | |
| | 160 | |
| |- | | |- |
| |} | | |} |
| {{clr}} | | {{clr}} |
| <br />
| | === ''Splatoon 2'' === |
| <div class="mw-collapsible" style="margin:auto; width:80%; background:#a9de00; border: 4px solid #a9de00; text-align:center; {{roundy}}">
| | In ''Splatoon 2'', the ink requirements to fill the special gauge (in p) are determined individually by each main weapon. |
| '''Weapon sets by special''' | | {| class="wikitable" |
| <div class="mw-collapsible-content">
| | ! Weapon !! Duration (s) !! Damage |
| {| class="sortable" align="center" width="100%" cellpadding="1px" style="background:#FFFFFF; text-align:center; border: 3px solid #a9de00; {{roundy}}" | |
| !Weapon | |
| ![[File:Item img special01.png|25px|link=Inkzooka]]
| |
| ![[File:Item img special02.png|25px|link=Inkstrike]]
| |
| ![[File:Killer Wail.png|25px|link=Killer Wail]]
| |
| ![[File:Bubbler.png|25px|link=Bubbler]]
| |
| ![[File:Item img special05.png|25px|link=Bomb Rush]] | |
| ![[File:Kraken2.png|25px|link=Kraken]] | |
| ![[File:Echolocator.png|25px|link=Echolocator]] | |
| !Special depletion | |
| |- | | |- |
| | style="text-align:center;"|{{Weapon|S|Main|.52 Gal|32}}
| | | {{Weapon|S2|Special|Baller|50}} || 7 || 180 |
| | {{style|no}}
| |
| | {{style|no}}
| |
| | {{style|yes|✓}}
| |
| | {{style|no}} | |
| | {{style|no}} | |
| | {{style|no}}
| |
| | {{style|no}}
| |
| |data-sort-value=2| Medium | |
| |- | | |- |
| | style="text-align:center;"|{{Weapon|S|Main|.52 Gal Deco|32}}
| | | {{Weapon|S2|Special|Splat-Bomb Launcher|50|icononly}} [[Bomb Launcher]] || 6 || (Depends on [[bomb]] type) |
| | {{style|no}} | |
| | {{style|yes|✓}} | |
| | {{style|no}}
| |
| | {{style|no}}
| |
| | {{style|no}}
| |
| | {{style|no}}
| |
| | {{style|no}}
| |
| |data-sort-value=1| Light
| |
| |- | | |- |
| | style="text-align:center;"|{{Weapon|S|Main|.96 Gal|32}}
| | | {{Weapon|S2|Special|Bubble Blower|50}} || 18 || 250 |
| | {{style|no}}
| |
| | {{style|no}}
| |
| | {{style|no}}
| |
| | {{style|no}} | |
| | {{style|no}} | |
| | {{style|no}} | |
| | {{style|yes|✓}}
| |
| |data-sort-value=1| Light | |
| |- | | |- |
| | style="text-align:center;"|{{Weapon|S|Main|.96 Gal Deco|32}}
| | | {{Weapon|S2|Special|Ink Armor|50}} || 6 || N/A |
| | {{style|no}}
| |
| | {{style|no}}
| |
| | {{style|no}}
| |
| | {{style|no}} | |
| | {{style|no}} | |
| | {{style|yes|✓}} | |
| | {{style|no}} | |
| |data-sort-value=3| Heavy | |
| |- | | |- |
| | style="text-align:center;"|{{Weapon|S|Main|Aerospray MG|32}}
| | | {{Weapon|S2|Special|Inkjet|50}} || 8 || 120 |
| | {{style|yes|✓}}
| |
| | {{style|no}}
| |
| | {{style|no}}
| |
| | {{style|no}} | |
| | {{style|no}} | |
| | {{style|no}} | |
| | {{style|no}} | |
| |data-sort-value=1| Light | |
| |- | | |- |
| | style="text-align:center;"|{{Weapon|S|Main|Aerospray PG|32}}
| | | {{Weapon|S2|Special|Ink Storm|50}} || 8 || 24/s |
| | {{style|no}}
| |
| | {{style|no}}
| |
| | {{style|no}}
| |
| | {{style|no}} | |
| | {{style|no}} | |
| | {{style|yes|✓}} | |
| | {{style|no}} | |
| |data-sort-value=1| Light | |
| |- | | |- |
| | style="text-align:center;"|{{Weapon|S|Main|Aerospray RG|32}}
| | | {{Weapon|S2|Special|Splashdown|50}} || Instant || 180 |
| | {{style|no}}
| |
| | {{style|yes|✓}}
| |
| | {{style|no}}
| |
| | {{style|no}} | |
| | {{style|no}} | |
| | {{style|no}} | |
| | {{style|no}} | |
| |data-sort-value=1| Light | |
| |- | | |- |
| | style="text-align:center;"|{{Weapon|S|Main|Bamboozler 14 Mk I|32}}
| | | {{Weapon|S2|Special|Sting Ray|50}} || 8 || 120/s |
| | {{style|no}}
| |
| | {{style|no}}
| |
| | {{style|yes|✓}}
| |
| | {{style|no}} | |
| | {{style|no}} | |
| | {{style|no}}
| |
| | {{style|no}}
| |
| |data-sort-value=1| Light | |
| |- | | |- |
| | style="text-align:center;"|{{Weapon|S|Main|Bamboozler 14 Mk II|32}}
| | | {{Weapon|S2|Special|Tenta Missiles|50}} || 2 || 150 |
| | {{style|no}}
| |
| | {{style|no}}
| |
| | {{style|no}}
| |
| | {{style|no}}
| |
| | {{style|no}}
| |
| | {{style|no}}
| |
| | {{style|yes|✓}}
| |
| |data-sort-value=1| Light
| |
| |-
| |
| | style="text-align:center;"|{{Weapon|S|Main|Bamboozler 14 Mk III|32}}
| |
| | {{style|no}}
| |
| | {{style|yes|✓}}
| |
| | {{style|no}}
| |
| | {{style|no}}
| |
| | {{style|no}}
| |
| | {{style|no}}
| |
| | {{style|no}}
| |
| |data-sort-value=3| Heavy
| |
| |-
| |
| | style="text-align:center;"|{{Weapon|S|Main|Bento Splat Charger|32}}
| |
| | {{style|no}}
| |
| | {{style|no}}
| |
| | {{style|no}}
| |
| | {{style|no}}
| |
| | {{style|no}}
| |
| | {{style|no}}
| |
| | {{style|yes|✓}}
| |
| |data-sort-value=2| Medium
| |
| |-
| |
| | style="text-align:center;"|{{Weapon|S|Main|Bento Splatterscope|32}}
| |
| | {{style|no}}
| |
| | {{style|no}}
| |
| | {{style|no}}
| |
| | {{style|no}}
| |
| | {{style|no}}
| |
| | {{style|no}}
| |
| | {{style|yes|✓}}
| |
| |data-sort-value=2| Medium
| |
| |-
| |
| | style="text-align:center;"|{{Weapon|S|Main|Berry Splattershot Pro|32}}
| |
| | {{style|no}}
| |
| | {{style|no}}
| |
| | {{style|no}}
| |
| | {{style|no}}
| |
| | {{style|yes|✓}}
| |
| | {{style|no}}
| |
| | {{style|no}}
| |
| |data-sort-value=2| Medium
| |
| |-
| |
| | style="text-align:center;"|{{Weapon|S|Main|Blaster|32}}
| |
| | {{style|no}}
| |
| | {{style|no}}
| |
| | {{style|yes|✓}}
| |
| | {{style|no}}
| |
| | {{style|no}}
| |
| | {{style|no}}
| |
| | {{style|no}}
| |
| |data-sort-value=1| Light
| |
| |-
| |
| | style="text-align:center;"|{{Weapon|S|Main|Carbon Roller|32}}
| |
| | {{style|yes|✓}}
| |
| | {{style|no}}
| |
| | {{style|no}}
| |
| | {{style|no}}
| |
| | {{style|no}}
| |
| | {{style|no}}
| |
| | {{style|no}}
| |
| |data-sort-value=2| Medium
| |
| |-
| |
| | style="text-align:center;"|{{Weapon|S|Main|Carbon Roller Deco|32}}
| |
| | {{style|no}}
| |
| | {{style|no}}
| |
| | {{style|no}}
| |
| | {{style|no}}
| |
| | {{style|yes|✓}}
| |
| | {{style|no}}
| |
| | {{style|no}}
| |
| |data-sort-value=1| Light
| |
| |-
| |
| | style="text-align:center;"|{{Weapon|S|Main|Cherry H-3 Nozzlenose|32}}
| |
| | {{style|no}}
| |
| | {{style|no}}
| |
| | {{style|no}}
| |
| | {{style|yes|✓}}
| |
| | {{style|no}}
| |
| | {{style|no}}
| |
| | {{style|no}}
| |
| |data-sort-value=1| Light
| |
| |-
| |
| | style="text-align:center;"|{{Weapon|S|Main|Classic Squiffer|32}}
| |
| | {{style|no}}
| |
| | {{style|no}}
| |
| | {{style|no}}
| |
| | {{style|yes|✓}}
| |
| | {{style|no}}
| |
| | {{style|no}}
| |
| | {{style|no}}
| |
| |data-sort-value=1| Light
| |
| |-
| |
| | style="text-align:center;"|{{Weapon|S|Main|CoroCoro Splat Roller|32}}
| |
| | {{style|yes|✓}}
| |
| | {{style|no}}
| |
| | {{style|no}}
| |
| | {{style|no}}
| |
| | {{style|no}}
| |
| | {{style|no}}
| |
| | {{style|no}}
| |
| |data-sort-value=1| Light
| |
| |-
| |
| | style="text-align:center;"|{{Weapon|S|Main|Custom Blaster|32}}
| |
| | {{style|no}}
| |
| | {{style|no}}
| |
| | {{style|no}}
| |
| | {{style|yes|✓}}
| |
| | {{style|no}}
| |
| | {{style|no}}
| |
| | {{style|no}}
| |
| |data-sort-value=2| Medium
| |
| |-
| |
| | style="text-align:center;"|{{Weapon|S|Main|Custom Dual Squelcher|32}}
| |
| | {{style|no}}
| |
| | {{style|no}}
| |
| | {{style|yes|✓}}
| |
| | {{style|no}}
| |
| | {{style|no}}
| |
| | {{style|no}}
| |
| | {{style|no}}
| |
| |data-sort-value=1| Light
| |
| |-
| |
| | style="text-align:center;"|{{Weapon|S|Main|Custom E-liter 3K|32}}
| |
| | {{style|no}}
| |
| | {{style|no}}
| |
| | {{style|no}}
| |
| | {{style|no}}
| |
| | {{style|no}}
| |
| | {{style|yes|✓}}
| |
| | {{style|no}}
| |
| |data-sort-value=2| Medium
| |
| |-
| |
| | style="text-align:center;"|{{Weapon|S|Main|Custom E-liter 3K Scope|32}}
| |
| | {{style|no}}
| |
| | {{style|no}}
| |
| | {{style|no}}
| |
| | {{style|no}}
| |
| | {{style|no}}
| |
| | {{style|yes|✓}}
| |
| | {{style|no}}
| |
| |data-sort-value=2| Medium
| |
| |-
| |
| | style="text-align:center;"|{{Weapon|S|Main|Custom Hydra Splatling|32}}
| |
| | {{style|no}}
| |
| | {{style|no}}
| |
| | {{style|no}}
| |
| | {{style|yes|✓}}
| |
| | {{style|no}}
| |
| | {{style|no}}
| |
| | {{style|no}}
| |
| |data-sort-value=1| Light
| |
| |-
| |
| | style="text-align:center;"|{{Weapon|S|Main|Custom Jet Squelcher|32}}
| |
| | {{style|no}}
| |
| | {{style|no}}
| |
| | {{style|no}}
| |
| | {{style|no}}
| |
| | {{style|no}}
| |
| | {{style|yes|✓}}
| |
| | {{style|no}}
| |
| |data-sort-value=1| Light
| |
| |-
| |
| | style="text-align:center;"|{{Weapon|S|Main|Custom Range Blaster|32}}
| |
| | {{style|no}}
| |
| | {{style|no}}
| |
| | {{style|no}}
| |
| | {{style|no}}
| |
| | {{style|no}}
| |
| | {{style|yes|✓}}
| |
| | {{style|no}}
| |
| |data-sort-value=1| Light
| |
| |-
| |
| | style="text-align:center;"|{{Weapon|S|Main|Custom Splattershot Jr.|32}}
| |
| | {{style|no}}
| |
| | {{style|no}}
| |
| | {{style|no}}
| |
| | {{style|no}}
| |
| | {{style|no}}
| |
| | {{style|no}}
| |
| | {{style|yes|✓}}
| |
| |data-sort-value=1| Light
| |
| |-
| |
| | style="text-align:center;"|{{Weapon|S|Main|Dual Squelcher|32}}
| |
| | {{style|no}}
| |
| | {{style|no}}
| |
| | {{style|no}}
| |
| | {{style|no}}
| |
| | {{style|no}}
| |
| | {{style|no}}
| |
| | {{style|yes|✓}}
| |
| |data-sort-value=1| Light
| |
| |-
| |
| | style="text-align:center;"|{{Weapon|S|Main|Dynamo Roller|32}}
| |
| | {{style|no}}
| |
| | {{style|no}}
| |
| | {{style|no}}
| |
| | {{style|no}}
| |
| | {{style|no}}
| |
| | {{style|no}}
| |
| | {{style|yes|✓}}
| |
| |data-sort-value=3| Heavy
| |
| |-
| |
| | style="text-align:center;"|{{Weapon|S|Main|E-liter 3K|32}}
| |
| | {{style|no}}
| |
| | {{style|no}}
| |
| | {{style|no}}
| |
| | {{style|no}}
| |
| | {{style|no}}
| |
| | {{style|no}}
| |
| | {{style|yes|✓}}
| |
| |data-sort-value=2| Medium
| |
| |-
| |
| | style="text-align:center;"|{{Weapon|S|Main|E-liter 3K Scope|32}}
| |
| | {{style|no}}
| |
| | {{style|no}}
| |
| | {{style|no}}
| |
| | {{style|no}}
| |
| | {{style|no}}
| |
| | {{style|no}}
| |
| | {{style|yes|✓}}
| |
| |data-sort-value=2| Medium
| |
| |-
| |
| | style="text-align:center;"|{{Weapon|S|Main|Forge Splattershot Pro|32}}
| |
| | {{style|yes|✓}}
| |
| | {{style|no}}
| |
| | {{style|no}}
| |
| | {{style|no}}
| |
| | {{style|no}}
| |
| | {{style|no}}
| |
| | {{style|no}}
| |
| |data-sort-value=1| Light
| |
| |-
| |
| | style="text-align:center;"|{{Weapon|S|Main|Fresh Squiffer|32}}
| |
| | {{style|no}}
| |
| | {{style|no}}
| |
| | {{style|no}}
| |
| | {{style|no}}
| |
| | {{style|no}}
| |
| | {{style|yes|✓}}
| |
| | {{style|no}}
| |
| |data-sort-value=2| Medium
| |
| |-
| |
| | style="text-align:center;"|{{Weapon|S|Main|Gold Dynamo Roller|32}}
| |
| | {{style|no}}
| |
| | {{style|yes|✓}}
| |
| | {{style|no}}
| |
| | {{style|no}}
| |
| | {{style|no}}
| |
| | {{style|no}}
| |
| | {{style|no}}
| |
| |data-sort-value=3| Heavy
| |
| |-
| |
| | style="text-align:center;"|{{Weapon|S|Main|Grim Range Blaster|32}}
| |
| | {{style|no}}
| |
| | {{style|no}}
| |
| | {{style|yes|✓}}
| |
| | {{style|no}}
| |
| | {{style|no}}
| |
| | {{style|no}}
| |
| | {{style|no}}
| |
| |data-sort-value=1| Light
| |
| |-
| |
| | style="text-align:center;"|{{Weapon|S|Main|H-3 Nozzlenose|32}}
| |
| | {{style|no}}
| |
| | {{style|no}}
| |
| | {{style|no}}
| |
| | {{style|no}}
| |
| | {{style|no}}
| |
| | {{style|no}}
| |
| | {{style|yes|✓}}
| |
| |data-sort-value=1| Light
| |
| |-
| |
| | style="text-align:center;"|{{Weapon|S|Main|H-3 Nozzlenose D|32}}
| |
| | {{style|yes|✓}}
| |
| | {{style|no}}
| |
| | {{style|no}}
| |
| | {{style|no}}
| |
| | {{style|no}}
| |
| | {{style|no}}
| |
| | {{style|no}}
| |
| |data-sort-value=1| Light
| |
| |-
| |
| | style="text-align:center;"|{{Weapon|S|Main|Heavy Splatling|32}}
| |
| | {{style|no}}
| |
| | {{style|yes|✓}}
| |
| | {{style|no}}
| |
| | {{style|no}}
| |
| | {{style|no}}
| |
| | {{style|no}}
| |
| | {{style|no}}
| |
| |data-sort-value=1| Light
| |
| |-
| |
| | style="text-align:center;"|{{Weapon|S|Main|Heavy Splatling Deco|32}}
| |
| | {{style|no}}
| |
| | {{style|no}}
| |
| | {{style|no}}
| |
| | {{style|no}}
| |
| | {{style|no}}
| |
| | {{style|yes|✓}}
| |
| | {{style|no}}
| |
| |data-sort-value=2| Medium
| |
| |-
| |
| | style="text-align:center;"|{{Weapon|S|Main|Heavy Splatling Remix|32}}
| |
| | {{style|no}}
| |
| | {{style|no}}
| |
| | {{style|yes|✓}}
| |
| | {{style|no}}
| |
| | {{style|no}}
| |
| | {{style|no}}
| |
| | {{style|no}}
| |
| |data-sort-value=1| Light
| |
| |-
| |
| | style="text-align:center;"|{{Weapon|S|Main|Hero Charger Replica|32}}
| |
| | {{style|no}}
| |
| | {{style|no}}
| |
| | {{style|no}}
| |
| | {{style|no}}
| |
| | {{style|yes|✓}}
| |
| | {{style|no}}
| |
| | {{style|no}}
| |
| |data-sort-value=3| Heavy
| |
| |-
| |
| | style="text-align:center;"|{{Weapon|S|Main|Hero Roller Replica|32}}
| |
| | {{style|no}}
| |
| | {{style|no}}
| |
| | {{style|yes|✓}}
| |
| | {{style|no}}
| |
| | {{style|no}}
| |
| | {{style|no}}
| |
| | {{style|no}}
| |
| |data-sort-value=1| Light
| |
| |-
| |
| | style="text-align:center;"|{{Weapon|S|Main|Hero Shot Replica|32}}
| |
| | {{style|no}}
| |
| | {{style|no}}
| |
| | {{style|no}}
| |
| | {{style|no}}
| |
| | {{style|yes|✓}}
| |
| | {{style|no}}
| |
| | {{style|no}}
| |
| |data-sort-value=1| Light
| |
| |-
| |
| | style="text-align:center;"|{{Weapon|S|Main|Hydra Splatling|32}}
| |
| | {{style|no}}
| |
| | {{style|no}}
| |
| | {{style|no}}
| |
| | {{style|no}}
| |
| | {{style|no}}
| |
| | {{style|no}}
| |
| | {{style|yes|✓}}
| |
| |data-sort-value=1| Light
| |
| |-
| |
| | style="text-align:center;"|{{Weapon|S|Main|Inkbrush|32}}
| |
| | {{style|no}}
| |
| | {{style|yes|✓}}
| |
| | {{style|no}}
| |
| | {{style|no}}
| |
| | {{style|no}}
| |
| | {{style|no}}
| |
| | {{style|no}}
| |
| |data-sort-value=1| Light
| |
| |-
| |
| | style="text-align:center;"|{{Weapon|S|Main|Inkbrush Nouveau|32}}
| |
| | {{style|no}}
| |
| | {{style|no}}
| |
| | {{style|no}}
| |
| | {{style|yes|✓}}
| |
| | {{style|no}}
| |
| | {{style|no}}
| |
| | {{style|no}}
| |
| |data-sort-value=1| Light
| |
| |-
| |
| | style="text-align:center;"|{{Weapon|S|Main|Jet Squelcher|32}}
| |
| | {{style|no}}
| |
| | {{style|yes|✓}}
| |
| | {{style|no}}
| |
| | {{style|no}}
| |
| | {{style|no}}
| |
| | {{style|no}}
| |
| | {{style|no}}
| |
| |data-sort-value=1| Light
| |
| |-
| |
| | style="text-align:center;"|{{Weapon|S|Main|Kelp Splat Charger|32}}
| |
| | {{style|no}}
| |
| | {{style|no}}
| |
| | {{style|yes|✓}}
| |
| | {{style|no}}
| |
| | {{style|no}}
| |
| | {{style|no}}
| |
| | {{style|no}}
| |
| |data-sort-value=2| Medium
| |
| |-
| |
| | style="text-align:center;"|{{Weapon|S|Main|Kelp Splatterscope|32}}
| |
| | {{style|no}}
| |
| | {{style|no}}
| |
| | {{style|yes|✓}}
| |
| | {{style|no}}
| |
| | {{style|no}}
| |
| | {{style|no}}
| |
| | {{style|no}}
| |
| |data-sort-value=2| Medium
| |
| |-
| |
| | style="text-align:center;"|{{Weapon|S|Main|Krak-On Splat Roller|32}}
| |
| | {{style|no}}
| |
| | {{style|no}}
| |
| | {{style|no}}
| |
| | {{style|no}}
| |
| | {{style|no}}
| |
| | {{style|yes|✓}}
| |
| | {{style|no}}
| |
| |data-sort-value=2| Medium
| |
| |-
| |
| | style="text-align:center;"|{{Weapon|S|Main|L-3 Nozzlenose|32}}
| |
| | {{style|no}}
| |
| | {{style|no}}
| |
| | {{style|yes|✓}}
| |
| | {{style|no}}
| |
| | {{style|no}}
| |
| | {{style|no}}
| |
| | {{style|no}}
| |
| |data-sort-value=1| Light
| |
| |-
| |
| | style="text-align:center;"|{{Weapon|S|Main|L-3 Nozzlenose D|32}}
| |
| | {{style|no}}
| |
| | {{style|no}}
| |
| | {{style|no}}
| |
| | {{style|no}}
| |
| | {{style|no}}
| |
| | {{style|yes|✓}}
| |
| | {{style|no}}
| |
| |data-sort-value=2| Medium
| |
| |-
| |
| | style="text-align:center;"|{{Weapon|S|Main|Luna Blaster|32}}
| |
| | {{style|yes|✓}}
| |
| | {{style|no}}
| |
| | {{style|no}}
| |
| | {{style|no}}
| |
| | {{style|no}}
| |
| | {{style|no}}
| |
| | {{style|no}}
| |
| |data-sort-value=1| {{explain|Medium before Version 2.8.0|Light}}
| |
| |-
| |
| | style="text-align:center;"|{{Weapon|S|Main|Luna Blaster Neo|32}}
| |
| | {{style|no}}
| |
| | {{style|no}}
| |
| | {{style|no}}
| |
| | {{style|no}}
| |
| | {{style|yes|✓}}
| |
| | {{style|no}}
| |
| | {{style|no}}
| |
| |data-sort-value=3| Heavy
| |
| |-
| |
| | style="text-align:center;"|{{Weapon|S|Main|Mini Splatling|32}}
| |
| | {{style|yes|✓}}
| |
| | {{style|no}}
| |
| | {{style|no}}
| |
| | {{style|no}}
| |
| | {{style|no}}
| |
| | {{style|no}}
| |
| | {{style|no}}
| |
| |data-sort-value=1| Light
| |
| |-
| |
| | style="text-align:center;"|{{Weapon|S|Main|Neo Splash-o-matic|32}}
| |
| | {{style|yes|✓}}
| |
| | {{style|no}}
| |
| | {{style|no}}
| |
| | {{style|no}}
| |
| | {{style|no}}
| |
| | {{style|no}}
| |
| | {{style|no}}
| |
| |data-sort-value=1| Light
| |
| |-
| |
| | style="text-align:center;"|{{Weapon|S|Main|Neo Sploosh-o-matic|32}}
| |
| | {{style|no}}
| |
| | {{style|no}}
| |
| | {{style|no}}
| |
| | {{style|no}}
| |
| | {{style|no}}
| |
| | {{style|yes|✓}}
| |
| | {{style|no}}
| |
| |data-sort-value=1| Light
| |
| |-
| |
| | style="text-align:center;"|{{Weapon|S|Main|New Squiffer|32}}
| |
| | {{style|yes|✓}}
| |
| | {{style|no}}
| |
| | {{style|no}}
| |
| | {{style|no}}
| |
| | {{style|no}}
| |
| | {{style|no}}
| |
| | {{style|no}}
| |
| |data-sort-value=1| Light
| |
| |-
| |
| | style="text-align:center;"|{{Weapon|S|Main|N-ZAP '83|32}}
| |
| | {{style|no}}
| |
| | {{style|no}}
| |
| | {{style|no}}
| |
| | {{style|no}}
| |
| | {{style|no}}
| |
| | {{style|yes|✓}}
| |
| | {{style|no}}
| |
| |data-sort-value=2| Medium
| |
| |-
| |
| | style="text-align:center;"|{{Weapon|S|Main|N-ZAP '85|32}}
| |
| | {{style|no}}
| |
| | {{style|no}}
| |
| | {{style|no}}
| |
| | {{style|no}}
| |
| | {{style|no}}
| |
| | {{style|no}}
| |
| | {{style|yes|✓}}
| |
| |data-sort-value=1| Light
| |
| |-
| |
| | style="text-align:center;"|{{Weapon|S|Main|N-ZAP '89|32}}
| |
| | {{style|no}}
| |
| | {{style|yes|✓}}
| |
| | {{style|no}}
| |
| | {{style|no}}
| |
| | {{style|no}}
| |
| | {{style|no}}
| |
| | {{style|no}}
| |
| |data-sort-value=1| Light
| |
| |-
| |
| | style="text-align:center;"|{{Weapon|S|Main|Octobrush|32}}
| |
| | {{style|no}}
| |
| | {{style|no}}
| |
| | {{style|no}}
| |
| | {{style|no}}
| |
| | {{style|no}}
| |
| | {{style|yes|✓}}
| |
| | {{style|no}}
| |
| |data-sort-value=1| Light
| |
| |-
| |
| | style="text-align:center;"|{{Weapon|S|Main|Octobrush Nouveau|32}}
| |
| | {{style|yes|✓}}
| |
| | {{style|no}}
| |
| | {{style|no}}
| |
| | {{style|no}}
| |
| | {{style|no}}
| |
| | {{style|no}}
| |
| | {{style|no}}
| |
| |data-sort-value=1| Light
| |
| |-
| |
| | style="text-align:center;"|{{Weapon|S|Main|Octoshot Replica|32}}
| |
| | {{style|yes|✓}}
| |
| | {{style|no}}
| |
| | {{style|no}}
| |
| | {{style|no}}
| |
| | {{style|no}}
| |
| | {{style|no}}
| |
| | {{style|no}}
| |
| |data-sort-value=3| Heavy
| |
| |-
| |
| | style="text-align:center;"|{{Weapon|S|Main|Permanent Inkbrush|32}}
| |
| | {{style|no}}
| |
| | {{style|no}}
| |
| | {{style|no}}
| |
| | {{style|no}}
| |
| | {{style|no}}
| |
| | {{style|yes|✓}}
| |
| | {{style|no}}
| |
| |data-sort-value=1| Light
| |
| |-
| |
| | style="text-align:center;"|{{Weapon|S|Main|Range Blaster|32}}
| |
| | {{style|no}}
| |
| | {{style|yes|✓}}
| |
| | {{style|no}}
| |
| | {{style|no}}
| |
| | {{style|no}}
| |
| | {{style|no}}
| |
| | {{style|no}}
| |
| |data-sort-value=1| Light
| |
| |-
| |
| | style="text-align:center;"|{{Weapon|S|Main|Rapid Blaster|32}}
| |
| | {{style|no}}
| |
| | {{style|no}}
| |
| | {{style|no}}
| |
| | {{style|yes|✓}}
| |
| | {{style|no}}
| |
| | {{style|no}}
| |
| | {{style|no}}
| |
| |data-sort-value=1| Light
| |
| |-
| |
| | style="text-align:center;"|{{Weapon|S|Main|Rapid Blaster Deco|32}}
| |
| | {{style|no}}
| |
| | {{style|no}}
| |
| | {{style|no}}
| |
| | {{style|no}}
| |
| | {{style|yes|✓}}
| |
| | {{style|no}}
| |
| | {{style|no}}
| |
| |data-sort-value=1| Light
| |
| |-
| |
| | style="text-align:center;"|{{Weapon|S|Main|Rapid Blaster Pro|32}}
| |
| | {{style|yes|✓}}
| |
| | {{style|no}}
| |
| | {{style|no}}
| |
| | {{style|no}}
| |
| | {{style|no}}
| |
| | {{style|no}}
| |
| | {{style|no}}
| |
| |data-sort-value=1| Light
| |
| |-
| |
| | style="text-align:center;"|{{Weapon|S|Main|Rapid Blaster Pro Deco|32}}
| |
| | {{style|no}}
| |
| | {{style|no}}
| |
| | {{style|yes|✓}}
| |
| | {{style|no}}
| |
| | {{style|no}}
| |
| | {{style|no}}
| |
| | {{style|no}}
| |
| |data-sort-value=1| Light
| |
| |-
| |
| | style="text-align:center;"|{{Weapon|S|Main|Refurbished Mini Splatling|32}}
| |
| | {{style|no}}
| |
| | {{style|no}}
| |
| | {{style|no}}
| |
| | {{style|no}}
| |
| | {{style|yes|✓}}
| |
| | {{style|no}}
| |
| | {{style|no}}
| |
| |data-sort-value=1| {{explain|Medium before Version 2.8.0|Light}}
| |
| |-
| |
| | style="text-align:center;"|{{Weapon|S|Main|Slosher|32}}
| |
| | {{style|no}}
| |
| | {{style|yes|✓}}
| |
| | {{style|no}}
| |
| | {{style|no}}
| |
| | {{style|no}}
| |
| | {{style|no}}
| |
| | {{style|no}}
| |
| |data-sort-value=1| Light
| |
| |-
| |
| | style="text-align:center;"|{{Weapon|S|Main|Slosher Deco|32}}
| |
| | {{style|no}}
| |
| | {{style|no}}
| |
| | {{style|no}}
| |
| | {{style|no}}
| |
| | {{style|no}}
| |
| | {{style|yes|✓}}
| |
| | {{style|no}}
| |
| |data-sort-value=1| Light
| |
| |-
| |
| | style="text-align:center;"|{{Weapon|S|Main|Sloshing Machine|32}}
| |
| | {{style|no}}
| |
| | {{style|no}}
| |
| | {{style|no}}
| |
| | {{style|no}}
| |
| | {{style|yes|✓}}
| |
| | {{style|no}}
| |
| | {{style|no}}
| |
| |data-sort-value=1| Light
| |
| |-
| |
| | style="text-align:center;"|{{Weapon|S|Main|Sloshing Machine Neo|32}}
| |
| | {{style|yes|✓}}
| |
| | {{style|no}}
| |
| | {{style|no}}
| |
| | {{style|no}}
| |
| | {{style|no}}
| |
| | {{style|no}}
| |
| | {{style|no}}
| |
| |data-sort-value=1| Light
| |
| |-
| |
| | style="text-align:center;"|{{Weapon|S|Main|Soda Slosher|32}}
| |
| | {{style|yes|✓}}
| |
| | {{style|no}}
| |
| | {{style|no}}
| |
| | {{style|no}}
| |
| | {{style|no}}
| |
| | {{style|no}}
| |
| | {{style|no}}
| |
| |data-sort-value=1| Light
| |
| |-
| |
| | style="text-align:center;"|{{Weapon|S|Main|Splash-o-matic|32}}
| |
| | {{style|no}}
| |
| | {{style|no}}
| |
| | {{style|no}}
| |
| | {{style|no}}
| |
| | {{style|yes|✓}}
| |
| | {{style|no}}
| |
| | {{style|no}}
| |
| |data-sort-value=1| Light
| |
| |-
| |
| | style="text-align:center;"|{{Weapon|S|Main|Splat Charger|32}}
| |
| | {{style|no}}
| |
| | {{style|no}}
| |
| | {{style|no}}
| |
| | {{style|no}}
| |
| | {{style|yes|✓}}
| |
| | {{style|no}}
| |
| | {{style|no}}
| |
| |data-sort-value=3| Heavy
| |
| |-
| |
| | style="text-align:center;"|{{Weapon|S|Main|Splat Roller|32}}
| |
| | {{style|no}}
| |
| | {{style|no}}
| |
| | {{style|yes|✓}}
| |
| | {{style|no}}
| |
| | {{style|no}}
| |
| | {{style|no}}
| |
| | {{style|no}}
| |
| |data-sort-value=1| Light
| |
| |-
| |
| | style="text-align:center;"|{{Weapon|S|Main|Splatterscope|32}}
| |
| | {{style|no}}
| |
| | {{style|no}}
| |
| | {{style|no}}
| |
| | {{style|no}}
| |
| | {{style|yes|✓}}
| |
| | {{style|no}}
| |
| | {{style|no}}
| |
| |data-sort-value=3| Heavy
| |
| |-
| |
| | style="text-align:center;"|{{Weapon|S|Main|Splattershot|32}}
| |
| | {{style|no}}
| |
| | {{style|no}}
| |
| | {{style|no}}
| |
| | {{style|no}}
| |
| | {{style|yes|✓}}
| |
| | {{style|no}}
| |
| | {{style|no}}
| |
| |data-sort-value=1| Light
| |
| |-
| |
| | style="text-align:center;"|{{Weapon|S|Main|Splattershot Jr.|32}}
| |
| | {{style|no}}
| |
| | {{style|no}}
| |
| | {{style|no}}
| |
| | {{style|yes|✓}}
| |
| | {{style|no}}
| |
| | {{style|no}}
| |
| | {{style|no}}
| |
| |data-sort-value=2| Medium
| |
| |-
| |
| | style="text-align:center;"|{{Weapon|S|Main|Splattershot Pro|32}}
| |
| | {{style|no}}
| |
| | {{style|yes|✓}}
| |
| | {{style|no}}
| |
| | {{style|no}}
| |
| | {{style|no}}
| |
| | {{style|no}}
| |
| | {{style|no}}
| |
| |data-sort-value=1| Light
| |
| |-
| |
| | style="text-align:center;"|{{Weapon|S|Main|Sploosh-o-matic|32}}
| |
| | {{style|no}}
| |
| | {{style|no}}
| |
| | {{style|yes|✓}}
| |
| | {{style|no}}
| |
| | {{style|no}}
| |
| | {{style|no}}
| |
| | {{style|no}}
| |
| |data-sort-value=1| Light
| |
| |-
| |
| | style="text-align:center;"|{{Weapon|S|Main|Sploosh-o-matic 7|32}}
| |
| | {{style|yes|✓}}
| |
| | {{style|no}}
| |
| | {{style|no}}
| |
| | {{style|no}}
| |
| | {{style|no}}
| |
| | {{style|no}}
| |
| | {{style|no}}
| |
| |data-sort-value=1| Light
| |
| |-
| |
| | style="text-align:center;"|{{Weapon|S|Main|Tempered Dynamo Roller|32}}
| |
| | {{style|no}}
| |
| | {{style|no}}
| |
| | {{style|yes|✓}}
| |
| | {{style|no}}
| |
| | {{style|no}}
| |
| | {{style|no}}
| |
| | {{style|no}}
| |
| |data-sort-value=2| Medium
| |
| |-
| |
| | style="text-align:center;"|{{Weapon|S|Main|Tentatek Splattershot|32}}
| |
| | {{style|yes|✓}}
| |
| | {{style|no}}
| |
| | {{style|no}}
| |
| | {{style|no}}
| |
| | {{style|no}}
| |
| | {{style|no}}
| |
| | {{style|no}}
| |
| |data-sort-value=3| Heavy
| |
| |-
| |
| | style="text-align:center;"|{{Weapon|S|Main|Tri-Slosher|32}}
| |
| | {{style|no}}
| |
| | {{style|no}}
| |
| | {{style|no}}
| |
| | {{style|yes|✓}}
| |
| | {{style|no}}
| |
| | {{style|no}}
| |
| | {{style|no}}
| |
| |data-sort-value=2| Medium
| |
| |-
| |
| | style="text-align:center;"|{{Weapon|S|Main|Tri-Slosher Nouveau|32}}
| |
| | {{style|no}}
| |
| | {{style|no}}
| |
| | {{style|no}}
| |
| | {{style|no}}
| |
| | {{style|no}}
| |
| | {{style|no}}
| |
| | {{style|yes|✓}}
| |
| |data-sort-value=1| Light
| |
| |-
| |
| | style="text-align:center;"|{{Weapon|S|Main|Wasabi Splattershot|32}}
| |
| | {{style|no}}
| |
| | {{style|yes|✓}}
| |
| | {{style|no}}
| |
| | {{style|no}}
| |
| | {{style|no}}
| |
| | {{style|no}}
| |
| | {{style|no}}
| |
| |data-sort-value=2| Medium
| |
| |-
| |
| | style="text-align:center;"|{{Weapon|S|Main|Zink Mini Splatling|32}}
| |
| | {{style|no}}
| |
| | {{style|no}}
| |
| | {{style|no}}
| |
| | {{style|yes|✓}}
| |
| | {{style|no}}
| |
| | {{style|no}}
| |
| | {{style|no}}
| |
| |data-sort-value=3| {{explain|Medium before Version 2.8.0|Heavy}}
| |
| |-
| |
| |}</div>
| |
| </div>
| |
| | |
| ===Splatoon 2===
| |
| In ''Splatoon 2'', the ink requirements to fill the special gauge (in p) are determined individually by each weapon.
| |
| {| class="sortable" align="left" width="100%" cellpadding="1px" style="background:#FFFFFF; text-align:center; border: 3px solid #f03c78; {{roundy}}"
| |
| !Image
| |
| !'''Special weapon'''
| |
| !Duration (seconds)
| |
| ![[Damage]]
| |
| |-
| |
| | [[File:S2 Weapon Special Baller.png|50px]]
| |
| | [[Baller]]
| |
| | 7
| |
| | 180
| |
| |-
| |
| | [[File:S2 Weapon Special Splat-Bomb Launcher.png|50px]]
| |
| | [[Bomb Launcher]]
| |
| | 6
| |
| | (Depends on [[bomb]] type)
| |
| |-
| |
| | [[File:S2 Weapon Special Bubble Blower.png|50px]]
| |
| | [[Bubble Blower]]
| |
| | 18
| |
| | 250
| |
| |-
| |
| | [[File:S2 Weapon Special Ink Armor.png|50px]] | |
| | [[Ink Armor]]
| |
| | 6
| |
| | N/A
| |
| |-
| |
| | [[File:S2 Weapon Special Inkjet.png|50px]]
| |
| | [[Inkjet]]
| |
| | 8
| |
| | 120
| |
| |-
| |
| | [[File:S2 Weapon Special Ink Storm.png|50px]]
| |
| | [[Ink Storm]]
| |
| | 8
| |
| | 24/s
| |
| |-
| |
| | [[File:S2 Weapon Special Splashdown.png|50px]]
| |
| | [[Splashdown]]
| |
| | Instant
| |
| | 180
| |
| |-
| |
| | [[File:S2 Weapon Special Sting Ray.png|50px]]
| |
| | [[Sting Ray]]
| |
| | 8
| |
| | 120/s
| |
| |-
| |
| | [[File:S2 Weapon Special Tenta Missiles.png|50px]]
| |
| | [[Tenta Missiles]] | |
| | 2 | |
| | 150 | |
| |- | | |- |
| |} | | |} |
|
| |
| {{:List of special weapon sets in Splatoon 2}}
| |
| {{clr}} | | {{clr}} |
| | | == Trivia == |
| ==Trivia== | | * Special weapons were originally called "Super Weapons." <ref>[https://www.youtube.com/watch?v=SxcLLFbmJHE {{YT}} Footage of the 2014 E3 Demo]</ref> |
| *Special weapons were originally called "Super Weapons." <ref>[https://www.youtube.com/watch?v=SxcLLFbmJHE {{YT}} Footage of the 2014 E3 Demo]</ref> | |
|
| |
|
| == Gallery == | | == Gallery == |
| ===Splatoon=== | | === ''Splatoon'' === |
| <gallery> | | <gallery> |
| Item img special01.png|[[Inkzooka]] | | Item img special01.png|[[Inkzooka]] |
| Line 1,092: |
Line 105: |
| </gallery> | | </gallery> |
|
| |
|
| ==Names in other languages== | | == Names in other languages == |
| {| | | {| |
| |- style="vertical-align:top" | | |- style="vertical-align:top" |
 Bomb Rush
 Bubbler
 Echolocator
 Inkstrike
 Inkzooka
 Killer Wail
 Kraken
 Baller
 Bomb Launcher
 Bubble Blower
 Ink Armor
 Inkjet
 Ink Storm
 Splashdown
 Sting Ray
 Tenta Missiles
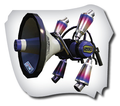


.png)