User:Nick the Splatoon Fanboy/Shooter: Difference between revisions
(Cloned some parts of the page. Will edit later) |
(complete overhaul: Preview of a possible future Shooter Page without Blasters (exeption for trivia); more work will come) |
||
| Line 3: | Line 3: | ||
'''Shooters''' are one of the [[main weapon]] classifications in the [[Splatoon (series)|''Splatoon'' series]]. Shooters are guns that fire small blobs of [[ink]] in quick succession. | '''Shooters''' are one of the [[main weapon]] classifications in the [[Splatoon (series)|''Splatoon'' series]]. Shooters are guns that fire small blobs of [[ink]] in quick succession. | ||
Most of them are [[wikipedia:Automatic firearm|fully automatic]], continuously firing when the player holds the trigger. Some have [[wikipedia:Semi-automatic firearm|semi-automatic]] operation, requiring the player to tap the trigger repeatedly instead of holding it and firing one bullet per tap. Some have [[wikipedia:Burst mode (weapons)|burst-fire]] operation, requiring the player to tap the trigger repeatedly and firing multiple bullets per tap. | |||
==List of Shooters== | |||
==List of | |||
{| class="wikitable sitecolor-generic" | {| class="wikitable sitecolor-generic" | ||
! style="width: 8.5em;" rowspan="2" | Series | ! style="width: 8.5em;" rowspan="2" | Series | ||
| Line 18: | Line 16: | ||
! style="width: 3em;" | [[File:Splatoon 3 "3" icon.png|x35px|link=Splatoon 3]] | ! style="width: 3em;" | [[File:Splatoon 3 "3" icon.png|x35px|link=Splatoon 3]] | ||
|- | |- | ||
| style="text-align:center;" rowspan="3" | {{Weapon| | | style="text-align:center;" rowspan="3" | {{Weapon|S3|Main|Sploosh-o-matic|64|icononly}}<br>'''Sploosh-o-matic''' | ||
| rowspan="3" | A mid-damage, close-range shooter with a high rate of fire. It features the highest damage output per second in its class, at the cost of having the shortest range. | | rowspan="3" | A mid-damage, close-range shooter with a high rate of fire. It features the highest damage output per second in its class, at the cost of having the shortest range. | ||
| {{Weapon| | | {{Weapon|S3|Main|Sploosh-o-matic|32}} | ||
| {{ya}} | | {{ya}} | ||
| {{ya}} | | {{ya}} | ||
| Line 35: | Line 33: | ||
| | | | ||
|- | |- | ||
| style="text-align:center;" rowspan="3" | {{Weapon| | | style="text-align:center;" rowspan="3" | {{Weapon|S3|Main|Splattershot Jr.|64|icononly}}<br>'''Splattershot Jr.''' | ||
| rowspan="3" | The first weapon given to the player upon starting the game. It is a low-damage, close-range shooter with a high rate of fire. Its fire rate and ink efficiency ensure that new players will be able to accomplish something. | | rowspan="3" | The first weapon given to the player upon starting the game. It is a low-damage, close-range shooter with a high rate of fire. Its fire rate and ink efficiency ensure that new players will be able to accomplish something. | ||
| {{Weapon| | | {{Weapon|S3|Main|Splattershot Jr.|32}} | ||
| {{ya}} | | {{ya}} | ||
| {{ya}} | | {{ya}} | ||
| Line 52: | Line 50: | ||
| | | | ||
|- | |- | ||
| style="text-align:center;" rowspan="2" | {{Weapon| | | style="text-align:center;" rowspan="2" | {{Weapon|S3|Main|Splash-o-matic|64|icononly}}<br>'''Splash-o-matic''' | ||
| rowspan="2" | A low-damage, close-range shooter with a high rate of fire. It features perfect accuracy, the best among all automatic shooters. | | rowspan="2" | A low-damage, close-range shooter with a high rate of fire. It features perfect accuracy, the best among all automatic shooters. | ||
| {{Weapon| | | {{Weapon|S3|Main|Splash-o-matic|32}} | ||
| {{ya}} | | {{ya}} | ||
| {{ya}} | | {{ya}} | ||
| Line 62: | Line 60: | ||
| {{ya}} | | {{ya}} | ||
| {{ya}} | | {{ya}} | ||
| | | {{Ya}} | ||
|- | |- | ||
| style="text-align:center;" rowspan="3" | {{Weapon| | | style="text-align:center;" rowspan="3" | {{Weapon|S3|Main|Aerospray MG|64|icononly}}<br>'''Aerospray''' | ||
| rowspan="3" | A low-damage, close-range shooter with a high rate of fire. It has the widest shot spread and the fastest firing rate in its class, allowing it to excel at covering turf. | | rowspan="3" | A low-damage, close-range shooter with a high rate of fire. It has the widest shot spread and the fastest firing rate in its class, allowing it to excel at covering turf. | ||
| {{Weapon| | | {{Weapon|S3|Main|Aerospray MG|32}} | ||
| {{ya}} | | {{ya}} | ||
| {{ya}} | | {{ya}} | ||
| Line 74: | Line 72: | ||
| {{ya}} | | {{ya}} | ||
| {{ya}} | | {{ya}} | ||
| | | {{ya}} | ||
|- | |- | ||
| {{Weapon|S2|Main|Aerospray PG|32}} | | {{Weapon|S2|Main|Aerospray PG|32}} | ||
| Line 81: | Line 79: | ||
| | | | ||
|- | |- | ||
| style="text-align:center;" rowspan="6" | {{Weapon| | | style="text-align:center;" rowspan="6" | {{Weapon|S3|Main|Splattershot|64|icononly}}<br>'''Splattershot''' | ||
| rowspan="6" | A mid-damage, mid-range shooter with a middling rate of fire. Has no real weaknesses and can adapt to any situation. | | rowspan="6" | A mid-damage, mid-range shooter with a middling rate of fire. Has no real weaknesses and can adapt to any situation. | ||
| {{Weapon| | | {{Weapon|S3|Main|Splattershot|32}} | ||
| {{ya}} | | {{ya}} | ||
| {{ya}} | | {{ya}} | ||
| Line 106: | Line 104: | ||
| {{ya}} | | {{ya}} | ||
| {{ya}} | | {{ya}} | ||
| | | {{ya}} | ||
|- | |- | ||
| {{Weapon|S2|Main|Octo Shot Replica|32}} | | {{Weapon|S2|Main|Octo Shot Replica|32}} | ||
| Line 113: | Line 111: | ||
| | | | ||
|- | |- | ||
| style="text-align:center;" rowspan="3" | {{Weapon| | | style="text-align:center;" rowspan="3" | {{Weapon|S3|Main|.52 Gal|64|icononly}}<br>'''.52 Gal''' | ||
| rowspan="3" | A high-damage, mid-range shooter with a slow rate of fire. This weapon suffers from low accuracy. | | rowspan="3" | A high-damage, mid-range shooter with a slow rate of fire. This weapon suffers from low accuracy. | ||
| {{Weapon| | | {{Weapon|S3|Main|.52 Gal|32}} | ||
| {{ya}} | | {{ya}} | ||
| {{ya}} | | {{ya}} | ||
| Line 130: | Line 128: | ||
| | | | ||
|- | |- | ||
| style="text-align:center;" rowspan="3" | {{Weapon| | | style="text-align:center;" rowspan="3" | {{Weapon|S3|Main|N-ZAP '85|64|icononly}}<br>'''N-ZAP''' | ||
| rowspan="3" | A low-damage, mid-range shooter with a fast rate of fire. | | rowspan="3" | A low-damage, mid-range shooter with a fast rate of fire. | ||
| {{Weapon| | | {{Weapon|S3|Main|N-ZAP '85|32}} | ||
| {{ya}} | | {{ya}} | ||
| {{ya}} | | {{ya}} | ||
| Line 152: | Line 150: | ||
| {{ya}} | | {{ya}} | ||
! | ! | ||
! | |||
|- | |- | ||
| {{Weapon|S|Main|Custom Dual Squelcher|32}} | | {{Weapon|S|Main|Custom Dual Squelcher|32}} | ||
| {{ya}} | | {{ya}} | ||
! | ! | ||
! | |||
|- | |- | ||
| style="text-align:center;" rowspan="4" | {{Weapon| | | style="text-align:center;" rowspan="4" | {{Weapon|S3|Main|Splattershot Pro|64|icononly}}<br>'''Splattershot Pro''' | ||
| rowspan="4" | A mid-damage, long-range shooter with a slow rate of fire. Notably, this weapon has very high ink consumption. | | rowspan="4" | A mid-damage, long-range shooter with a slow rate of fire. Notably, this weapon has very high ink consumption. | ||
| {{Weapon| | | {{Weapon|S3|Main|Splattershot Pro|32}} | ||
| {{ya}} | | {{ya}} | ||
| {{ya}} | | {{ya}} | ||
| Line 181: | Line 179: | ||
| | | | ||
|- | |- | ||
| style="text-align:center;" rowspan="2" | {{Weapon| | | style="text-align:center;" rowspan="2" | {{Weapon|S3|Main|.96 Gal|64|icononly}}<br>'''.96 Gal''' | ||
| rowspan="2" | A high-damage, long-range shooter with a slow rate of fire. As a trade-off for its power and range, this weapon suffers from low accuracy, and it consumes more ink per shot than any other weapon in its class. | | rowspan="2" | A high-damage, long-range shooter with a slow rate of fire. As a trade-off for its power and range, this weapon suffers from low accuracy, and it consumes more ink per shot than any other weapon in its class. | ||
| {{Weapon| | | {{Weapon|S3|Main|.96 Gal|32}} | ||
| {{ya}} | | {{ya}} | ||
| {{ya}} | | {{ya}} | ||
| Line 193: | Line 191: | ||
| | | | ||
|- | |- | ||
| style="text-align:center;" rowspan="2" | {{Weapon| | | style="text-align:center;" rowspan="2" | {{Weapon|S3|Main|Jet Squelcher|64|icononly}}<br>'''Jet Squelcher''' | ||
| rowspan="2" | A low-damage, long-range shooter with a slow rate of fire. It has the longest range in its class. | | rowspan="2" | A low-damage, long-range shooter with a slow rate of fire. It has the longest range in its class. | ||
| {{Weapon| | | {{Weapon|S3|Main|Jet Squelcher|32}} | ||
| {{ya}} | | {{ya}} | ||
| {{ya}} | | {{ya}} | ||
| Line 201: | Line 199: | ||
|- | |- | ||
| {{Weapon|S2|Main|Custom Jet Squelcher|32}} | | {{Weapon|S2|Main|Custom Jet Squelcher|32}} | ||
| {{ya}} | | {{ya}} | ||
| {{ya}} | | {{ya}} | ||
| Line 301: | Line 205: | ||
! colspan="6" | Burst-fire or semi-automatic | ! colspan="6" | Burst-fire or semi-automatic | ||
|- | |- | ||
| style="text-align:center;" rowspan="3" | {{Weapon| | | style="text-align:center;" rowspan="3" | {{Weapon|S3|Main|L-3 Nozzlenose|64|icononly}}<br>'''L-3 Nozzlenose''' | ||
| rowspan="3" | A low-damage, mid-range shooter. It is burst | | rowspan="3" | A low-damage, mid-range shooter. It is burst fire, firing three bullets after a pull of the trigger. Well-timed button presses are required to maintain an optimal rate of fire. | ||
| {{Weapon| | | {{Weapon|S3|Main|L-3 Nozzlenose|32}} | ||
| {{ya}} | | {{ya}} | ||
| {{ya}} | | {{ya}} | ||
| Line 318: | Line 222: | ||
| | | | ||
|- | |- | ||
| style="text-align:center;" rowspan="3" | {{Weapon| | | style="text-align:center;" rowspan="3" | {{Weapon|S3|Main|H-3 Nozzlenose|64|icononly}}<br>'''H-3 Nozzlenose''' | ||
| rowspan="3" | A mid-damage, long-range shooter. It is burst-fire, firing three bullets after a pull of the trigger. | | rowspan="3" | A mid-damage, long-range shooter. It is burst-fire, firing three bullets after a pull of the trigger. | ||
| {{Weapon| | | {{Weapon|S3|Main|H-3 Nozzlenose|32}} | ||
| {{ya}} | | {{ya}} | ||
| {{ya}} | | {{ya}} | ||
| Line 335: | Line 239: | ||
| | | | ||
|- | |- | ||
| style="text-align:center;" rowspan="2" | {{Weapon| | | style="text-align:center;" rowspan="2" | {{Weapon|S3|Main|Squeezer|64|icononly}}<br>'''Squeezer''' | ||
| rowspan="2" | A shooter with two firing modes, semi-automatic and fully automatic. Pulling the trigger once will squirt out a single long range, low spread, high-power ink shot. Holding the button leads to successive low range, high spread, lower-powered shots. The trigger can be tapped repeatedly to maintain the high-power mode. | | rowspan="2" | A shooter with two firing modes, semi-automatic and fully automatic. Pulling the trigger once will squirt out a single long range, low spread, high-power ink shot. Holding the button leads to successive low range, high spread, lower-powered shots. The trigger can be tapped repeatedly to maintain the high-power mode. | ||
| {{Weapon| | | {{Weapon|S3|Main|Squeezer|32}} | ||
! | ! | ||
| {{ya}} | | {{ya}} | ||
| Line 347: | Line 251: | ||
| | | | ||
|} | |} | ||
==Sets== | |||
{{Weapons/S Weapons|class=Shooter|collapsed=true}} | |||
{{Weapons/S2 Weapons|class=Shooter|collapsed=true}} | |||
{{Weapons/S3 Weapons|class=Shooter|collapsed=true}} | |||
==Animations== | |||
((Todo|Add missing animation descriptions.)) | |||
===''Splatoon''=== | |||
Victory: | |||
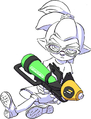
* Inkling Girl: Flails her arms around, jumps once with her arms over her head, then thrusts the weapon out. | |||
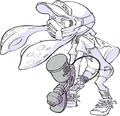
* Inkling Boy: Jumps once while swinging the weapon forwards, does a fist pump with both arms, throws the weapon in the air, then catches the spinning weapon, holding the weapon across his chest. | |||
Defeat: | |||
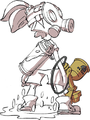
* Both genders get on their knees with their left hand down while swinging their weapon up and down in disappointment. | |||
In Ammo Knights (Clicking {{Button|RS}}): | |||
* Inkling Girl: | |||
* Inkling Boy: | |||
===''Splatoon 2''=== | |||
Spawning in before a match starts: | |||
* Both Inklings and Octolings point their weapon down at a 45-degree angle after shaking off their excess ink. | |||
Victory: | |||
* Inkling Girl: Jumps up and down twice before spinning around once and strikes a pose while pointing her weapon up. | |||
* Inkling Boy: Jumps up and thrusts his left fist forward before raising it over his chest while holding his weapon downward. | |||
* Octoling Girl: Winces before twirling her weapon and ending it pointing upward at an angle while having her left hand on her hip in a pose. | |||
* Octoling Boy: Similar to the Octoling Girl's but stands up straight. | |||
Defeat: | |||
* Inkling Girl: Throws a fit. | |||
* Inkling Boy: Sits down on the ground and holds his head in frustration. | |||
* Octoling Girl: Falls down to the ground, dropping her weapon in front of her, then turns her head away in anger. | |||
* Octoling Boy: Similar to the Inkling Boy's but lays his weapon behind him and puts his right arm on his right knee. | |||
In Ammo Knights (Clicking {{Button|RS}}): | |||
* Inklings: Raises and lowers their weapon, looking it over, gets into a shooting stance, then looks down the weapon from behind. | |||
* Octolings: Looks over their weapon from the side and back, bends over slightly, and aims around before sighing. | |||
===''Splatoon 3''=== | |||
Spawner Drone pose: | |||
* All styles: Holds their weapon across their torso. | |||
Victory: | |||
* All styles: | |||
==Quotes== | |||
===''Splatoon''=== | |||
{{JuddAdvice|Meow! (Fire a '''Shooter''' while jumping to spray your [[ink]] wider than usual! The size of the reticle shows how wide your ink will spray, so pay attention!)}} | |||
===''Splatoon 3''=== | |||
{{QuoteW|Squid Research Lab here again with a special report on "'''shooter'''" [[weapon]]s. On the surface, shooters are pretty straightforward. You press {{button|ZR}} - you shoot! But the range of functions and features these weapons possess is quite impressive indeed!|@SplatoonNA on Twitter<ref>[https://twitter.com/SplatoonNA/status/1521112275926626306 {{TWI}} @SplatoonNA on Twitter]</ref>}} | |||
{{QuoteW|On the surface, "'''shooter'''" weapons are pretty straightforward, but the range of functions and features these weapons possess is quite impressive indeed!|@NintendoUKVS on Twitter<ref>[https://twitter.com/NintendoUKVS/status/1521059433245204483 {{TWI}} @NintendoUKVS on Twitter]</ref>}} | |||
==Trivia== | ==Trivia== | ||
| Line 353: | Line 305: | ||
===''Splatoon 2''=== | ===''Splatoon 2''=== | ||
* The order of weapons by weapon class is | * The order of weapons by weapon class is automatic Shooters → Blasters → burst-fire Shooters. | ||
==Gallery== | |||
===SplatNet icons=== | |||
<gallery> | |||
Splattershot Jr. HQ.png|The [[Splattershot Jr.]] | |||
Custom Splattershot Jr. HQ.png|The [[Custom Splattershot Jr.]] | |||
Splattershot HQ.png|The [[Splattershot]]. | |||
Tentatek Splattershot HQ.png|The [[Tentatek Splattershot]]. | |||
Wasabi Splattershot HQ.png|The [[Wasabi Splattershot]]. | |||
Hero Shot Replica HQ.png|The [[Hero Shot Replica]]. | |||
Octoshot Replica HQ.png|The [[Octo Shot Replica|Octoshot Replica]]. | |||
Splattershot Pro HQ.png|The [[Splattershot Pro]]. | |||
Forge Splattershot Pro HQ.png|The [[Forge Splattershot Pro]]. | |||
Berry Splattershot Pro HQ.png|The [[Berry Splattershot Pro]]. | |||
Aerospray MG HQ.png|The [[Aerospray MG]]. | |||
Aerospray RG HQ.png|The [[Aerospray RG]]. | |||
Aerospray PG HQ.png|The [[Aerospray PG]]. | |||
Jet Squelcher HQ.png|The [[Jet Squelcher]]. | |||
Custom Jet Squelcher HQ.png|The [[Custom Jet Squelcher]]. | |||
Dual Squelcher HQ.png|The [[Dual Squelcher]]. | |||
Custom Dual Squelcher HQ.png|The [[Custom Dual Squelcher]]. | |||
L-3 Nozzlenose HQ.png|The [[L-3 Nozzlenose]]. | |||
L-3 Nozzlenose D HQ.png|The [[L-3 Nozzlenose D]]. | |||
H-3 Nozzlenose HQ.png|The [[H-3 Nozzlenose]]. | |||
H-3 Nozzlenose D HQ.png|The [[H-3 Nozzlenose D]]. | |||
Cherry H-3 Nozzlenose HQ.png|The [[Cherry H-3 Nozzlenose]]. | |||
N-ZAP '85 HQ.png|The [[N-ZAP '85]]. | |||
N-ZAP '89 HQ.png|The [[N-ZAP '89]]. | |||
N-ZAP '83 HQ.png|The [[N-ZAP '83]]. | |||
Splash-o-matic HQ.png|The [[Splash-o-matic]]. | |||
Neo Splash-o-matic HQ.png|The [[Neo Splash-o-matic]]. | |||
Sploosh-o-matic HQ.png|The [[Sploosh-o-matic]]. | |||
Neo Sploosh-o-matic HQ.png|The [[Neo Sploosh-o-matic]]. | |||
Sploosh-o-matic 7 HQ.png|The [[Sploosh-o-matic 7]]. | |||
.52 Gal HQ.png|The [[.52 Gal]]. | |||
.52 Gal Deco HQ.png|The [[.52 Gal Deco]]. | |||
.96 Gal HQ.png|The [[.96 Gal]]. | |||
.96 Gal Deco HQ.png|The [[.96 Gal Deco]]. | |||
</gallery> | |||
===In-game=== | |||
<gallery> | |||
S2 Ammo Knights.jpg|[[Ammo Knights]], [[Sheldon]] selling shooters with a shooter on the shelf at the back. | |||
Anchov magazines 2.png|Magazines at [[Ancho-V Games]], with several shooters at the bottom. | |||
</gallery> | |||
===Art=== | |||
<gallery> | |||
JPTSplattershotJr.png|[[Splattershot Jr.]] | |||
JPTCustomSplattershotJr.png|[[Custom Splattershot Jr.]] and [[Echolocator]] | |||
JPTSplattershot.png|[[Splattershot]] | |||
JPTTentatekSplattershot.png|[[Tentatek Splattershot]], two [[Suction Bomb]]s, and [[Inkzooka]] | |||
JPTHeroSplatReplica.png|[[Hero Shot Replica]] and the [[Hero]] Replica set | |||
JPTOctoshotReplica.png|[[Octo Shot Replica|Octoshot Replica]] and [[Octoling Gear]] | |||
JPTSplattershotPro.png|[[Splattershot Pro]] | |||
JPTForgeSplattershotPro.png|[[Forge Splattershot Pro]] | |||
JPTAerosprayMG.png|[[Aerospray MG]] | |||
JPTAerosprayRG.png|[[Aerospray RG]] and [[Ink Mine]] | |||
JPTJetSquelcher.png|[[Jet Squelcher]] | |||
JPTCustomJetSquelcher.png|[[Custom Jet Squelcher]] | |||
JPTDualSquelcher.png|[[Dual Squelcher]] | |||
JPTCustomDualSquelcher.png|[[Custom Dual Squelcher]] | |||
JPTL3Nozzlenose.png|[[L-3 Nozzlenose]] | |||
JPTL3NozzlenoseB.png|[[L-3 Nozzlenose D]] and [[Burst Bomb]] | |||
JPTH3Nozzlenose.png|[[H-3 Nozzlenose]] | |||
JPTH3NozzlenoseB.png|[[H-3 Nozzlenose D]] and [[Point Sensor]] | |||
JPTNZap85.png|[[N-ZAP '85]] | |||
JPTNZap89.png|[[N-ZAP '89]] | |||
JPTSplashOMatic.png|[[Splash-o-matic]] | |||
JPTNeoSplashOMatic.png|[[Neo Splash-o-matic]] | |||
JPTSplooshOMatic.png|[[Sploosh-o-matic]] | |||
JPTNeoSplooshOMatic.png|[[Neo Sploosh-o-matic]] | |||
JPT52Gal.png|[[.52 Gal]] | |||
JPT52GalDeco.png|[[.52 Gal Deco]] | |||
JPT96Gal.png|[[.96 Gal]] | |||
JPT96GalDeco.png|[[.96 Gal Deco]] | |||
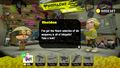
Splat2n Inkling Girl Shooter.jpg|Inkling Girl with a shooter from ''[[Splatoon 2]]''. | |||
</gallery> | |||
===Promo renders for ''Splatoon 2''=== | |||
<gallery> | |||
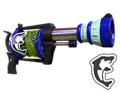
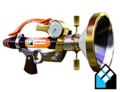
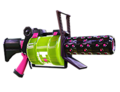
S2 Sploosh-o-matic Official 1.jpg|[[Sploosh-o-matic]] | |||
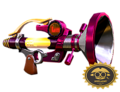
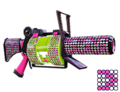
S2 Weapon Neo Sploosh-o-matic Promo Image1.jpg|[[Neo Sploosh-o-matic]] | |||
S2 Sploosh-o-matic 7 promo render.jpg|[[Sploosh-o-matic 7]] | |||
S2 Splattershot Jr. promo render.jpg|[[Splattershot Jr.]] | |||
S2 Custom Splattershot Jr Twitter SplatoonJP Image1.jpg|[[Custom Splattershot Jr.]] | |||
S2 Kensa Splattershot Jr. promo render.jpg|[[Kensa Splattershot Jr.]] | |||
S2 Splash-o-matic promo render.jpg|[[Splash-o-matic]] | |||
S2 Neo Splash-o-matic promo render.jpg|[[Neo Splash-o-matic]] | |||
S2 Aerospray MG Line Nintendo Image.jpg|[[Aerospray MG]] | |||
S2 Aerospray RG Line Nintendo Image.jpg|[[Aerospray RG]] | |||
S2 Aerospray PG promo render.jpg|[[Aerospray PG]] | |||
S2 Splattershot promo render.jpg|[[Splattershot]] | |||
Tentatek Splattershot S2.jpg|[[Tentatek Splattershot]] | |||
S2 Kensa Splattershot promo render.jpg|[[Kensa Splattershot]] | |||
S2 Hero Shot Replica promo render.jpg|[[Hero Shot Replica]] | |||
S2 Octo Shot Replica promo render.jpg|[[Octo Shot Replica]] | |||
S2 52 Gal Line Nintendo Image.jpg|[[.52 Gal]] | |||
S2 .52 Gal Deco Twitter SplatoonJP Image1.jpg|[[.52 Gal Deco]] | |||
S2 Kensa .52 Gal promo render.jpg|[[Kensa .52 Gal]] | |||
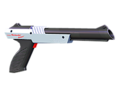
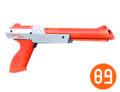
S2 N-ZAP '85 promo render.jpg|[[N-ZAP '85]] | |||
S2 N-ZAP '89 promo render.jpg|[[N-ZAP '89]] | |||
S2 N-ZAP '83 promo render.jpg|[[N-ZAP '83]] | |||
S2 Splattershot Pro promo render.jpg|[[Splattershot Pro]] | |||
S2 Forge Splattershot Pro promo render.jpg|[[Forge Splattershot Pro]] | |||
S2 Kensa Splattershot Pro promo render.jpg|[[Kensa Splattershot Pro]] | |||
S2 96 Gal Line Nintendo Image.jpg|[[.96 Gal]] | |||
S2 .96 Gal Deco promo render.jpg|[[.96 Gal Deco]] | |||
S2 Jet Squelcher promo render.jpg|[[Jet Squelcher]] | |||
S2 Custom Jet Squelcher promo render.jpg|[[Custom Jet Squelcher]] | |||
S2 L-3 Nozzlenose Line Nintendo Image.jpg|[[L-3 Nozzlenose]] | |||
S2 L-3 Nozzlenose D Twitter SplatoonJP Image1.jpg|[[L-3 Nozzlenose D]] | |||
S2 Kensa L-3 Nozzlenose Promo Image1.jpg|[[Kensa L-3 Nozzlenose]] | |||
S2 H-3 Nozzlenose promo render.jpg|[[H-3 Nozzlenose]] | |||
S2 H-3 Nozzlenose D promo render.jpg|[[H-3 Nozzlenose D]] | |||
S2 Cherry H-3 Nozzlenose promo render.jpg|[[Cherry H-3 Nozzlenose]] | |||
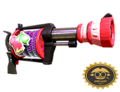
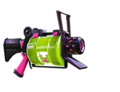
S2 Squeezer Promo.jpg|[[Squeezer]] | |||
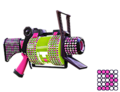
S2 Foil Squeezer promo render.jpg|[[Foil Squeezer]] | |||
</gallery> | |||
=== Promotional renders for ''Splatoon 3'' === | |||
<gallery> | |||
File:S3 Splattershot Promotional 3D Render.jpg|[[Splattershot]] | |||
File:S3 Splattershot Jr. Promotional 3D Render.jpg|[[Splattershot Jr.]] | |||
File:S3 .96 Gal Promotional 3D Render.jpg|[[.96 Gal]] | |||
</gallery> | |||
==Names in other languages== | |||
{{Foreignname | |||
|Jap=シューター | |||
|JapR=Shūtā | |||
|JapM=Shooter | |||
|Dut=Spetter | |||
|DutM=Splatter | |||
|Fre=Lanceurs | |||
|FreM=Thrower | |||
|Ger=Kleckser | |||
|GerM=Stainer | |||
|Ita=Armi a ripetizione | |||
|ItaM=Repeating weapons | |||
|Rus=Краскомат | |||
|RusR=Kraskomat | |||
|RusM=Paintomatic | |||
|Spa=Lanzatintas | |||
|SpaM=Ink lance | |||
|ChiT=射擊槍 | |||
|ChiTR=shè jī qiāng (Mandarin) | |||
|ChiTM= | |||
|Kor=슈터 | |||
|KorR=syuteo | |||
|KorM=Shooter | |||
}} | |||
== References == | |||
<references /> | |||
{{Navbox/S Weapons}} | |||
{{Navbox/S2 Weapons}} | |||
{{Navbox/S3 Weapons}} | |||
[[Category:Main weapons by class]] | |||
[[Category:Shooters]] | |||
Revision as of 16:41, 29 August 2022

Shooters are one of the main weapon classifications in the Splatoon series. Shooters are guns that fire small blobs of ink in quick succession.
Most of them are fully automatic, continuously firing when the player holds the trigger. Some have semi-automatic operation, requiring the player to tap the trigger repeatedly instead of holding it and firing one bullet per tap. Some have burst-fire operation, requiring the player to tap the trigger repeatedly and firing multiple bullets per tap.
List of Shooters
| Series | Description | Variants | Games | ||
|---|---|---|---|---|---|
| File:Splatoon 3 "3" icon.png | |||||
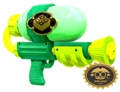
 Sploosh-o-matic |
A mid-damage, close-range shooter with a high rate of fire. It features the highest damage output per second in its class, at the cost of having the shortest range. | Template:Ya | Template:Ya | Template:Ya | |
| Template:Ya | Template:Ya | ||||
| Template:Ya | Template:Ya | ||||
 Splattershot Jr. |
The first weapon given to the player upon starting the game. It is a low-damage, close-range shooter with a high rate of fire. Its fire rate and ink efficiency ensure that new players will be able to accomplish something. | Template:Ya | Template:Ya | Template:Ya | |
| Template:Ya | Template:Ya | ||||
| Template:Ya | |||||
 Splash-o-matic |
A low-damage, close-range shooter with a high rate of fire. It features perfect accuracy, the best among all automatic shooters. | Template:Ya | Template:Ya | Template:Ya | |
| Template:Ya | Template:Ya | Template:Ya | |||
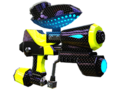
 Aerospray |
A low-damage, close-range shooter with a high rate of fire. It has the widest shot spread and the fastest firing rate in its class, allowing it to excel at covering turf. | Template:Ya | Template:Ya | Template:Ya | |
| Template:Ya | Template:Ya | Template:Ya | |||
| Template:Ya | Template:Ya | ||||
 Splattershot |
A mid-damage, mid-range shooter with a middling rate of fire. Has no real weaknesses and can adapt to any situation. | Template:Ya | Template:Ya | Template:Ya | |
| Template:Ya | Template:Ya | ||||
| Template:Ya | |||||
| Template:Ya | |||||
| Template:Ya | Template:Ya | Template:Ya | |||
| Template:Ya | Template:Ya | ||||
 .52 Gal |
A high-damage, mid-range shooter with a slow rate of fire. This weapon suffers from low accuracy. | Template:Ya | Template:Ya | Template:Ya | |
| Template:Ya | Template:Ya | ||||
| Template:Ya | |||||
 N-ZAP |
A low-damage, mid-range shooter with a fast rate of fire. | Template:Ya | Template:Ya | Template:Ya | |
| Template:Ya | Template:Ya | ||||
| Template:Ya | Template:Ya | ||||
 Dual Squelcher |
A low-damage, long-range shooter with a middling rate of fire. | Template:Ya | |||
| Template:Ya | |||||
 Splattershot Pro |
A mid-damage, long-range shooter with a slow rate of fire. Notably, this weapon has very high ink consumption. | Template:Ya | Template:Ya | Template:Ya | |
| Template:Ya | Template:Ya | ||||
| Template:Ya | |||||
| Template:Ya | |||||
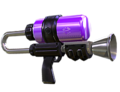
 .96 Gal |
A high-damage, long-range shooter with a slow rate of fire. As a trade-off for its power and range, this weapon suffers from low accuracy, and it consumes more ink per shot than any other weapon in its class. | Template:Ya | Template:Ya | Template:Ya | |
| Template:Ya | Template:Ya | ||||
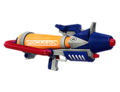
 Jet Squelcher |
A low-damage, long-range shooter with a slow rate of fire. It has the longest range in its class. | Template:Ya | Template:Ya | Template:Ya | |
| Template:Ya | Template:Ya | ||||
| Burst-fire or semi-automatic | |||||
 L-3 Nozzlenose |
A low-damage, mid-range shooter. It is burst fire, firing three bullets after a pull of the trigger. Well-timed button presses are required to maintain an optimal rate of fire. | Template:Ya | Template:Ya | Template:Ya | |
| Template:Ya | Template:Ya | ||||
| Template:Ya | |||||
 H-3 Nozzlenose |
A mid-damage, long-range shooter. It is burst-fire, firing three bullets after a pull of the trigger. | Template:Ya | Template:Ya | Template:Ya | |
| Template:Ya | Template:Ya | ||||
| Template:Ya | Template:Ya | ||||
 Squeezer |
A shooter with two firing modes, semi-automatic and fully automatic. Pulling the trigger once will squirt out a single long range, low spread, high-power ink shot. Holding the button leads to successive low range, high spread, lower-powered shots. The trigger can be tapped repeatedly to maintain the high-power mode. | Template:Ya | Template:Ya | ||
| Template:Ya | |||||
Sets


Animations
((Todo|Add missing animation descriptions.))
Splatoon
Victory:
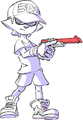
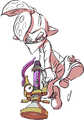
- Inkling Girl: Flails her arms around, jumps once with her arms over her head, then thrusts the weapon out.
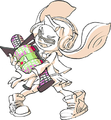
- Inkling Boy: Jumps once while swinging the weapon forwards, does a fist pump with both arms, throws the weapon in the air, then catches the spinning weapon, holding the weapon across his chest.
Defeat:
- Both genders get on their knees with their left hand down while swinging their weapon up and down in disappointment.
In Ammo Knights (Clicking ![]() ):
):
- Inkling Girl:
- Inkling Boy:
Splatoon 2
Spawning in before a match starts:
- Both Inklings and Octolings point their weapon down at a 45-degree angle after shaking off their excess ink.
Victory:
- Inkling Girl: Jumps up and down twice before spinning around once and strikes a pose while pointing her weapon up.
- Inkling Boy: Jumps up and thrusts his left fist forward before raising it over his chest while holding his weapon downward.
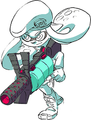
- Octoling Girl: Winces before twirling her weapon and ending it pointing upward at an angle while having her left hand on her hip in a pose.
- Octoling Boy: Similar to the Octoling Girl's but stands up straight.
Defeat:
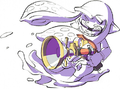
- Inkling Girl: Throws a fit.
- Inkling Boy: Sits down on the ground and holds his head in frustration.
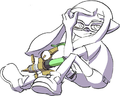
- Octoling Girl: Falls down to the ground, dropping her weapon in front of her, then turns her head away in anger.
- Octoling Boy: Similar to the Inkling Boy's but lays his weapon behind him and puts his right arm on his right knee.
In Ammo Knights (Clicking ![]() ):
):
- Inklings: Raises and lowers their weapon, looking it over, gets into a shooting stance, then looks down the weapon from behind.
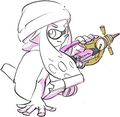
- Octolings: Looks over their weapon from the side and back, bends over slightly, and aims around before sighing.
Splatoon 3
Spawner Drone pose:
- All styles: Holds their weapon across their torso.
Victory:
- All styles:
Quotes
Splatoon

Splatoon 3
| “ | Squid Research Lab here again with a special report on "shooter" weapons. On the surface, shooters are pretty straightforward. You press |
” | — @SplatoonNA on Twitter[1]
| ||
| “ | On the surface, "shooter" weapons are pretty straightforward, but the range of functions and features these weapons possess is quite impressive indeed! | ” | — @NintendoUKVS on Twitter[2]
| ||
Trivia
Splatoon
- Shooters are the only main weapon class to have each sub weapon represented at least once.
Splatoon 2
- The order of weapons by weapon class is automatic Shooters → Blasters → burst-fire Shooters.
Gallery
SplatNet icons
-
The Splattershot Jr.
-
-
The Splattershot.
-
-
The Wasabi Splattershot.
-
The Hero Shot Replica.
-
The Octoshot Replica.
-
The Splattershot Pro.
-
-
-
The Aerospray MG.
-
The Aerospray RG.
-
The Aerospray PG.
-
The Jet Squelcher.
-
The Custom Jet Squelcher.
-
The Dual Squelcher.
-
-
The L-3 Nozzlenose.
-
The L-3 Nozzlenose D.
-
The H-3 Nozzlenose.
-
The H-3 Nozzlenose D.
-
-
The N-ZAP '85.
-
The N-ZAP '89.
-
The N-ZAP '83.
-
The Splash-o-matic.
-
The Neo Splash-o-matic.
-
The Sploosh-o-matic.
-
The Neo Sploosh-o-matic.
-
The Sploosh-o-matic 7.
-
The .52 Gal.
-
The .52 Gal Deco.
-
The .96 Gal.
-
The .96 Gal Deco.


In-game
-
Ammo Knights, Sheldon selling shooters with a shooter on the shelf at the back.
-
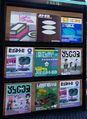
Magazines at Ancho-V Games, with several shooters at the bottom.


Art
-

-
-
-
Tentatek Splattershot, two Suction Bombs, and Inkzooka
-
Hero Shot Replica and the Hero Replica set
-
-

-
-
-
Aerospray RG and Ink Mine
-
-
-
-
-
-
-
-
-
-
-
-
-
-
-

-
-
-
-
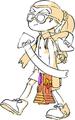
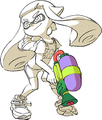
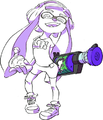
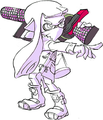
Inkling Girl with a shooter from Splatoon 2.


